.svg@webp)
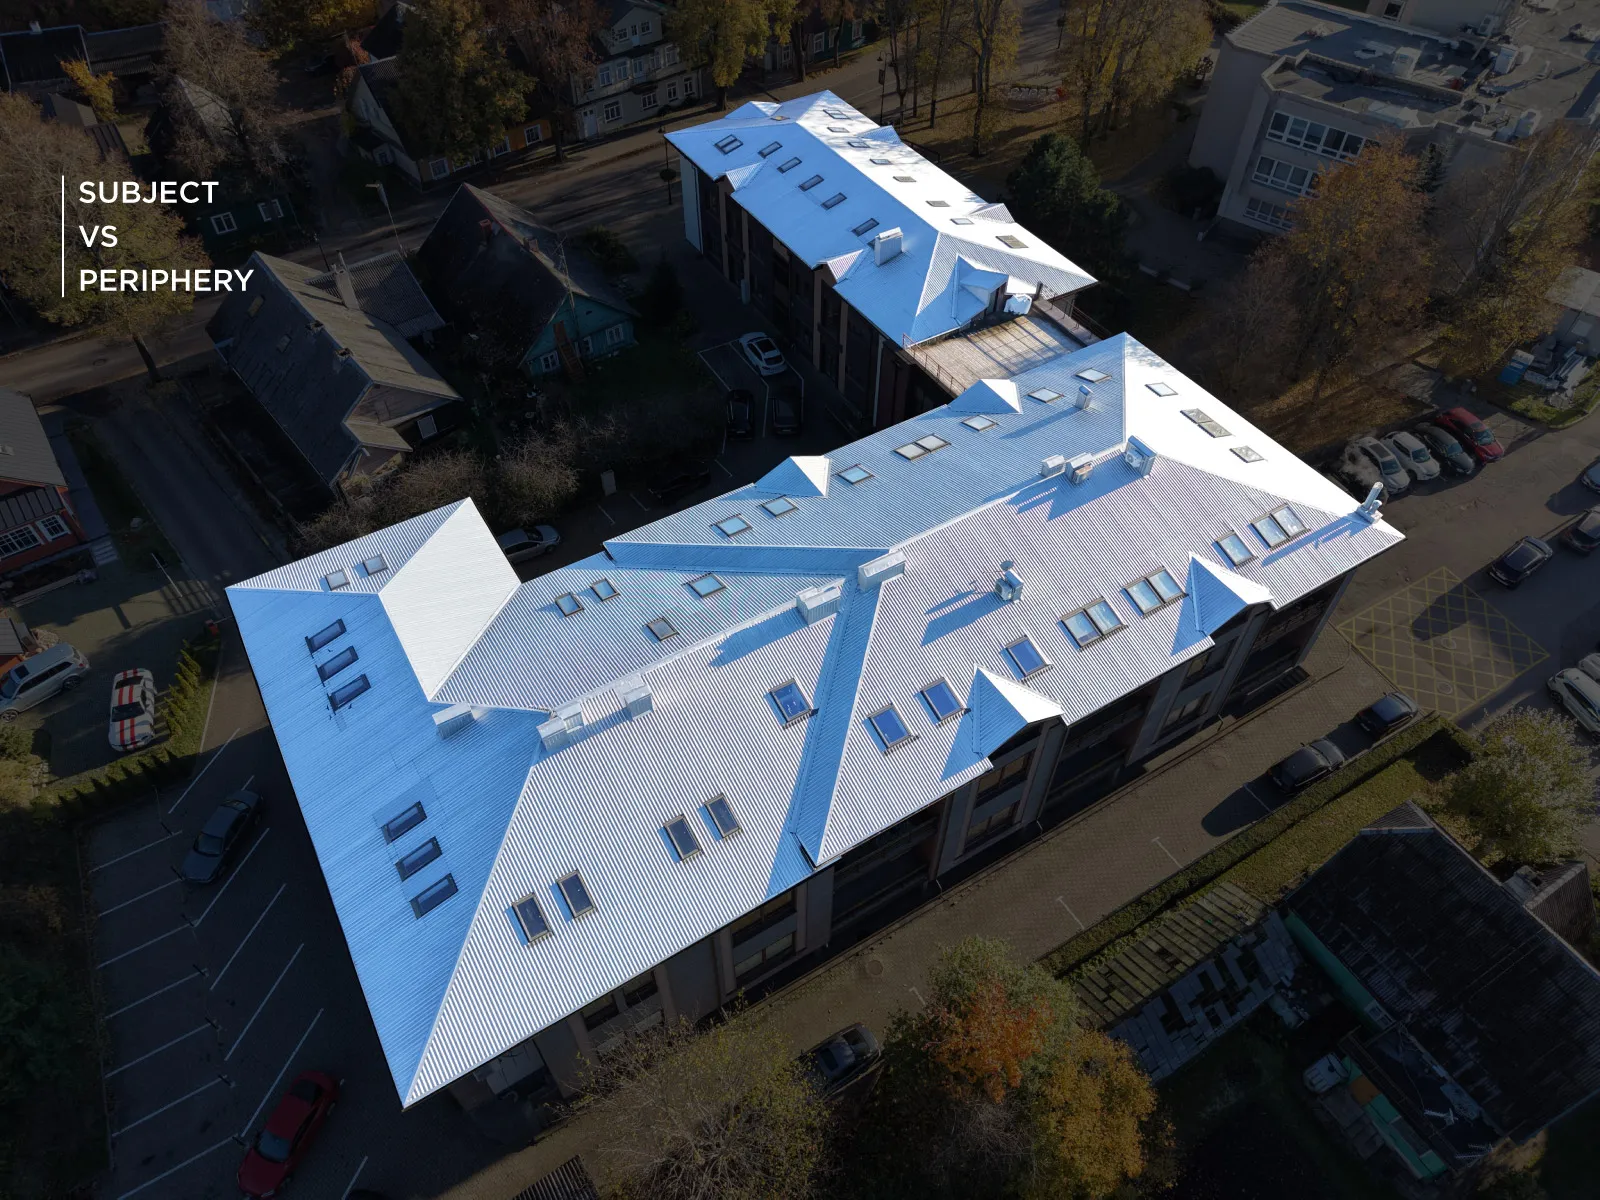
Photo Dynamic Range - Real Life Tests and Advice
 Lukas
Zmejevskis
Lukas
Zmejevskis
Dynamic range is an inescapable term when talking about digital photo or video capture. Our human vision has an incredible ability to adapt, allowing us to perceive both very dark and very bright scenes. When a digital imaging sensor or even a chemical negative captures a scene frozen in time, it is much more difficult for such a system to relay all the shades of visual information at once. Camera enthusiasts like me often enjoy measuring and pushing the limits of what digital sensors are capable of capturing, and the topic of dynamic range is quite interesting overall. In this article, I will share my insights and practical advice on how to track highlights and shadows to produce high-quality photos for photogrammetric scans — and in general.
Photo Dynamic Range in Theory
The dynamic range of an imaging sensor determines whether your photo captures the whole story or just the easy parts. Some scenes are gentle or "flat" — overcast skies, soft shadows, controlled studio setups, no big deal. But others punch you in the face with contrast: sunlit rooftops right next to deep shade, bright clouds over a black car, a glowing window in a dark room — basically everything during golden hour. In those moments, you have to choose what to sacrifice. Blow out the highlights? Crush the shadows? That tradeoff — or the ability to avoid it — is what dynamic range is all about. It is the span between the darkest shadow with detail and the brightest highlight with texture, and every sensor has a limit.
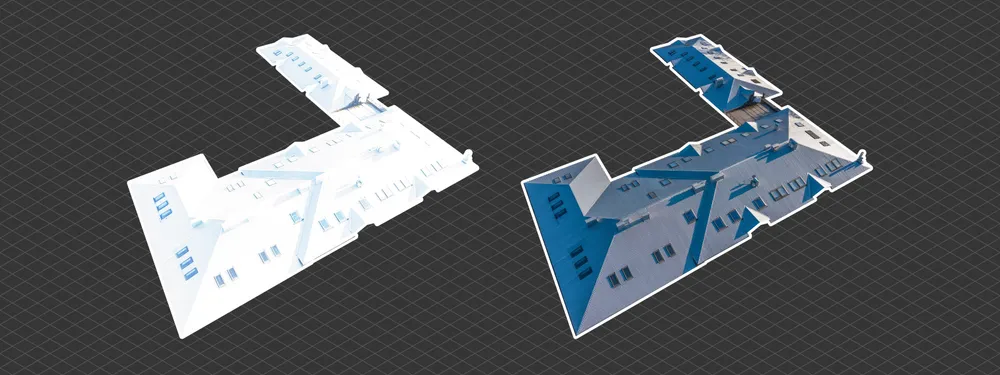
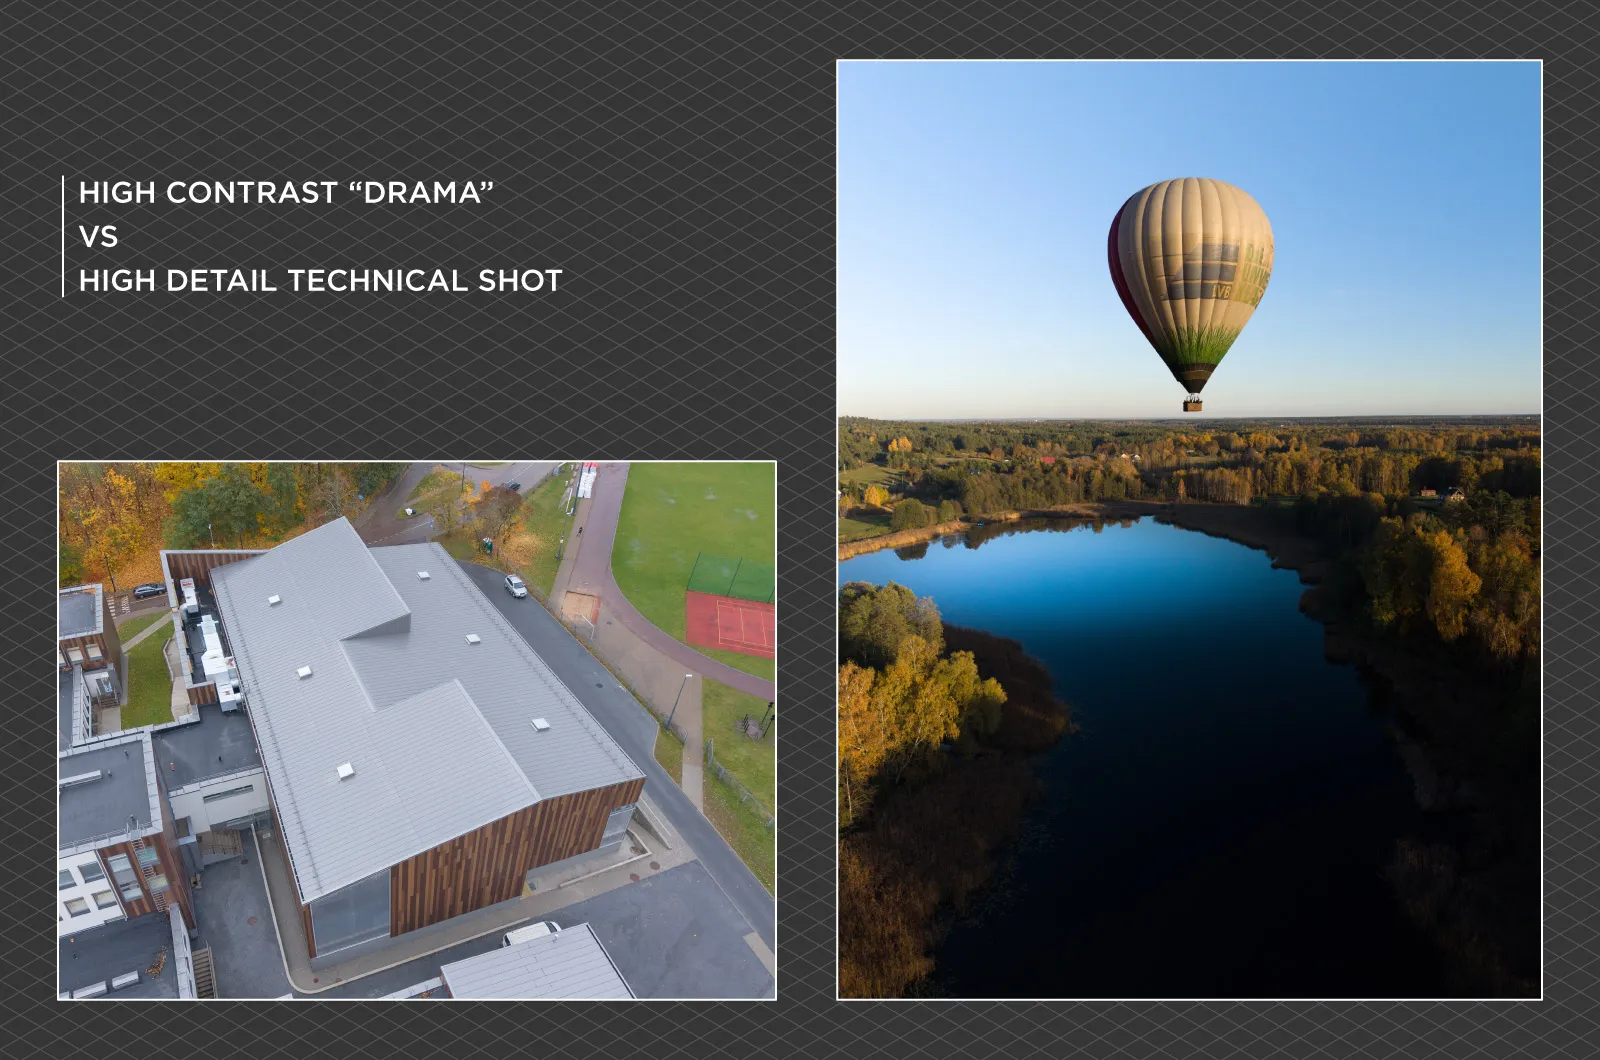
This is not an issue in creative scenarios when we are going for a dramatic aesthetic. However, in photogrammetry, we often strive to create technically well-executed photos with all the data we can gather. So we need to be wary of the limitations of dynamic range.
 Different Tiers of Camera Sensors
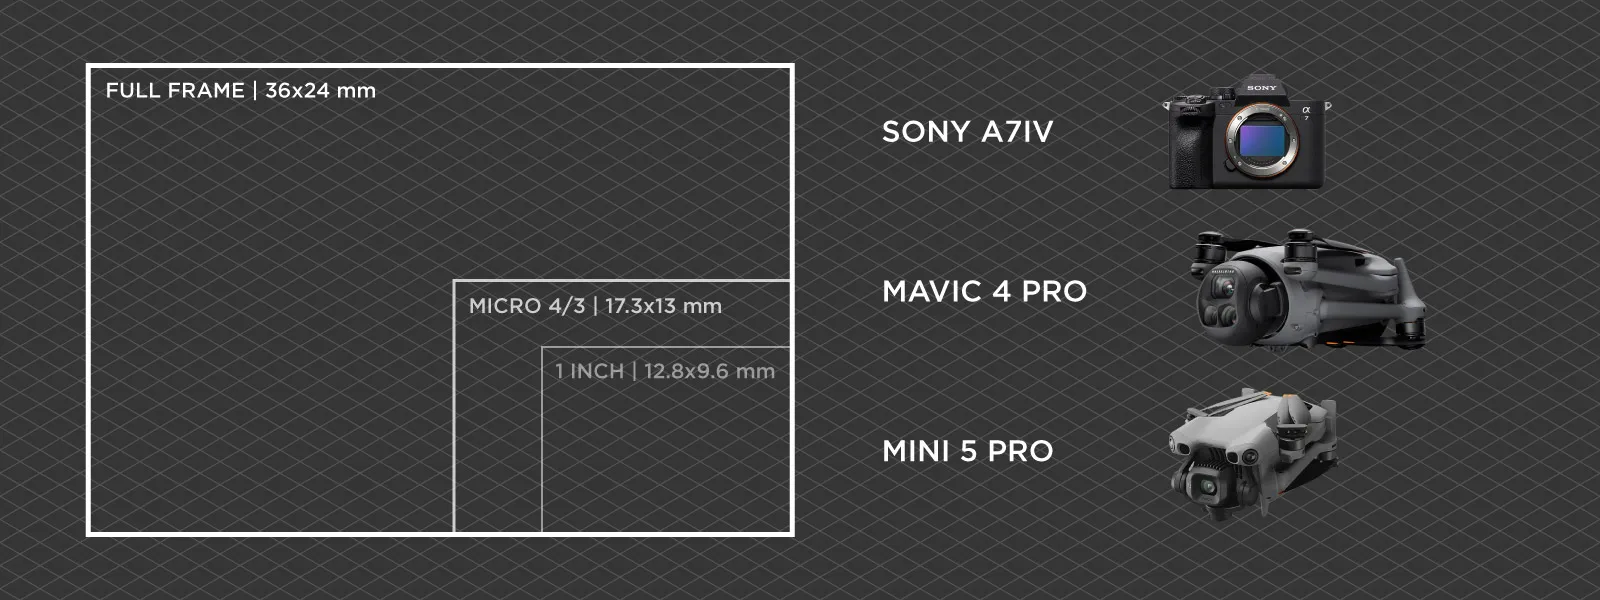
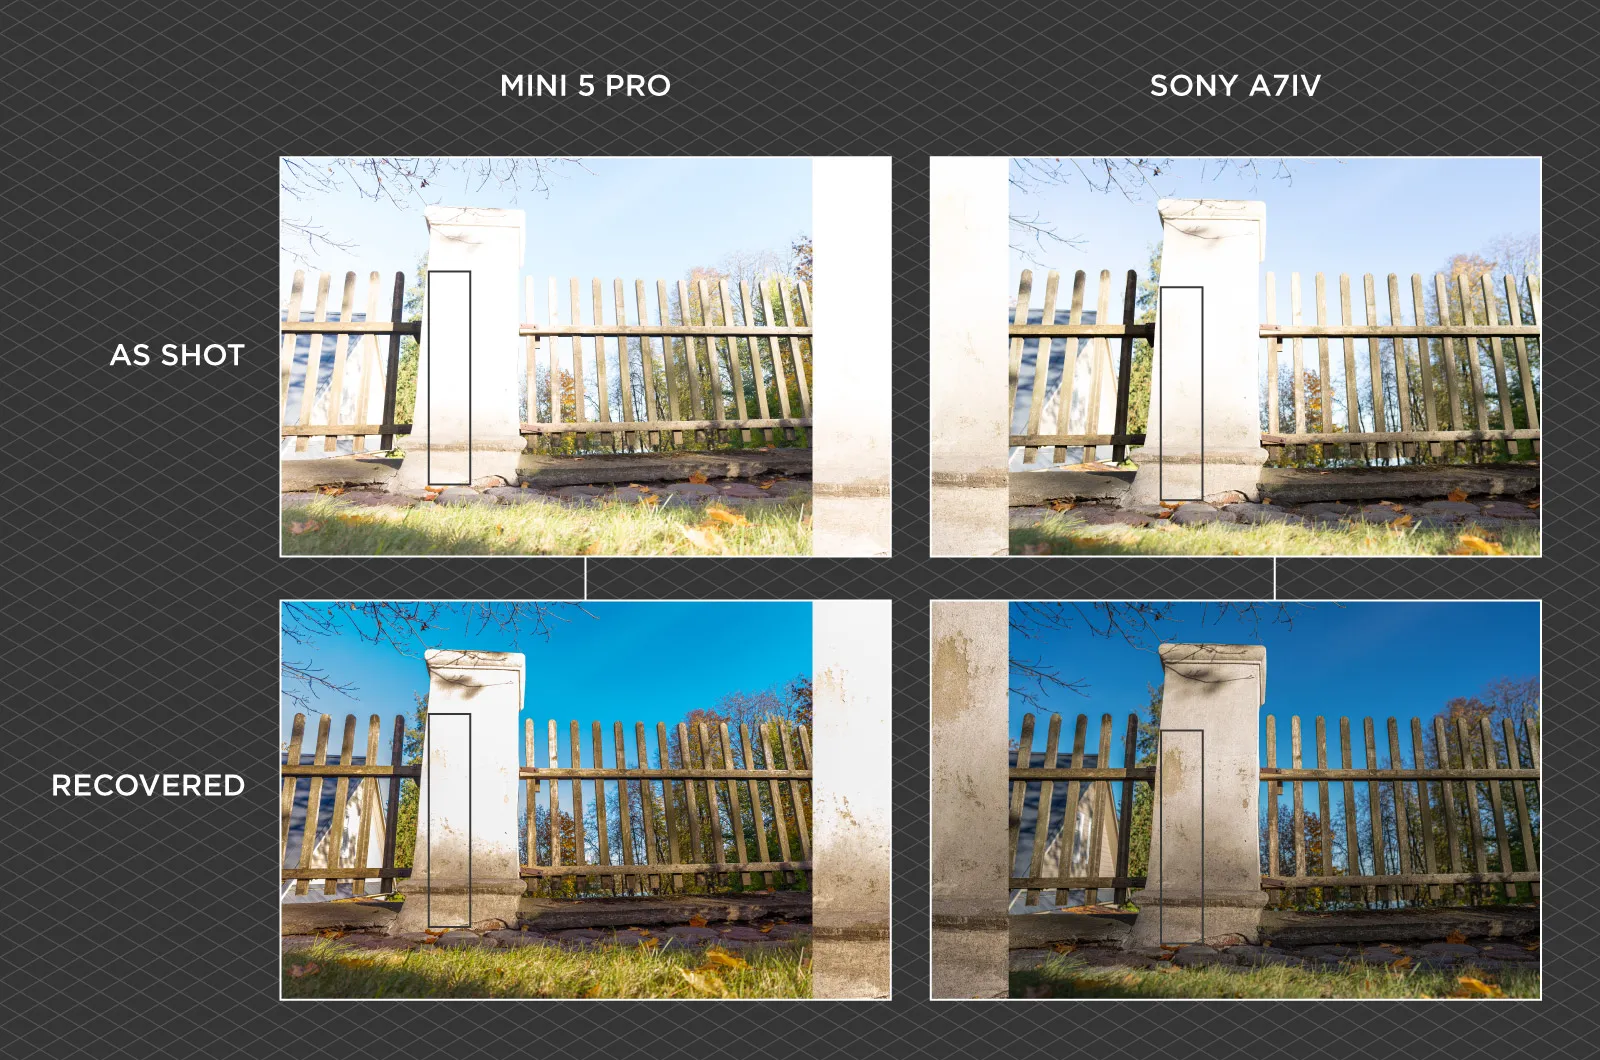
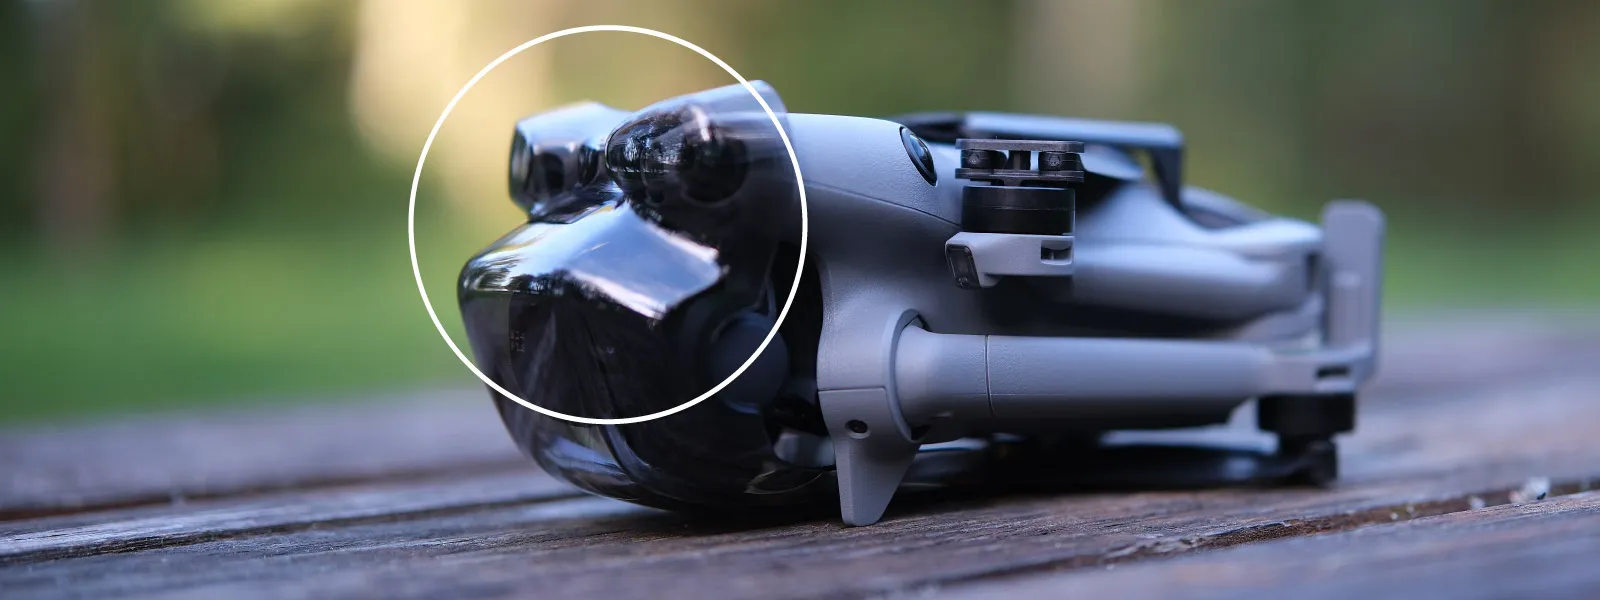
The dynamic range capability of a camera sensor depends heavily on its size and technology. Bigger sensors tend to gather more light and separate tones more cleanly, which usually results in a better dynamic range. For example, the DJI Mini 5 Pro features a 1-inch type sensor, which does a solid job for such a compact package — but it still cannot match the full-frame sensor inside the Sony A7 IV, which has a larger surface area and more room to capture subtle differences in light. Somewhere in the middle sits the Mavic 4 Pro with its custom 4:3 format sensor, offering more dynamic range than the Mini but still falling short of a full-frame mirrorless camera.
 Sensor technology matters too — newer designs, such as backlit sensors or improved ADCs (analog-to-digital converters), can squeeze out extra stops. However, in general, the rule is simple: the more sensor area, the more light, and the greater the dynamic range.
 The Subject is What Really Matters
Now that the theory is out of the way, it's time to talk about what really matters. You control the camera. If there are exposure problems where essential data is missing, that is on you. To avoid capturing scenes with blown highlights or crushed shadows, consider the following: First and most importantly, we need to expose our photos to the subject.
 If we are doing a roof scan of a building, our subject is the roof. If we fail to capture a very bright marble pavement next to the house or the dark walls of a nearby building, that is of zero concern. Visual data within the confines of our camera's dynamic range, only on the subject, is what matters to us. We should never compromise this data for something irrelevant.
Rule number one is: your subject in your photos must not be too dark or too bright. Because that is what really matters.
Protect Your Highlights
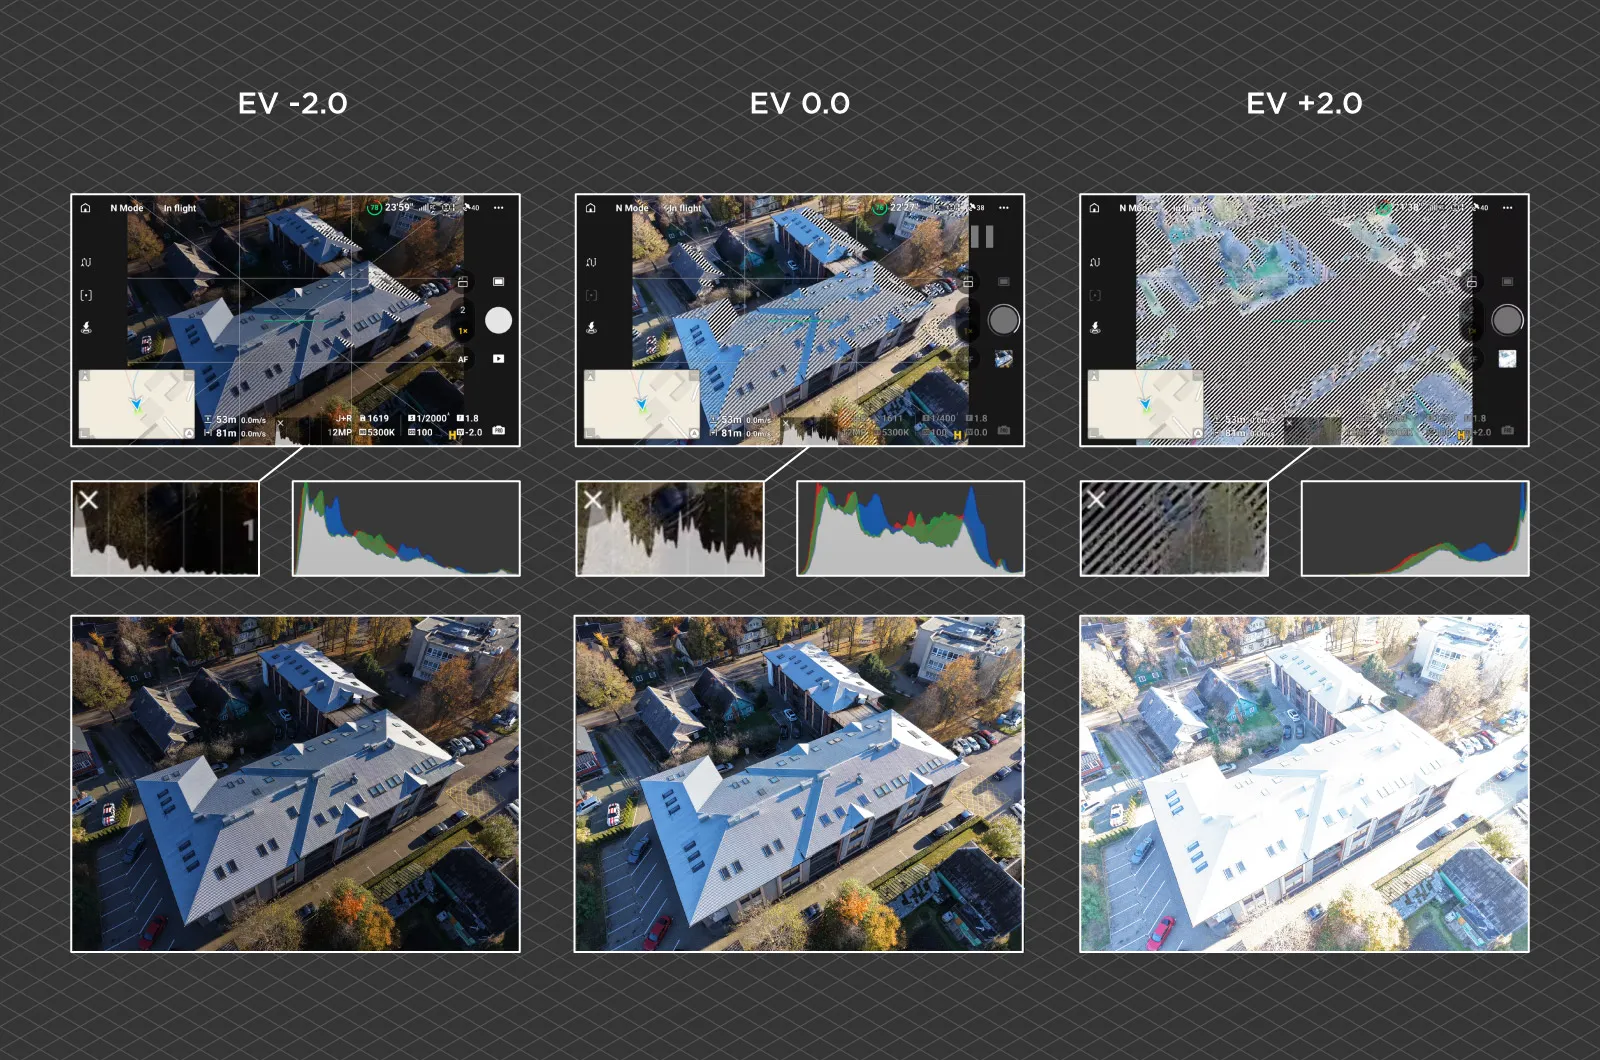
In almost all cases, highlights are harder to recover. Which means you should prioritize protecting bright areas. If your subject is or contains the brightest part in the scene, you must protect that area by exposing the entire photo accordingly, so that it is not pure white.
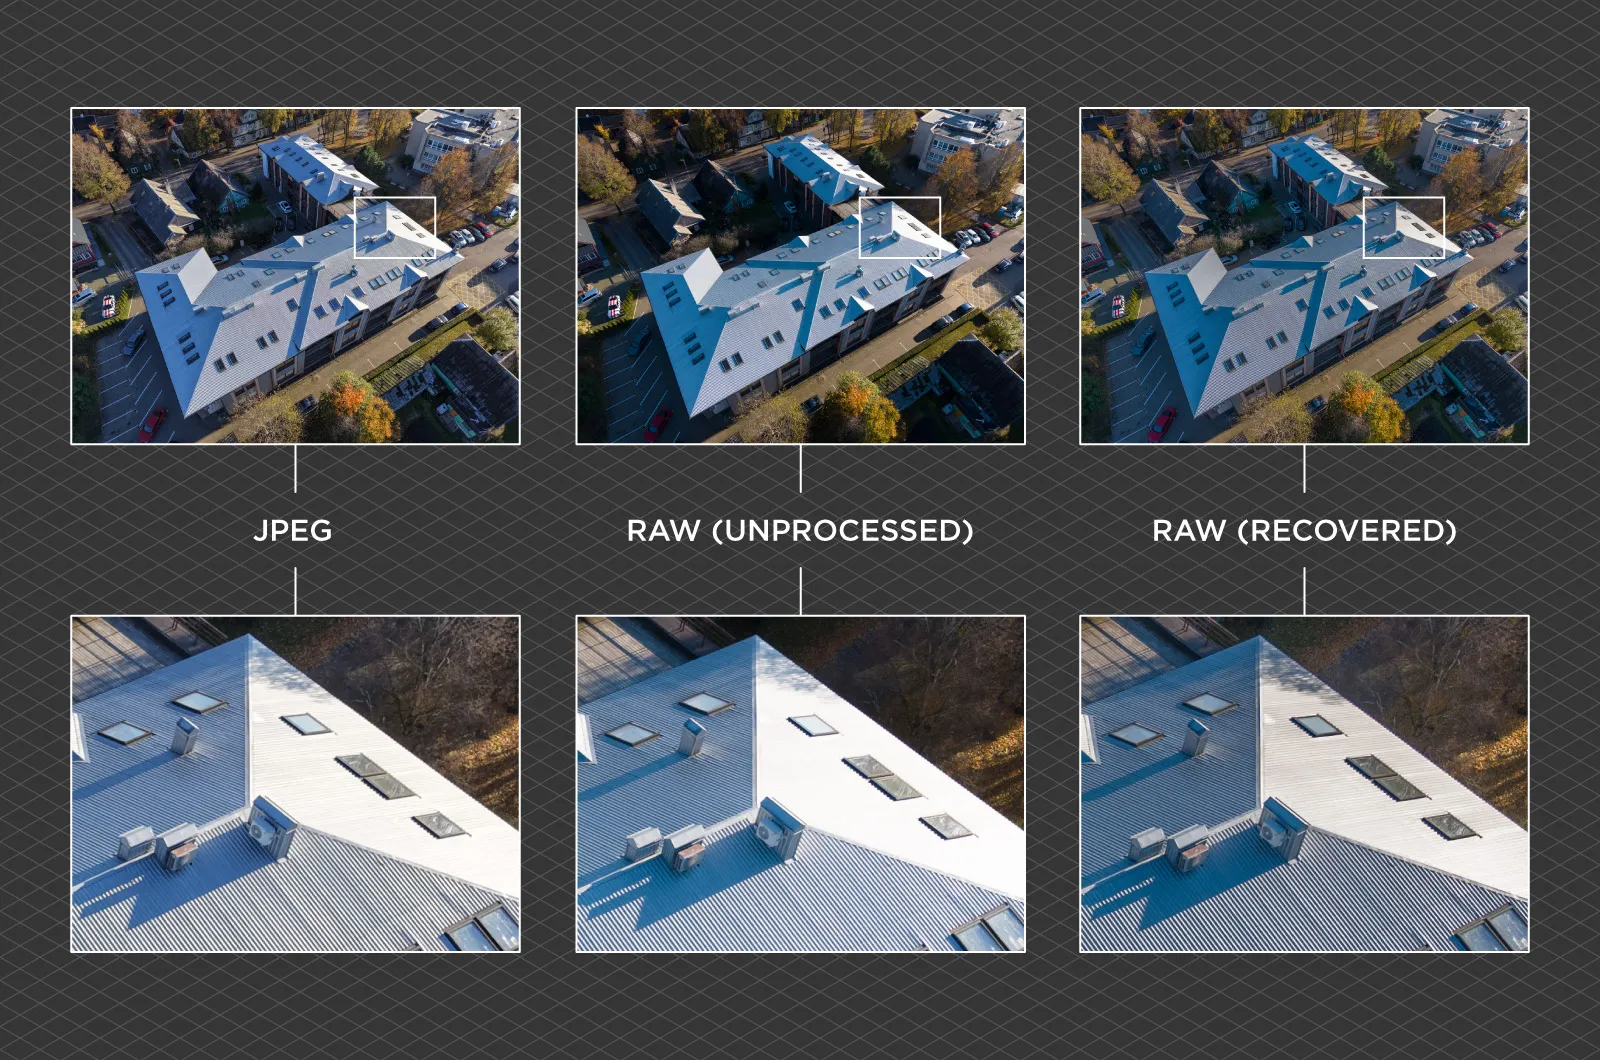
The first and simplest solution is to shoot RAW. Raw photo files have a greater dynamic range than any compressed format, such as JPEG. You do not have to shoot in raw format, and everything I write further down applies to JPEGs as well. However, raw files offer better flexibility at the cost of requiring additional processing later.
 The hardest part is monitoring the live view of your camera and determining when a vital area is overexposed. If it appears totally white, it is probably overexposed. I say perhaps because it heavily depends on the screen you are using.
 Different camera and drone screens display things differently, depending on their own brightness and contrast. However, we can assume that all modern remote controller screens and phones are capable of displaying a reasonably accurate representation of the visual data we receive. So if you see your roof looking completely white, you are likely overexposing or very close to it.
You have two main options:
-
Use auto exposure with compensation: This is particularly useful in ever-changing light conditions. Just dial in -0.7 or -1 on the exposure compensation slider until the bright parts start to look better, with visible detail.
-
Use the fully manual exposure: This works best when the light is stable. Set your shutter speed and ISO manually, and ensure your important highlights are not entirely white.
Protect Your Shadows
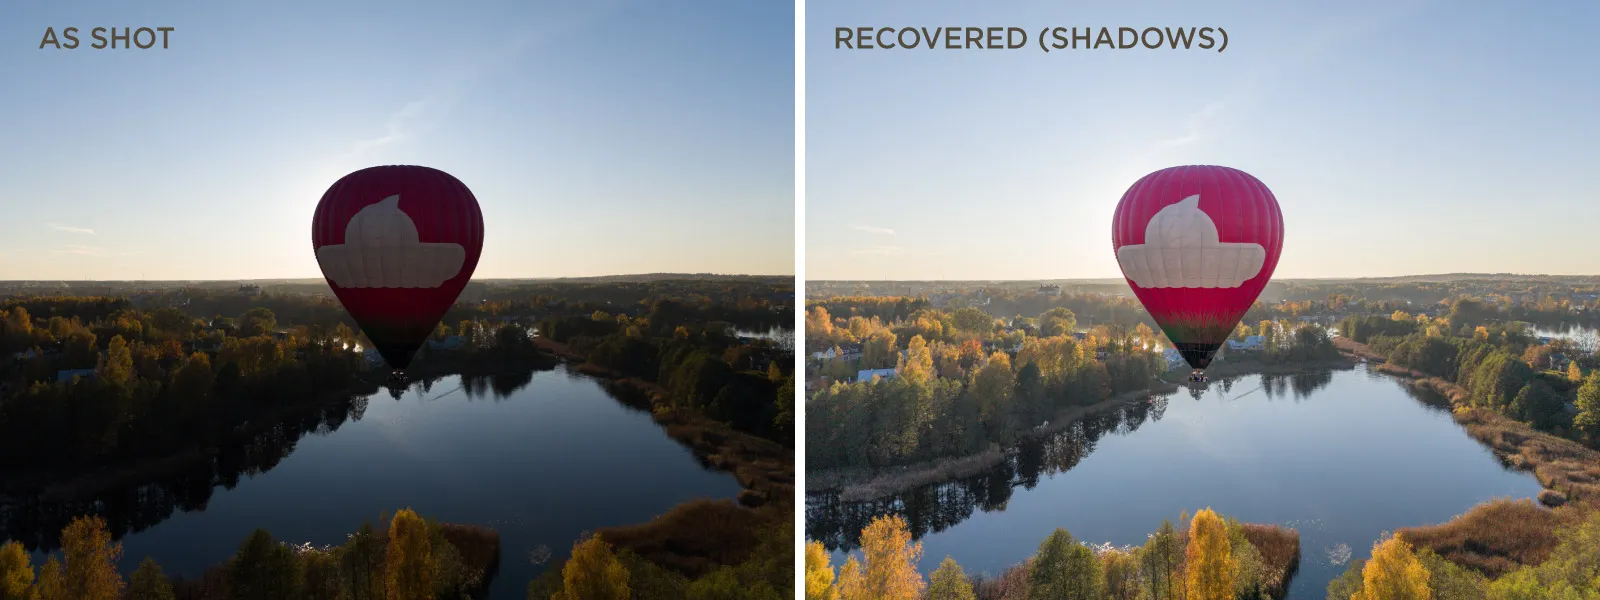
When it comes to shadows, things are simpler. Shadows recover more easily than highlights, and only true blacks are a problem. The approach remains the same, but it is more forgiving.
Monitor your subject to ensure that parts of it do not appear completely black. And again — shoot raw if you want to be able to recover more detail in post-production.
 Zebras and Histogram
Zebras are overlays that show areas of the frame that are overexposed. Sounds perfect, right? Unfortunately, zebra implementation can vary wildly.
For example, DJI uses zebras based on the live video feed to your controller or phone — not the raw image data. So what zebras show and what the actual photo looks like can be completely different. On the Sony A7 IV, zebras can be adjusted and tied more closely to raw capture — but even then, if you use an external monitor or phone app, results will vary.
Histograms are more reliable. If the graph hits the right edge, you are overexposed. If it hugs the left, the photo is too dark. This works more consistently across cameras and is a great sanity check when setting up your exposure.
 Ignore Specular Highlights
Specular highlights are those intense reflections from glass, metal, or glossy surfaces — like a car catching the sun or a rooftop tile gleaming at the wrong angle. These often go completely white because they are direct reflections of light sources. They carry no actual scene detail and cannot be "recovered." Learn to identify them and ignore them. They are expected to clip and should not influence your exposure decision for the rest of the frame.
 Conclusion
Dynamic range is not just a technical specification — it is something we fight for on every single scan. Good exposure is about compromise, and dynamic range is the boundary of how much you can keep before sacrificing something. Every camera has its limits, and your job is to know when and where those limits matter.
If you shoot a lot, you will learn very quickly where the "safe zones" are on your camera. Expose for your subject, watch the histogram, protect the highlights, and do not worry about the shiny bits. Raw helps, manual control helps more, and experience helps most.
The next time you take off to scan a roof, a building, or even a rock wall, take an extra second to think about the scene's contrast. You will get better results if you notice the clipped areas and eliminate them.
Photographer - Drone Pilot - Photogrammetrist. Years of experience in gathering data for photogrammetry projects, client support and consultations, software testing, and working with development and marketing teams. Feel free to contact me via Pixpro Discord or email (l.zmejevskis@pix-pro.com) if you have any questions about our blog.
Related Blog Posts
Our Related Posts
All of our tools and technologies are designed, modified and updated keeping your needs in mind
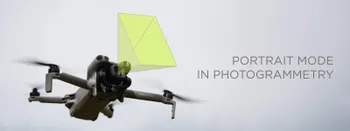
Portrait Orientation in Photogrammetry: When It Actually Helps
Is there anything to gain by scanning in portrait instead of the usual landscape? Sometimes, a little. But orientation is one of the least important decisions you make on a scan, and it is worth understanding why before you give it any more thought than that.

Better Photogrammetry Results Without Buying New Gear
Every time a new drone or camera comes out, the same thought appears: this is the upgrade that will finally fix my results. Sometimes it is even true. But in my experience, the gap between a mediocre scan and a great one is rarely the hardware.

Workstation PC 2026 – PC Build Hardware Advice
Another year, another look at the workstation PC market. The thing is, last year's advice still mostly stands, and that tells you everything about 2026. Almost nothing got faster, and almost everything got more expensive.
Ready to get started with your project?
You can choose from our three different plans or ask for a custom solution where you can process as many photos as you like!
Free 14-day trial. Cancel any time.