.svg@webp)
Hyperlapse Capture for Photogrammetry
 Lukas Zmejevskis
Automated flights for photogrammetry are reserved mainly for enterprise-grade drones. But when it comes to hyperlapse photography, it is regarded as a standard feature for consumers. However, both techniques have similar requirements and employ similar execution techniques. Can we use hyperlapse flight modes for photogrammetric scans? The answer is definitely yes. This article will look at available hyperlapse modes in the most popular drones. We will use them to acquire photogrammetric 3D models.
What is Hyperlapse?
Hyperlapse photography is a technique that involves the capturing of a large number of consecutive photographs while moving through a scene, with each frame aligned to create the illusion of seamless motion in a time-compressed video format. Unlike traditional time-lapse, hyperlapse introduces a dynamic element by incorporating camera movement, adding fluidity and immersion to the final output. This technique has been widely embraced by filmmakers, photographers, and enthusiasts alike, enabling them to showcase the passing of time and encapsulate the essence of a location or journey.
Unsurprisingly the best camera for hyperlapse photography is a flying one. Drones can introduce controlled movement to the image capture and provide a different perspective. Many consumer drones these days come with hyperlapse modes available right away. Such a mode involves automated image capture with an interval, automated flight movement (camera motion), and hyperlapse video creation. Additionally, you can see information such as final video duration and frame count during the capture. We can utilize this information for photogrammetry as well. Below is a typical, short hyperlapse video made with a DJI drone; the video is straight from the memory card created automatically in the drone itself:
Hyperlapse Capture Modes
We tested DJI and Autel drone hyperlapse features, which are similar. At first, the automatic photo capture is a given. You can choose the photo format, capture interval, and overall desired video length. The app will display the photo amount required to reach the set hyperlapse video length. Besides the automated interval capture, we have the motion. Most DJI drones come with these different flight patterns, which you can choose from the hyperlapse menu:
Free - this mode means that flying itself is entirely manual. The drone will capture all photos per your settings, but flying is up to you. Circle - allows you to choose a subject and orbit around it while the photo capture is underway—essentially a POI flight tracking mode but with automated image capture. Course lock - with course lock, you can set the course of the drone to a straight line but then manipulate the camera without changing it. The camera can face anywhere you like while the drone flies in a perfect line, which is nigh impossible to do manually. Waypoints - are the most comprehensive type of automated flight available in consumer-grade drones. You can set waypoints where the drone should fly and set the camera headings and angles. You can save and repeat waypoint flights any number of times.
With DJI drones, you can set the flight speed for each of the modes from 0.5 to 3 meters per second. You can also choose all the camera settings and get raw and jpeg images. After each flight, the drone will create a 4k 25-frame-per-second video, regardless of your preferred image format. All photos will remain alongside the video. Video creation begins immediately after the capture finishes. One downside is that you can not resume shooting while the video generates. But, the whole process takes mere seconds, depending on the length of the hyperlapse.
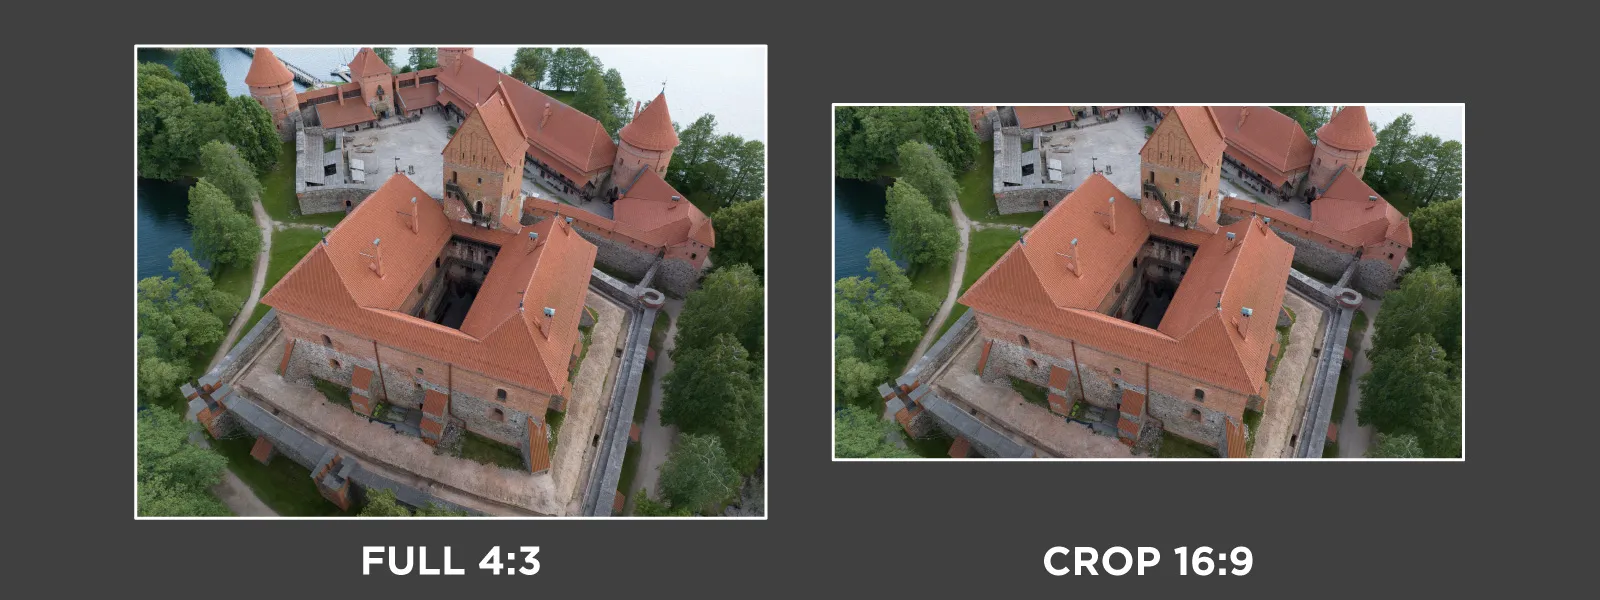
The feature set for hyperlapse creation is quite complete. The same applies to the latest Autel drones, like the Evo 2 Pro we reviewed earlier. One downside with Autel is that the drone does not save full-resolution raw images; instead, it keeps the cropped 16:9 versions only, which is not ideal but still usable. These saved photos are for hyperlapse professionals wanting to create something better than the automatic video, or - we can use these photos for photogrammetry.
Adapting for Photogrammetry
As you can see, hyperlapse and photogrammetry fundamentals are pretty similar. For hyperlapse, we need to control the image interval to meet the video requirements, while in photogrammetry, we maintain the speed and interval for overlap. If we delve deeper, for hyperlapse, some motion blur may be desirable. It is not for photogrammetry, but as we have the full camera controls as usual, we can ensure there is no motion blur.
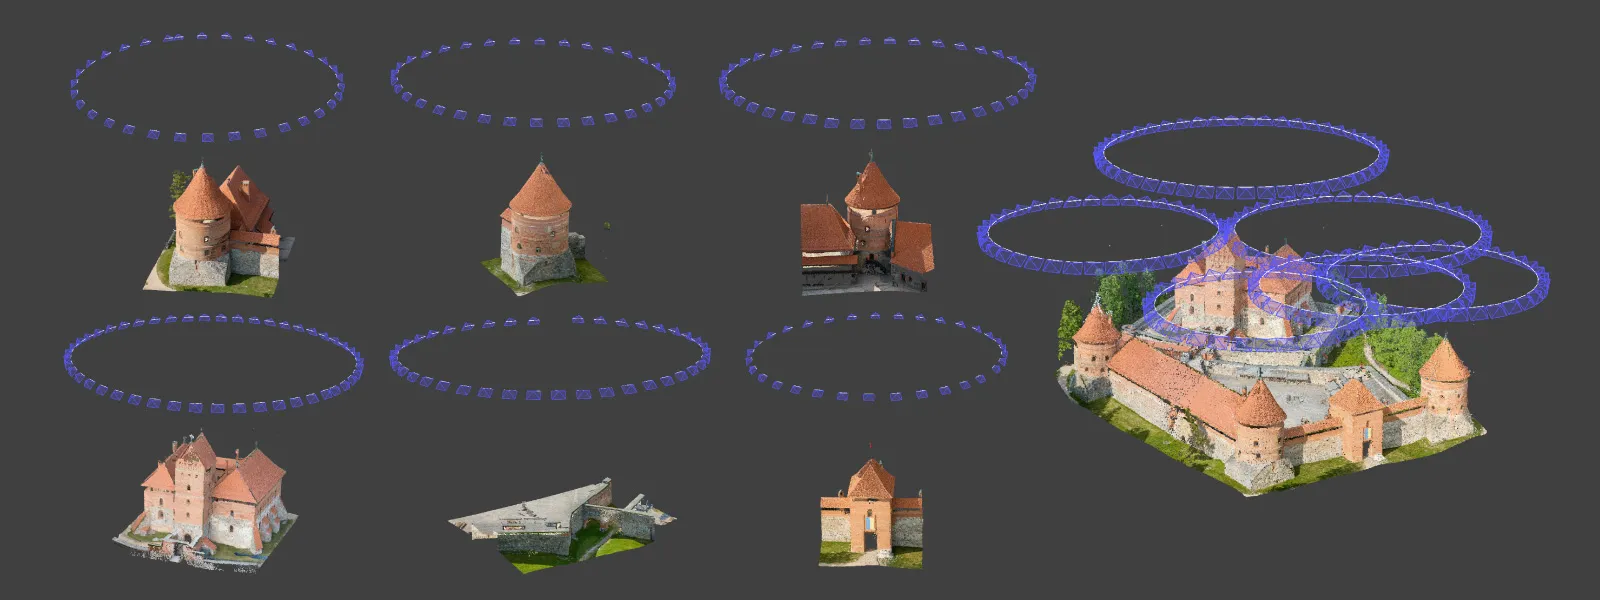
So which hyperlapse modes can we adapt for photogrammetry? In short - all of them, but the easiest and most efficient one is the circle mode which we are more used to calling orbital. The orbital scan type is the most efficient for more isolated subjects and can be combined to cover larger areas. We have been discussing the orbital flight type in various posts since the inception of this blog.
We described the more complicated but powerful waypoint functionality in this article, and with our photogrammetry calculator, you can create reliable and easily repeatable automated flights with consumer-grade drones if you are willing to learn.
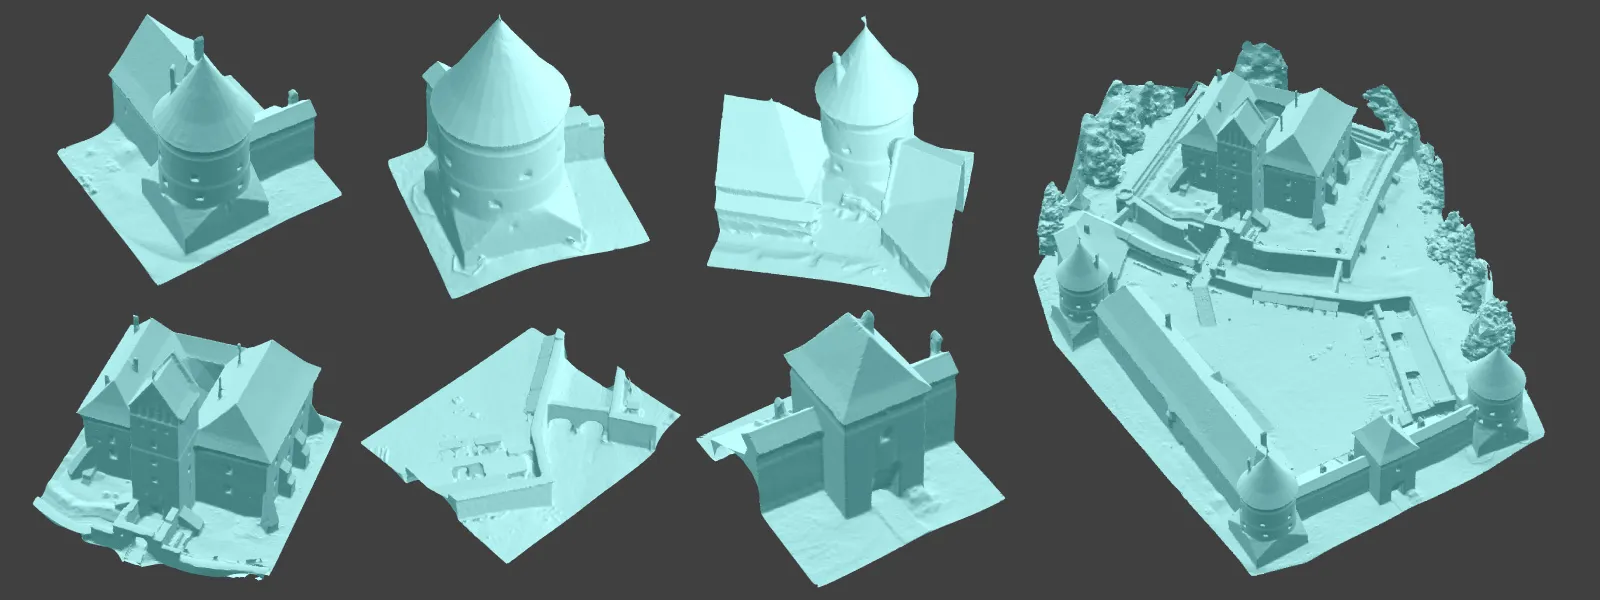
Examples
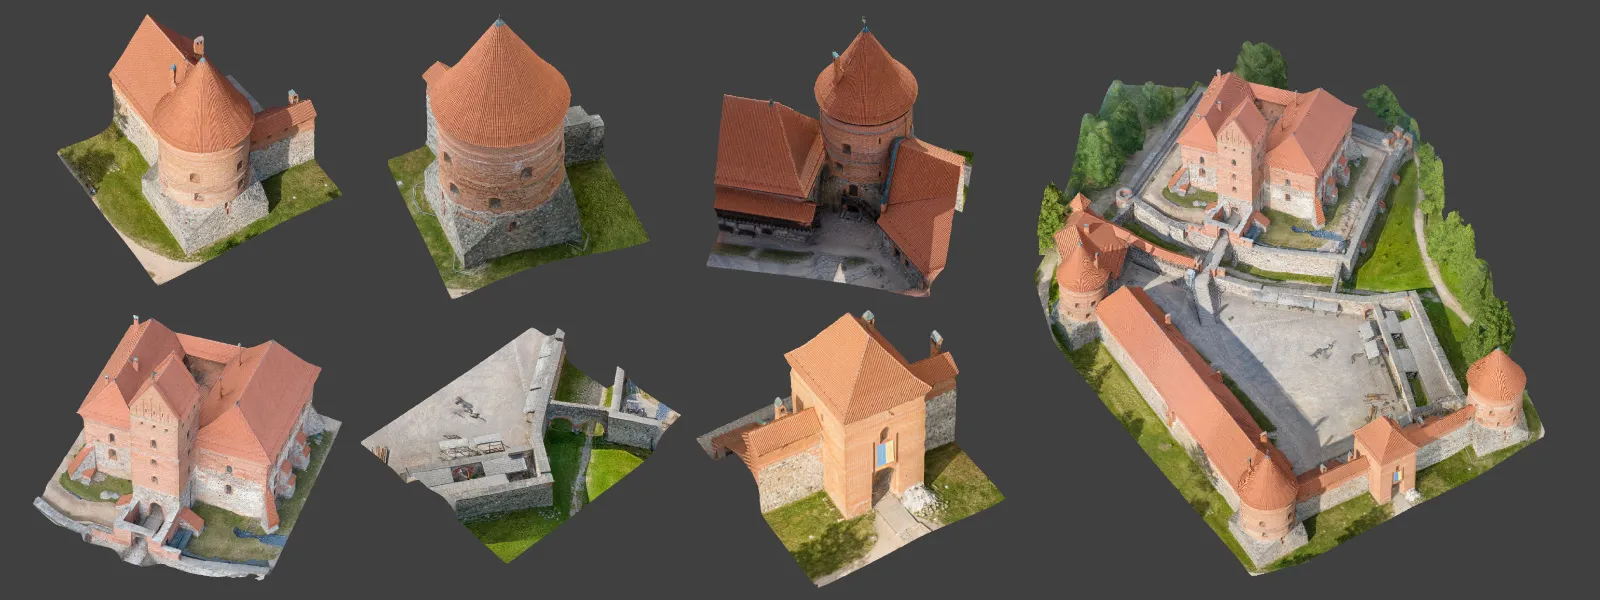
We used the circle hyperlapse flight mode and obtained some examples. The best way to approach using circle mode is to experiment with it. Activate the hyperlapse shooting mode in the app and select the subject in the same manner as you would with tracking - by drawing on the screen. If you have experience with POI mode, this will behave identically. For large buildings, choose the fastest 3-meter-per-second speed and 2-second interval. Depending on the size of your subject, a complete orbit will consist of about 35 to 40 photos.
Reduce the drone's speed if it takes less than 35 photos during a full rotation. You may need to reduce the flight speed for smaller subjects such as tiny houses or monuments. If you see excessive amounts of photos with little movement in between - increase the shooting interval to 3 seconds or more. With these parameters, you can quickly achieve sufficient overlap and full coverage. Ensure that there are at least 35 photos for each orbit and that the subject always stays in the frame. Below is a complete unedited screen capture of how we got our examples using the Mavic 3 Pro and the DJI FLY app.
Remember - you can track only a part of the subject; for example, you can select only the center part of the building. It lets you fill the frame with your subject, providing the best reconstruction quality. You do not need to draw around the entire building, which would force you to fly further than necessary because tracking does not quite work for the whole frame. Tracking and the hyperlapse mode have such operational peculiarities, which will become apparent only when trying it yourself. We noticed consistently that the photo capture starts with a considerable delay, so always remember where the image capture started to identify when a full rotation is complete.
The last thing to note is the camera settings. Use a quick shutter speed to eliminate motion blur; for the 3 meters per second orbiting speed with the wide angle camera - a 1/400 or faster shutter speed will guarantee zero motion blur in the photos. Use the lowest ISO value for the best image quality overall, if possible. Suppose you keep subject coverage and photo quality at a high level. In that case, these orbital image sets are perfectly suitable for photogrammetric 3D reconstruction. Last tip: if you made more than a full rotation of photos in the same orbit - delete those photos before processing. Overlapping and redundant images will not add anything good to the 3D reconstruction.
Conclusion
The convergence of hyperlapse photography and photogrammetry presents a convenience that expands the possibilities for 3D scanning. By harnessing consumer-grade drones' automated flight modes and image capture capabilities, we can utilize hyperlapse modes to acquire the images for photogrammetric 3D modeling. Camera movement and interval capture in hyperlapse photography align closely with the requirements of photogrammetry, enabling us to create efficient, high-quality 3D models. Whether employing circle mode for isolated subjects or utilizing advanced waypoint functionality for larger areas, adapting hyperlapse modes for photogrammetry opens up easy 3D scanning workflows even without expensive enterprise drones.
Photographer - Drone Pilot - Photogrammetrist. Years of experience in gathering data for photogrammetry projects, client support and consultations, software testing, and working with development and marketing teams. Feel free to contact me via Pixpro Discord or email (l.zmejevskis@pix-pro.com) if you have any questions about our blog.
Related Blog Posts
Our Related Posts
All of our tools and technologies are designed, modified and updated keeping your needs in mind

Photogrammetry Settings: A Practical Capture Checklist
This is a practical photogrammetry settings checklist built around that: the camera and drone settings I actually use, how to handle overlap and flight patterns, what to check before you start, and a cheat sheet at the end you can screenshot.
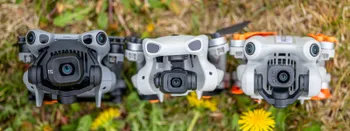
DJI Lito X1 vs Mini 5 Pro vs Mini 4 Pro: Which Sub-250g Drone Should You Buy?
Three current sub-250 gram DJI drones, almost identical on paper, all sitting on the same shelf. The DJI Lito X1, the Mini 4 Pro, and the Mini 5 Pro each have a clear value proposition, but the differences are small enough that picking the right one is a real question.
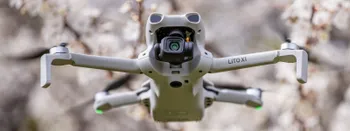
DJI Lito X1 Review: Specs, Flight Impressions, and How It Compares to the Lito 1
DJI recently launched a new drone series called Lito. It consists of two drones, the Lito 1 and the Lito X1. Both are sub-250 gram drones aimed at the more affordable end of the small drone segment.
Ready to get started with your project?
You can choose from our three different plans or ask for a custom solution where you can process as many photos as you like!
Free 14-day trial. Cancel any time.
Welcome to Pixpro
Sign in
And access your account.