.svg@webp)
How to Use Pixpro Waypoints – Step-by-Step Guide
 Lukas
Zmejevskis
Lukas
Zmejevskis

Pixpro Waypoints is a simple but powerful workaround that allows users to execute precise, automated flights on compatible DJI drones, such as the Mini 4 Pro, Mini 5 Pro, and Mavic 3/4 series. Instead of capturing everything by hand, Pixpro Waypoints lets you generate a complete waypoint flight and export it into the DJI Fly app by replacing a placeholder file. This enables proper photogrammetry-style scanning that would otherwise be accessible only on enterprise-grade drones.
From our client support experience, we know that many users run into small but important issues when setting up Waypoints for the first time. That is precisely why this article exists: to serve as a direct, up-to-date, and easy-to-follow step-by-step guide on how to use Pixpro Waypoints correctly and consistently. If you follow it carefully, your drone will fly a fully automated, consistent, and repeatable mission, just like a professional mapping drone would.
Compatibility
Pixpro Waypoint service is compatible with the latest DJI drones, which have the standard waypoint feature:
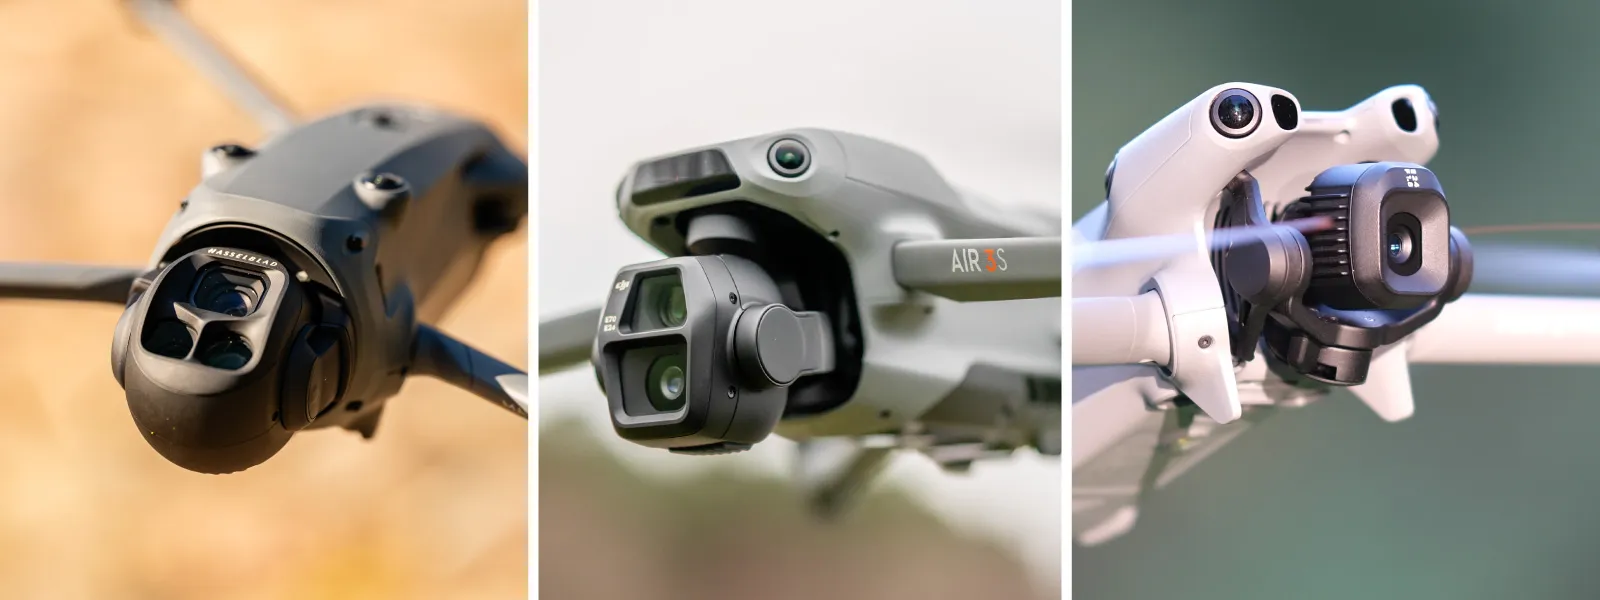
Currently compatible drones are: Mavic 4 Pro, Mavic 3, Mavic 3 Classic, Mavic 3 Pro, Air 3, Air 3S, Mini 4 Pro, Mini 5 Pro. This list will be updated with each drone launch.
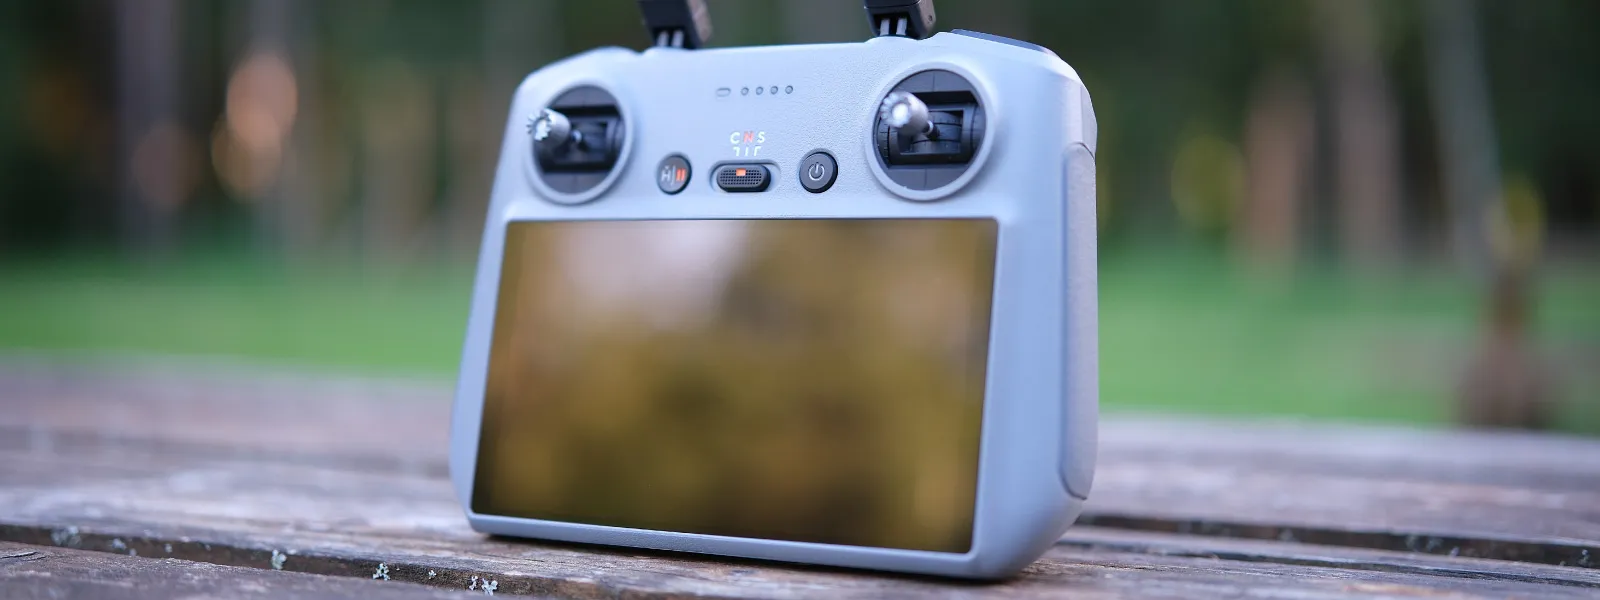
 Pixpro Waypoints require the use of the DJI Fly app, but due to some under-the-hood differences, the iOS version of the app does not support proper straight flight paths. So we always recommend using the DJI RC2 remote controller with compatible drones. Most Android phones with screenless remotes will work as well.
 Pixpro Waypoints License
Now that we have the right equipment, we can start using Waypoints. Pixpro Waypoints is a service available for all Pixpro subscribers, including the cheapest 5 euros per month option. If you have it, you can start using waypoints right now. To get your license, go to:
https://www.pix-pro.com/plans-and-pricing
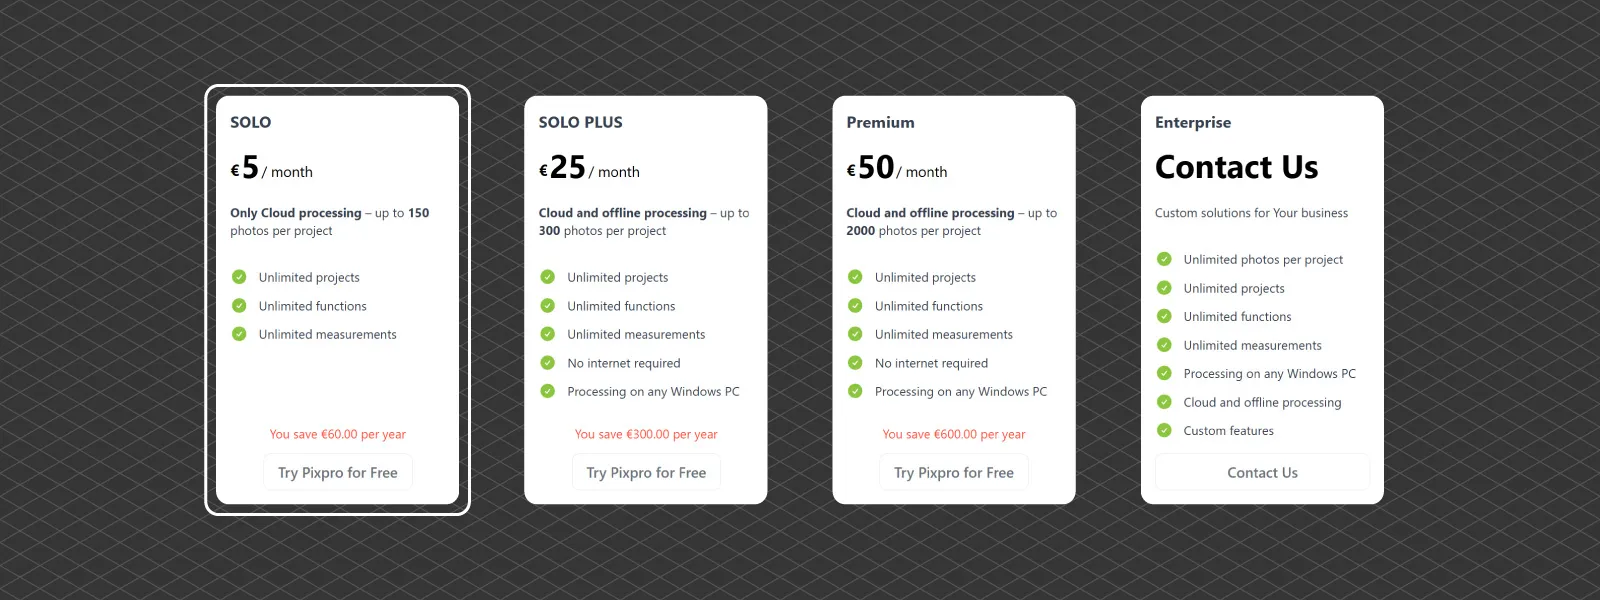 And of course, you get access to Pixpro photogrammetry software as well. The waypoints service link is available in your user dashboard on Pixpro.com when you log in, or via this URL:
https://www.pix-pro.com/waypoints
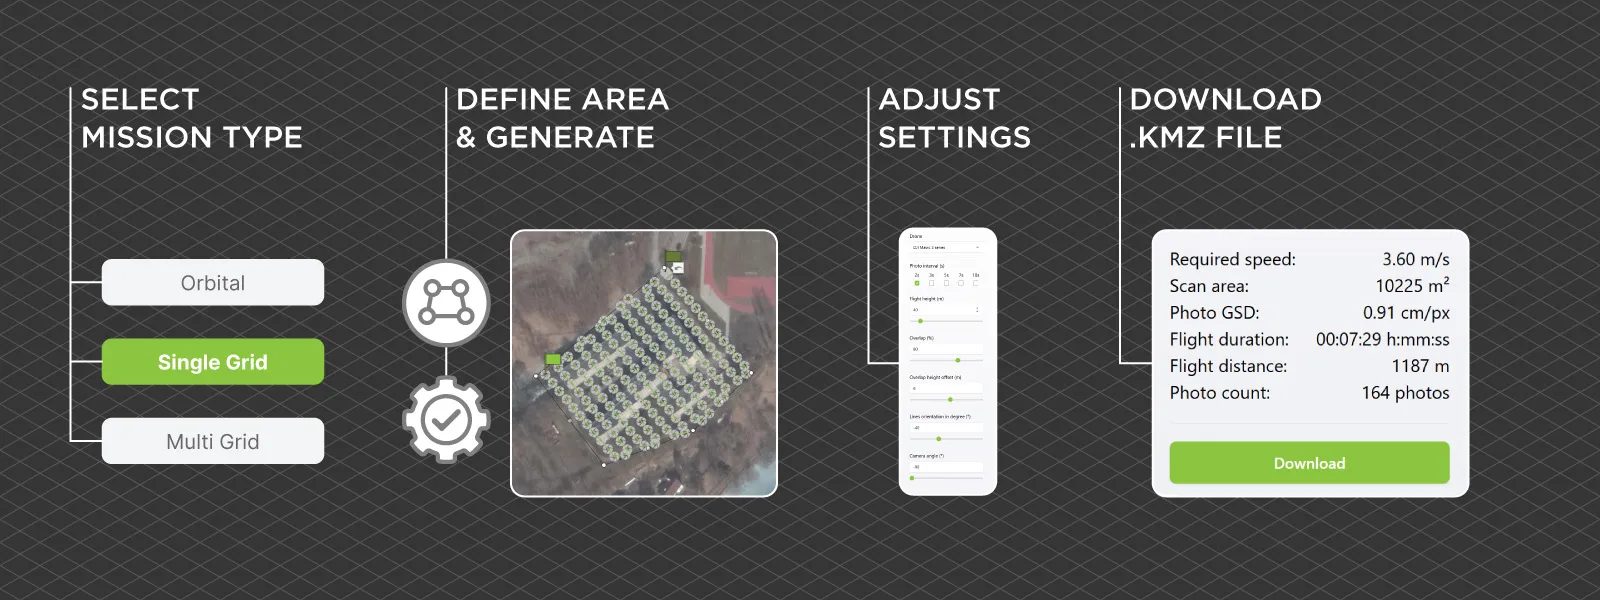
Step 1 – Planning the Flight
Planning the flight means choosing the flight type and its parameters. Now we have Orbital, Single Grid, and Multi Grid flight plan types.
Orbits are more for small isolated objects, such as residential roofs, single grids are for terrains and orthophoto creation, and multigrids are for entire urban blocks and complex buildings.
However, we can rarely abide by just using one flight plan; combinations of multiple different flights often yield the best results.
After choosing the type of plan you wish to make, define your area or location on the map. For orbits, you can click on a spot. The single grid allows drawing any polygon, while the multi-grid option is a rectangular area.
Once the area is defined, you can choose various settings on the right side of the screen. Key settings to look out for are the photo interval and flight height. The faster the interval, the quicker the drone will fly, and the lower the height - the same applies. Lower altitude means more photos, higher means fewer. We recommend keeping the overlap always at 80 percent.
Once settings are finalized, you can click to generate the plan. The flight path and theoretical camera positions will show up on the map. You can still change things and see the changes in real time.
Click Download once the plan is to your liking, and a .kmz or a .zip file will be presented to you. The .zip file, in case of multiple grids, will contain all four flight paths.
 Step 2 – Create a Placeholder Waypoint Mission
Now you need to import the .kmz waypoint flight into the DJI Fly app. To do that, we need to have a placeholder plan that we can replace with Pixpro Waypoints one.
Power on your DJI RC2 remote or launch the Fly app on your Android phone. Go to the camera view and go to the waypoints menu on the right.
Set just one or two dummy waypoints on the map, and save the mission. This creates a real file on the controller's storage. Save the mission and exit.
This placeholder file is what we'll now replace with the Pixpro-generated version. Create as many placeholder plans as you need.
 Step 3 – Replace the Placeholder Mission
Now that the placeholder file exists on your controller, connect the RC2 remote or your phone to your computer via USB-C. Go to this location on the device:
Internal storage/Android/data/dji.go.v5/files/waypoint/
You will find as many folders as missions you created. Inside each folder, there is a .kmz file with the same name as the folder. Open your downloaded Pixpro Waypoints .kmz in directory side by side. Rename a waypoint file by copying an existing name of a folder in the device. Then drag that file over to the same folder and replace the .kmz file inside. Do that for as many flights as you need.
That is it. Now you have replaced the original file and given the replacement the same name.
Step 4 – Check if Everything is OK
Relaunch the DJI Fly app and open the same mission from the Waypoints menu. The map should now display your Pixpro-generated flight path.
It should clearly have a grid pattern.
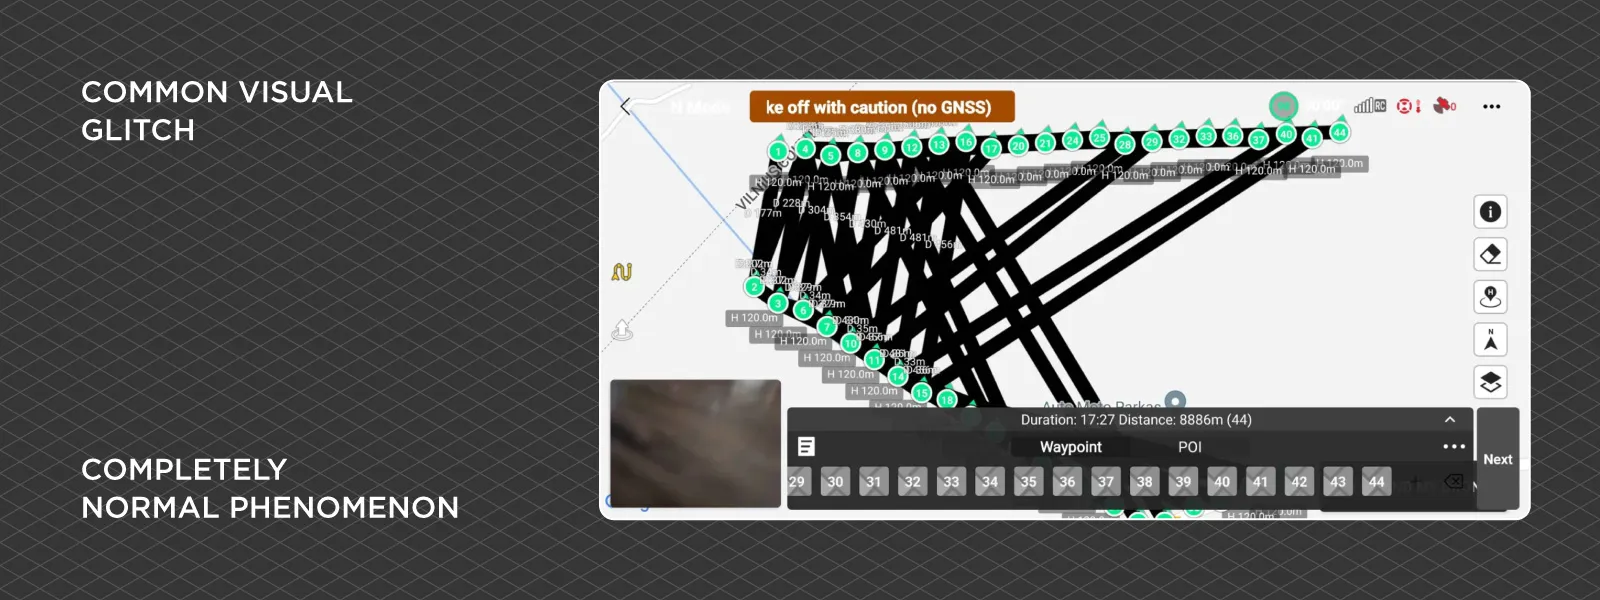
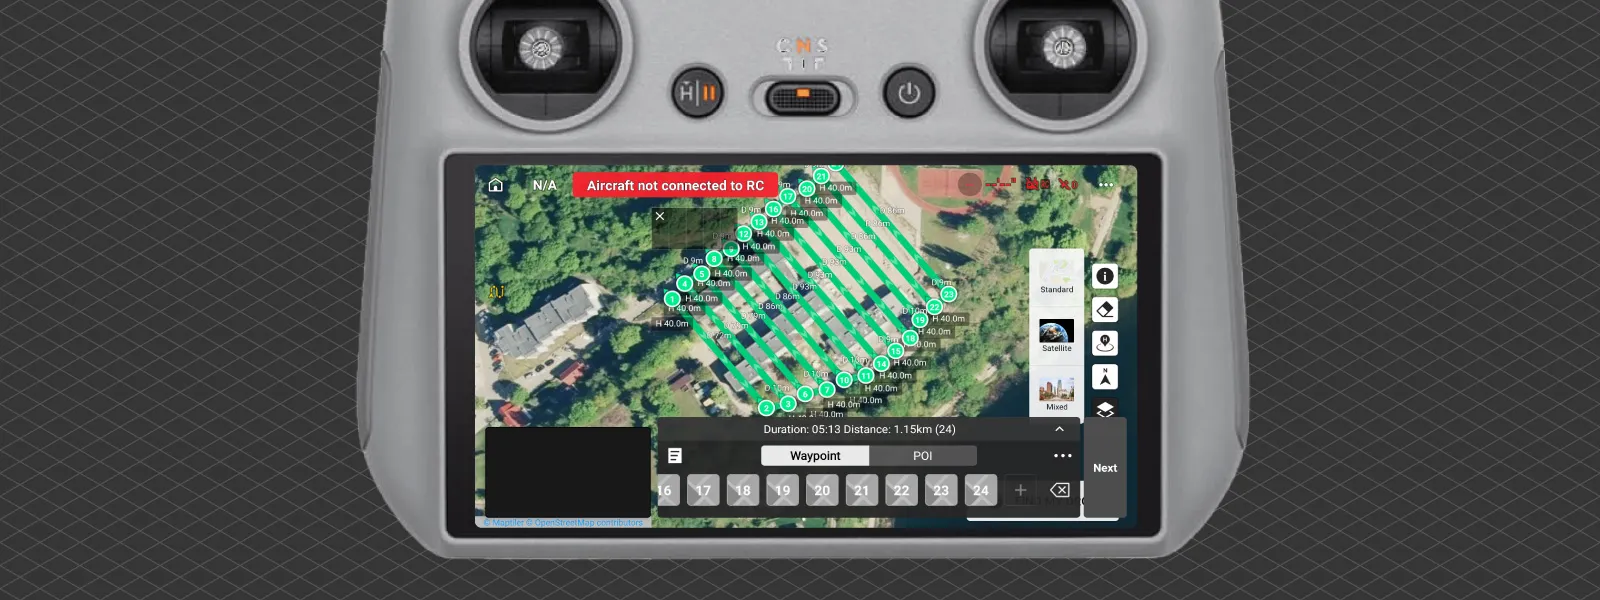 If you observe a glitch of black lines being all messy, that is fine; it is only a visual bug generated by the app. What matters are the green waypoints, which should be at the ends of each straight line of the generated path.
 Keep in mind that waypoints do not represent photo locations in any manner. Waypoints are for the flight path only.
Step 5 – Execute the Mission
Go to your scan location, choose a good take-off spot, and power on your drone and remote.
Ensure you have enough battery for the mission. Make sure the GNSS signal is strong.
Check your photo settings. You must shoot in full uncropped resolution modes; 16:9 photos are undesirable. We recommend shooting in shutter priority mode with a shutter speed of 1/250 or faster, but auto settings will be OK in good lighting conditions.
Now with everything ready, go to the waypoints menu and choose the flight you want to do.
Launch the waypoint flight. The drone will take off and will execute the flight as planned.
 Once the drone reaches the first waypoint, start the timed shot photo capture at the appropriate interval. The same one you selected during the flight planning step. This is the way we capture photos; the drone will not trigger any capture automatically.
Once the flight path is completed, immediately stop the timed shot capture. Return home as you prefer, and your flight is completed.
Step 6 - Check Your Data
Check what photos you get. Photos that are blurry and out of focus will not work for photogrammetry. Photos that are clearly too dark or too bright will not work as well. If your photos look good, you've got a good set for photogrammetric 3D reconstruction.
Conclusion
Pixpro Waypoints unlock automated scanning for drones that were never meant to support this feature. It is a workaround, but a very robust one, one that many users rely on every week for their 3D scanning work. With this guide, you should be able to plan and fly fully automated photogrammetry missions using just your DJI drone, a Pixpro subscription, and some basic care during setup. Once you do it a few times, it becomes second nature.
It is one of the best services we have made, and we hope you make full use of it. We have quite a lot more articles about Pixpro waypoints, so if you did not find the information you were looking for, explore the blog or write straight to us.
Photographer - Drone Pilot - Photogrammetrist. Years of experience in gathering data for photogrammetry projects, client support and consultations, software testing, and working with development and marketing teams. Feel free to contact me via Pixpro Discord or email (l.zmejevskis@pix-pro.com) if you have any questions about our blog.
Related Blog Posts
Our Related Posts
All of our tools and technologies are designed, modified and updated keeping your needs in mind
Ready to get started with your project?
You can choose from our three different plans or ask for a custom solution where you can process as many photos as you like!
Free 14-day trial. Cancel any time.