.svg@webp)
Video Frames vs. Photos for Photogrammetry
 Lukas
Zmejevskis
Lukas
Zmejevskis

Photogrammetry uses raster data to calculate a 3D scene. Raster is just another word for images made out of pixels. So, taking photos is the fundamental first step of creating a scan. Video is just pictures taken many times a second, so one could assume it's another good way of capturing photogrammetric scans. In this article, I'll summarize the practical differences between using video and photo capture for getting photogrammetric scans.
What is Digital Video?
A digital video file is a box (called a container, such as MP4 or MOV) that holds multiple things inside: the video frames themselves, audio, maybe subtitles, and some info like the title or resolution. The real difference-makers are the codecs—the tools that shrink all that video and audio data down into something manageable. Without the compression they provide, even a minute of video would be massive.
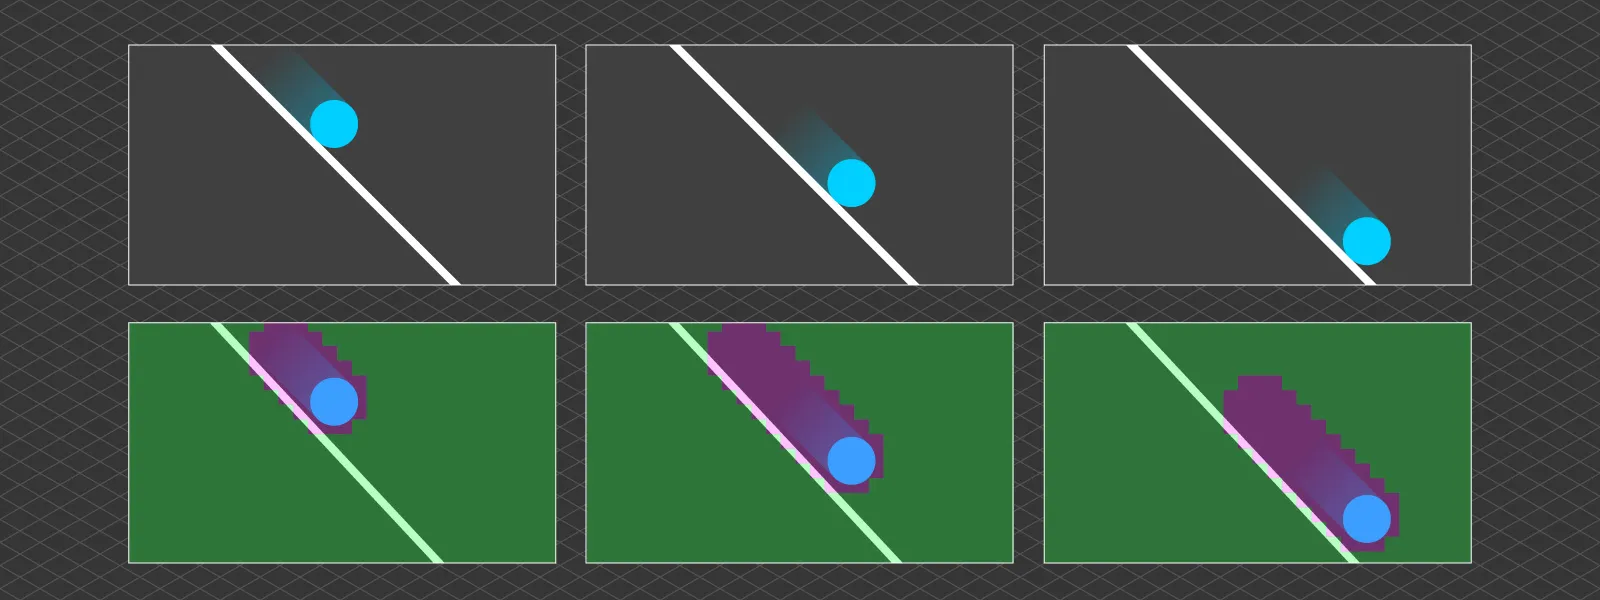
Compared to a photo (like a JPEG), a compressed video is more complex because it has to handle time and motion. Some parts are similar: keyframes in the video are compressed, like JPEGs, using color tricks and math. However, lossy video compression goes further by analyzing what has changed from one frame to the next instead of saving every frame from scratch. This is why a video of someone standing still will have a much smaller file size than a landscape shot from a moving drone.
 These fundamental concepts are worth considering when capturing video for 3D scans. If possible, we need to choose as little compression as possible at the highest resolution, which immediately means huge file sizes.
Pros and Cons of Video Capture
The main downside of using video for photogrammetry scans arises from the fact that there is effectively more data than we need, while each frame is of lesser quality than a photo taken in still mode. Let me summarize:
Video Cons:
-
Large video files with tons of unnecessary data (thousands of unused frames).
-
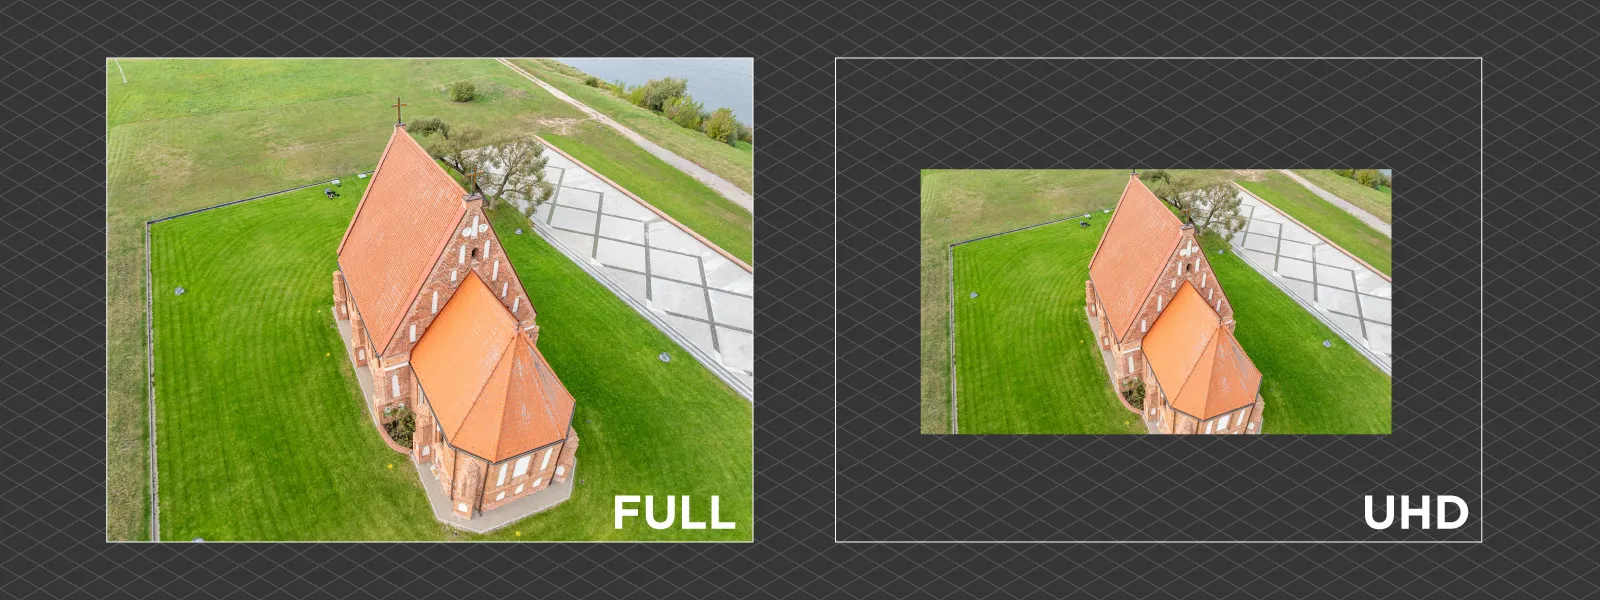
Lower raster resolution than still photos.
-
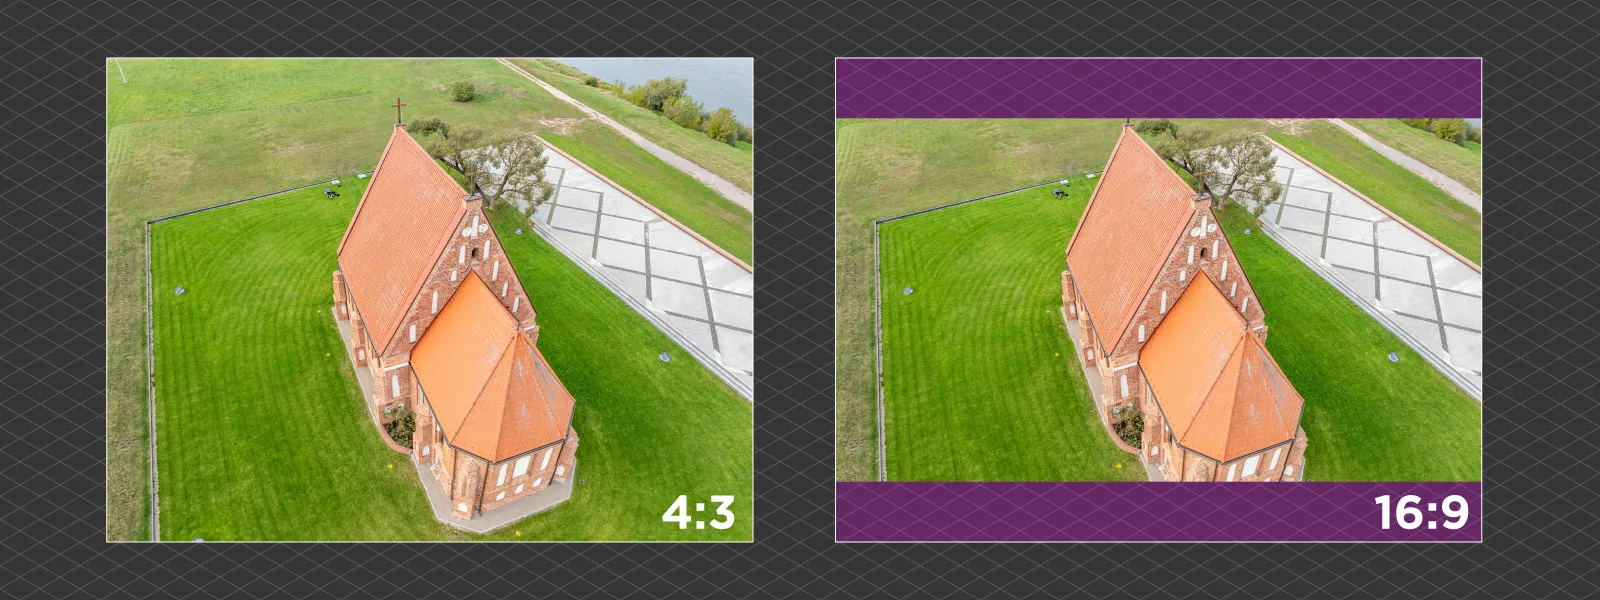
Widescreen format crop—may not be an issue in some cases, but pixel data is lost.
-
Requires an additional frame extraction step before use in photogrammetry.
-
There is no RAW capture. And even if raw video is available, most users find file sizes ridiculous and the workflow impractical.
-
Harder overlap control when using arbitrary frame extraction intervals.
 Video Pros:
-
Natural coverage of the subject might feel more intuitive or easier.
-
Scans can seemingly be done quickly.
-
No need to program interval shooting or click a shutter repeatedly.
Photo Cons:
-
Capture may be more tedious if not automated.
-
Because each picture is captured deliberately, it may seem harder or require more thinking than video.
Photo Pros:
-
Better quality per frame.
-
No or minimal unnecessary data.
-
RAW capture available.
-
No extra processing steps are required.
-
Better compatibility with photogrammetry software.
 Video Capture Tips
I'll be upfront: I prefer photo capture in 99% of photogrammetry cases for the reasons above. What these pros and cons don't convey is how deceptively simple video capture seems. But the final result is often disappointing—even when using the best software and settings—because the data just isn't great to begin with.
That said, here are some tips if you're going to use video for 3D scanning:
-
Use the maximum resolution available. More pixels = better results (up to a point). If your phone or camera does real 8K, that's great—but real 8K is rare despite marketing claims.
-
Use the lowest frame rate available. We don't need more than 24 frames per second.
-
Use manual video settings. Eliminate motion blur by setting a fast shutter speed—1/1000th of a second or faster. This is crucial since you'll be moving during the video.
-
Ensure good lighting. Fast shutter speeds need plenty of light to avoid underexposure.
-
Disable digital stabilization. It introduces motion blur, which we want to avoid.
-
Use mechanical stabilization. A gimbal or even just a steady grip can make a big difference.
-
Move slowly and smoothly. Again, to avoid motion blur.
-
Cover the entire subject once. Don't film the same spot twice or hover in one place. This is the most challenging part, especially with complex subjects.
You might get a decent result if you do all of this and choose the correct capture settings.
3D Scan Examples
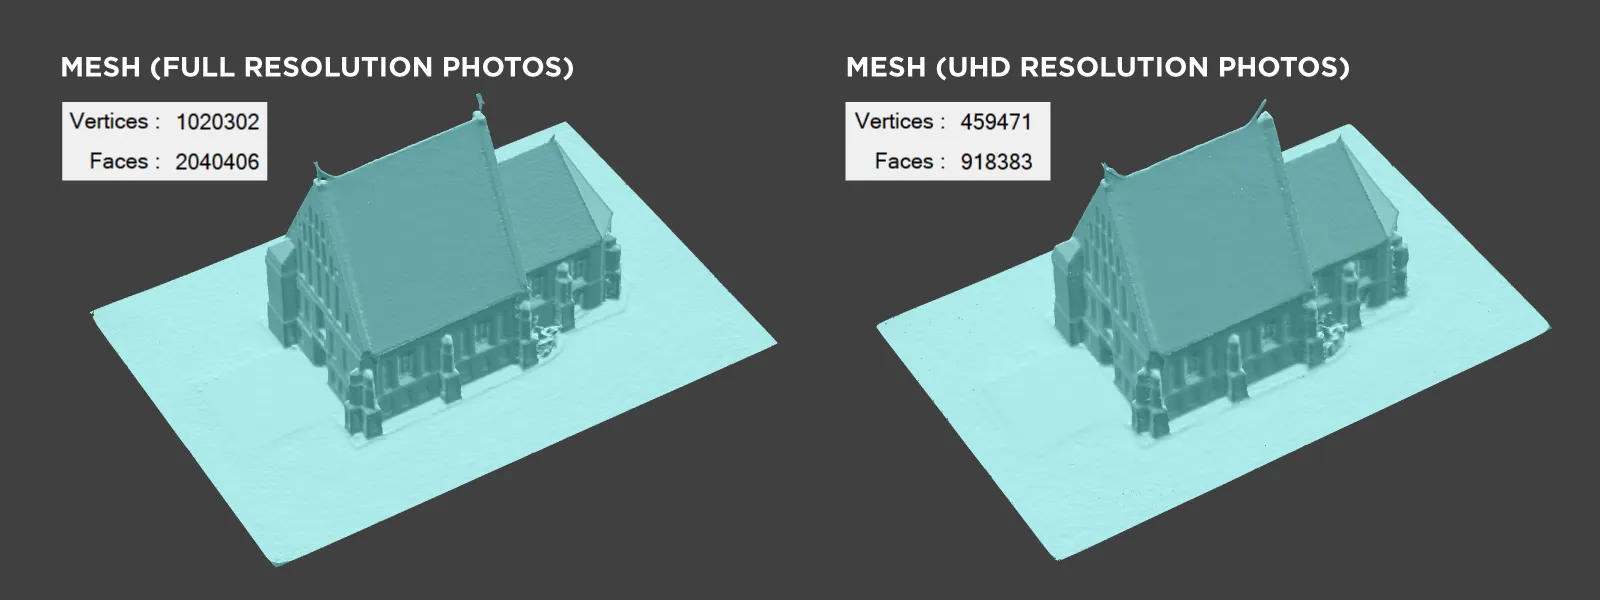
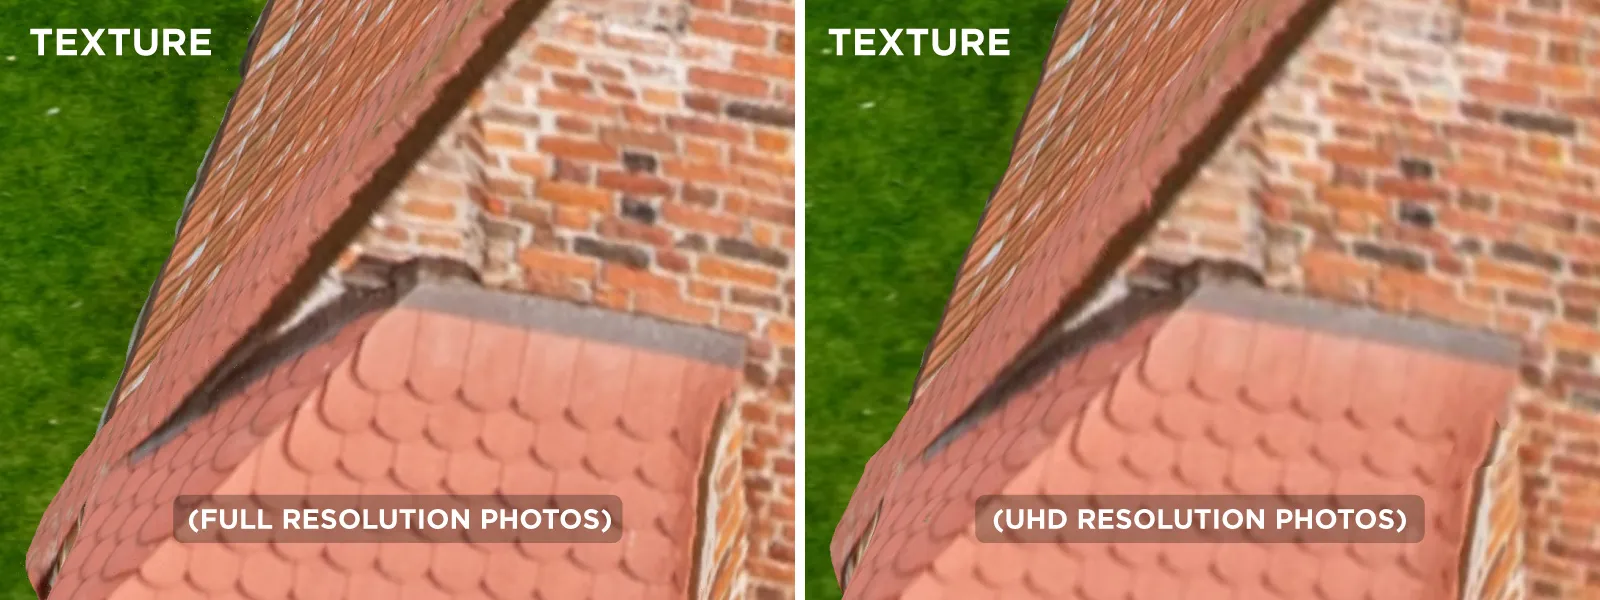
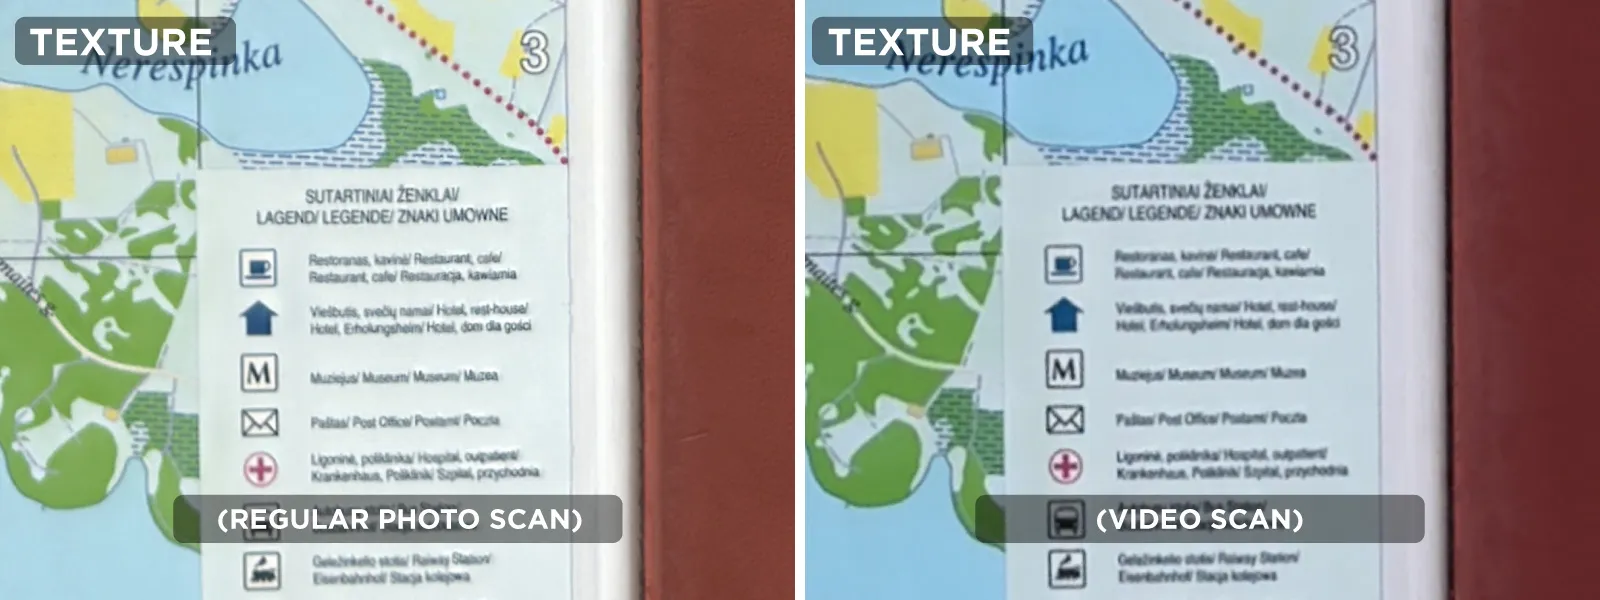
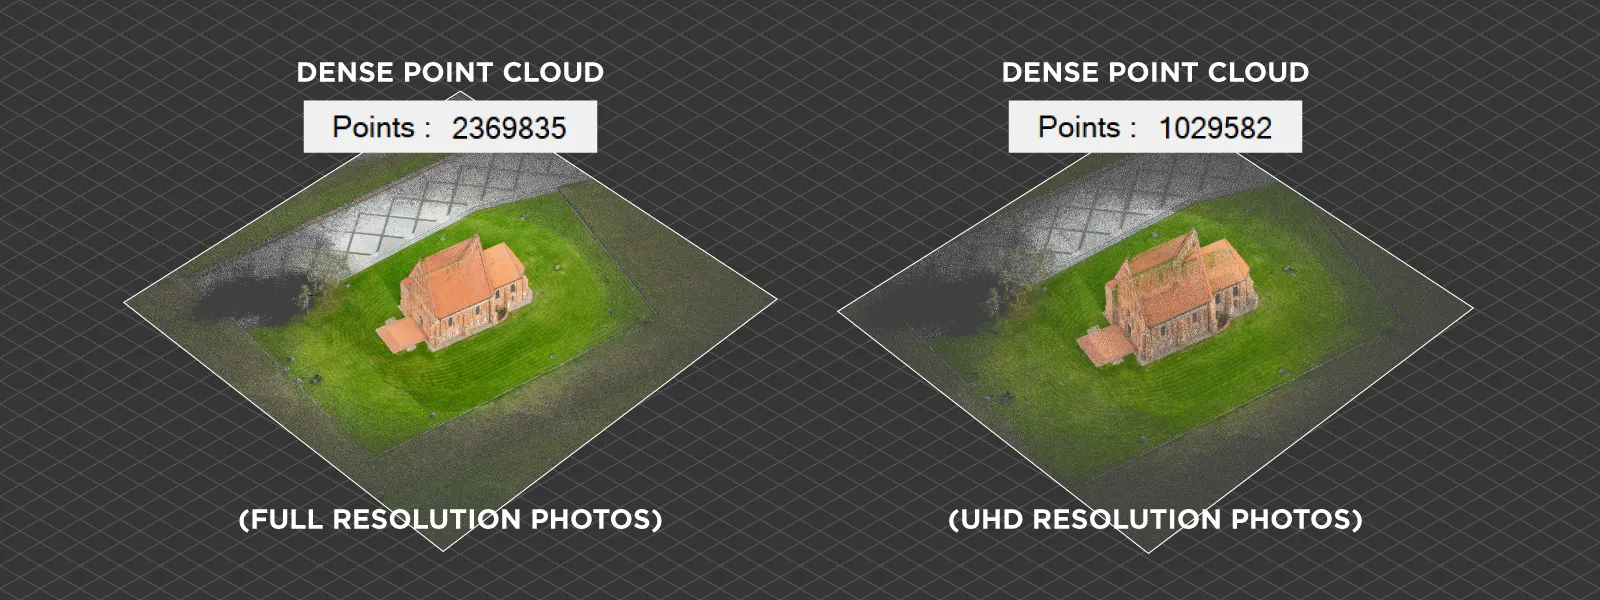 I have two examples here. The first is artificially created by mimicking the frame size of video captured from a drone. We took a good JPEG image set, cropped, and resized the photos to match the video frame size. This shows only the difference between smaller resolution and narrower coverage. It's an ideal-case scenario for video capture, with all other factors held constant.
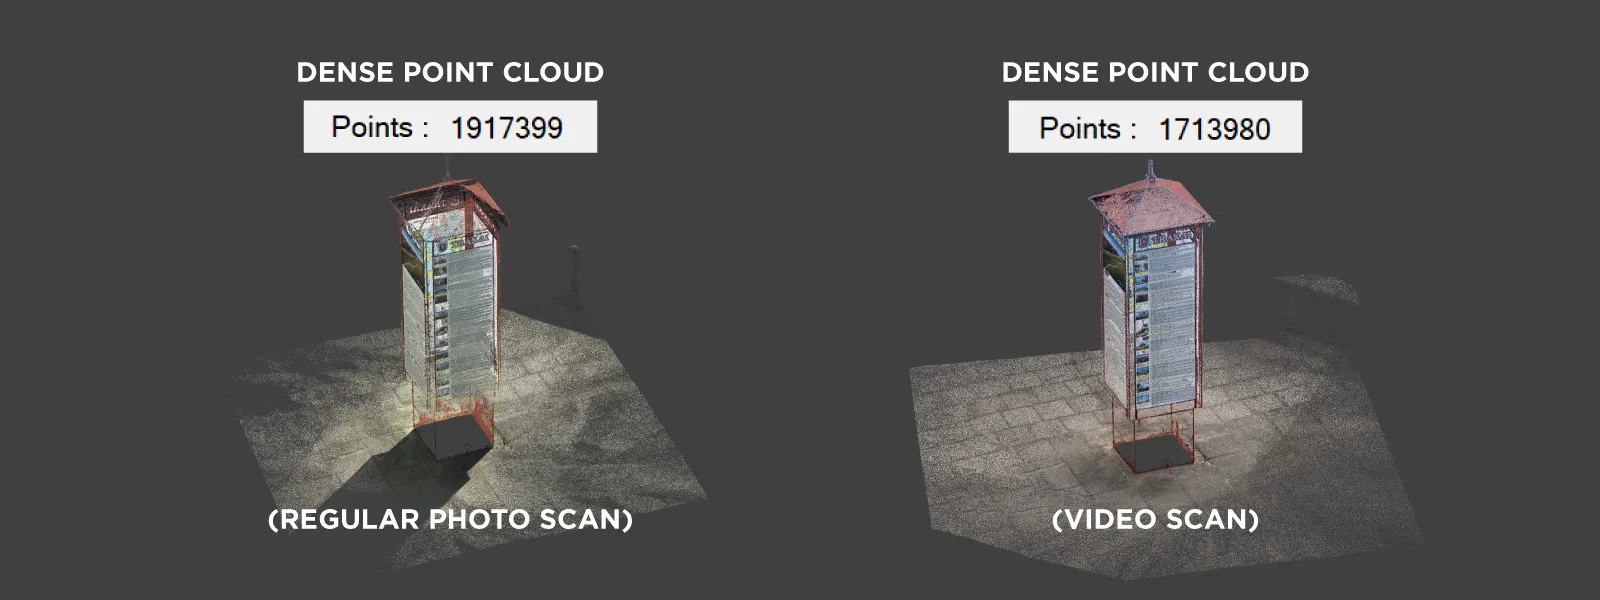
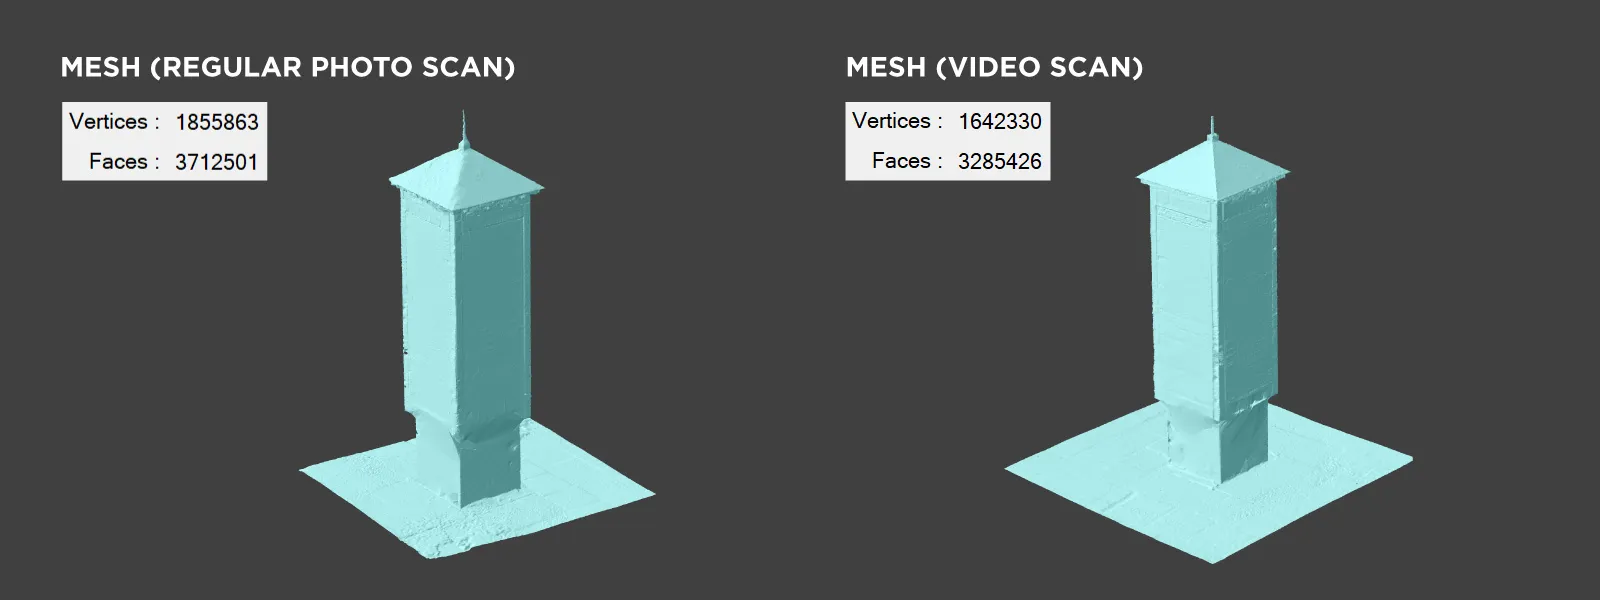
 The second example is a scan made from a video taken with a phone, and then the same subject is scanned with still photos. It's a practical apples-to-apples comparison. It's the same phone, the same subject, the same lighting, and the careful video capture. I extracted the frames and processed them, then did the same using only still photos. Judge the results yourself—the differences are quite clear.
 Conclusion
Video capture for 3D scanning is undoubtedly a possibility. If you follow the advice I outlined above, you can get quick scans using video instead of photo capture. However, photo capture is more stable and well worth the extra effort, in my opinion. Even if you just use auto mode for photos, I still recommend that route, while relying on auto mode in video is often a miss.
The most important thing to watch for in video capture is motion blur, which can creep in so many ways. If you avoid blur, you may well get a usable, quick photogrammetric 3D scan from video.
Photographer - Drone Pilot - Photogrammetrist. Years of experience in gathering data for photogrammetry projects, client support and consultations, software testing, and working with development and marketing teams. Feel free to contact me via Pixpro Discord or email (l.zmejevskis@pix-pro.com) if you have any questions about our blog.
Related Blog Posts
Our Related Posts
All of our tools and technologies are designed, modified and updated keeping your needs in mind

Stockpile Volume Measurement With Drone Photogrammetry: A Practical Guide
Measuring a stockpile sounds trivial until you actually have to do it on a real site. You need a number you can defend at the end of the month, and you would rather get it without sending somebody to climb up a 10 meter mountain of gravel with a GPS pole.
DJI Lito X1 for Photogrammetry
Can the Lito X1 be used for photogrammetry? Yes it can. Can it produce good results? Yes it can. How to do it? Yes it… well, that is what the rest of this article is for.
3D Roof Scanning with the DJI Mini 5 Pro
Another entry in our ongoing exploration of roof photogrammetry workflows. This time, the subject is the DJI Mini 5 Pro — DJI's latest 250g drone with a 1-inch sensor, omnidirectional obstacle avoidance, and Pixpro Waypoints support.
Ready to get started with your project?
You can choose from our three different plans or ask for a custom solution where you can process as many photos as you like!
Free 14-day trial. Cancel any time.