.svg@webp)
Digital Elevation Map Editing Tools in Pixpro
 Lukas
Zmejevskis
Lukas
Zmejevskis
Pixpro photogrammetry software provides various spatial data generation and has a few tools for data manipulation. This blog post will demonstrate a few digital elevation map manipulation tools that can help in many use cases. These can add, subtract, and alter a generated surface with a reasonable degree of control, providing a basic simulation of what may be needed to accomplish in real life.
Potential Use Cases
A digital elevation map in Pixpro is necessary for volumetric measurements and orthophoto creation. Most of the use cases for the tools to manipulate the DEM will relate to construction, stockpile, earthworks, mining, and surveying use cases. Some tools also help get a better, artifact-free orthophoto image because a true orthorectified mosaic image uses an actual DEM surface.
For this article, we created a project of a hilly area with statues, which will serve as "noise" on our 2.5D surface. 2.5D means that the surface has elevation information - hence the name - but it is just a raster image with a height value for each pixel. So, there can not be any real 3D detail as if it would be on a mesh or a point cloud.
DEM Generation
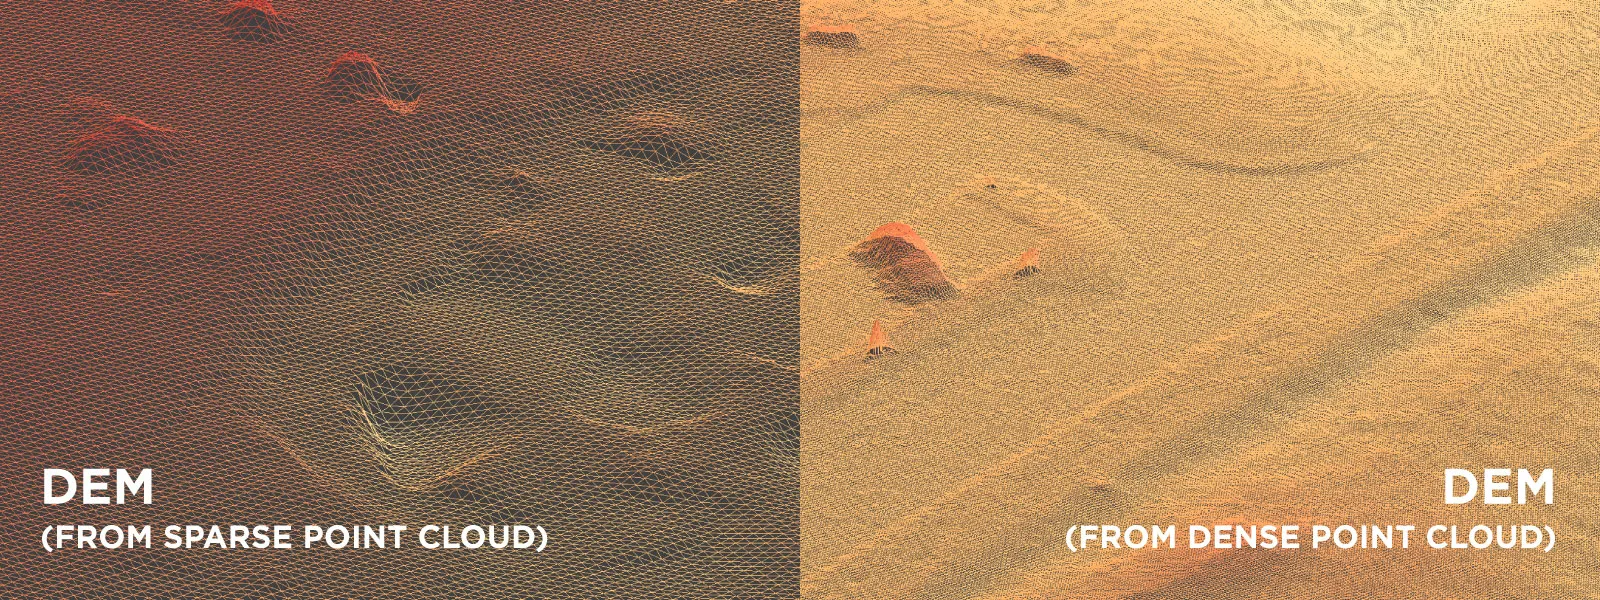
You must have a point cloud to create a DEM surface in Pixpro. Usually, it means a dense point cloud. Still, our software also has the option to use a sparse point cloud for rough-quality DEM generation. Below are examples of different GSD value DEMs created from sparse and dense point clouds.
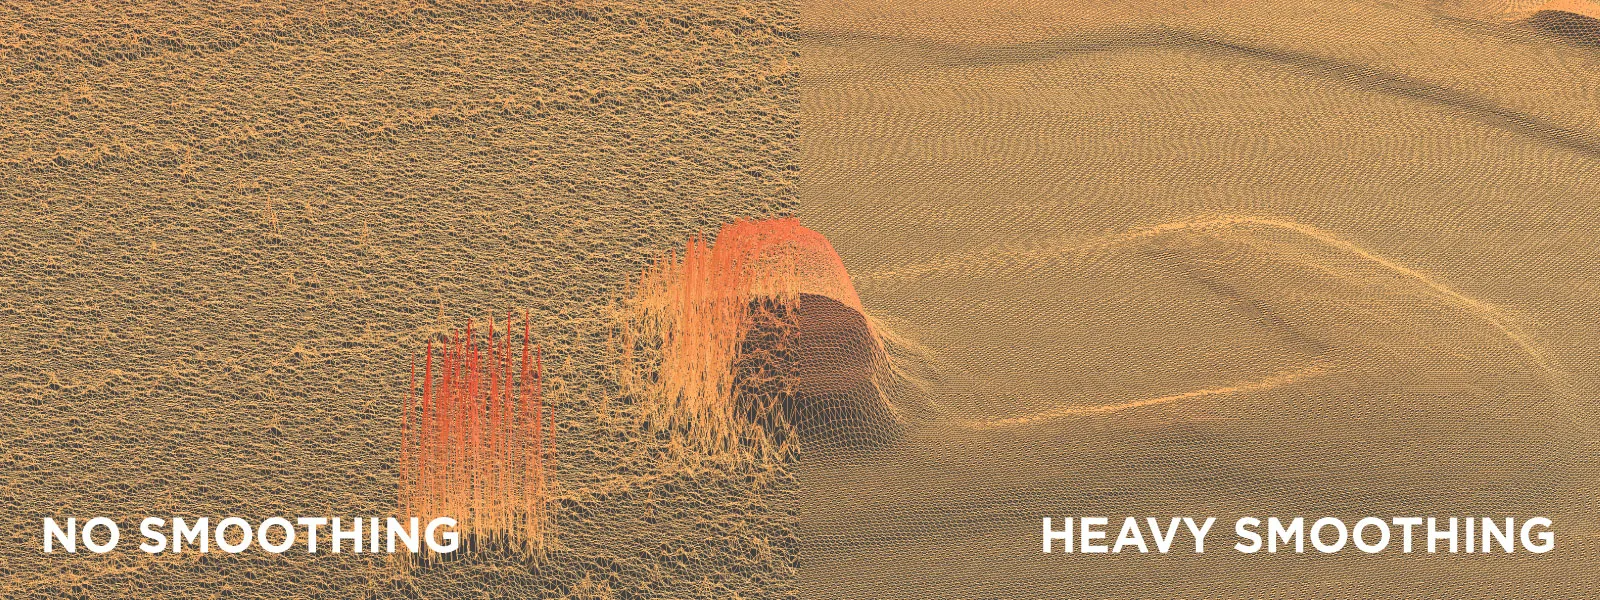
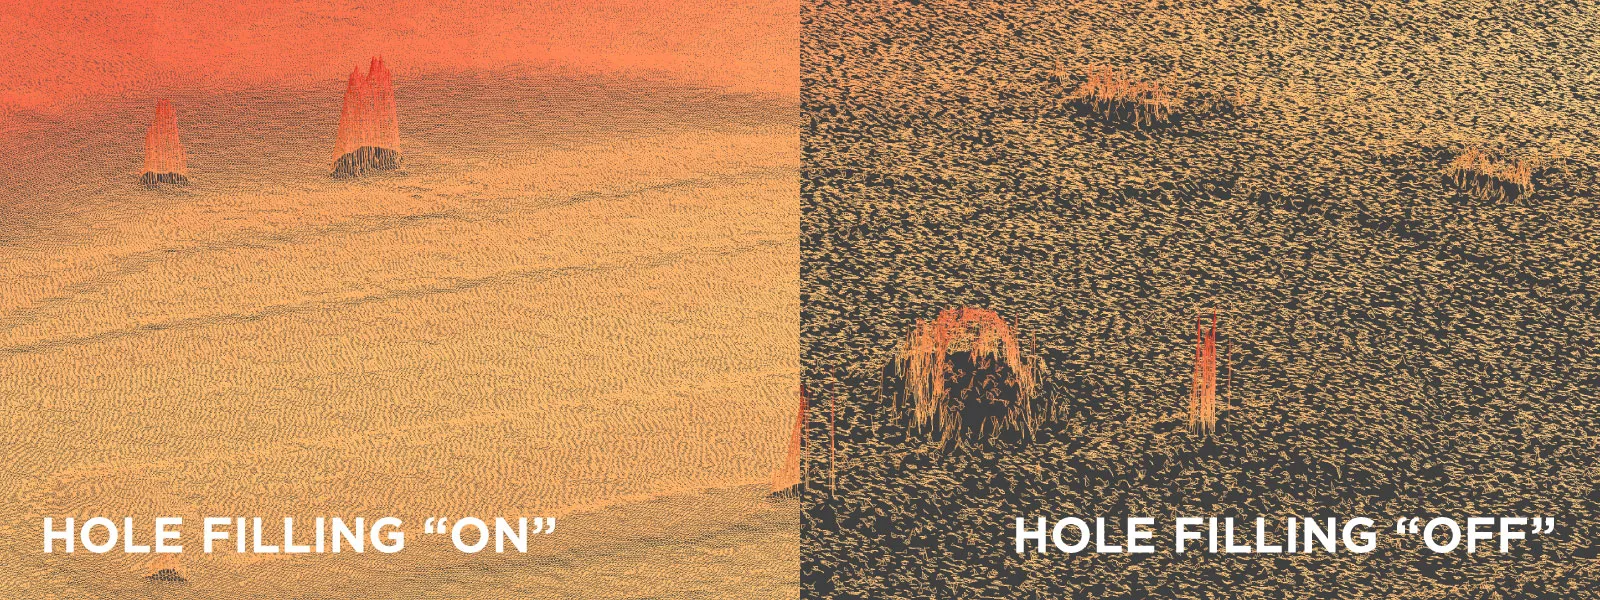
We have three main DEM creation settings: hole filling, smoothing, and GSD. These are self-explanatory. Let's see a few extreme examples of these settings in effect:
No smoothing vs. Heavy smoothing:
Hole filling on vs. off:
GSD value of 10 centimeters vs. 1 meter:
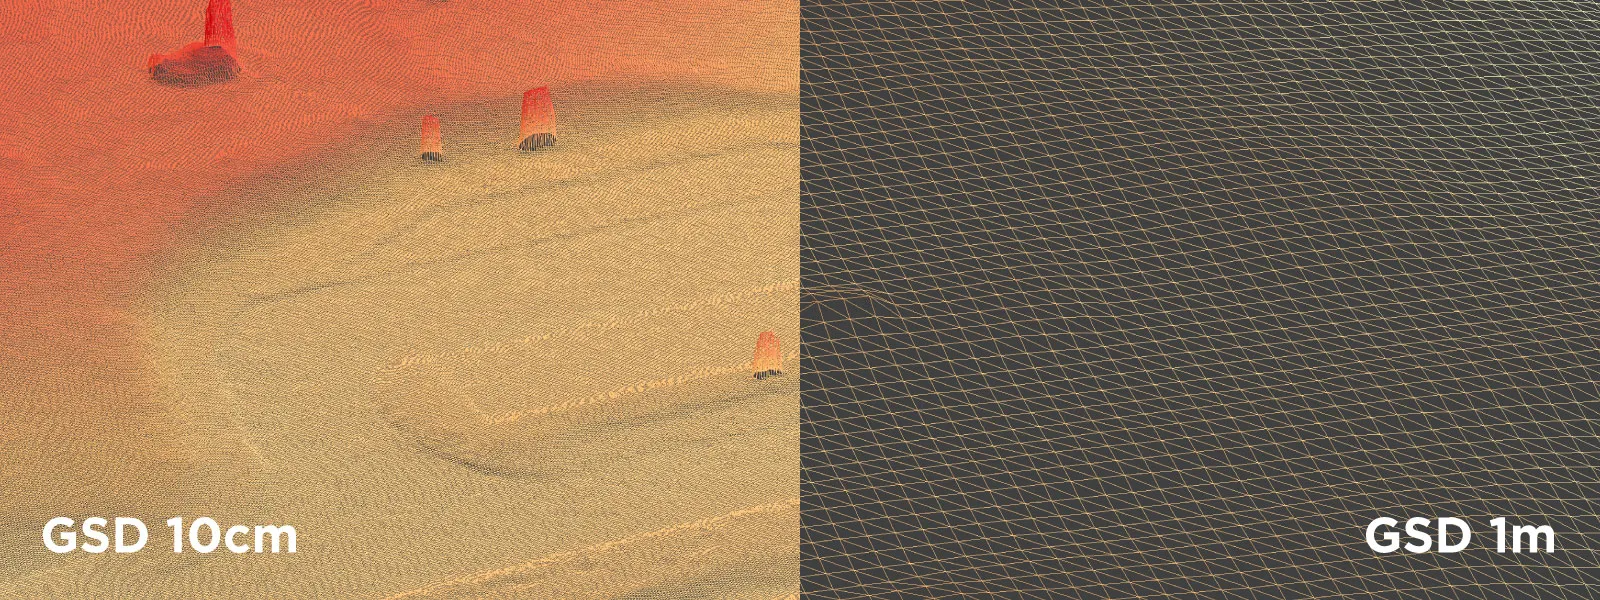
Most of the time, we recommend using the default GSD value, as it depends on the quality of the point cloud you are using. Hole filling should stay on as well, as usually small holes do not affect actual accuracy. Smoothing is more complex. Our default value of 2 is more geared to dimensional accuracy. Still, if you need a smoother aesthetic for orthophoto or contour line creation - you can increase this value.
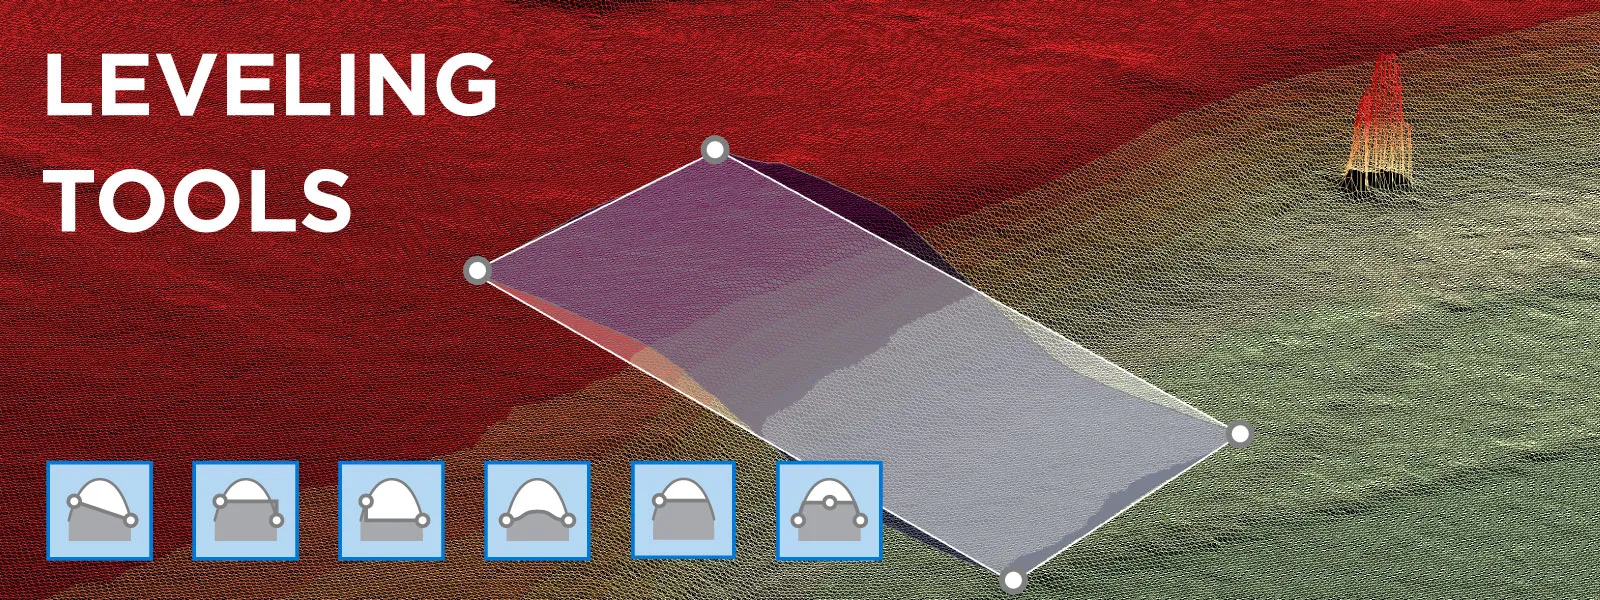
DEM Manipulation Tools - Levelling
Leveling tools allow us to edit the surface shape. When we use leveling, we need to draw a polygon, and designating the area will be affected. How many and where you draw the polygon vertices matters a lot. There are five different types of leveling available in Pixpro:
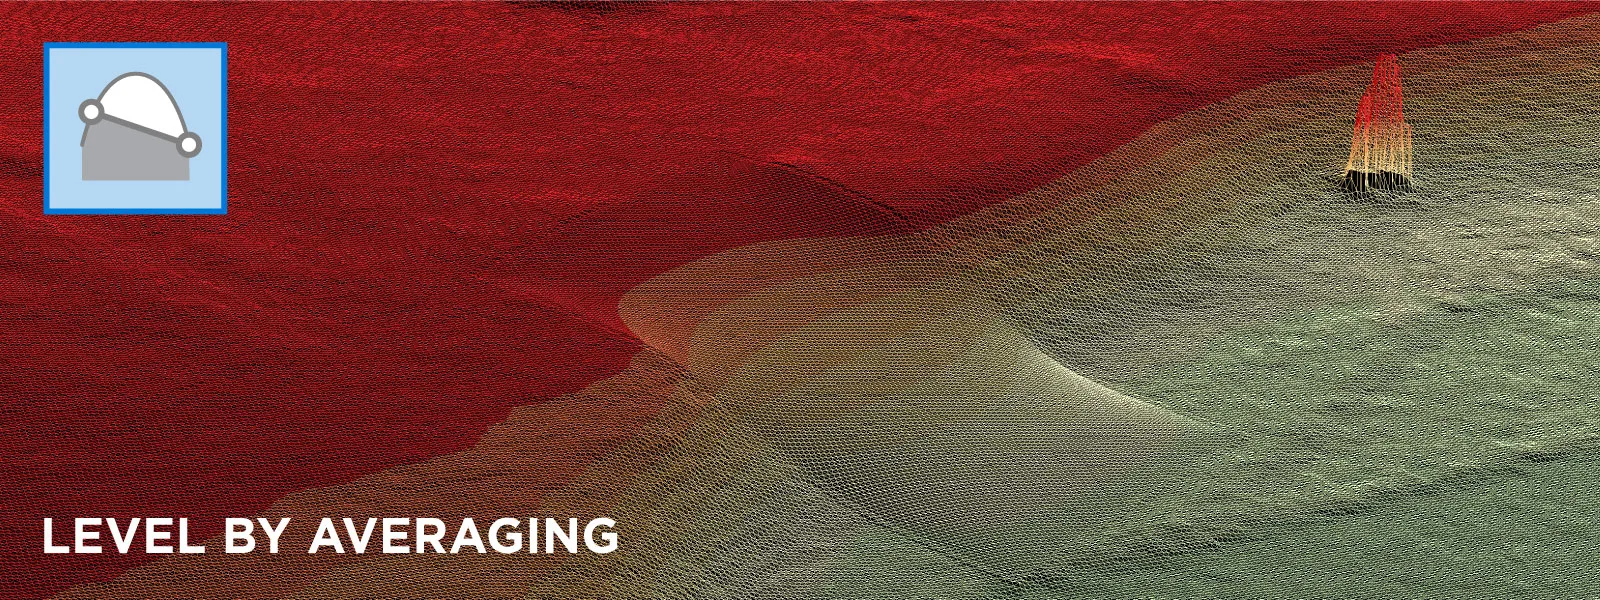
Level by Averaging: this is the most popular type of leveling. It will consider all the vertices you drew and create a smooth, organic surface within the designated polygon area. This tool helps delete noise in non-perfectly flat areas or make a natural slope between two elevation levels.
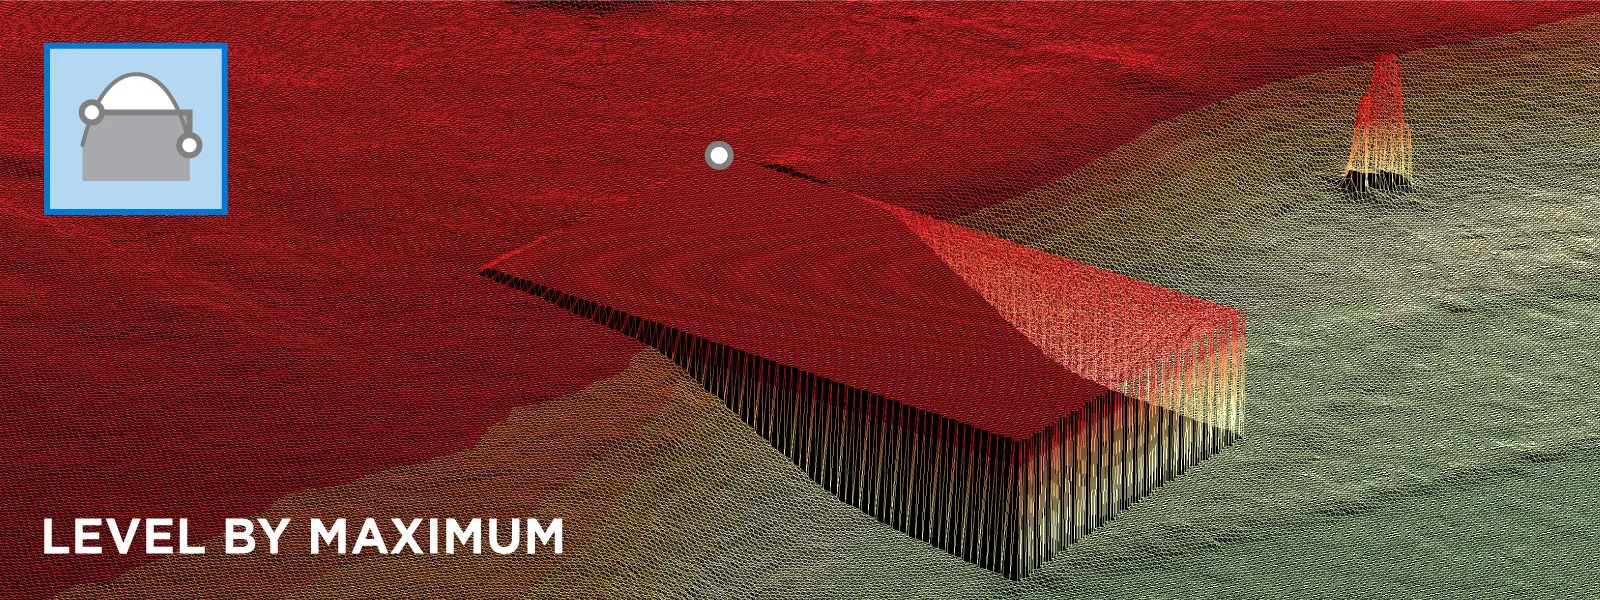
 Level by Maximum: will create a perfectly flat surface at the height of the highest vertice in the polygon.
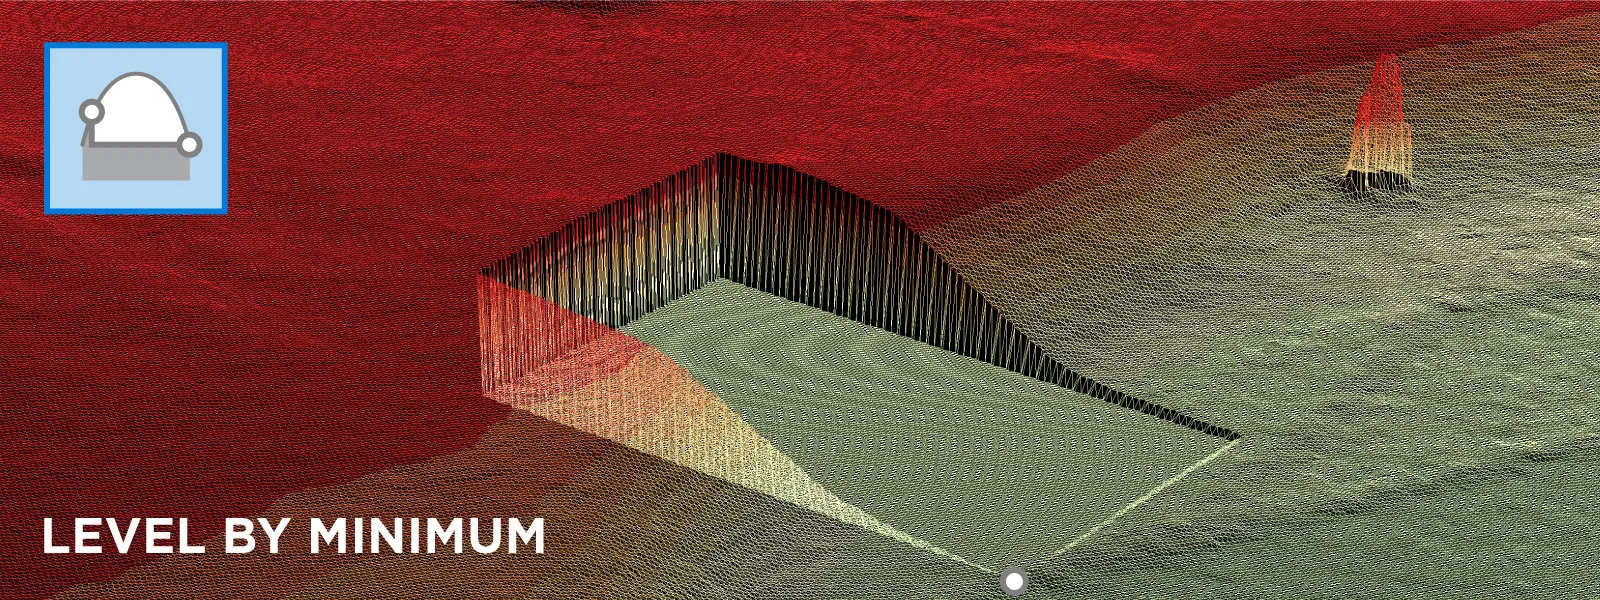
 Level by Minimum: will create a perfectly flat surface at the height of the lowest vertice in the polygon.
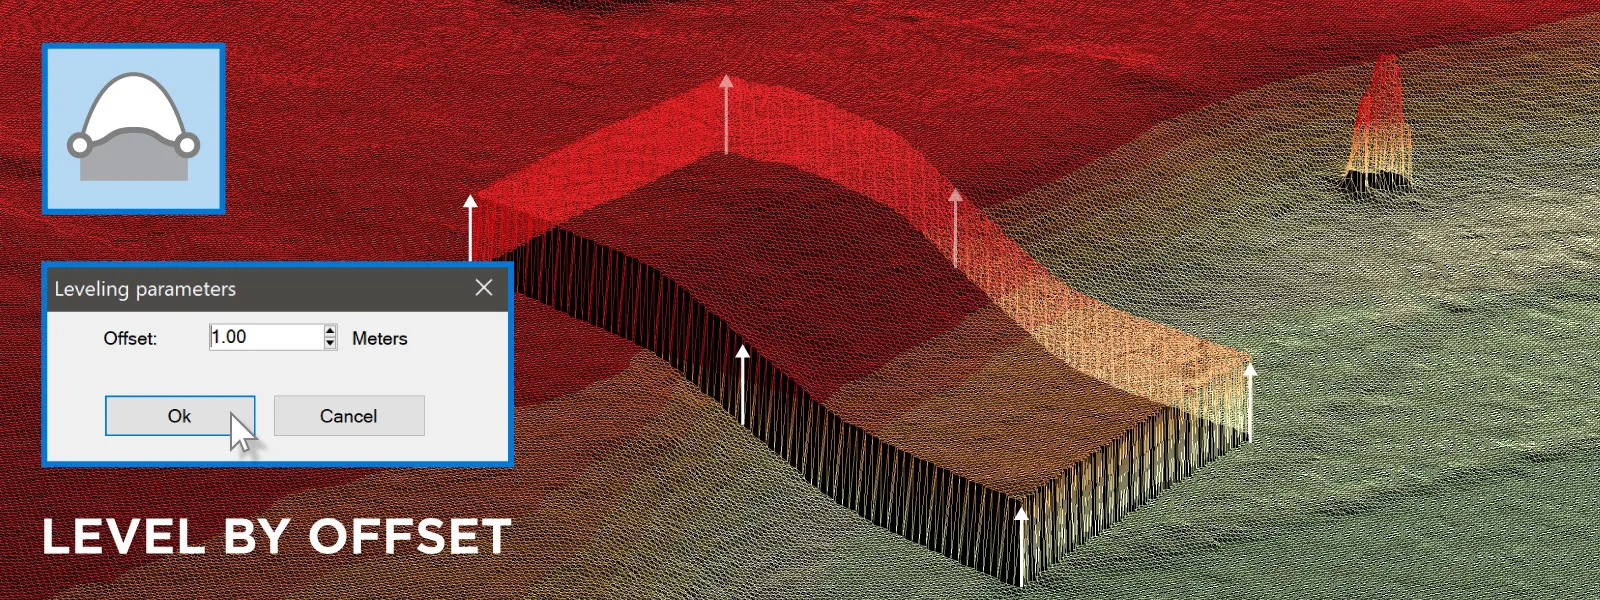
 Level by Offset: this tool will offset the current surface by a designated distance. The surface will retain all its properties but sink or rise by the specified amount.
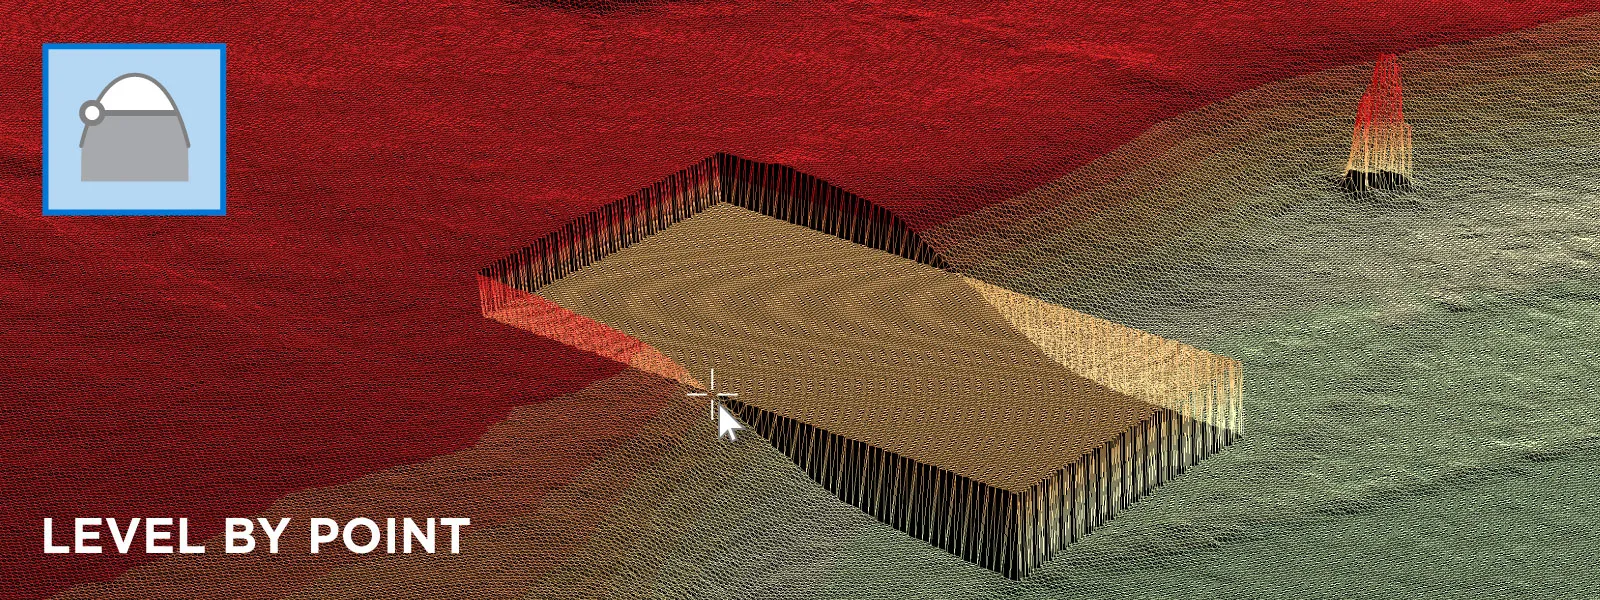
 Level by Point: create a perfectly flat surface at the height you choose anywhere on the DEM surface.
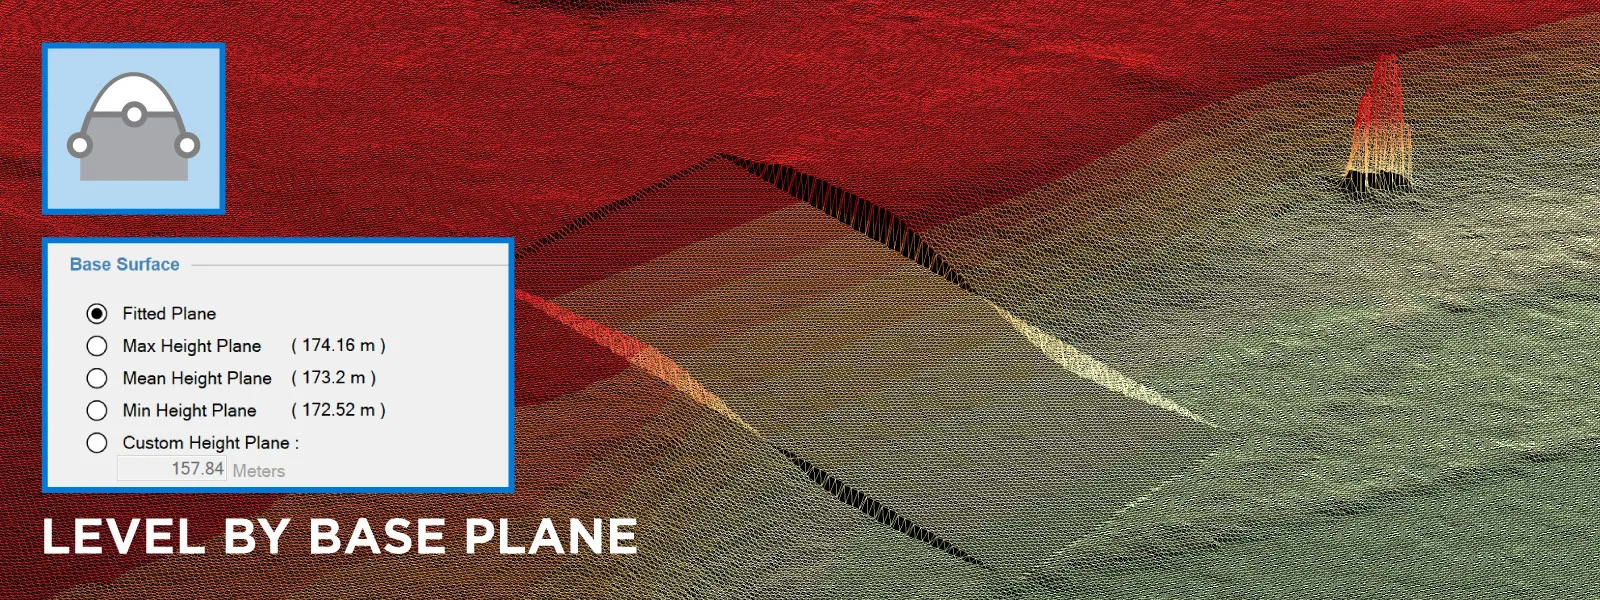
Level by Base Plane: this type of leveling is only accessible in the properties panel of a polygon. As the name implies, it will create a surface corresponding to the polygon's selected base plane. This surface will be perfectly flat but not perpendicular to the gravitational vector of the project like the others.
Other Tools
The remaining surface alteration tools are more straightforward but effective.
Cut hole - a cutting tool to remove unwanted parts of the surface.
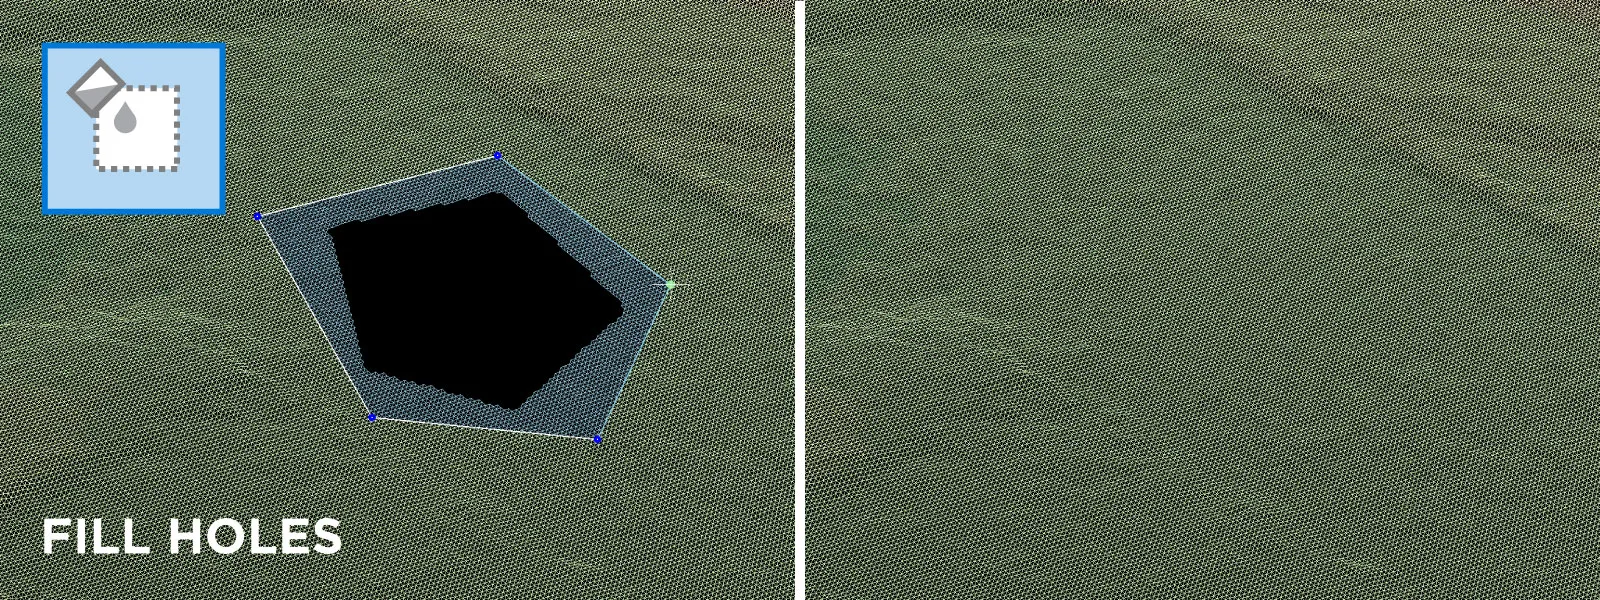
 Fill holes - manual hole filling tool.
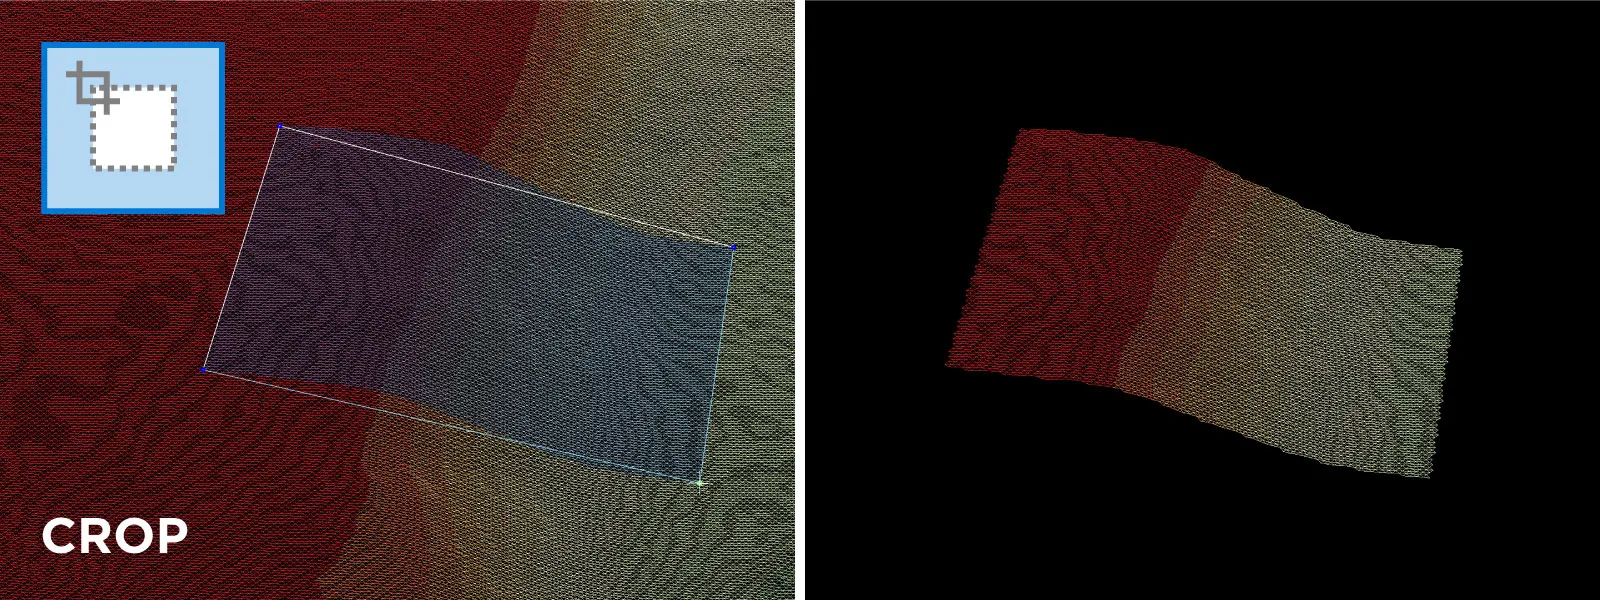
 Crop - cropping tool to isolate a part of the DEM surface.
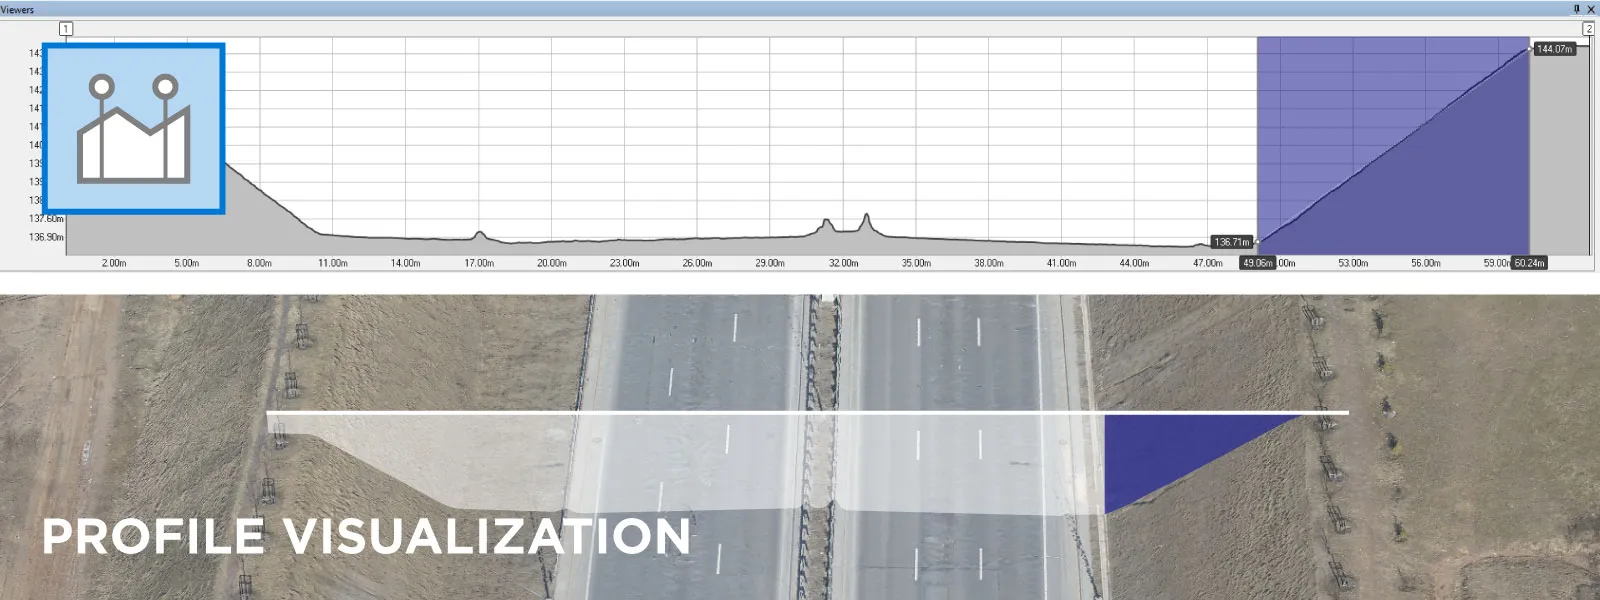
Profile Cross Section Tool
The profile visualization tool falls under data analysis tools. By drawing a line on a surface, you can see the cross-section of said surface. The profile in itself is interactive and can provide linear and angle measurements. Profile tool works only on the DEM surface.
 Visualization Tools
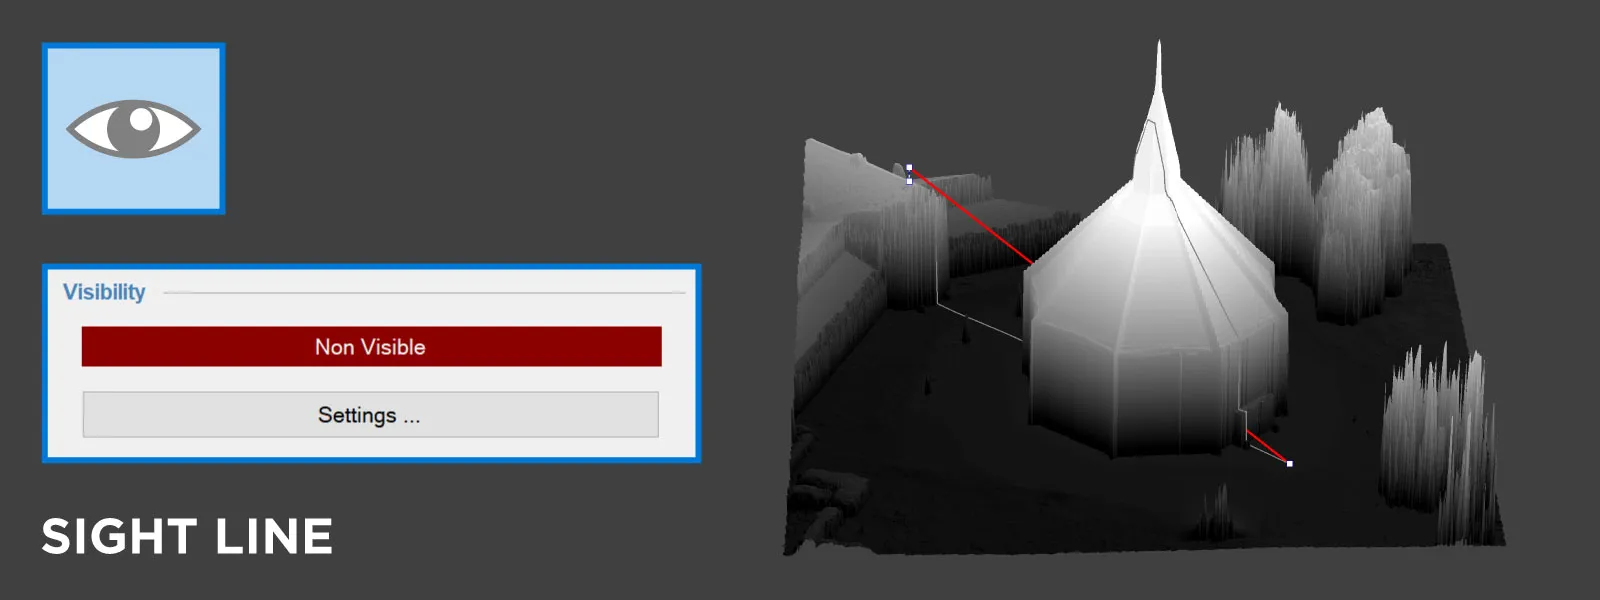
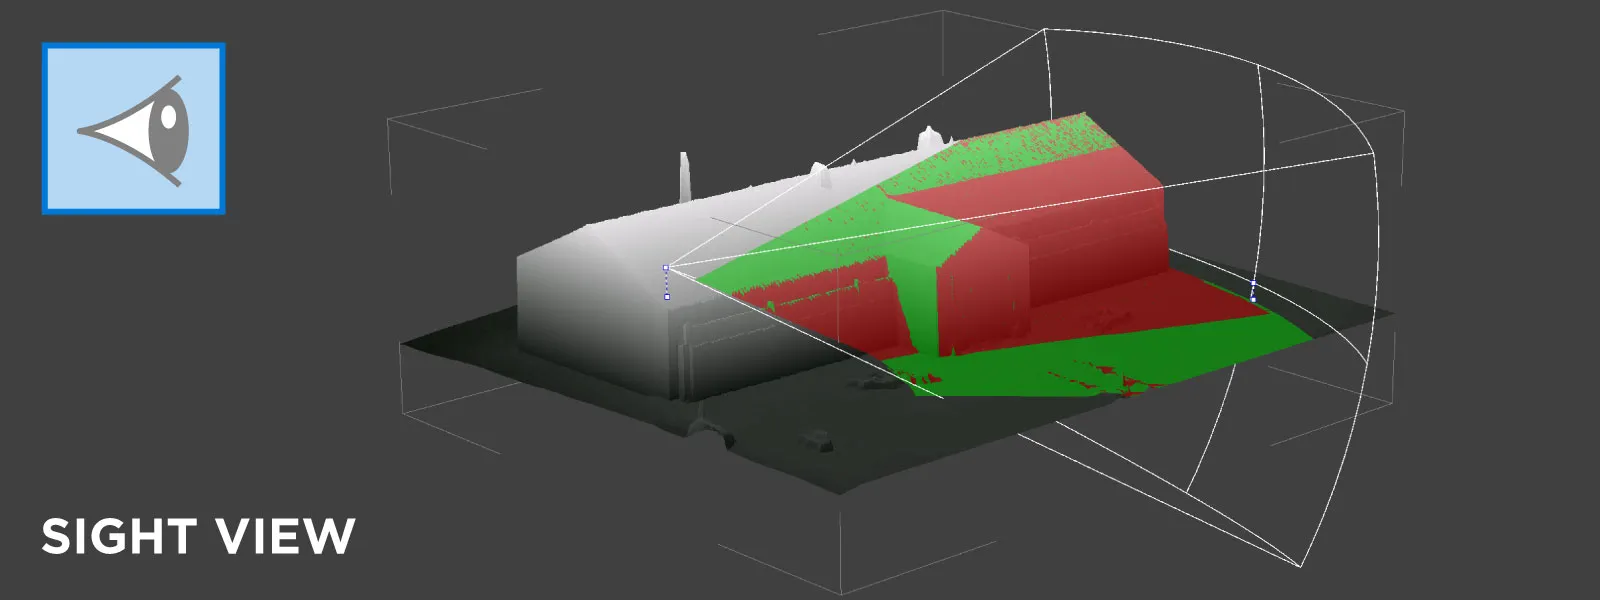
Pixpro also has easy-to-use tools to determine blind spots and areas on the DEM. These are useful for security applications.
Sightline - shows if there is a direct line of sight between two spots on the surface.
 Sight View - shows an entire visible area from a designated location. You can enter the horizontal and vertical field of view of the observer.
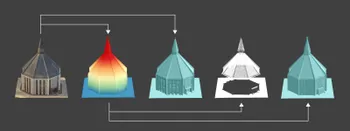
Derivative Layer Generation Tools
We can also create layers from an existing surface by accessing the context menu on each DEM in Pixpro. These tools are:
-
Duplicate DEM - makes a copy of the selected DEM.
-
Create Dense - creates a dense point cloud from the DEM surface.
-
Create Mesh - creates a 3D mesh from the 2.5 DEM surface.
We added these particular features for some niche use cases. For example, creating a dense point cloud from a 2.5D surface might sound odd, but this allows some people to skip conversion steps in CAD software, which prefers points rather than triangles. The same applies to having the surface in a technically 3D mesh format rather than a raster image. You will get an identical surface in both cases - but represented differently.
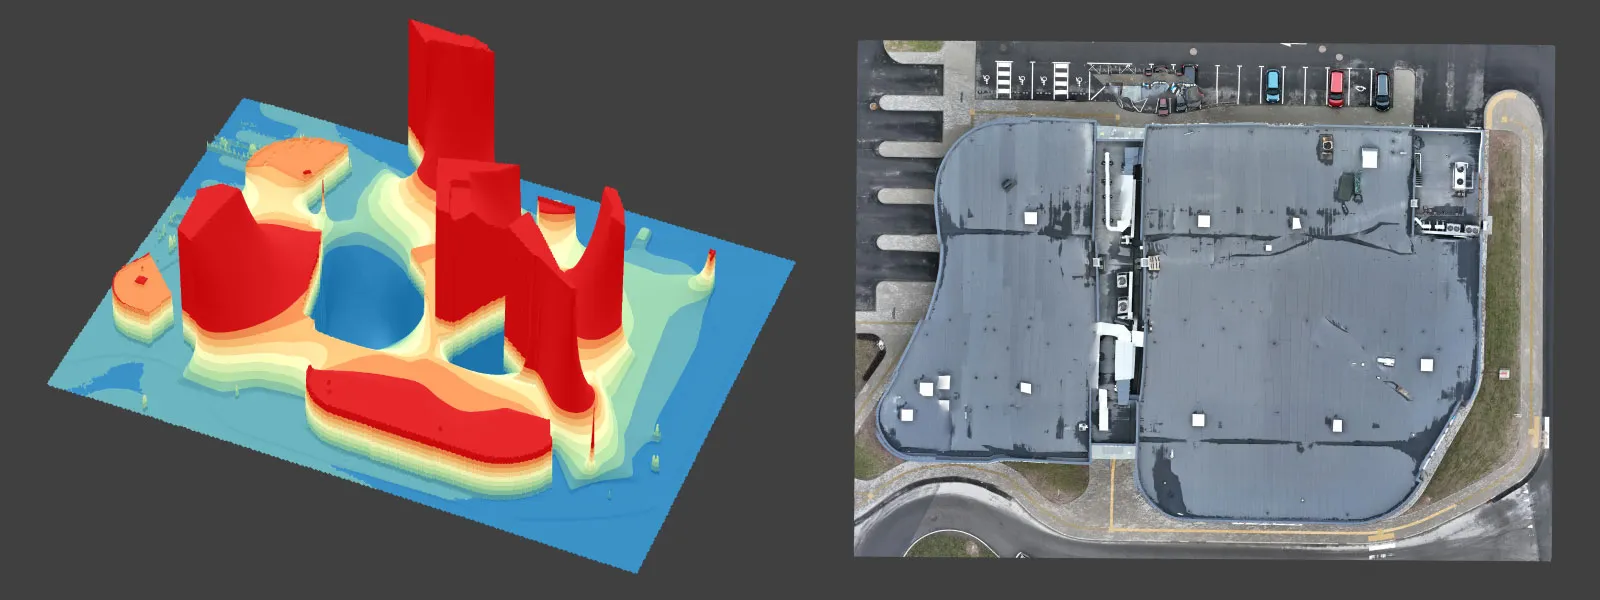
Orthophoto Generation
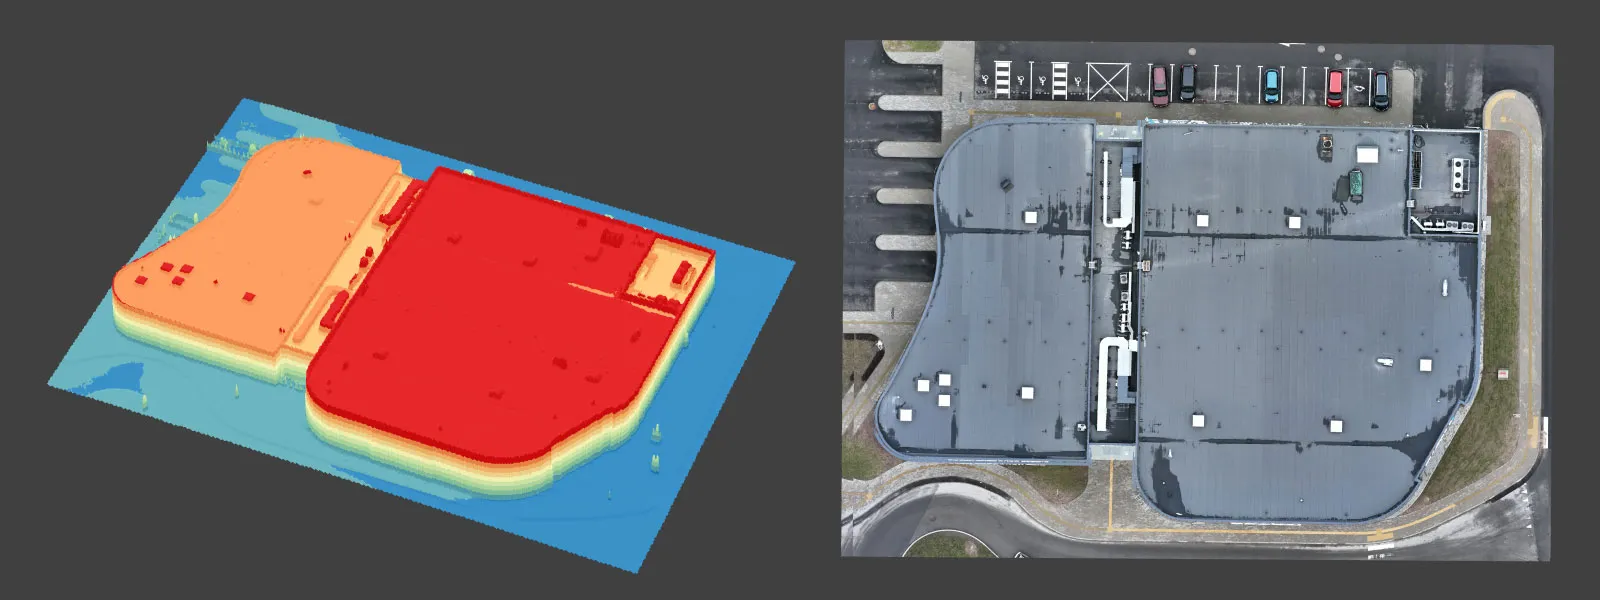 A true orthophoto image uses a DEM as a base. Therefore, the orthomosaic image can appear distorted and unnatural if a base DEM has some defects. The leveling tools described above may help fix some of such issues by repairing the surface. To illustrate, we ruined a perfect surface using our leveling tools to demonstrate how an orthophoto looks when created on an illogical DEM.
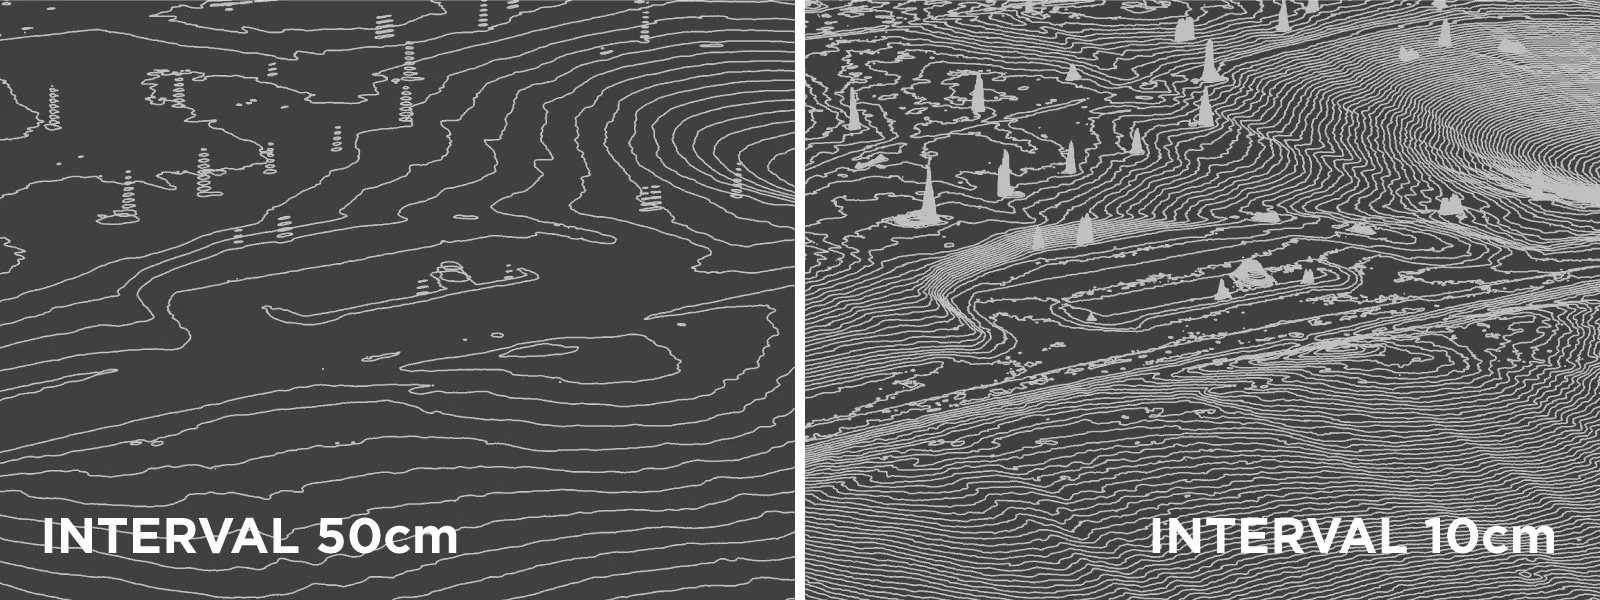
Contour Lines Generation
A digital elevation map is the basis for contour line generation. In essence, it is a different way of viewing the surface. Pixpro can create contour lines from any DEM surface. The primary setting for creating contour lines is the height interval - how dense the lines will be. A couple of different density examples down below.
Conclusion
We aimed to make DEM generation and editing easy and practical. Pixpro is a photogrammetry software, but we added these essential tools to enable some post-processing. Hence, the exported layers are as ready for more in-depth data analysis as possible. You can simulate and measure various surface alteration use cases with some imagination without even leaving Pixpro. We will explore these tools in real-world use cases to better understand their practicality.
Photographer - Drone Pilot - Photogrammetrist. Years of experience in gathering data for photogrammetry projects, client support and consultations, software testing, and working with development and marketing teams. Feel free to contact me via Pixpro Discord or email (l.zmejevskis@pix-pro.com) if you have any questions about our blog.
Related Blog Posts
Our Related Posts
All of our tools and technologies are designed, modified and updated keeping your needs in mind

Why Choose Pixpro Photogrammetry Software? Practical Comparison
There is no shortage of photogrammetry software today. From well established industry tools to newer cloud based solutions, the choice is not exactly obvious, especially for someone just getting started. Most options promise high accuracy, automation, and ease of use, and to some extent they all del
3D Point Clouds in Pixpro: How to Convert and Export Spatial Data
Photogrammetry software produces several types of spatial outputs, but the dense 3D point cloud is the foundation of them all. In Pixpro, the dense point cloud acts as the base dataset from which every other derivative is generated.

How to Create and Import a KML File in Pixpro Waypoints
We are continuing our improvements to the Pixpro Waypoints service and bringing a few small updates. Pixpro Waypoints is a service that allows automatic photogrammetry flights with consumer grade DJI drones using a bit of workaround magic.
Ready to get started with your project?
You can choose from our three different plans or ask for a custom solution where you can process as many photos as you like!
Free 14-day trial. Cancel any time.