.svg@webp)
Pixpro to PowerPoint - 3D Data in Your Presentation
 Lukas
Zmejevskis
Lukas
Zmejevskis

Sometimes, it is really about the presentation. Showing off your data in a well-made slideshow can make or break the deal. In this article, we will overview how you can show off data processed in Pixpro photogrammetry software in your presentation. We will use Microsoft Office 365's PowerPoint as it is the staple presentation software in the industry. PowerPoint also has an essential feature for us - 3D model import.
Making Screenshots
We begin with the basics. Screenshots are one of the most valuable tools in day-to-day computing. For troubleshooting, sharing something funny, or highlighting something. If you need to show something as it looks in the Pixpro software, you must master the Shift + Win + S shortcut command.

The old-school way of doing a screenshot was by pressing the PRT SCN button on the keyboard and pasting the image where you can. It works fine if you need to grab a shot of your entire screen or screens.

The modern way is to hold the Shift + Win key and tap S. Then a screenshot interface appears graying out the entire or multiple screens. Now, you have four options on how to snip your screen and a close button:
Rectangular snip - allows you to draw a rectangle, which will define the screenshot area.
 Freeform snip - enables you to draw anything to create the screenshot area.
 Window snip - allows you to select a specific software window for a screenshot.
 Screen snip - snips the entire screen or multiple.
If you have not tried this before - try using this feature now if you are on a Windows machine. Once you confirm your snip area, a prompt will appear on the right side of the screen. If you want to highlight something on your screenshot before saving it - tap on this prompt, and the snipping tool will open with your screenshot loaded. You can add some hand drawings to your screenshot and save it as a discrete file. The prompt will only stay up for a few seconds. Otherwise, you can paste your screenshot using Ctrl + V wherever you want.
Pixpro Print to Snapshot
Pixpro has a simple but effective document creation feature called Print to Snapshot. To learn how to use it, check out our previous article. However, this feature creates a rather less convenient PDF file. You can not drag and drop the PDF file to become an image in your presentation. To achieve this, we will need third-party tools.

The easiest way is to find a converter on Google using the keywords "pdf to image converter." There will be a lot of options where you will be required to upload your PDF file and then download the image. Our weapon is the aptly titled pdftoimage.com, which works fine and safely. Of course, we do not want to upload sensitive data to sites like these, so if you are working with something classified - utilize the screenshot features described earlier or use a professional PDF editor.

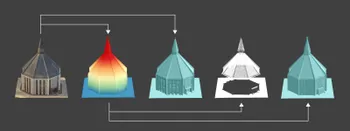
Exporting 3D Models from Pixpro
We discussed Pixpro export options for different purposes in a few previous articles.
From Pixpro to Sketchup
Pixpro and PVsol
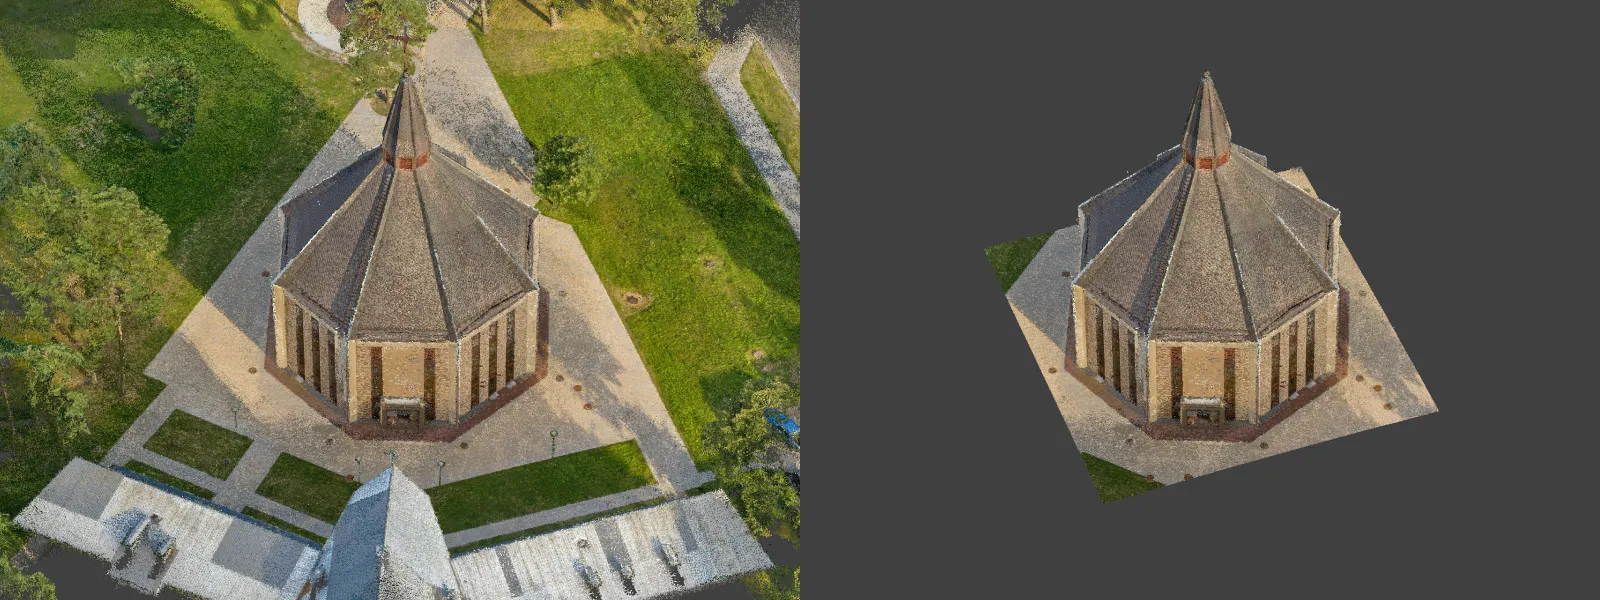
A lot of the same applies when optimizing for export to PowerPoint. The first step to getting a good-looking 3D model is limiting the data processing to only the needed stuff. It means clipping the dense point cloud to your area of interest only. Any excess points will reduce the final quality of the entire scene while making the process longer.
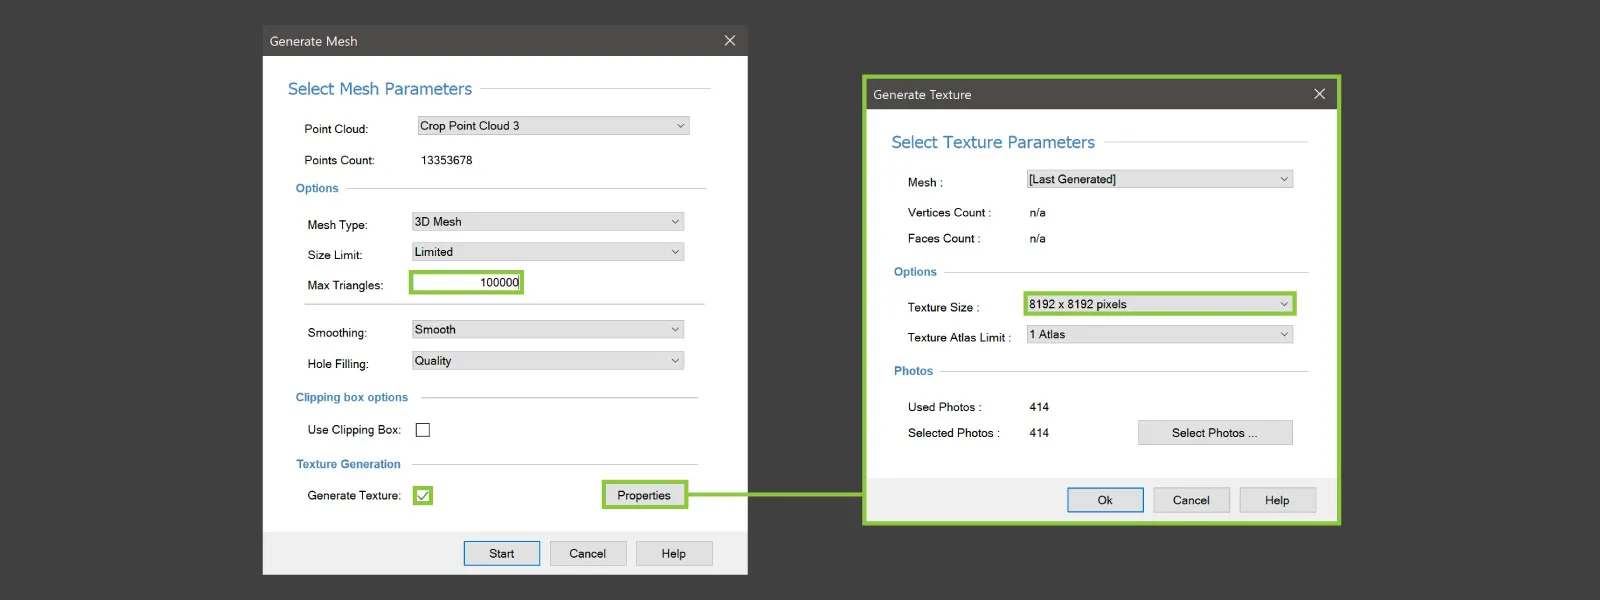
You also need to keep the mesh size under control. We pushed the limits of PowerPoint and found that even 300,000 triangle models work fine. Still, the software does get slower, and the performance will depend on your hardware. So when creating a mesh in Pixpro - choose a reasonable triangle amount and a conservative texture size. A good starting point for many would be 100,000 triangles with a single 8k texture.
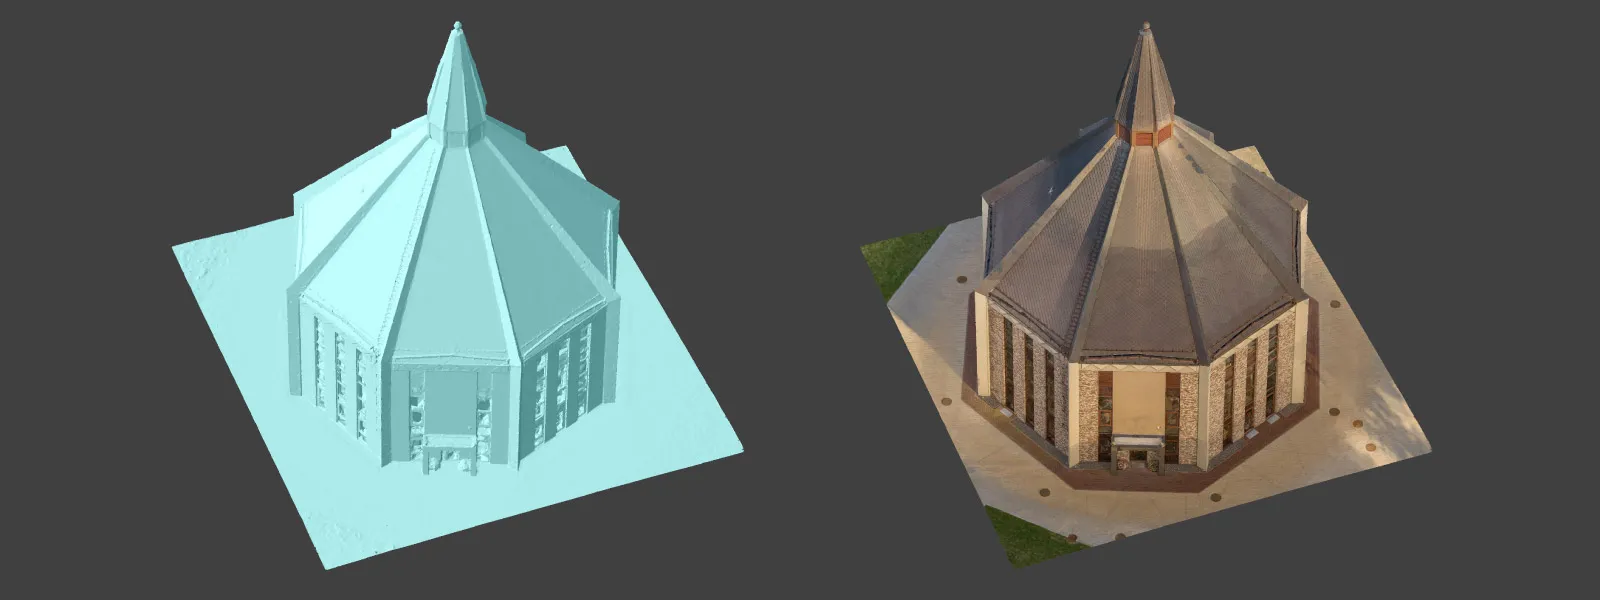
PowerPoint works great with OBJ files. So, we chose OBJ and a few critical options in the Pixpro export menu. Export to Projection - we need to set Local Coordinates. OBJ files do not play well with geographic coordinates if you want to export a project made with a drone or GCPs. We can also choose whether we wish to have a texture or not.
Importing to PowerPoint
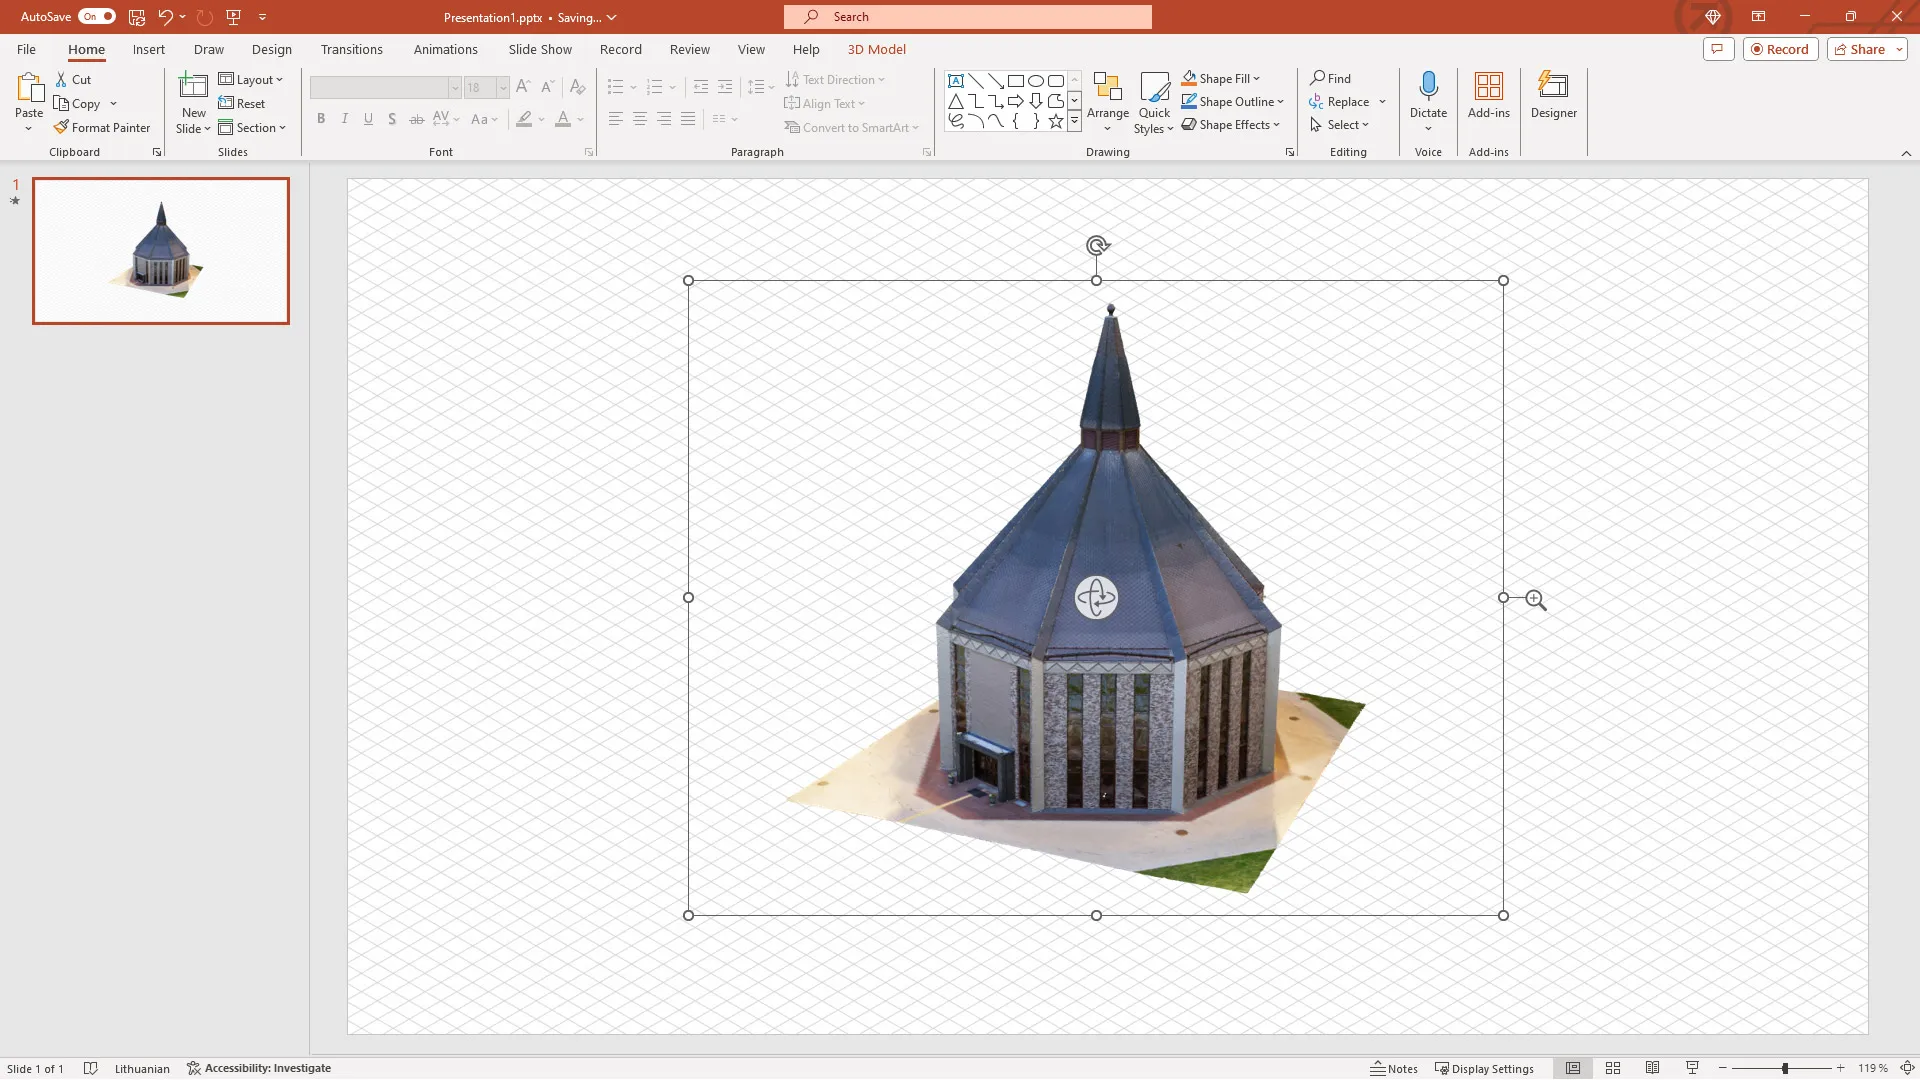
Importing PowerPoint is straightforward. Just drag and drop the .obj file exported from Pixpro on a slide of your choice, and the model will appear as a new block in the slide. You can resize this block as usual and manipulate it with all of the tools that apply to the software.
The most fun and valuable part is adding animations to your 3D model. A simple animation preset like "Turntable" is present, and with a single button click, you can do a spinning animation that shows the 3D model from all sides. However, while the import itself is just as simple as dragging in the model file, the PowerPoint has many different settings and possibilities.
 Explore various rendering-related options by right-clicking on the 3D model block and choosing Format 3D Model. You can also alter the animations in the Timing and Advanced Animation sections. You can draw over the 3D model and add text with the basic shape and text tools.
 These options are learned best by just experimenting with them on an example. We made an example slideshow consisting of a few slides with a 3D model. You can download and explore this presentation for yourself from the link below.
Download presentation file here.
If you open the the presentation with Google slides - it will not work as intended. If you do not have PowerPoint - below is a video of how the presentation should look.
Conclusion
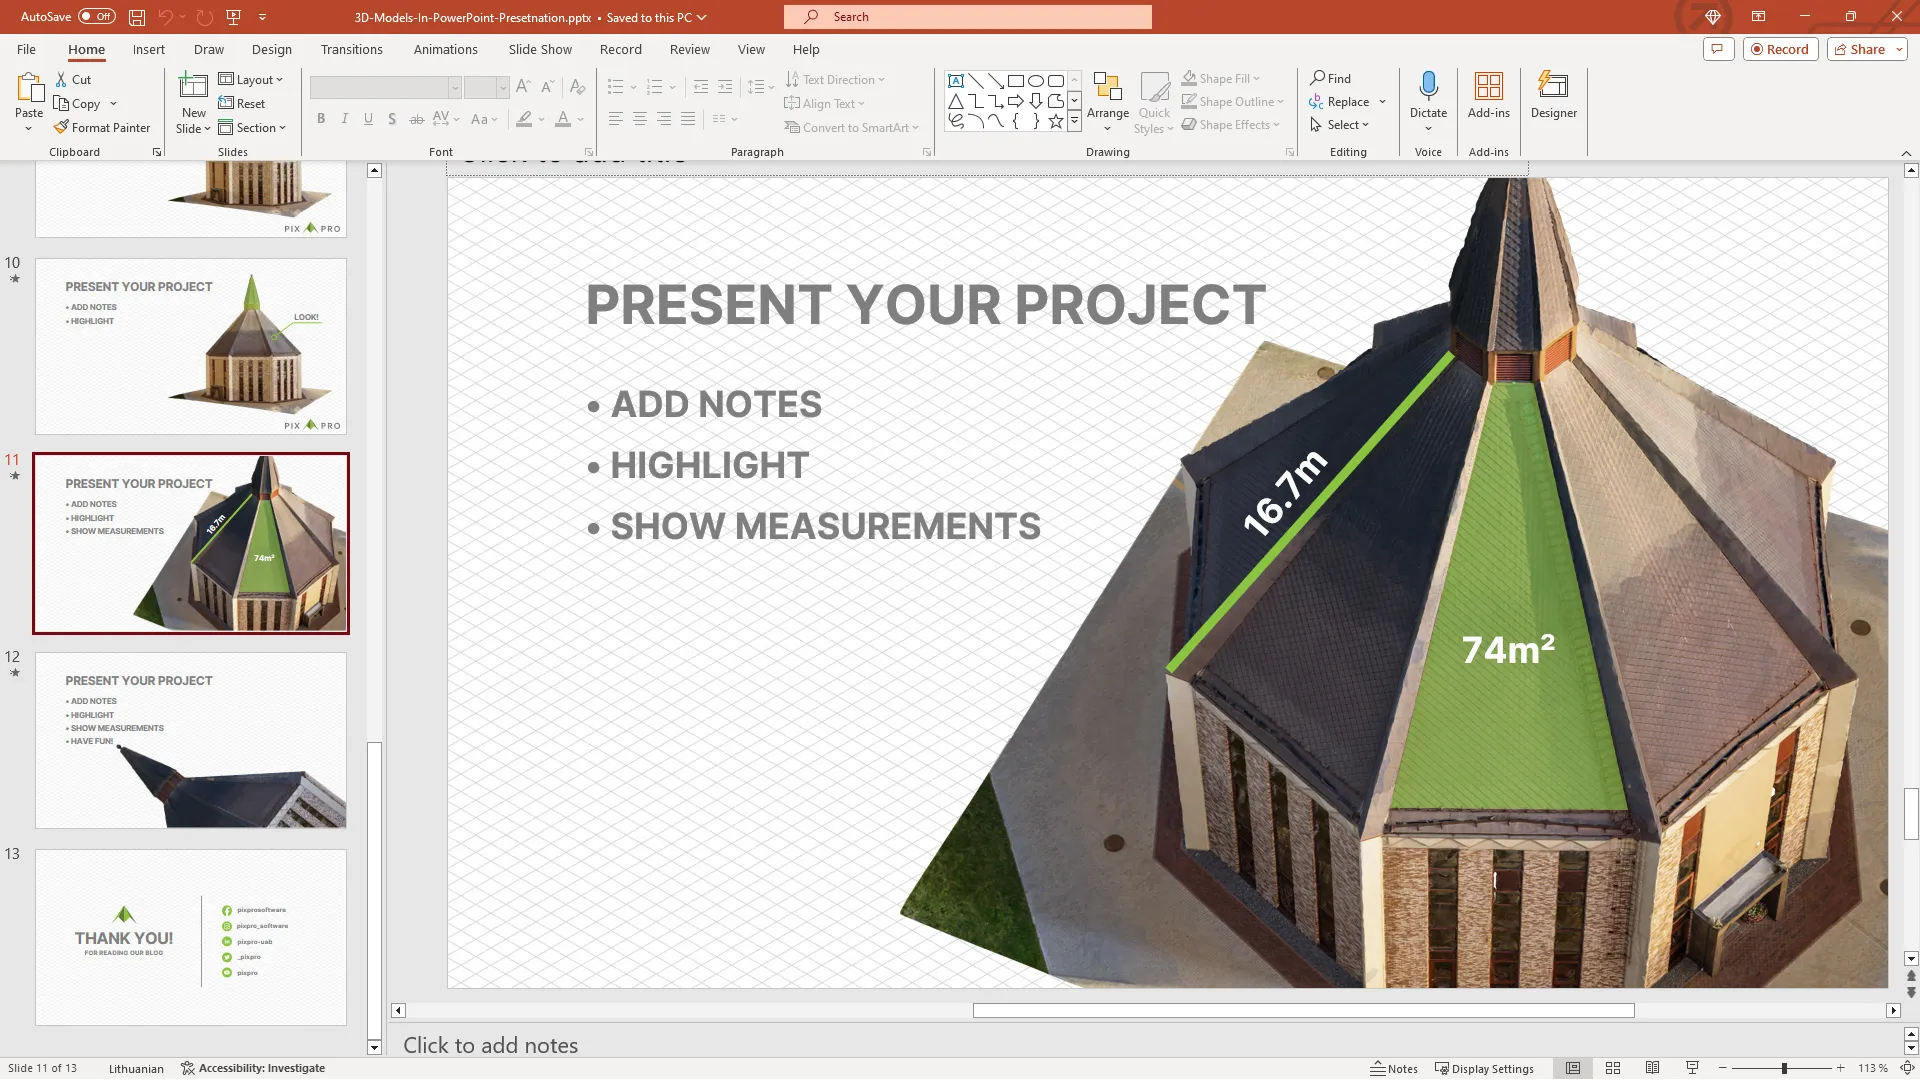
An interactive 3D model in a slideshow will be a nice touch, sure to raise some eyebrows if you work with photogrammetry or 3D modeling in general. Presenting a client's roof scan with measurements, massive mines from an aerial perspective, or cultural heritage objects in full 3D takes your presentation to the next level. It looks good, adds value, and is relatively easy to learn.
Photographer - Drone Pilot - Photogrammetrist. Years of experience in gathering data for photogrammetry projects, client support and consultations, software testing, and working with development and marketing teams. Feel free to contact me via Pixpro Discord or email (l.zmejevskis@pix-pro.com) if you have any questions about our blog.
Related Blog Posts
Our Related Posts
All of our tools and technologies are designed, modified and updated keeping your needs in mind
Why Choose Pixpro Photogrammetry Software? Practical Comparison
There is no shortage of photogrammetry software today. From well established industry tools to newer cloud based solutions, the choice is not exactly obvious, especially for someone just getting started. Most options promise high accuracy, automation, and ease of use, and to some extent they all del
3D Point Clouds in Pixpro: How to Convert and Export Spatial Data
Photogrammetry software produces several types of spatial outputs, but the dense 3D point cloud is the foundation of them all. In Pixpro, the dense point cloud acts as the base dataset from which every other derivative is generated.

How to Create and Import a KML File in Pixpro Waypoints
We are continuing our improvements to the Pixpro Waypoints service and bringing a few small updates. Pixpro Waypoints is a service that allows automatic photogrammetry flights with consumer grade DJI drones using a bit of workaround magic.
Ready to get started with your project?
You can choose from our three different plans or ask for a custom solution where you can process as many photos as you like!
Free 14-day trial. Cancel any time.