.svg@webp)
3D Scanning without Automatic Flight Planner? Easier than You Think
Photogrammetry is a science that enables detailed object analysis from images. Drones are probably one of the most convenient ways to gather the necessary data (images) for big scale objects. For this reason, drone industry is tightly connected with photogrammetry. There are situations when companies or individuals decide to start with photogrammetry and purchase the latest drone on the market. But often times software lags behind the hardware and there’s a big chance that it won’t be compatible with the existing flight planners yet. In this case one must be prepared for fully manual flights to get images good for photogrammetry.
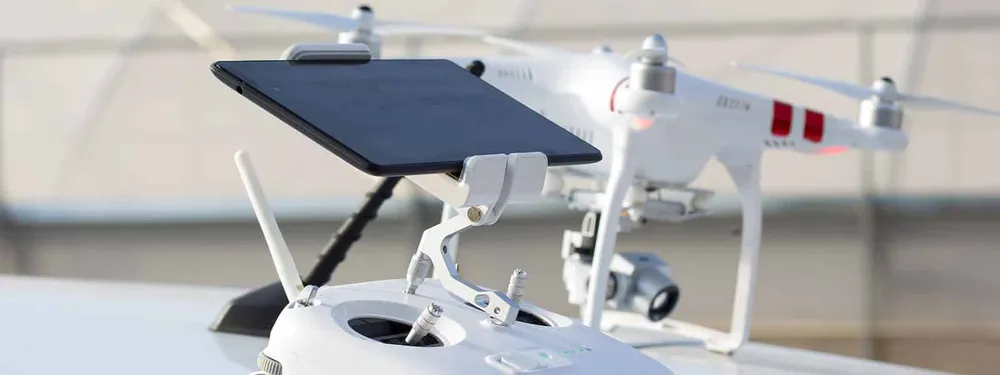
Drone – a remote controlled unmanned aerial vehicle
Drones that are usually known as unmanned aerial vehicles are often managed through flight apps. Today, there are many flight planner apps that offer selection the desired area and executes image capture in with full automation. Such apps ensure the flight track to be fully executed by the drone, necessary amount of pictures to be taken, and the necessary picture overlap. But what happens when a drone is not yet compatible with the any of the existing flight planners? Our partner – a professional UAV pilot Lukas is sharing his insights on what to do in such situations.
3D scanning without an app for photogrammetry
In photogrammetry, images taken by a drone have to comply with some requirements. Images need to fit quality standards and overlap requirements. Seeing as recently released DJI Mavic 2 Pro had no compatible flight planners shortly after its release, the only option was to fly manually as consistently as possible. To achieve reasonable consistency, one has to use a few features and settings:
- GPS flying mode for stability if flying high – 30 meters or more. Tripod mode (if available) when flying lower than 30 meters.
- Enable the rule of thirds grid on the app. When taking nadir (downward) pictures it is important to use the grid to see how much did the drone move between the shots.
- Keep an eye on the map view and the flight track that the drone is making. If the conditions are windy you may have to compensate for the wind. If the drone is not making straight lines when there’s no wind – calibration is required.
Using these tools one can achieve a good overlap and consistent scan quality. Also having manual camera settings is a bonus as well as taking the pictures in raw format. With manual settings, one doesn’t have to rely on auto exposure and with raw file formats, can have the ability to tweak white balance and other settings after taking the pictures. This gives much flexibility and quality even if something goes wrong during the flight.
Manual focus, on the other hand, is not optional, but obligatory. Always use manual focus (not any automatic mode) as misfocused or inconsistently focused pictures can ruin the whole process.
To begin flying manually, first set the required altitude that is dependent on the scene. Then face the camera down. Choose a flying direction. It can follow the compass– north for example, or it can be directed according to the scene, perpendicular to the object or nearby road.
When the direction is set (and the drone is facing that direction) fly to such a position so that the scanned object or area is in the top right corner of the screen (as seen in picture 1).
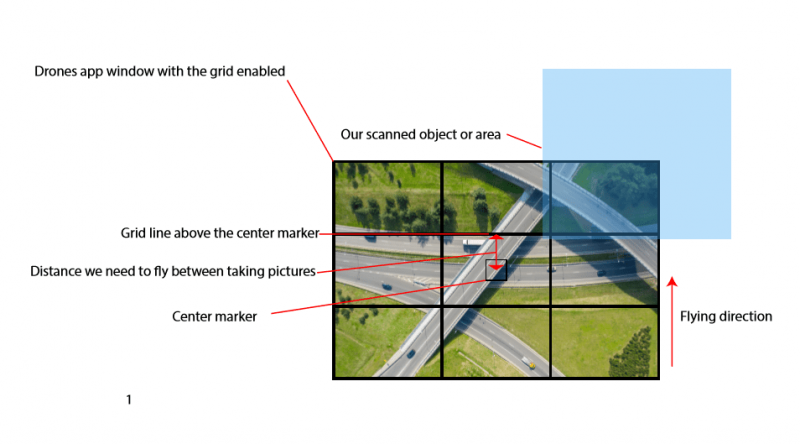
When the object is in the required place – fly forwards (which is the chosen direction) and take a picture every time the drone moves for 1/6 of the initial view. For that, just track where the center marker is. Then take note of what is under the grid line above the center marker (picture 1).
Fly until the center marker would be over the object that the grid line used to be and take the picture.
Repeat this process of flying 1/6th of the view from the center to the grid line and taking pictures on each step. When taking pictures you can either choose to stop and press the shutter button or keep going at a consistent speed – most important thing is to take the pictures every 1/6th part of the view.
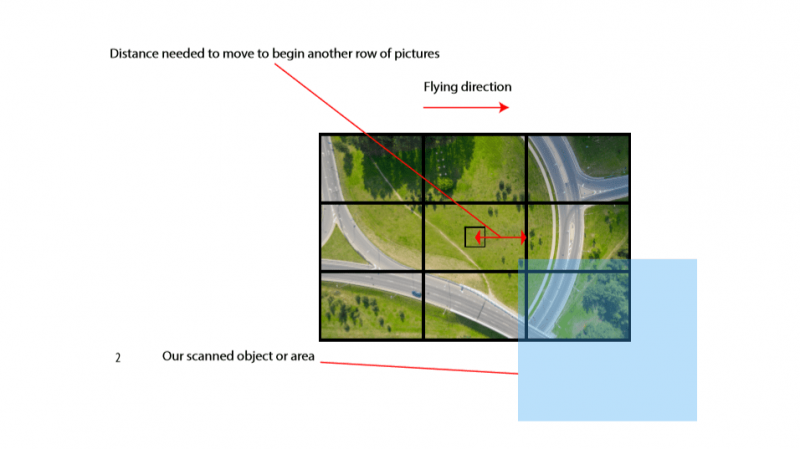
If you take the picture not exactly where you wanted, don’t worry and just keep going. Small deviations from this technique will not ruin the scan, but it’s always better to take more pictures than less. When the scanned object is in the bottom right corner of the view, it’s time to move sideways (picture 2).
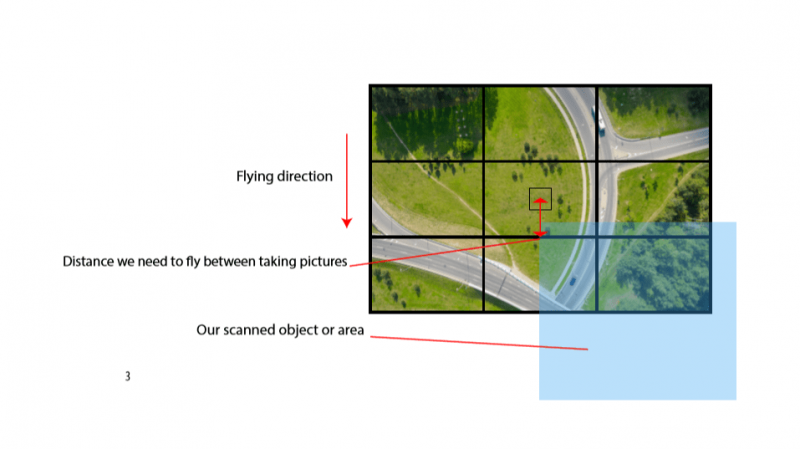
Move sideways 1/6th of the picture using the vertical grid line and the same center point. Then fly backward using the same 1/6th rule with the help of the center point and grid lines (picture 3).
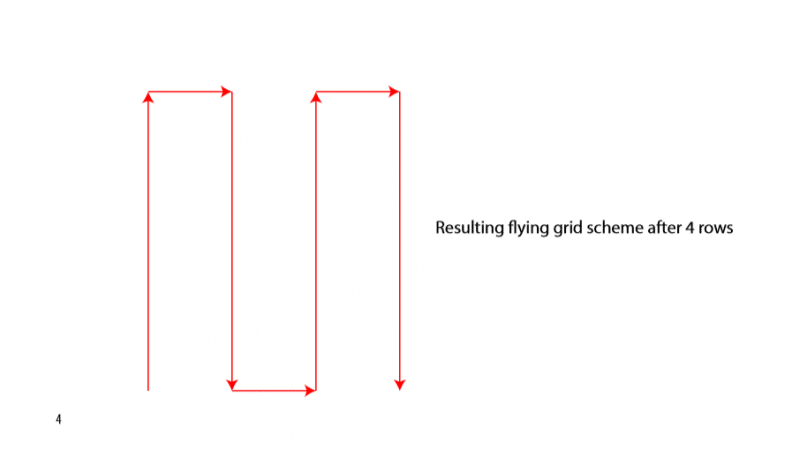
When the object is right at the top of the view, again move sideways to the right. It should become clear by now that you are flying in a grid pattern (picture 4). The same grid pattern the flight planners usually suggest.
To verify your path, look at the map in the app where the flight track is displayed. By taking pictures every 1/6th of the image you ensure enough overlap to recreate the object and make a fully fledged photogrammetric scan.
This technique should work in most cases of nadir scans. The technique should not be difficult at all for experienced fliers and approachable for beginners. Keep in mind that the larger the object the more pictures it is necessary to be taken. Flying manually straight for 20 minutes is not such an easy task to be always comfortable, beware of the surroundings and know local rules and regulations regarding drones.
3D scanning for photogrammetry – manual flying is easy
To produce a reasonably quick and adequate nadir scan a flight planner is not necessary. Camera positions may not look perfect, compared to using an automation app, but it will not impact the photogrammetric reconstruction result as long as overlap and image quality requirements are met.
With this technique no matter what is your hardware, you can always get your scan results with some practice, without being dependent on an app.
Related Blog Posts
Our Related Posts
All of our tools and technologies are designed, modified and updated keeping your needs in mind
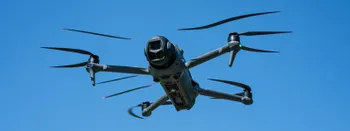
DJI Mavic 4 Pro – Sensor Readout Speeds Tested
The Mavic 4 Pro is the most capable consumer drone available today. Naturally, it gets pulled into all the usual debates — including the decade-old mechanical vs. electronic shutter discussion. Sensor technology has come a long way, and the Mavic 4 Pro's fast readout speed means you are unlikely to
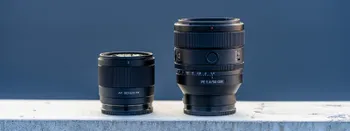
Premium vs. Budget - Viltrox vs. Sony GM - Landmark Lens Comparison
Professional photography has to be distinguished by creativity and results obtained from cameras and lenses that clearly can provide technically better photos than any phone. As a photographer, I should get the best camera gear or not bother at all. But what does it mean to get the best?
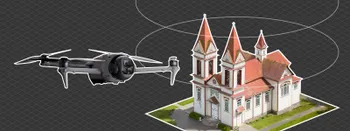
DJI Mavic 4 Pro Photogrammetry – Pixpro Waypoints
DJI Mavic 4 Pro is the flagship foldable consumer drone from DJI. It will become a workhorse for many creators in the next few years, including some of us in photogrammetry.
Ready to get started with your project?
You can choose from our three different plans or ask for a custom solution where you can process as many photos as you like!
Free 14-day trial. Cancel any time.