.svg@webp)
Event Planning with Photogrammetry – Use Case from A to Z
 Lukas
Zmejevskis
Lukas
Zmejevskis
Photogrammetry for event planning was the first use case I wrote about on this blog. Now we are back with another venue and an event that will take place in a couple of months. The venue is a considerable distance away for most of the planning team, so visiting it on a whim to check out any small detail is not viable. The next best thing is having its digital twin, of course. Photogrammetry is the method of choice for obtaining said twin. I will briefly go through all the steps I followed to get a valuable dataset.
Scan Purpose and Methods
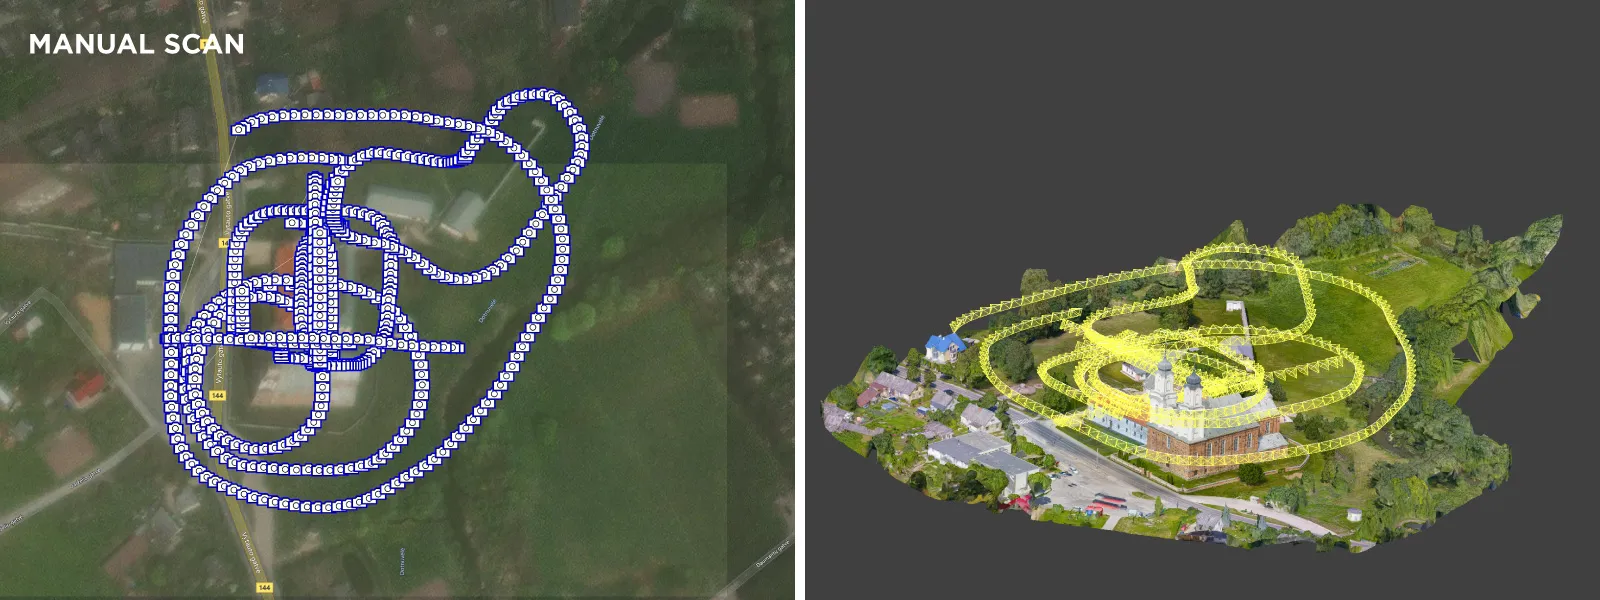
In this case, I relied entirely on aerial photogrammetry. I used the DJI Mavic 4 Pro to capture all the photos. The flight was a mix of automated Pixpro Waypoint flights (a single grid and multiple orbitals) and some additional manual capture. The scan aimed to get a good-quality orthophotography image and a 3D model to use as a reference for event planning purposes. These are logistics, decorations, safety, zoning, and all other event-related spatial variables. This data will also be used for promotional material and artistic event map creation.
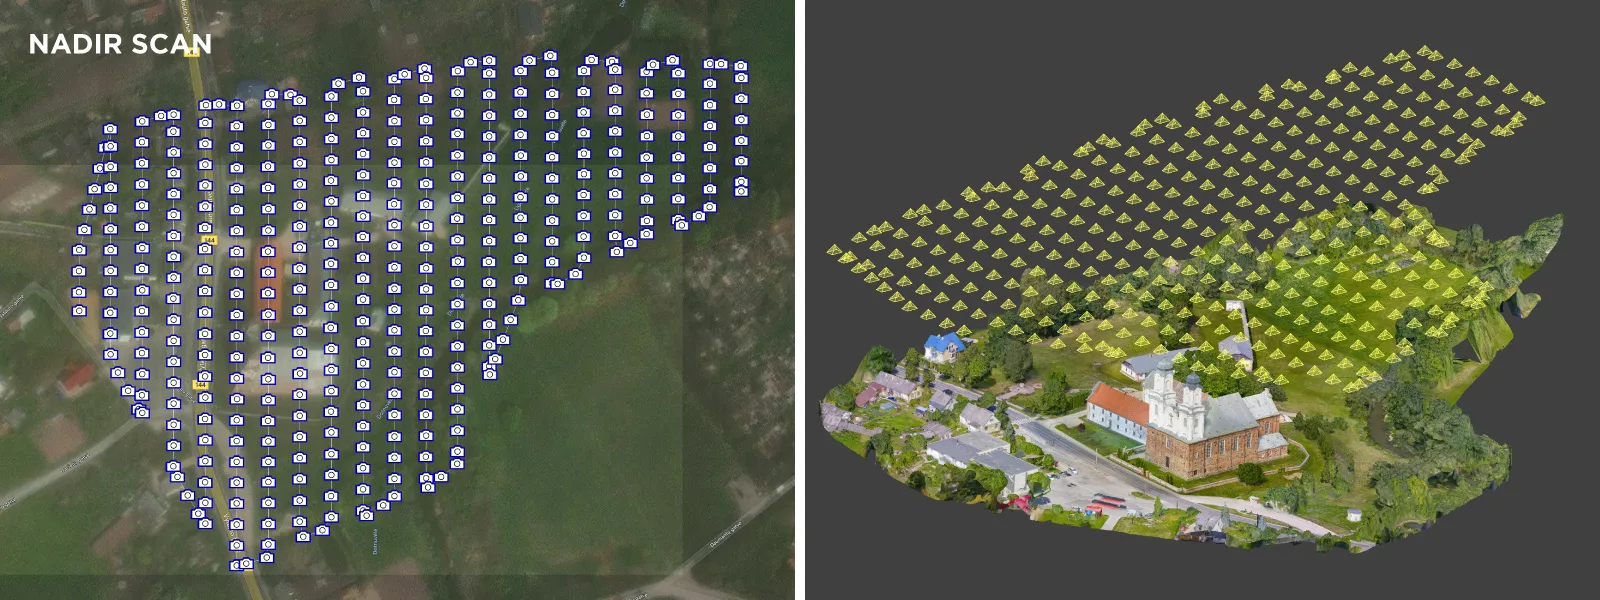
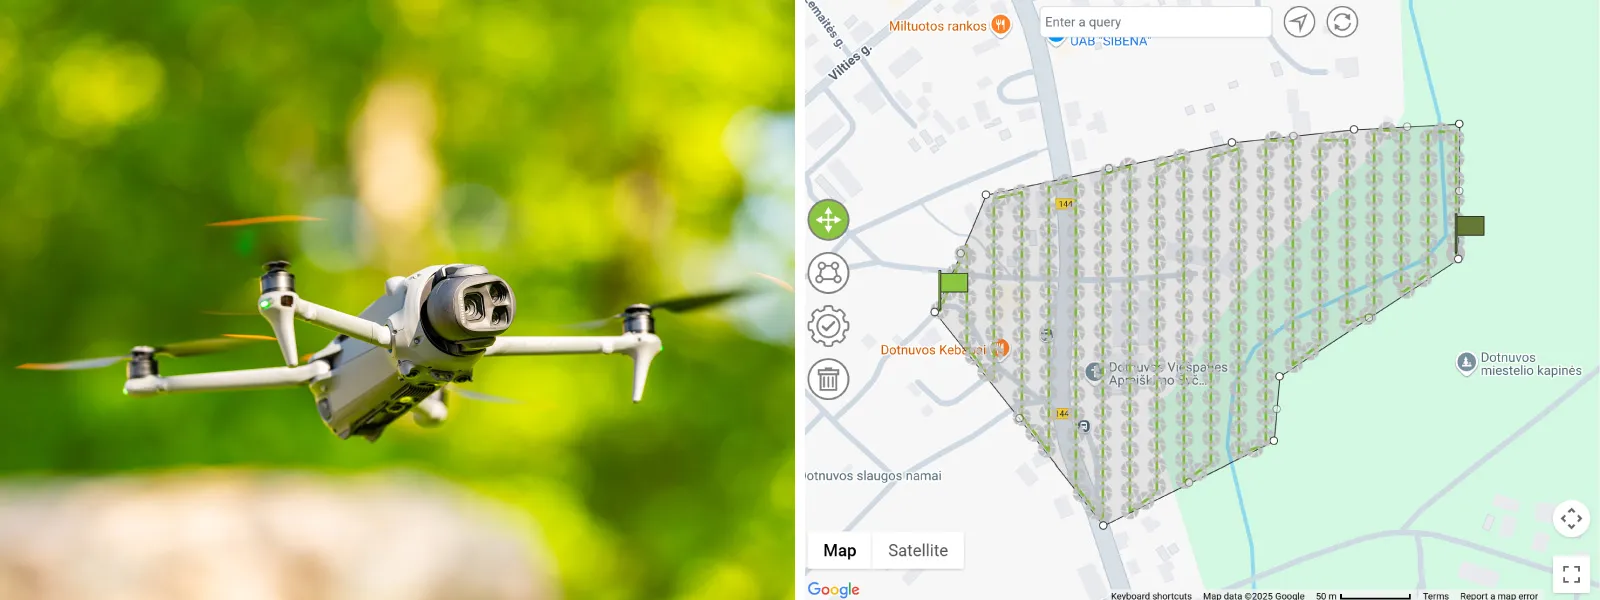 At stage one, I captured a nadir single-grid scan of the entire area from a reasonable 70-meter altitude, which gives us a theoretical maximum 1.5-centimeter ground sampling distance resolution. Such detail is unnecessary; I based the flight altitude on the number of photos it generated. My aim was to obtain fewer than 400 photos for the nadir grid.
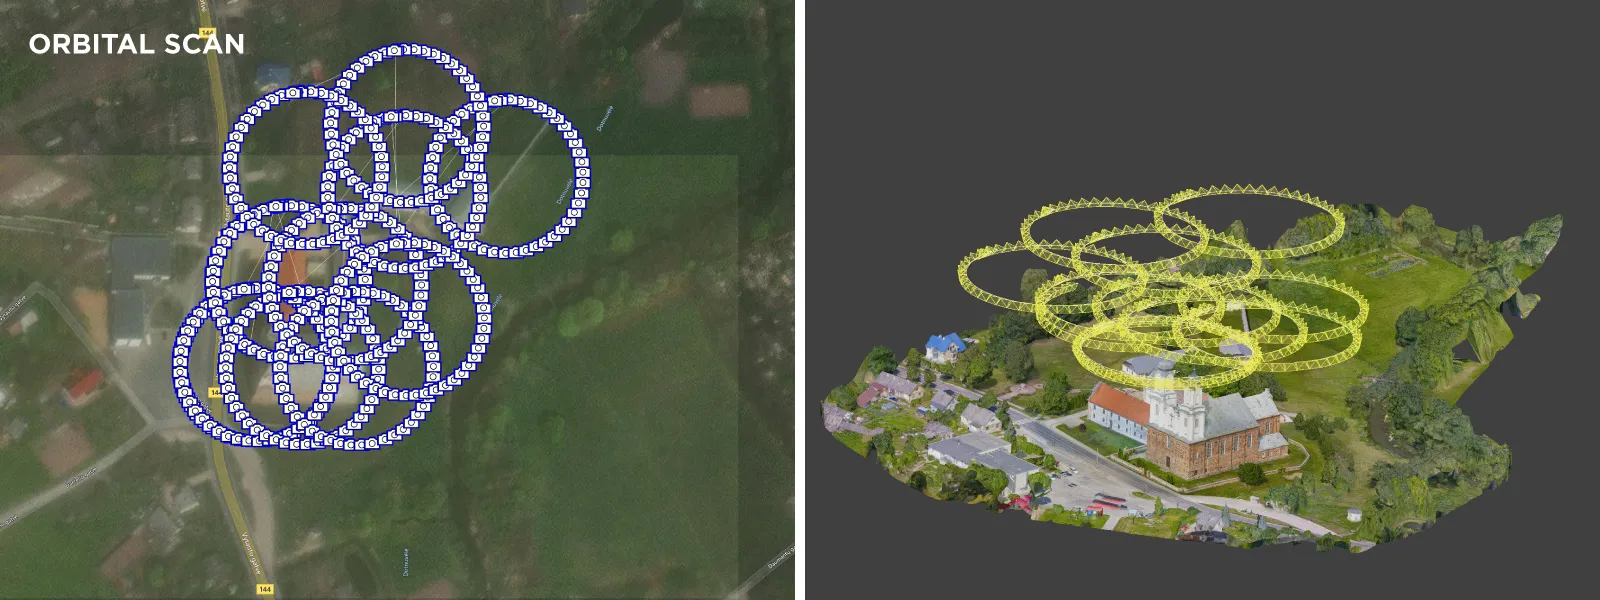
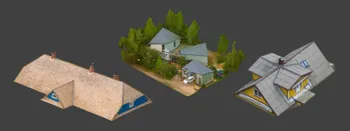
 Stage two involved adding orbitals around key structures—the building inside the event territory. Pixpro Waypoint orbits are flexible, so any camera angle can be used and adjusted on the fly. I dotted the orbits around the building and flew with the camera pointed so that each roof of the building was covered appropriately.
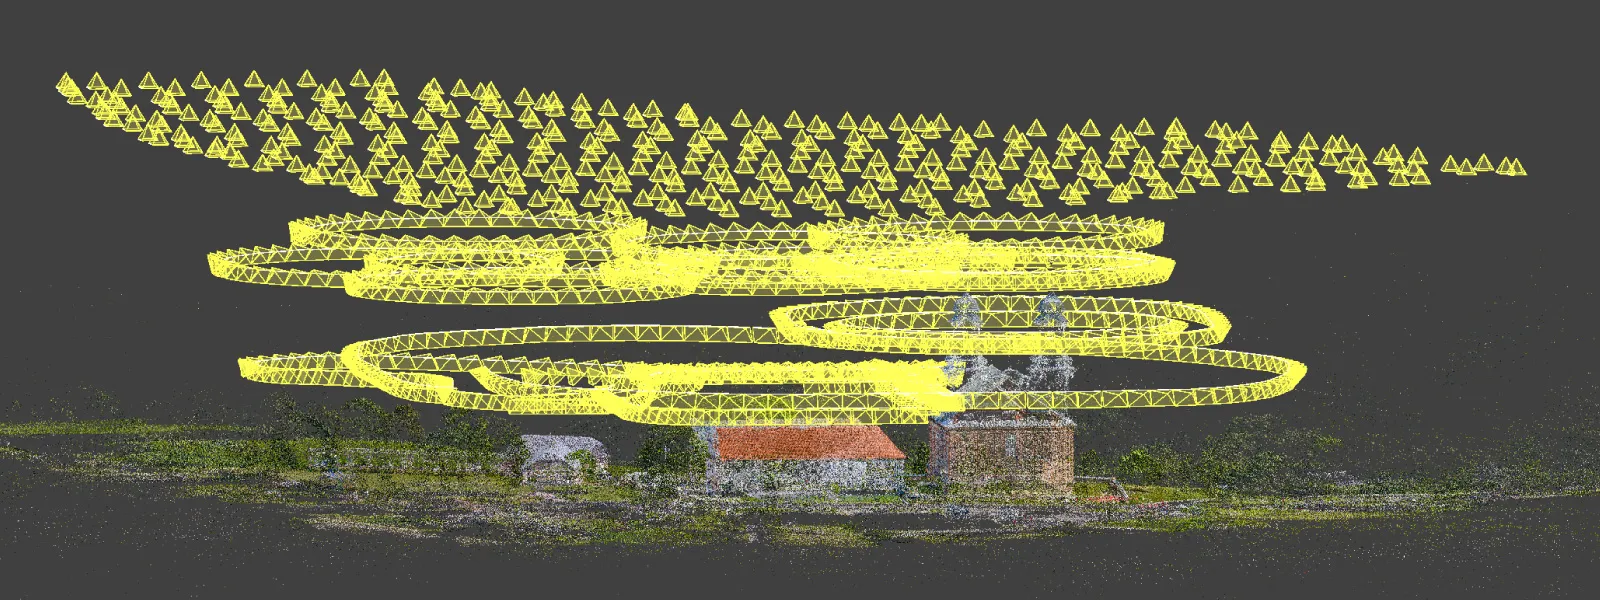
 The final stage was to add some manual flight capture data. I did some perimeters around the individual buildings and around the central part of the entire complex, along with a few tunnel scan–type passes in shadowy areas. I did that to add a bit more oblique detail—flying at lower altitudes, capturing more wall information for a neater 3D model and a cleaner overall 3D reconstruction.
 I got 1,539 RAW photos in total. I shot mainly in aperture priority mode, with the shutter speeds changing according to lighting conditions. I had to intervene a few times during the scan when auto mode did not compensate quickly enough or dipped into slower shutter speeds.
 Photogrammetric Data Processing
As always, I processed RAW photos in Adobe Lightroom Classic, converting DJI's .dng files into regular JPEGs. The processing is straightforward and technical: match the colors as much as possible using white balance and recover shadows and highlights. Nothing fancy is necessary.
All 1,539 photos were processed at once in Pixpro photogrammetry software. On a decent desktop computer, processing took a few hours.
 Scan Results
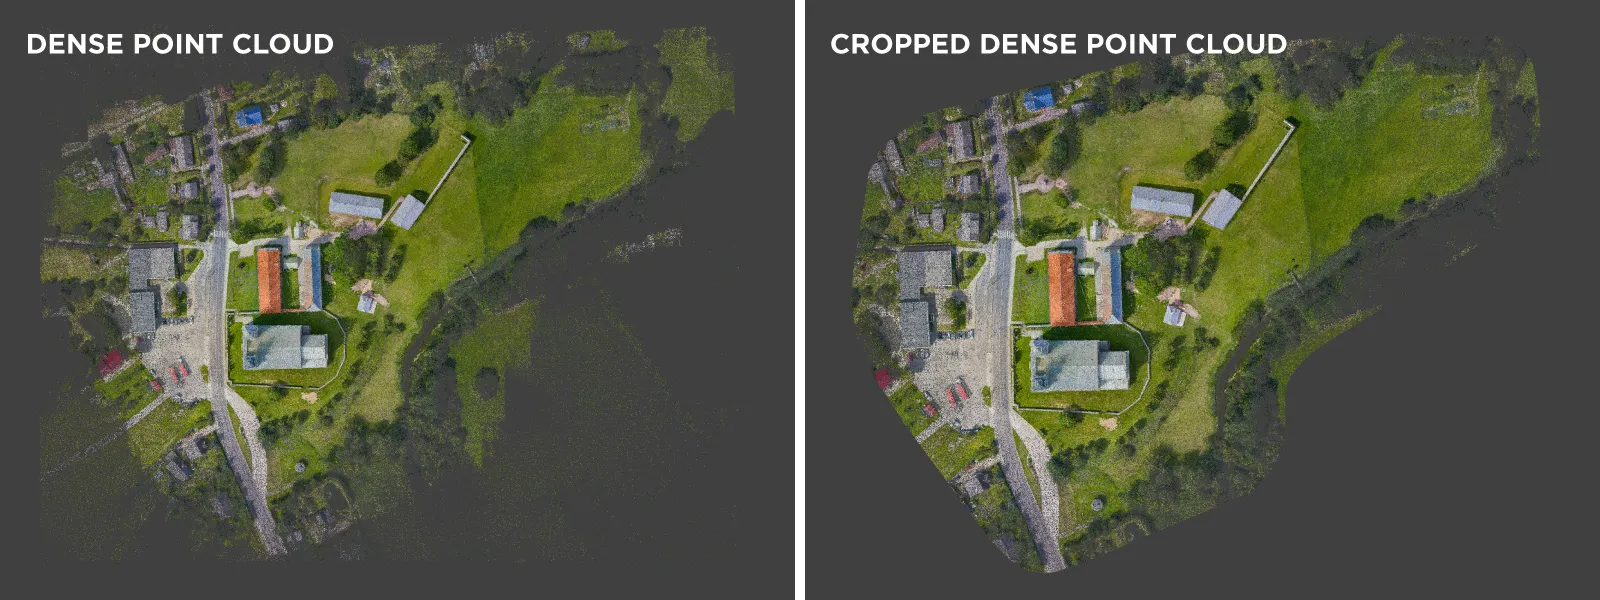
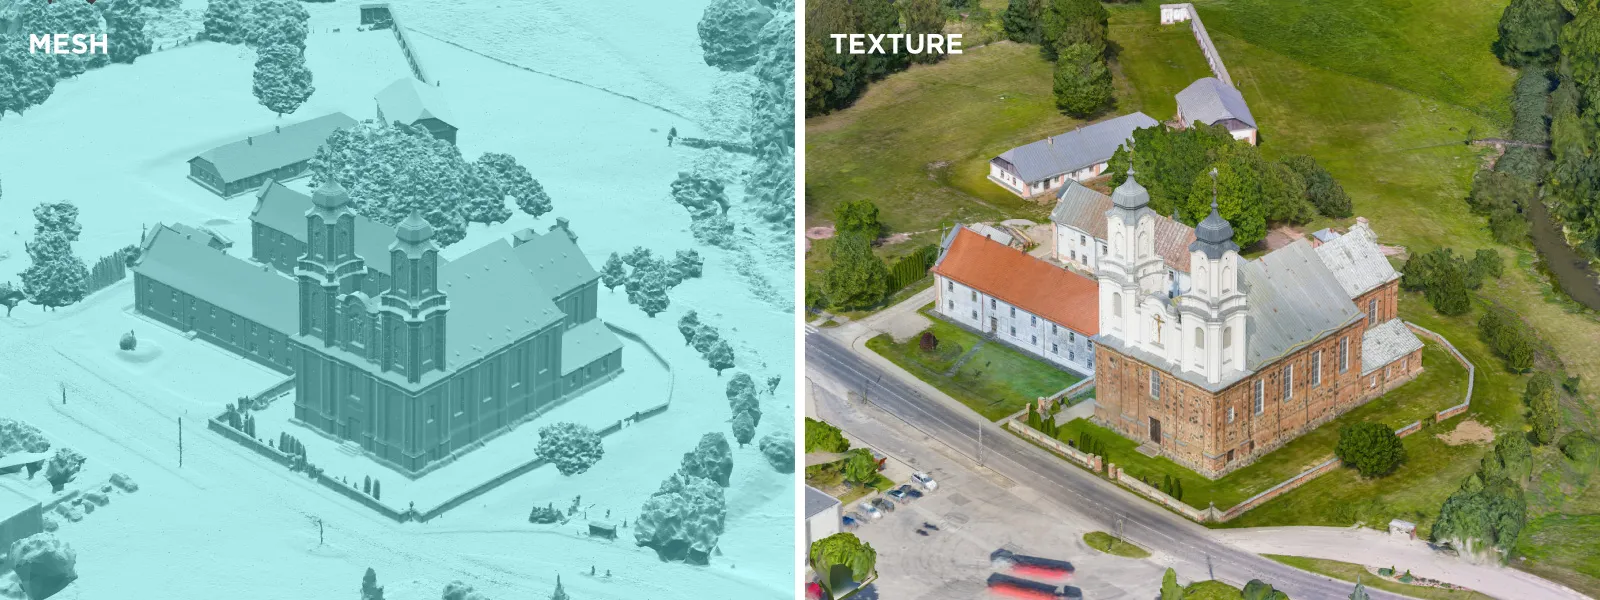
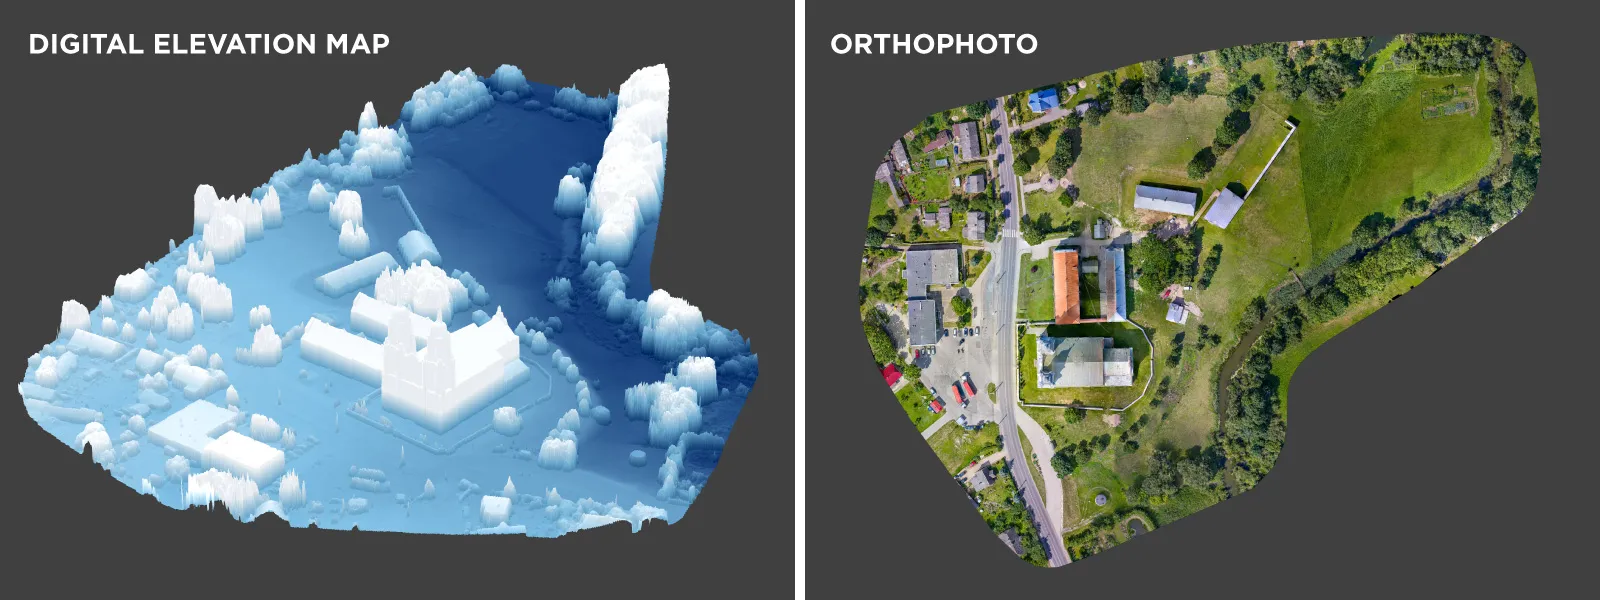
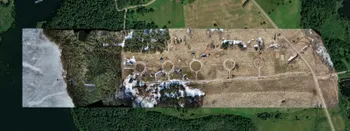
All photos were included in the 3D reconstruction, which is always the goal. We need a 3D model and an orthophoto image, so a dense point cloud, 3D mesh surface, texture, digital elevation map, and the orthophoto image were selected during processing – essentially default settings.
To get the best results, there are a couple of practices you should always follow with Pixpro:
-
Always use the clipping box. We do not need to process the peripheral data for our delivery layers. Always crop that out to save time and resources and increase quality in the key areas.
-
We can do minor cleanup with dense point cloud filtering. An optional step, only if you notice some weirdness or artifacts. Only occasionally necessary, but always an option.
-
Choose only nadir images for orthophoto. It is a no-brainer. While we need all the 3D data for a good DEM, which is the base for the orthophoto raster image, to clean up the image itself we can just use nadirs, and we have a convenient tool for that.
 Orthorectified Imagery
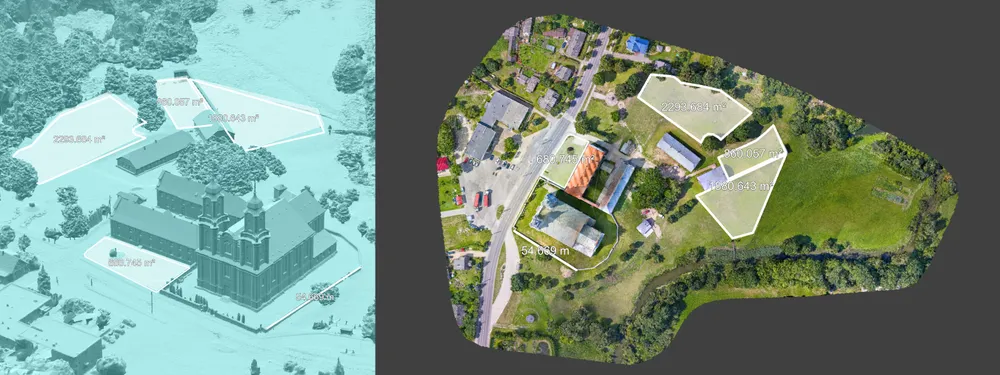
A True Orthophoto or orthorectified imagery is a top-down view of the area with perspective correction. The lack of changing perspective means that wherever you look, you seem to be perfectly above the target area. We need a digital elevation map "below" color photo imagery to project on. We are projecting the photos on a 2.5D height map to get a perfect orthorectified image, which retains scale and shape perfectly. It can be used to measure and create maps.
 Data Analysis in Pixpro
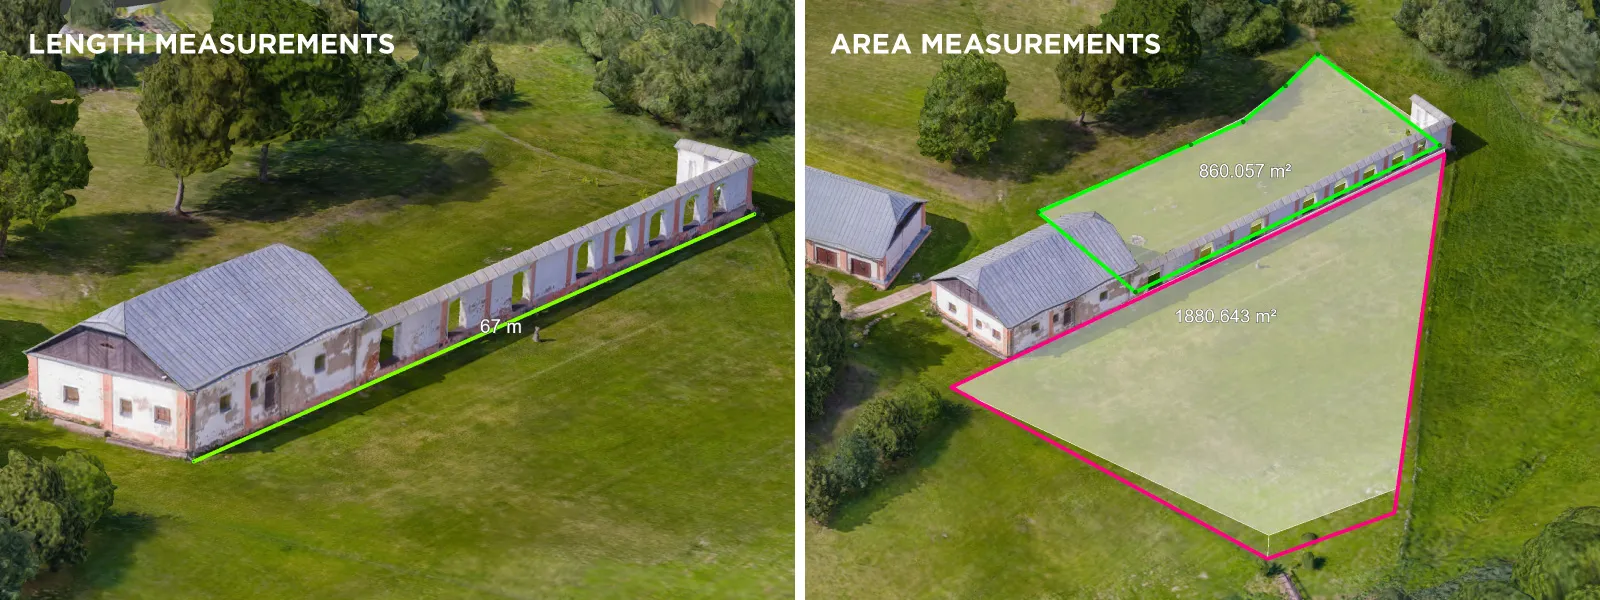
We can use Pixpro to measure distance, area, and volume. In the case of a good 3D reconstruction, we also expect great relative accuracy, which would mean centimeter accuracy in distance measurements and sub-2-percent accuracy in volumetrics.
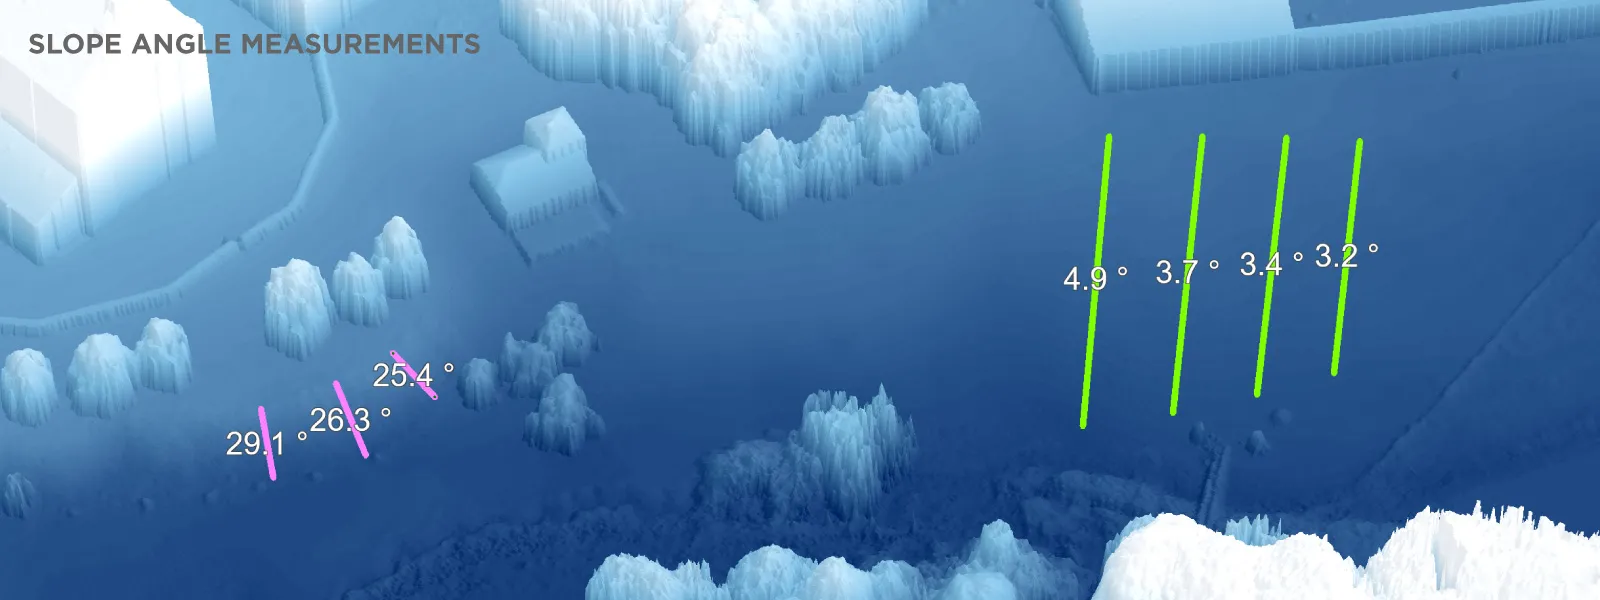
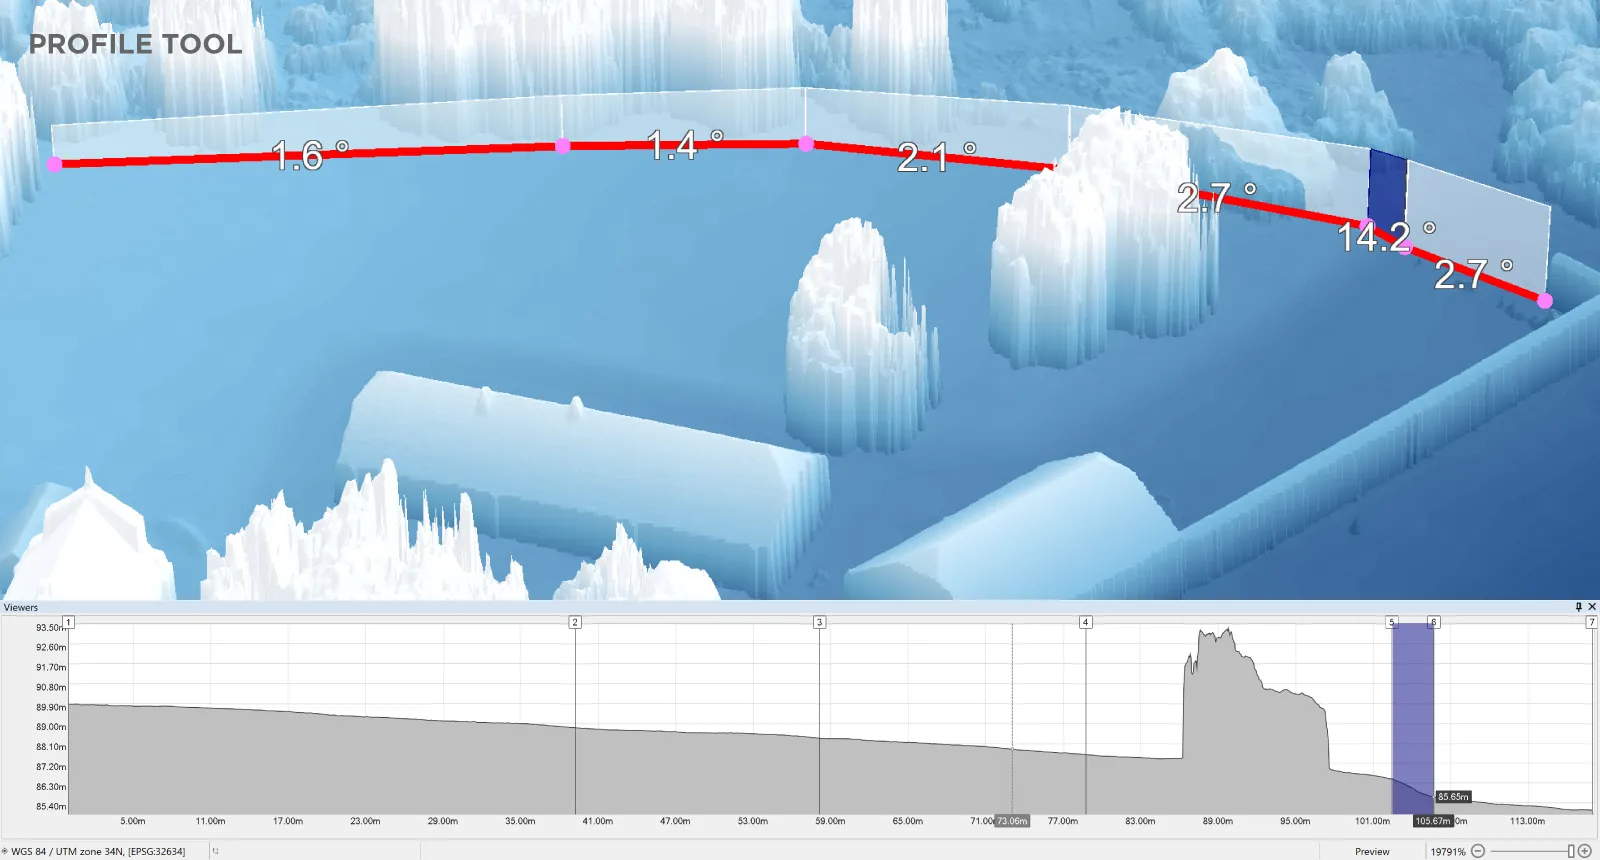
 There are also slope measurements for safety and runoff purposes. Each line can be turned into a slope profile for visualization and precise measurements.
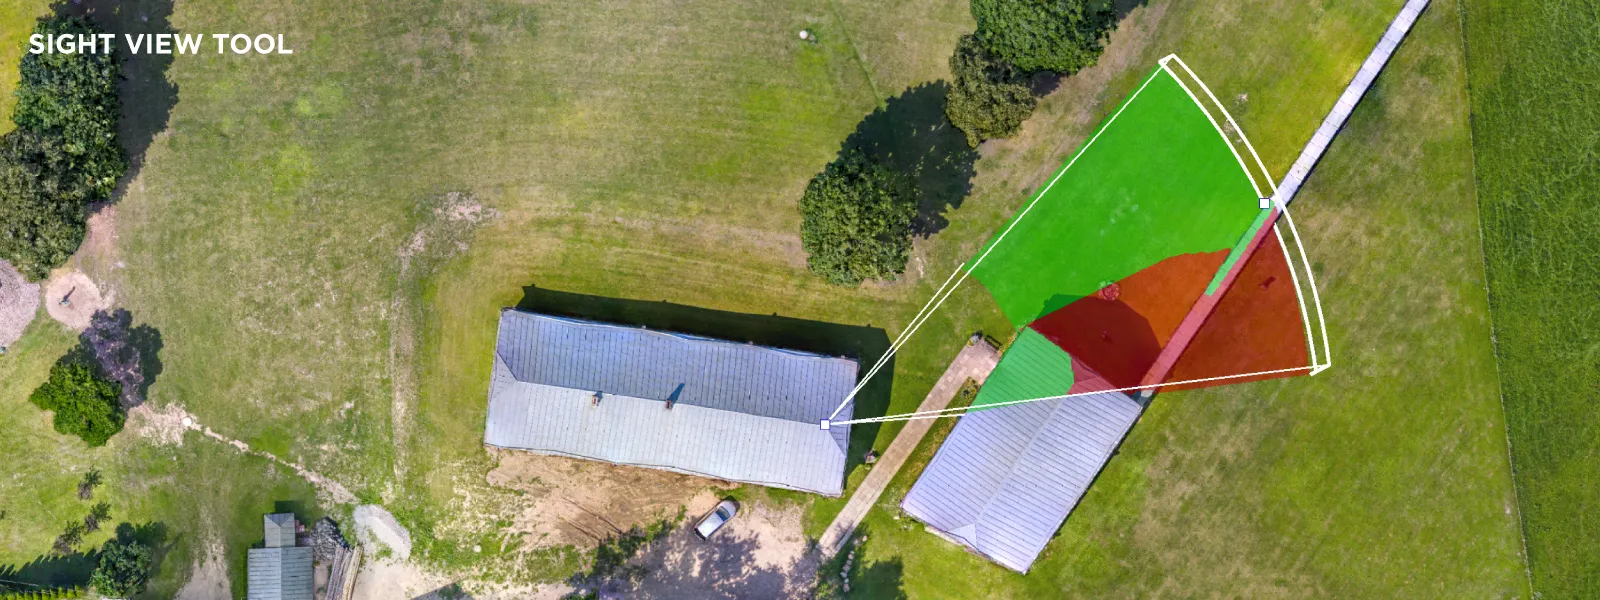
 We also have sightline and sight view tools, which are slated for improvement in the future but can still provide good references for lighting or security camera placement and designated useful vantage points.
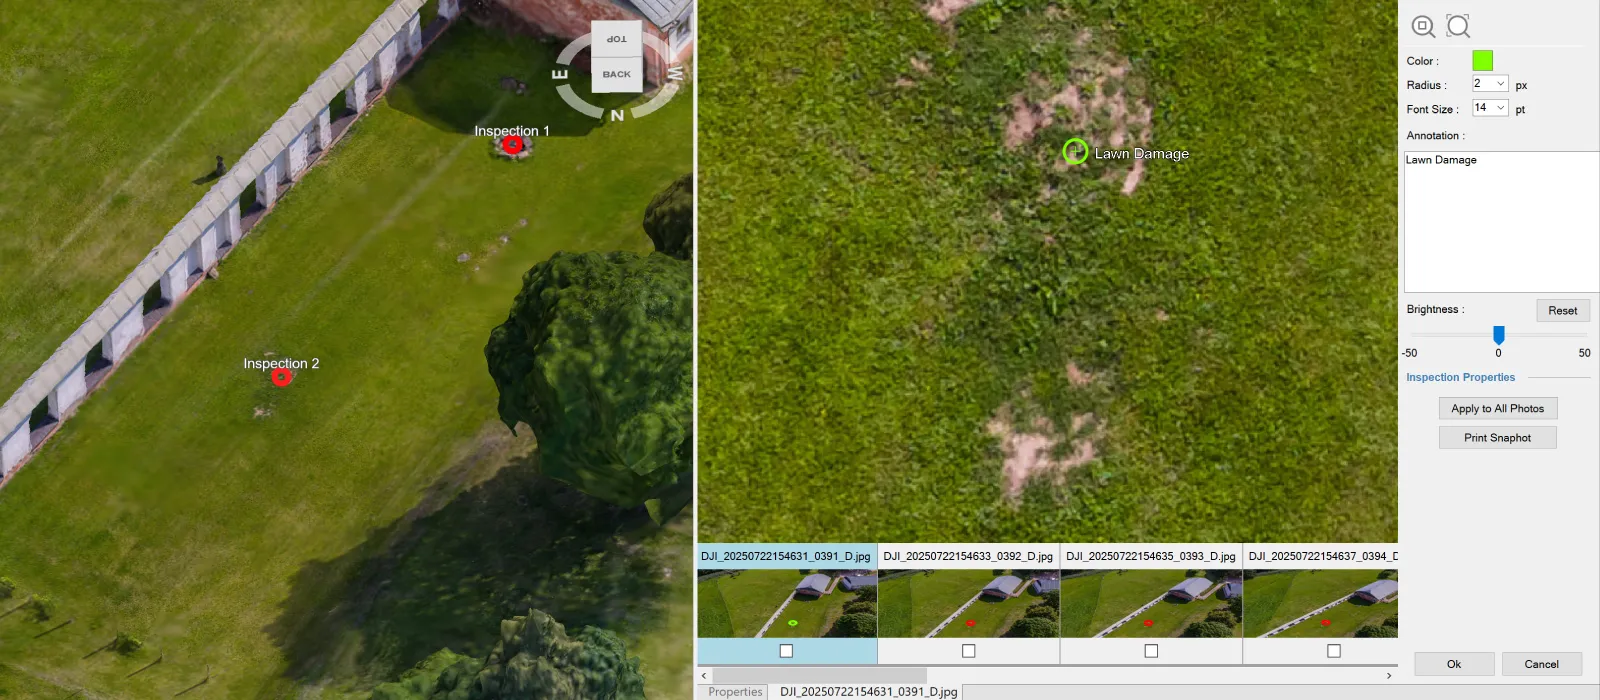
 Lastly, visual inspection. With projections, we can zoom in on each point and designate current defects, so there will be no disputes after the event.
 Analysis does not necessarily end here. There are always export options for more specialized software. Pixpro can export all layers it generated and all layers we draw. We also have the option to make simple, easily printable reports that will contain the 3D view snapshot and measurements if you require them.
Conclusion
The event in question is small and organized for the second time by just a few people. Yet we did not even think about not using photogrammetry to obtain an up-to-date, high-resolution image and a 3D model of the monastery/church complex. Without such data, there is just too much guesswork or logistical cost to manually visit and measure the place. Photogrammetry is the king of affordable, quick, and visually appealing remote sensing. Nothing beats having the entire place at your and everyone else's fingertips.
Photographer - Drone Pilot - Photogrammetrist. Years of experience in gathering data for photogrammetry projects, client support and consultations, software testing, and working with development and marketing teams. Feel free to contact me via Pixpro Discord or email (l.zmejevskis@pix-pro.com) if you have any questions about our blog.
Related Blog Posts
Our Related Posts
All of our tools and technologies are designed, modified and updated keeping your needs in mind
DJI Lito X1 for Roof Photogrammetry: Solar and Inspection Use Case
Small drones are the best tool for residential and even commercial roof photogrammetry. They are quiet, attract less attention, are easier to fly fully within regulations, and they are affordable.
Large Property Photogrammetry – Real Estate Development Use Case
Property scans are one of the most common use cases, especially for our software. Pixpro is affordable and works well with RTK data and ground control points when necessary.

Handheld Photogrammetry Construction Interior Scan Use Case
Interior 3D scanning can be useful in a myriad of ways. In this article, I present a scan of a residential building construction site, with its foundation walls and roof almost complete. Further construction will require some visualizations and design according to “the fact.”
Ready to get started with your project?
You can choose from our three different plans or ask for a custom solution where you can process as many photos as you like!
Free 14-day trial. Cancel any time.