.svg@webp)
3D Roof Photogrammetry with DJI Mavic 4 Pro
 Lukas
Zmejevskis
Lukas
Zmejevskis
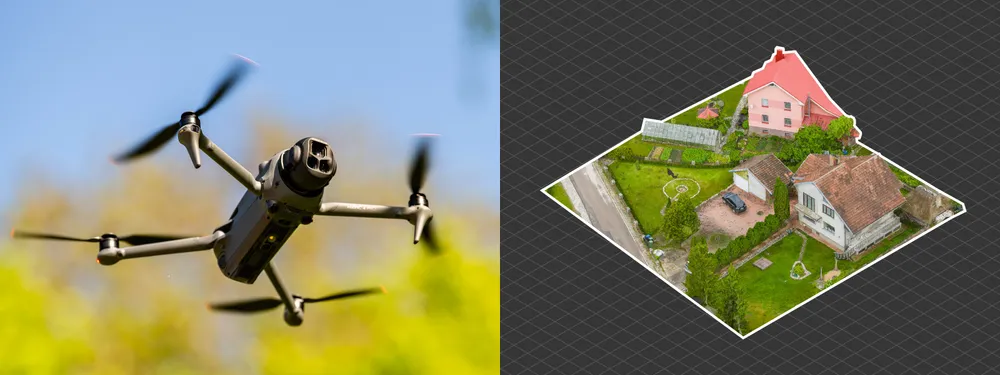
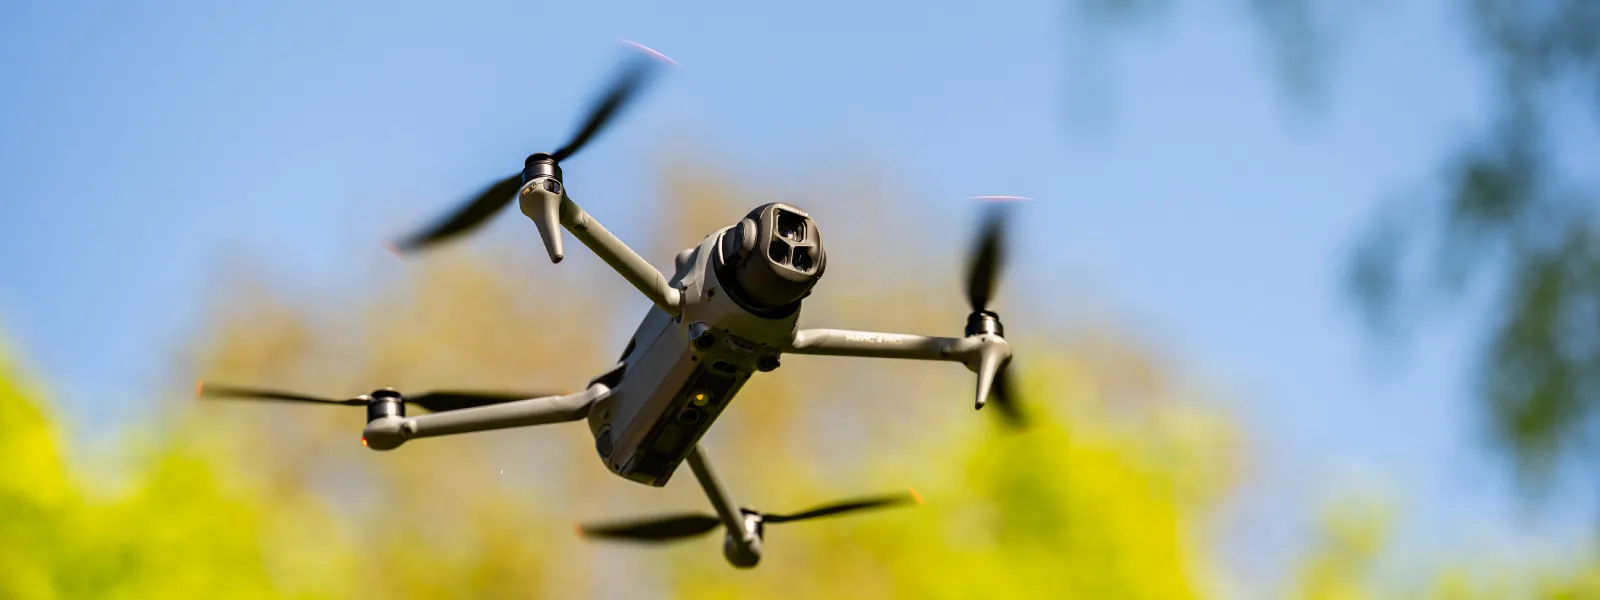
3D roof photogrammetry is the best way of measuring, inspecting, and evaluating roofs in many use cases. Our most common use case is either inspection for renovation or solar panel installation and energy simulation. The best drone to do that is just the best drone you can get, and for many, it will be the DJI Mavic 4 Pro for quite some time. Of course, having the most expensive consumer-grade flagship drone for this use case is unnecessary. However, many creators and pros will use the new Mavic, and I will show how to scan a roof or two.
Pixpro Waypoints
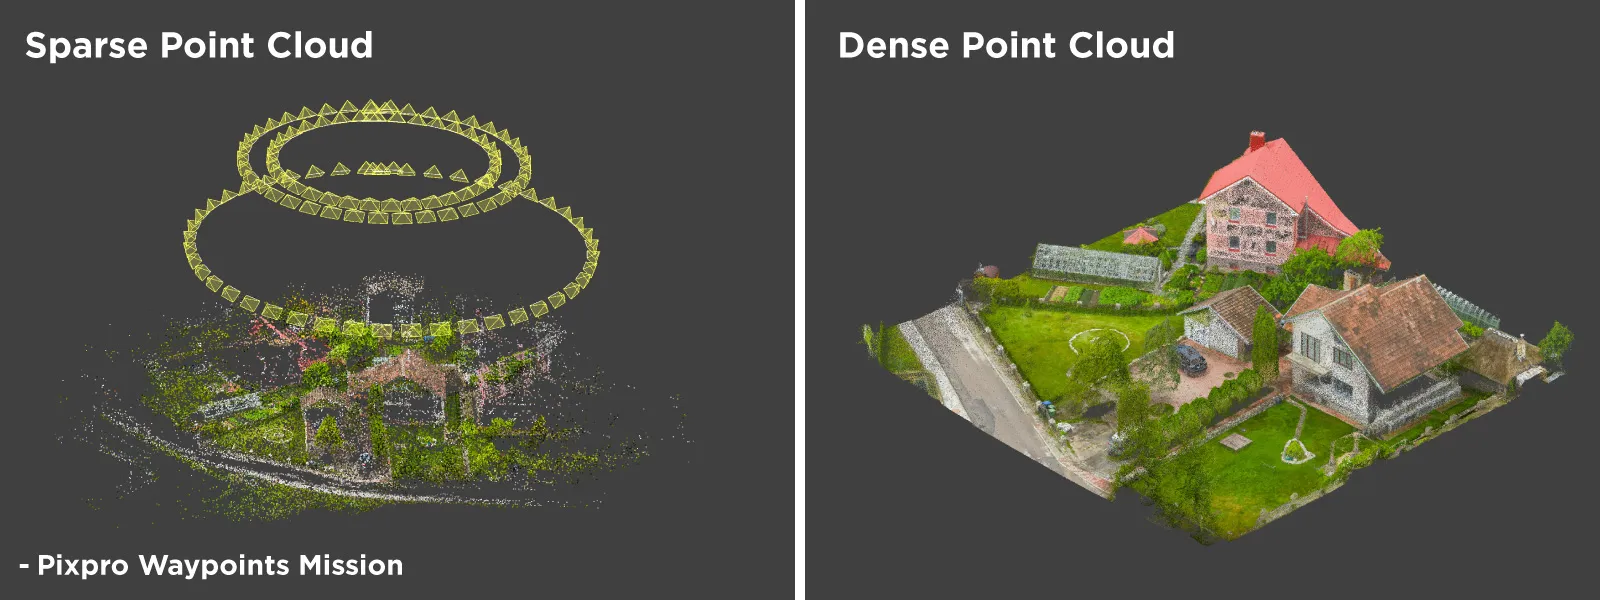
Data collection comes first, and when we can automate it, we should. Pixpro Waypoints allows us to do that with the consumer-grade Mavic 4 Pro. DJI ordinarily reserves automatic flight capabilities for enterprise-grade drones with special remotes, but our workaround effectively gives the same results without the premium price.
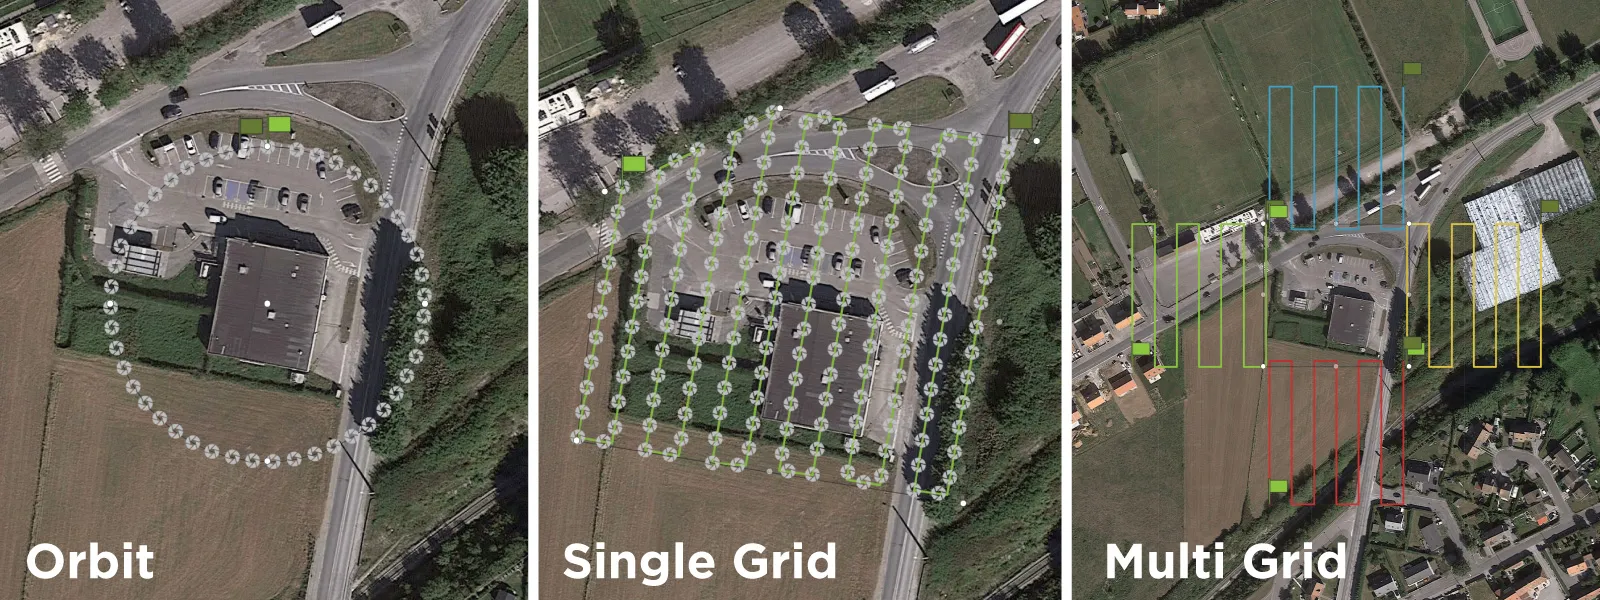
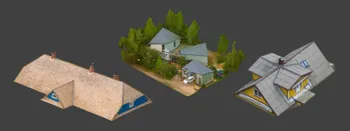
 Quick residential roof scanning is simple – we use orbital flights. Orbits in Pixpro Waypoints provide the consistent overlap needed to ensure a good 3D reconstruction. Depending on the situation, two or three orbits should be enough in most small building cases.
Whether to use a single or a few orbits depends on the detail requirement, whether we need detail in the walls or around the entire property. The essential rule here is to have the orbits at different altitudes and/or camera orientations so that no photos are identical.
Covering a larger building with overlapping orbits is also always a possibility. We can divide larger buildings into arbitrary quadrants or choose orbits above key spots that need to be 3D scanned.
 One small caveat when using orbital planning in Pixpro Waypoints and other similar services is the map offset. The orthophoto imagery you see in maps is never perfectly aligned with the real world and often has an imperfect perspective, so the center designation may not be quite perfect with smaller subjects. Doing multiple orbits can also help in that regard. If the map is outdated or extremely skewed, we arrive at the next solution for doing orbital scans.
Hyperlapse Tracking
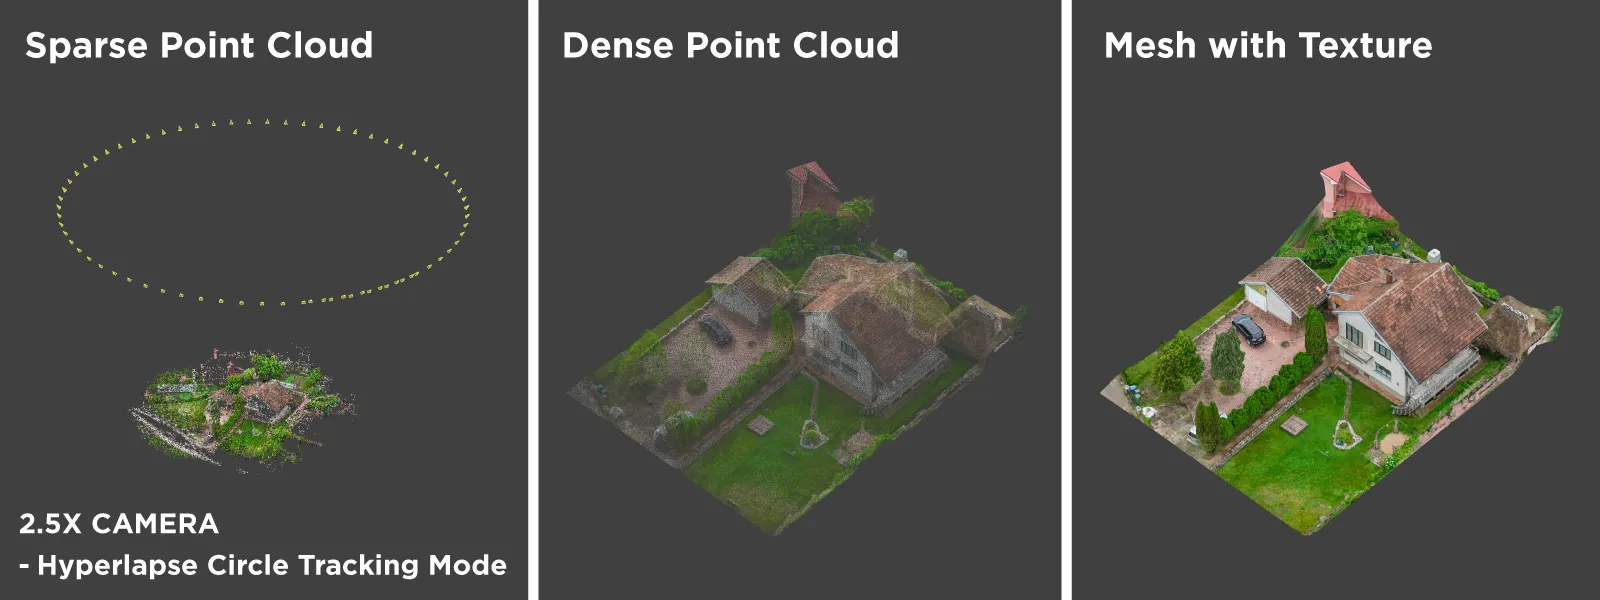
Using the built-in hyperlapse circle tracking mode provides a good, flexible alternative to using waypoints. The only nuance here is to get a feel for how many photos to take, which means balancing drone speed vs. the interval of photo capture. However, we can always use orbital specs from the Waypoint service for a rough estimate. Plan an orbit at an approximate diameter and height, and you will see the speed change according to the photo capture interval.
Hyperlapse Capture for Photogrammetry
Synchronize those two with a hyperlapse orbit, at least approximately, and you should be in a good spot. I will do a dedicated blog post on using hyperlapse for photogrammetry with the DJI Mavic 4 Pro.
 Manual Photogrammetry
Finally, there is always the option to take photos fully manually. This requires the most “feel” and experience because it is easy to lose track of coverage and spiral out of control into taking many redundant photos or, contrarily, not taking enough pictures. This comes naturally with time, but if I had to give some advice in manual photogrammetry, these would be my top 3:
-
Each small part you want to get in 3D must be visible in at least 5 photos with clearly different perspectives.
-
Images must be sharp and correctly exposed at all times.
-
During capture – more photos are better. Before photogrammetric processing – we remove redundant photos. (Redundant photos are photos made in the same spot or facing an irrelevant direction.)
Pixpro Processing
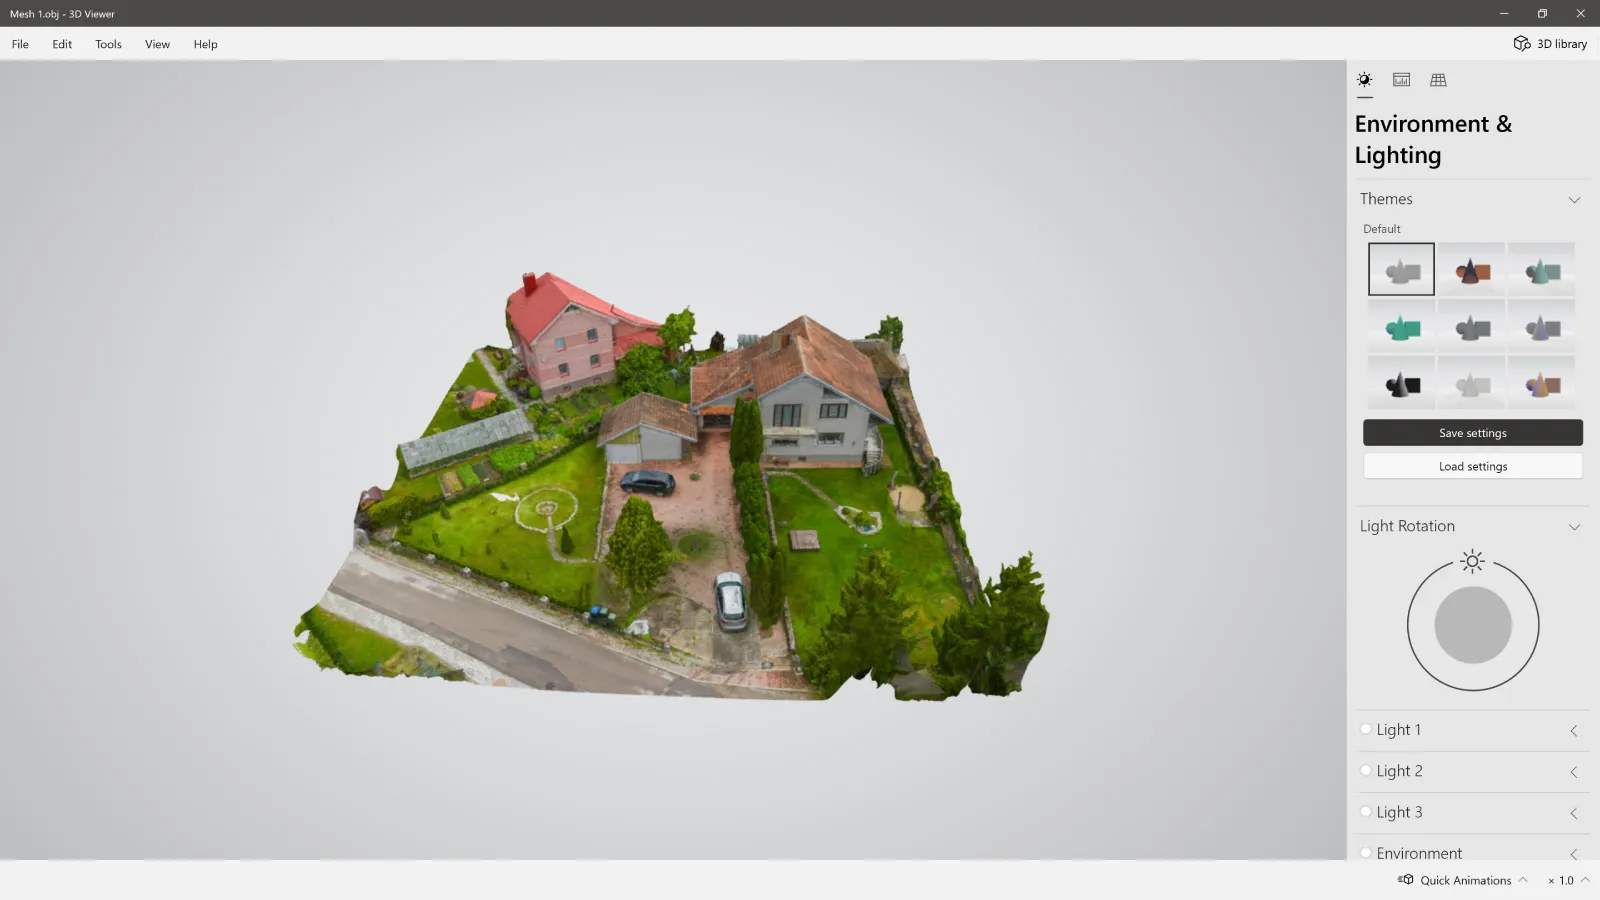
Pixpro photogrammetry software is the easiest and most accessible way of doing 3D reconstruction on a Windows machine. Create a new project, select your captured photos, thoroughly check the pictures before clicking OK in the photo manager so there are no irrelevant or duplicate photos, and upload them into the software. Check again on the map view, and if you are feeling advanced – run 3D reconstruction and dense point cloud steps.
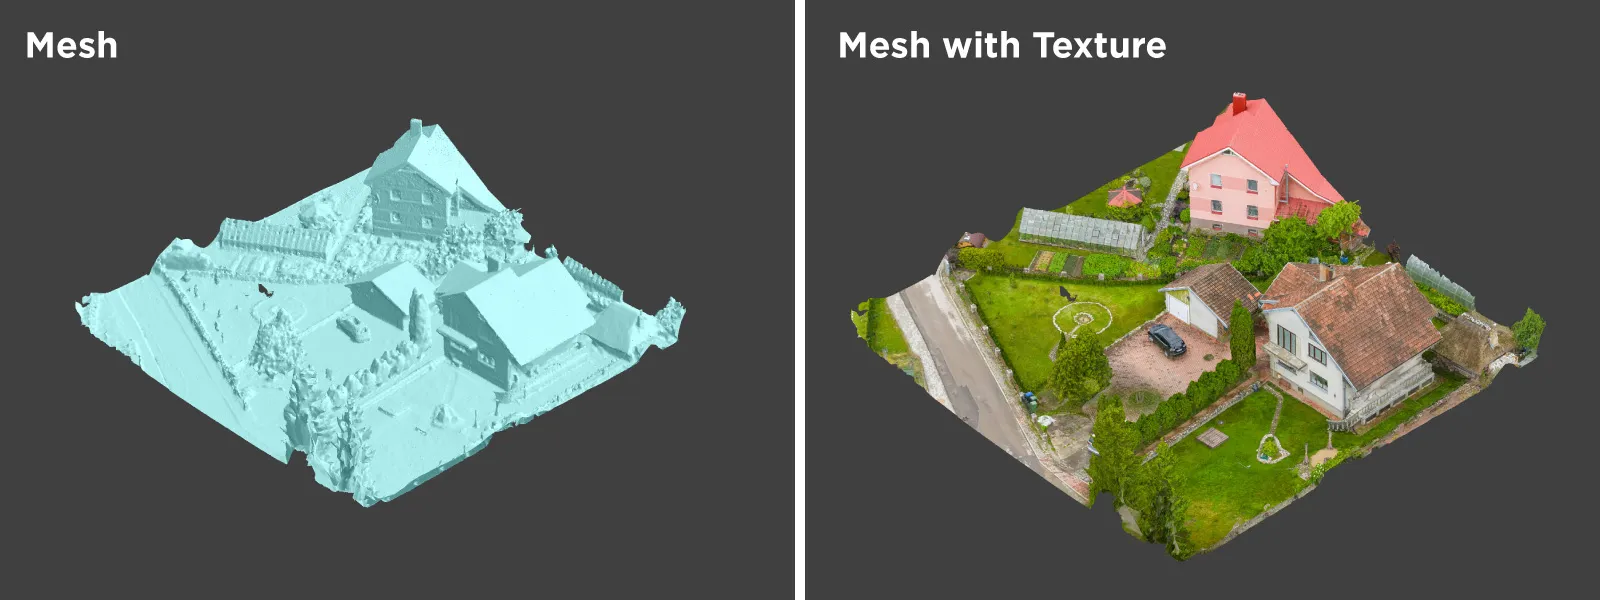
 After these steps are complete, we crop the point cloud and create a 3D mesh with texture, which will provide us a 3D model. And that is it — we can use that for measurements.
 Data Analysis
After the processing, we can do a good amount of data analysis inside Pixpro. Measurements and roof inspection are the bread and butter of photogrammetric remote sensing. Even if we are not using professional RTK drones, we can expect great relative measurement accuracy, which will outperform any physical measurements.
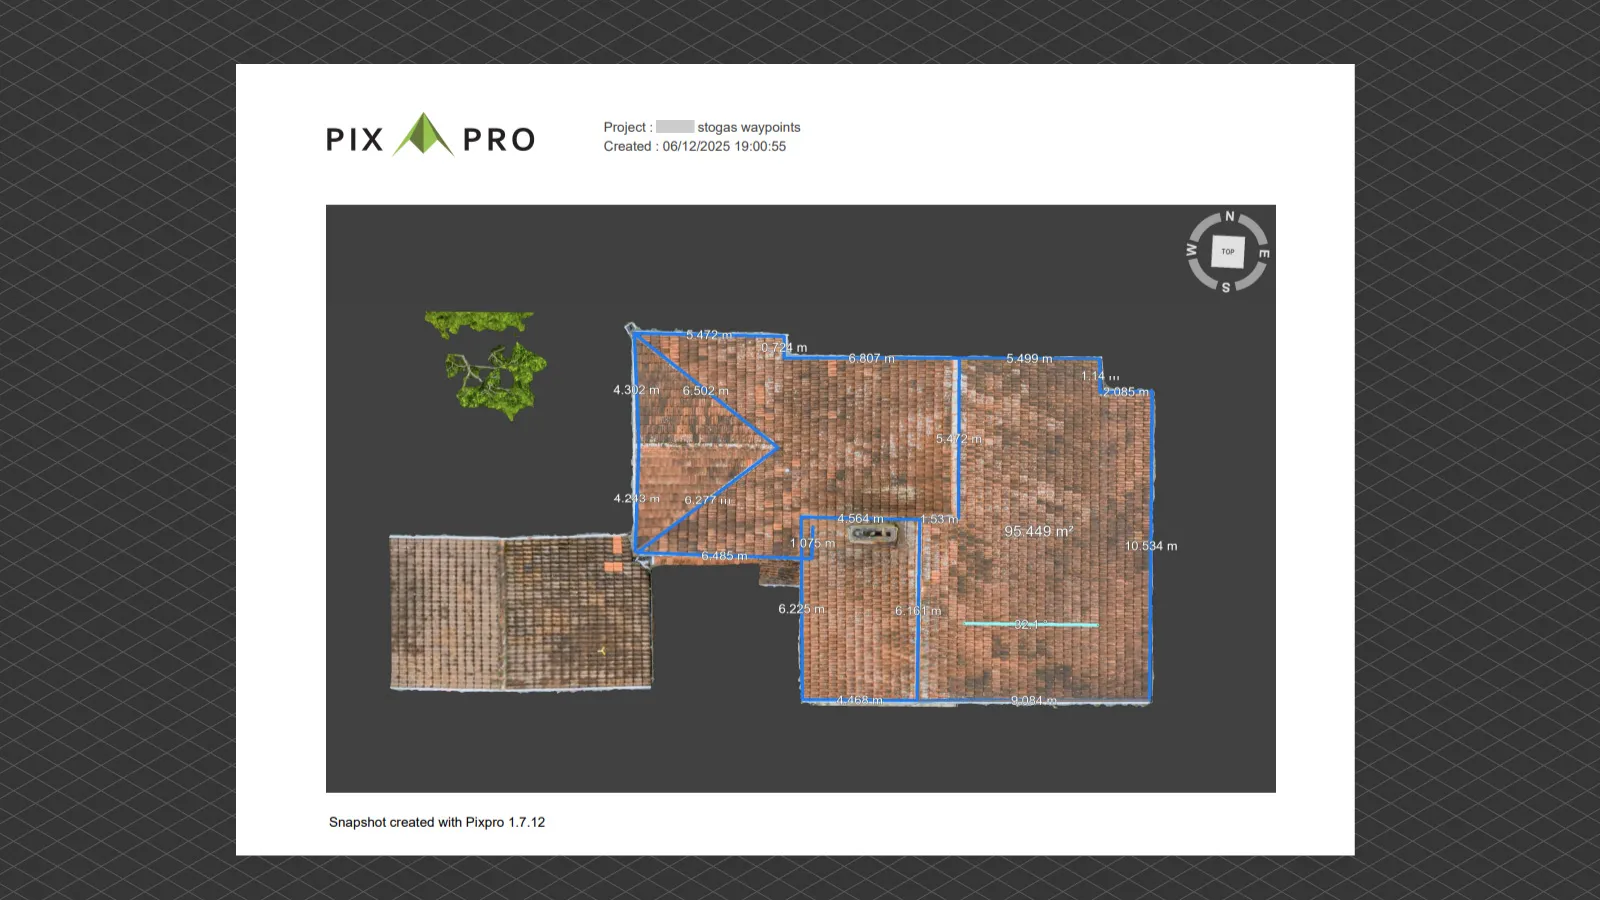
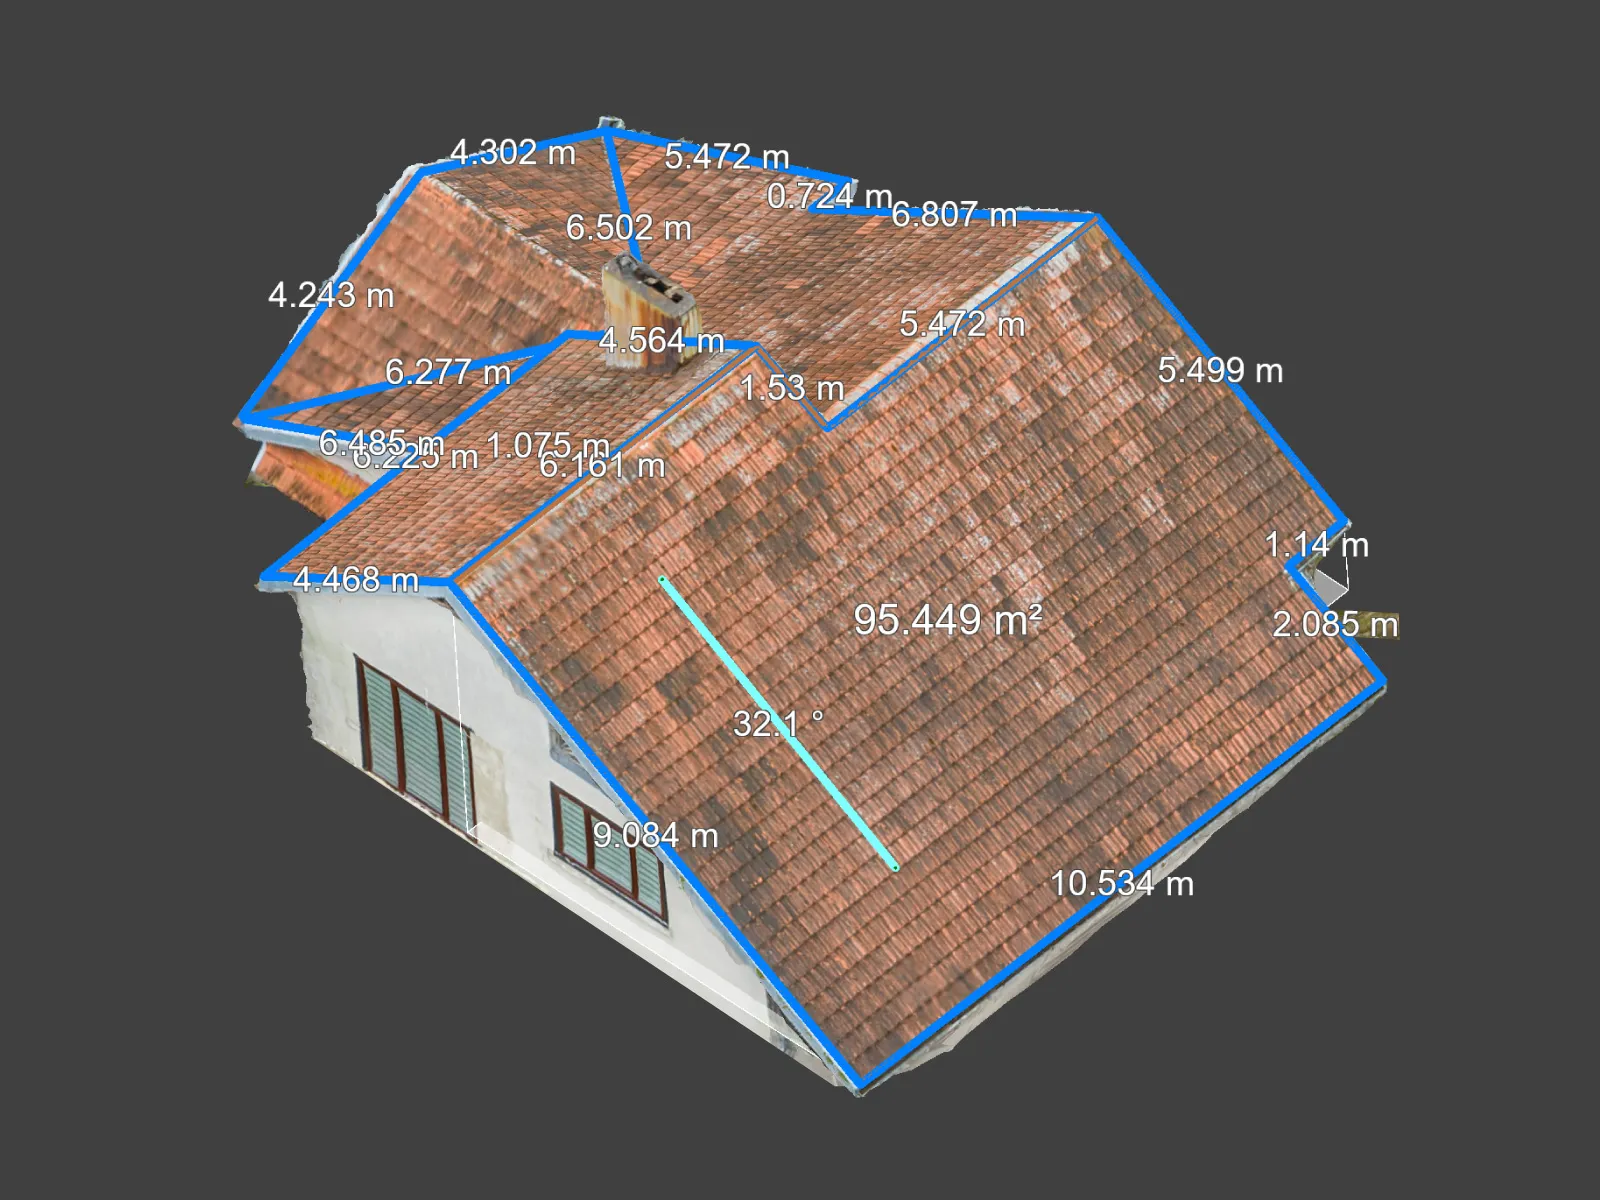 There is no need to use lasers, tape measures, or any of the less accessible scanning techniques like LiDAR. Take a bunch of photos, bring those to the software, and a digital twin will be on your screen. With Pixpro, we can also create simple reports for easy PDF/printed delivery.
 Data Export
Finally, when it comes to data use, there are export options. Each layer we make or draw in Pixpro can be exported using the most popular and compatible formats, from 3D models to solar simulation software like PV*Sol to line and polygon drawings to CAD of your choice.
 Conclusion
The Mavic 4 Pro is an excellent tool for roof scans. It provides the best image quality, flight stability, and wind resistance in the consumer drone market. The DJI Air 3S and Mini 4 Pro come quite close as well, as smaller-class drones. The fundamentals for all flying cameras remain the same. Pair these with Pixpro Waypoints and Pixpro photogrammetry software, and we have a complete roof scanning solution.
Photographer - Drone Pilot - Photogrammetrist. Years of experience in gathering data for photogrammetry projects, client support and consultations, software testing, and working with development and marketing teams. Feel free to contact me via Pixpro Discord or email (l.zmejevskis@pix-pro.com) if you have any questions about our blog.
Related Blog Posts
Our Related Posts
All of our tools and technologies are designed, modified and updated keeping your needs in mind
DJI Lito X1 for Roof Photogrammetry: Solar and Inspection Use Case
Small drones are the best tool for residential and even commercial roof photogrammetry. They are quiet, attract less attention, are easier to fly fully within regulations, and they are affordable.
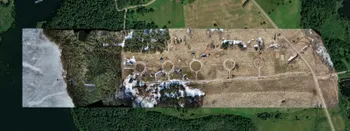
Large Property Photogrammetry – Real Estate Development Use Case
Property scans are one of the most common use cases, especially for our software. Pixpro is affordable and works well with RTK data and ground control points when necessary.

Handheld Photogrammetry Construction Interior Scan Use Case
Interior 3D scanning can be useful in a myriad of ways. In this article, I present a scan of a residential building construction site, with its foundation walls and roof almost complete. Further construction will require some visualizations and design according to “the fact.”
Ready to get started with your project?
You can choose from our three different plans or ask for a custom solution where you can process as many photos as you like!
Free 14-day trial. Cancel any time.