.svg@webp)
Better Photogrammetry Results Without Buying New Gear
 Paulius Bagdonas

The Short Version
If you only have a minute, here is the whole argument:
- The gap between a mediocre scan and a great one is rarely the hardware. It is the pipeline around it.
- Capture is where most quality is won or lost: sharp photos, correct exposure, 80/80 overlap, full coverage, and a buffer around the subject. Patience and good light cost nothing.
- Cull before processing. Remove blurred, misexposed, and redundant frames; keep everything decent.
- If you shoot RAW, a gentle, uniform development gives the software detail your camera's JPEGs throw away.
- Software settings are the polish, not the foundation. Fix problems at the earliest stage they appear, and keep your software current.
Every time a new drone or camera comes out, the same thought appears: this is the upgrade that will finally fix my results. Sometimes it is even true. But in my experience, the gap between a mediocre scan and a great one is rarely the hardware. The same drone, in more careful hands, routinely produces a visibly better model, tighter measurements, and cleaner orthophotos.
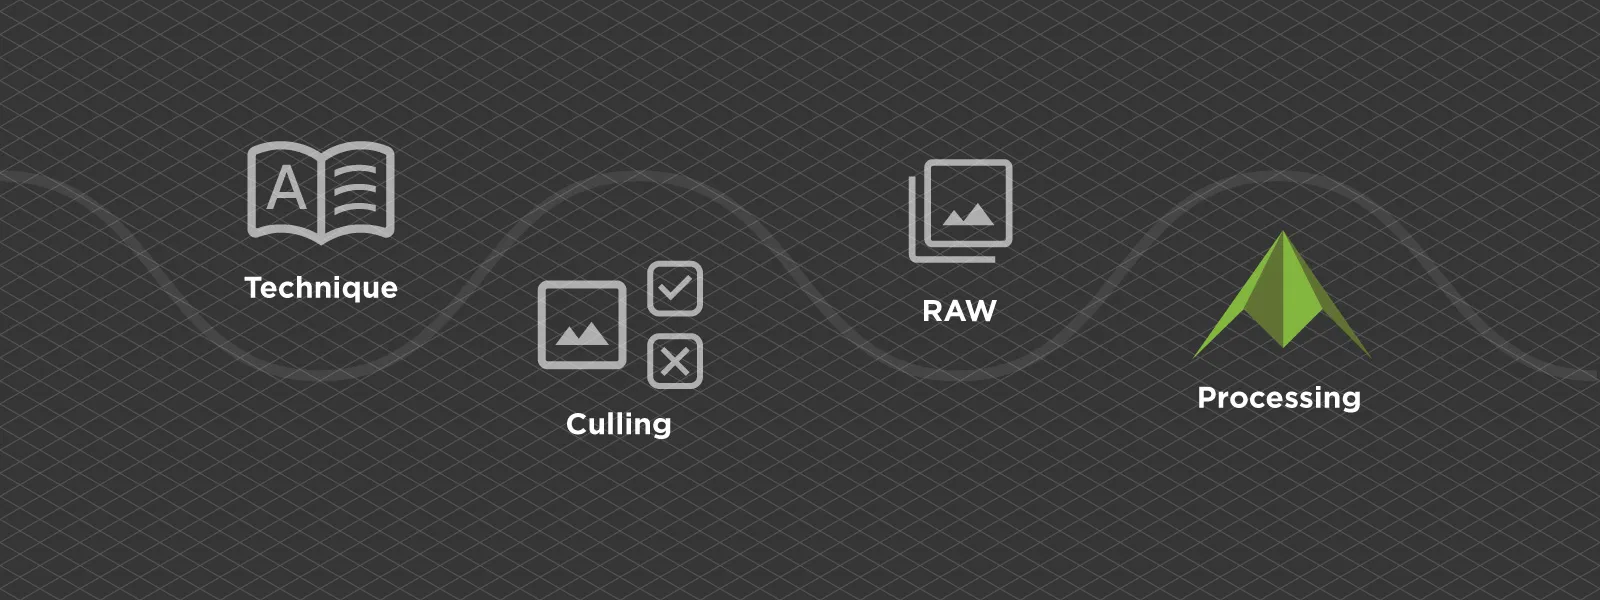 So before spending money, it is worth walking through the whole photogrammetry pipeline and asking where quality is actually lost. There are four stages where you can win it back for free: capture, culling, photo processing, and model processing. In this article I will go through all four, wide rather than deep. Consider it a map, with links to the detailed guides where we have them.
Capture Technique: Where Most Quality Is Won or Lost
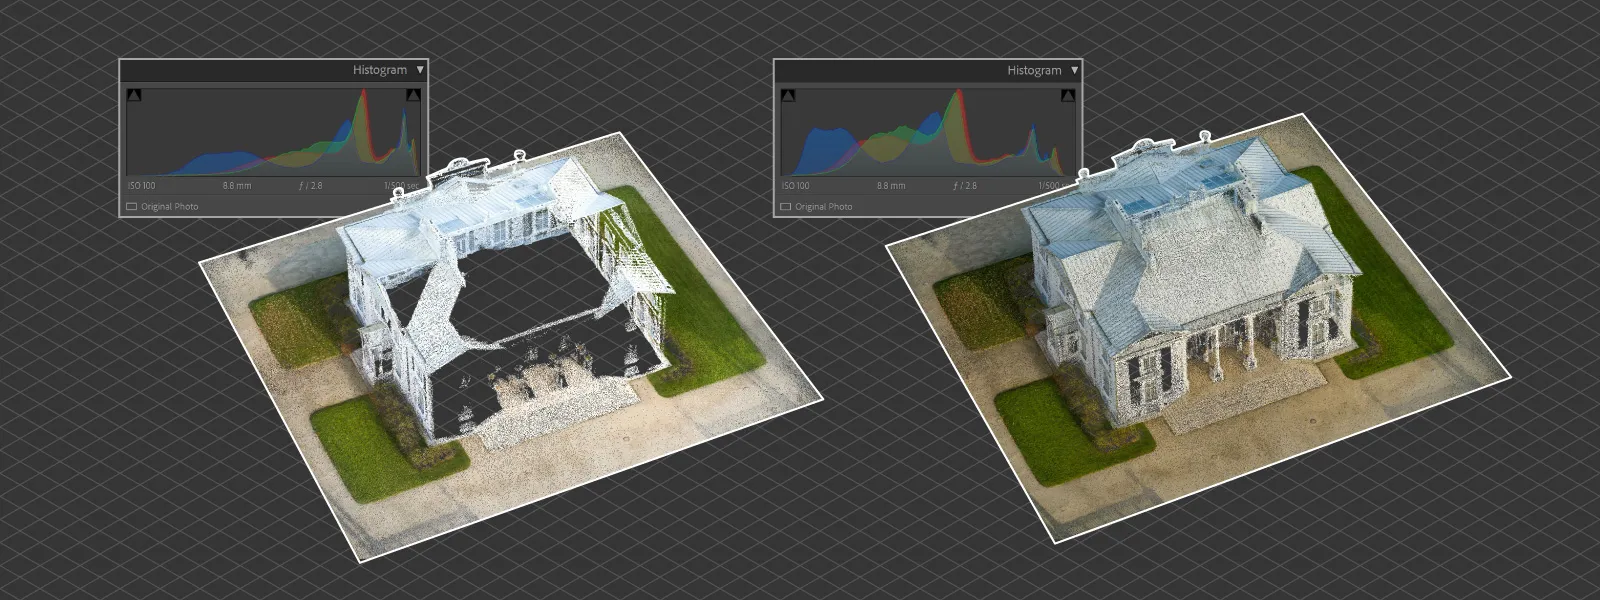
Photogrammetry software can only reconstruct what the photos contain. No setting later in the chain will invent detail that was never captured, which is why capture technique has the highest return of anything on this list.
The fundamentals are simple to state and easy to rush: sharp photos, correct exposure, 80 percent overlap, and full coverage of the subject from every side that matters. A wall you never pointed the camera at will not reconstruct, no matter how many photos you have of the other walls.
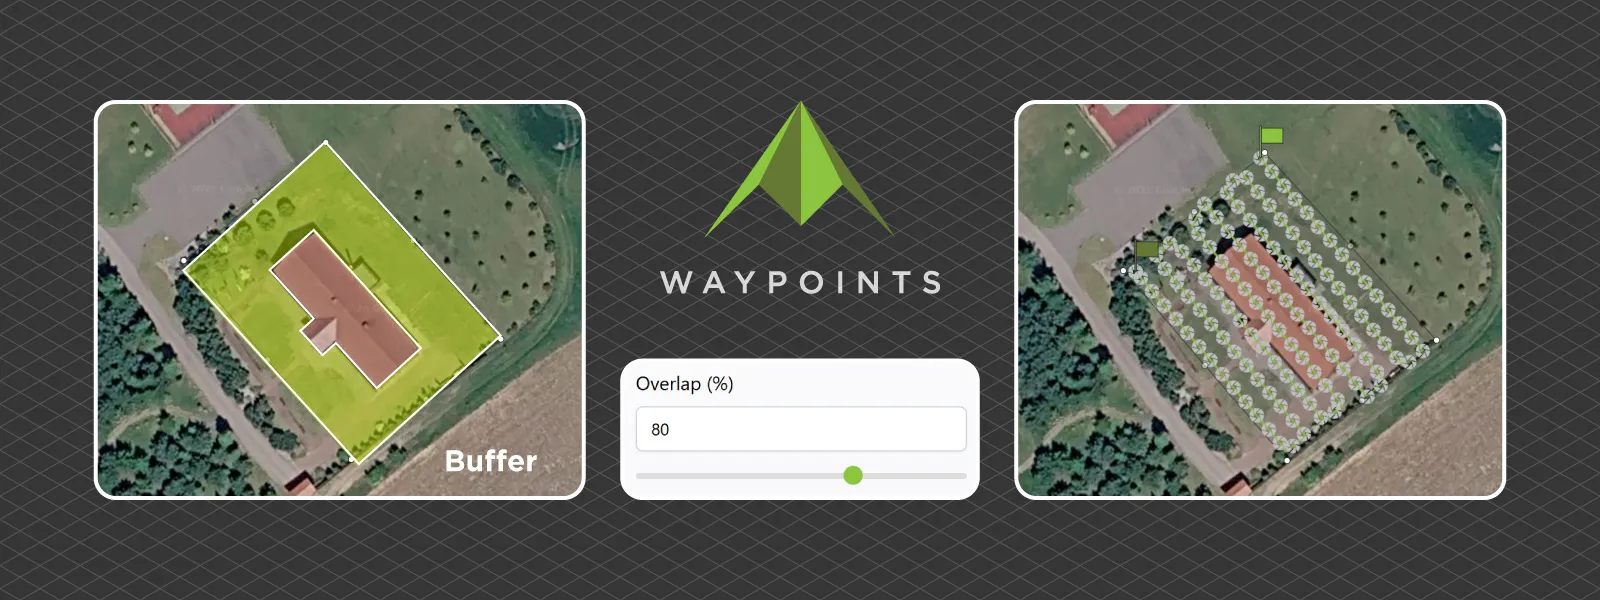
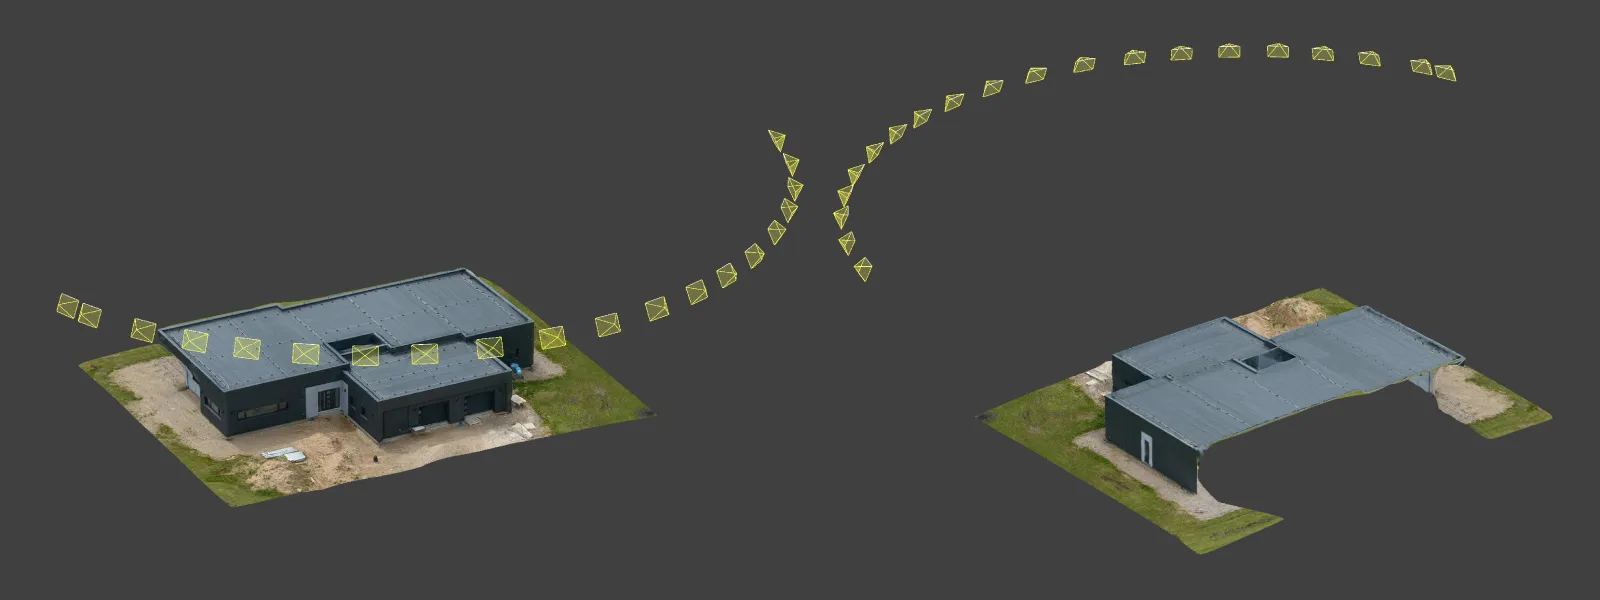 Coverage and overlap are not separate boxes to tick either. Coverage only counts when it is captured at that same 80/80 overlap. A handful of isolated photos of the far side do not connect to the rest of the set, so as far as the software is concerned, that side was never photographed. The same thinking applies at the edges of your scan. Reconstruction quality always degrades toward the border of the photographed area, so plan a buffer on every scan: fly or shoot slightly wider than the thing you care about, so your subject sits in the well-covered middle.
 As for the settings side of capture, we recently published a full photogrammetry settings checklist covering the exact camera and drone numbers, so I will not repeat them here.
Beyond settings, the cheapest upgrades are patience and conditions. Fly or shoot in even, diffused light when you can, since harsh shadows become baked-in dark patches on your model. Wait out the wind. Slow down between photos instead of racing the battery. And plan the mission before takeoff rather than improvising coverage in the air; a planner like Pixpro Waypoints guarantees the overlap you think you are getting. None of this shows up on a spec sheet, and all of it shows up in the model.
Photo Culling: The Step Almost Everyone Skips
More photos is not better. Better photos is better. Photogrammetry software matches features between images, and every blurry, misexposed, or redundant frame you feed it is a chance to introduce noise into that matching, on top of longer processing times.
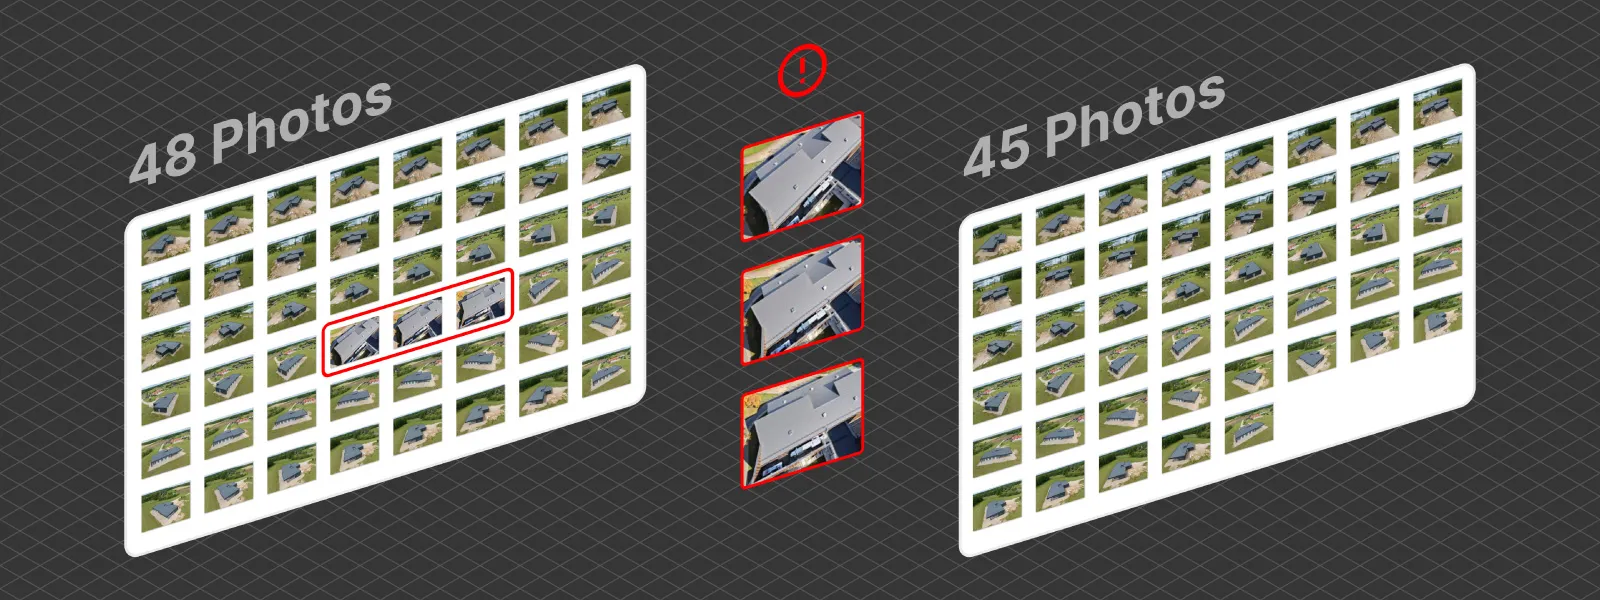 So before processing anything, look through your set and remove the obvious offenders: motion-blurred frames, shots where autofocus missed, badly over or underexposed images, and accidental photos of your feet or the horizon during turns. On a typical drone mission this takes ten minutes. If two photos are nearly identical because the drone paused, one of them can go too.
 The goal is not to cut the set down aggressively. Overlap is sacred, and deleting too much will hurt far more than a few soft frames ever would. Cull the clearly bad, keep everything decent, and when in doubt, keep it. This is quality control, not dieting.
RAW and JPEG Processing: Free Detail Hiding in Your Files
If you shoot RAW, you are sitting on quality most people never extract. A RAW file (the unprocessed sensor data) holds more dynamic range and finer detail than the JPEG your camera would have produced. Developing those files yourself (lifting shadows, recovering blown highlights, correcting exposure) hands the photogrammetry software an image with usable texture in places that were previously pure black or white. We covered why this matters in the post on dynamic range.
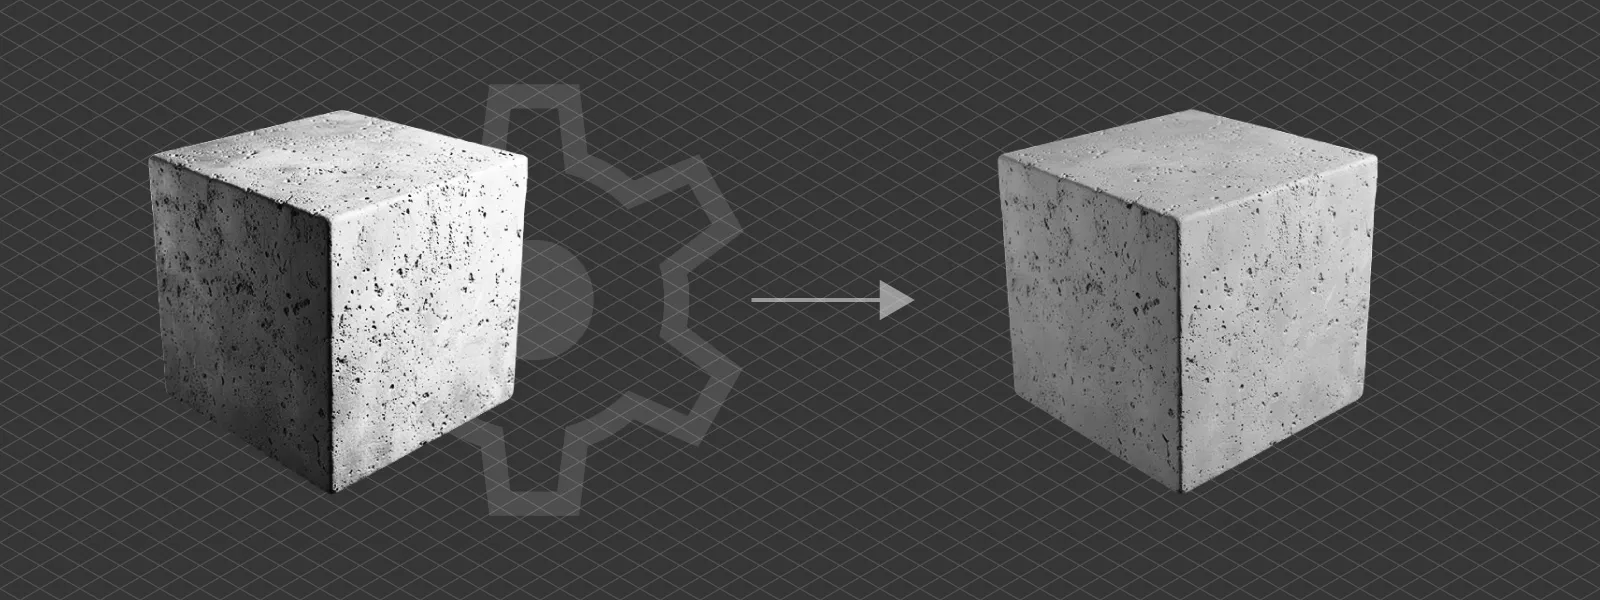 Two rules keep this safe. First, process every photo in the set identically, applying the same adjustments to all frames, which is one batch operation in any RAW editor. Second, be gentle. Moderate shadow lifts and highlight recovery help; heavy sharpening, aggressive noise reduction, and creative color grading actively hurt, because they smear or invent pixel-level detail that the software then tries to match.
 With JPEGs only, you lose most of that flexibility. What remains is emergency processing: you can recover some shadows or nudge the color balance, but not much more, because the camera already threw the rest of the data away.
Model Processing: Photogrammetry Software Settings and Workflow
The last stage is the one people fiddle with first, usually because it does not require leaving the desk. Software settings do matter, but they are the polish, not the foundation. They determine how much of your captured quality survives, not how much exists.
The workflow habits pay off more than any single slider. In Pixpro photogrammetry software that means checking how your photos aligned before judging the result, and cropping the reconstruction region to your actual subject instead of processing the whole scene. After reconstruction, spend a few minutes on the dense point cloud with the built-in cleaning tools. Every stray point you remove there is an artifact that never makes it into the mesh.
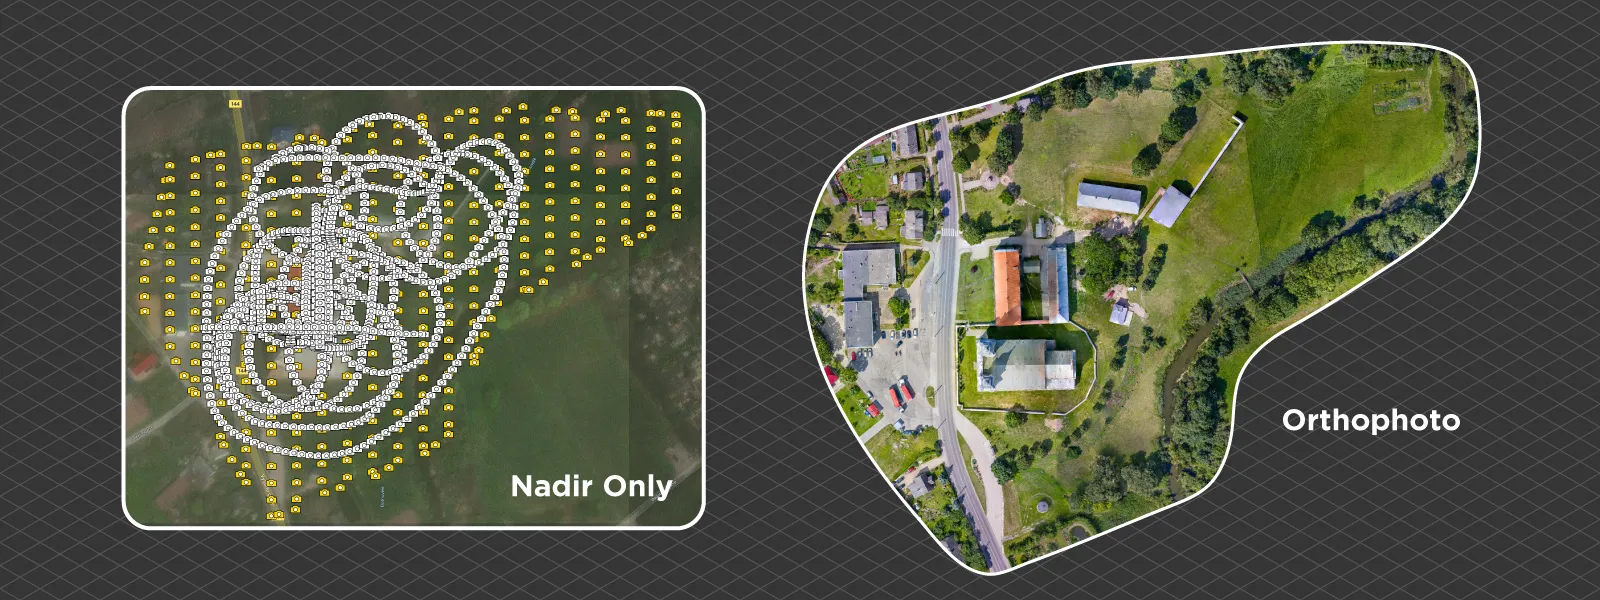
 A few settings earn their keep too. Reconstruction speed in Pixpro is a straight trade: fast, medium, and slow, with slow giving the algorithm the best chance at a clean result. Once in a while, slow will pull a usable model out of a photo set that falls apart at the faster two. A rare save, but cheaper than a reflight. Texture size is another quiet one; bumping it up costs only processing time, and a model with the same geometry can look noticeably better for it. And when a set mixes nadir and oblique photos, Pixpro lets you build the orthophoto from the nadirs alone. You keep a true, orthorectified map and skip most of the artifacts the obliques would have dragged into it.
 Higher quality settings extract more from good data, but they extract nothing from bad data except longer processing times. If a project looks poor at default settings, the answer is almost always earlier in this pipeline, not in the quality dropdown.
Then there is the boring advice nobody wants to hear: keep your software up to date. Photogrammetry algorithms improve steadily, and reprocessing an old dataset in a current version is the closest thing to getting better gear without paying for it.
Conclusion
New gear is enjoyable, and there are situations where it is the real answer. But it is the last multiplier in a chain of four, and the most expensive one. Careful capture, ten minutes of culling, a uniform RAW development pass, and a sane processing workflow will do more for your next project than a new drone.
Run your next project through all four stages deliberately and compare it to your last one. The difference will not look like you changed your technique. It will look like you changed your camera.
Frequently Asked Questions
Does a better camera improve photogrammetry accuracy?
Not directly. Accuracy comes from capture geometry, overlap, and referencing, meaning GPS or ground control points, not from the sensor. A better camera mostly buys finer texture detail and more forgiving low-light performance.
Does a faster computer produce better 3D models?
No, only faster ones. The same photos at the same settings produce the same model on any machine; hardware changes processing time, not quality.
How many photos should I delete when culling?
Usually only a few percent of the set. Remove clearly blurred, misexposed, or accidental frames and stop there. Deleting aggressively breaks overlap and does more damage than a few soft frames ever would.
Is it safe to edit photos before photogrammetry?
Yes, as long as the adjustments are moderate and identical across the whole set. Exposure, shadow, and highlight corrections help; heavy sharpening, aggressive noise reduction, and creative color grading hurt the reconstruction.
Related Blog Posts
Our Related Posts
All of our tools and technologies are designed, modified and updated keeping your needs in mind
Workstation PC 2026 – PC Build Hardware Advice
Another year, another look at the workstation PC market. The thing is, last year's advice still mostly stands, and that tells you everything about 2026. Almost nothing got faster, and almost everything got more expensive.
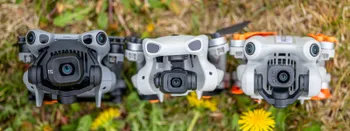
DJI Lito X1 vs Mini 5 Pro vs Mini 4 Pro: Which Sub-250g Drone Should You Buy?
Three current sub-250 gram DJI drones, almost identical on paper, all sitting on the same shelf. The DJI Lito X1, the Mini 4 Pro, and the Mini 5 Pro each have a clear value proposition, but the differences are small enough that picking the right one is a real question.
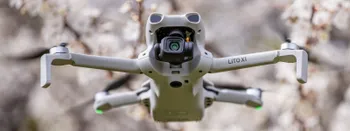
DJI Lito X1 Review: Specs, Flight Impressions, and How It Compares to the Lito 1
DJI recently launched a new drone series called Lito. It consists of two drones, the Lito 1 and the Lito X1. Both are sub-250 gram drones aimed at the more affordable end of the small drone segment.
Ready to get started with your project?
You can choose from our three different plans or ask for a custom solution where you can process as many photos as you like!
Free 14-day trial. Cancel any time.
Welcome to Pixpro
Sign in
And access your account.