.svg@webp)
Comparing Surfaces in Pixpro Part 1 - Creating Custom GCPs
 Lukas
Zmejevskis
Lukas
Zmejevskis

Comparing surfaces from photogrammetric scans is a ubiquitous workflow in some industries. Our Pixpro photogrammetry software allows us to compare a few surfaces in a uniquely easily accessible manner. Not only that, but we can also precisely compare projects without using high-accuracy survey-grade GPS data such as RTK drones or GCPs. In this blog post, we will explain the rationale behind such a workflow and demonstrate the first step in creating reference projects and “fake” GCPs, as we call them.
Potential Use Cases
The most common use case for this workflow is stockpile measurements and monitoring. If you want to measure volumes on surfaces that are not perfectly level or flat, having an empty reference surface of your lot is the way to go. Nothing is more accurate than comparing factual surfaces to factual changes (like freshly deposited piles of material). The same principles apply to construction site monitoring, long-term object or landscape observations, visual comparison between different moments in time, and so on.
Initial Project
The comparison workflow begins with the first scan. Here, we must add a disclaimer that using survey-grade GCPs, RTK drones, and all of the more expensive equipment meant for such things will always produce the best results combined with good technique. But with our workflow, you can either increase the accuracy of RTK-level data or get accurate enough results even with consumer-grade drones.
The initial scan of the area in question should be done exceptionally well. So, following photogrammetry fundamentals, we require:
1. Perfect 80/80 percent overlap and 100 percent coverage of the subject or area.
2. Nadir and oblique coverage of the site. It means with photos from all angles.
3. Perfect image quality of all pictures. Clear images with good exposure.
4. The scan should be made in good lighting conditions in the shortest period possible.
5. The drone should have good GPS reception during this flight.
To summarize - a well-made scan is the main requirement to build a solid foundation for future comparisons. Ideally - the scan should be repeatable in an identical manner, like saving a flight plan. If not, all basic settings should be noted, such as flight altitude, flight speed, and camera settings, and used accordingly for all subsequent scans.
Processing Photos
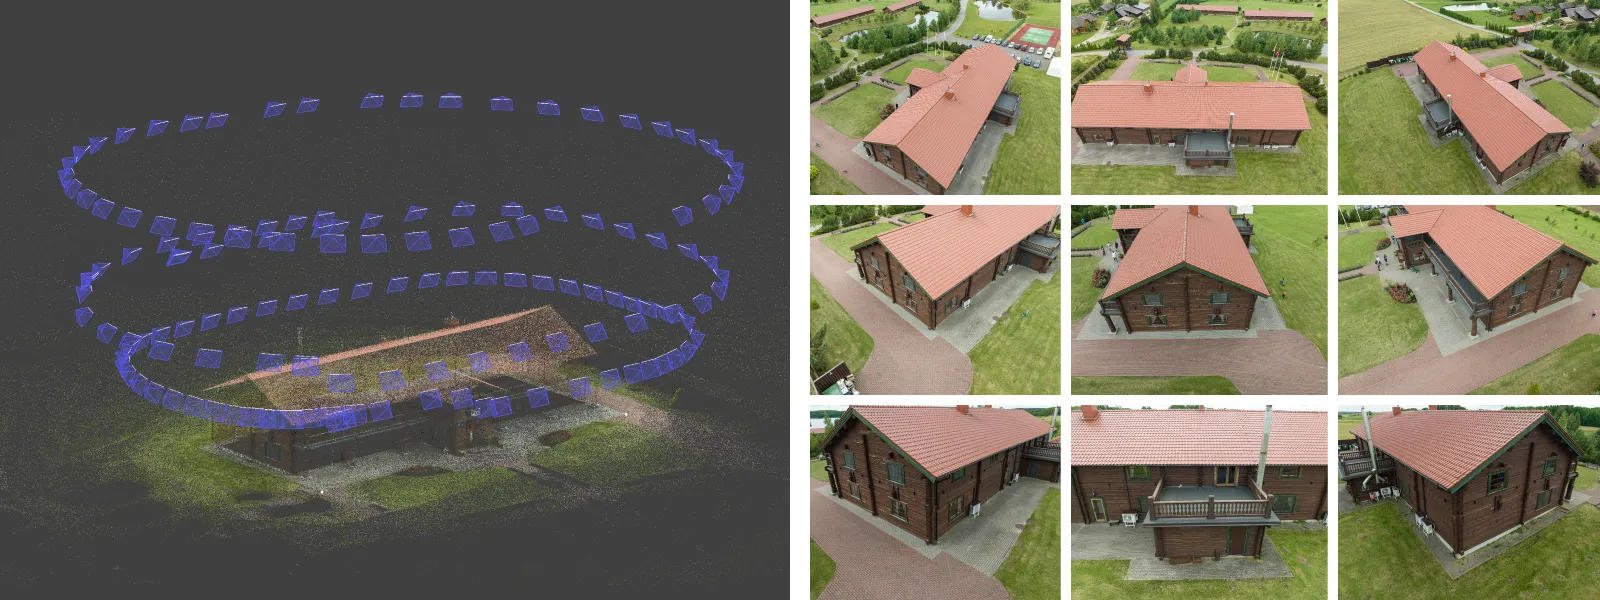
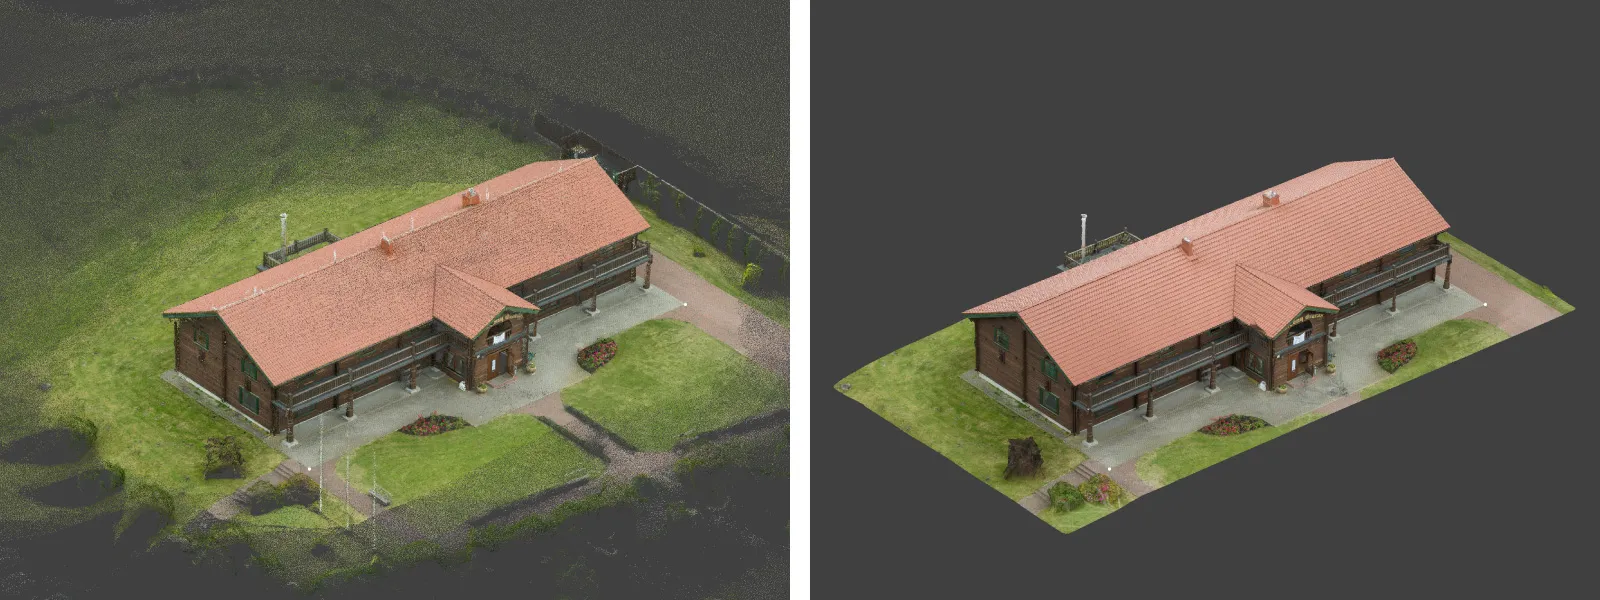
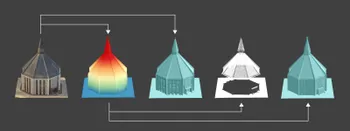
In this article, we use a simple example processed in default settings to illustrate the workflow for the first step. We are using a building scan with plenty of stable, distinct spots around it. These can be pavement brick patterns, building foundations, utility hole covers, etc. This project is simple but well made, with robust 3D reconstruction and clear high-quality photos made with DJI Mavic 3.
Choosing GCP Locations
To use the initial project as a reference, we will need to choose places to create our GCPs. For that, we need to use either dedicated places we set up physically on-site or stable locations that will remain stable in the future. (or a mix of the two)
To set up a dedicated spot for control, you will need something heavy that will not obstruct any work on the site and can not be easily damaged. If we are working on a temporary construction site - a heavy stone, movable only by heavy machinery, is usually the easiest solution.
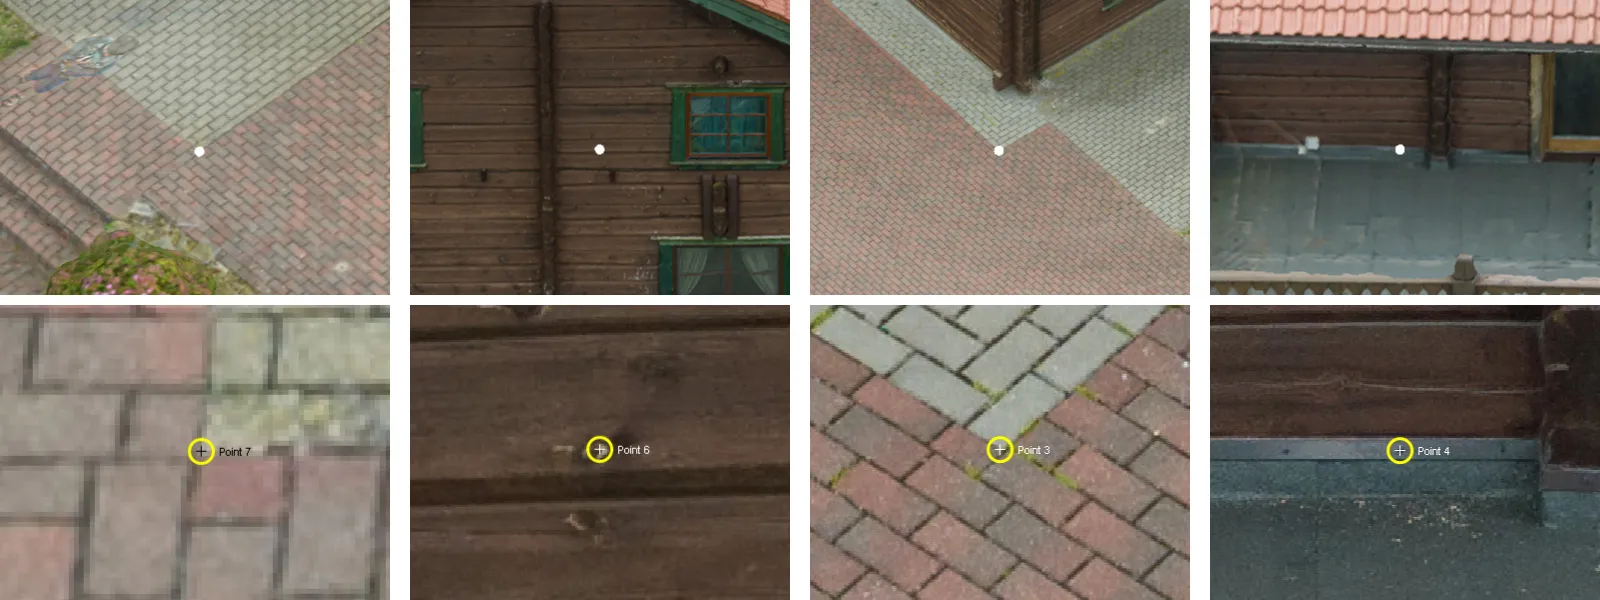
If we do not want to change the environment - we choose locations that are definitely fixed and stable. For example, we can select corners of buildings or structures, maintenance hole covers, and permanent concrete or metal fixtures. The point is to choose something extremely stable.
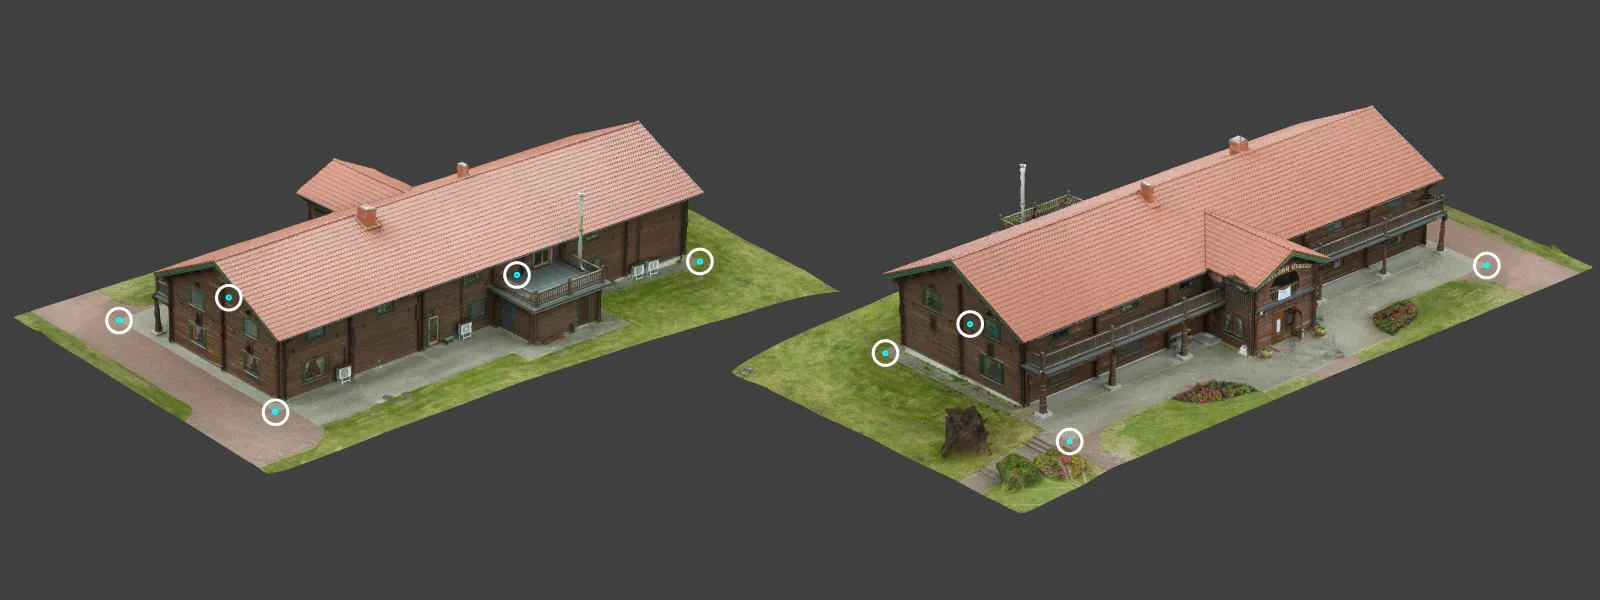
These conditions dictate the spots available for us. Still, we need to ensure as close to uniform site coverage as possible and choose spots in different elevations. This helps to create a more robust framework of reference down the line. So, if you can adhere to this advice - definitely do. If there is no way to do that without compromising the site, do as best you can.
If you are a surveyor, you are probably asking, why not just measure these places with a professional GCP RTK rover and have robust actual GCP data forever? And the answer is you definitely can and should.
All the advice above applies if you are measuring actual ground control points on the site and 90 percent of the workflow remains the same. This article aims to show that if you cannot obtain real survey grade GCPs - you can still compare surfaces of two different sites, in many cases, even without leaving your computer seat. Even if both or more scans are already done, comparing the surfaces is an afterthought.
Workflow in Pixpro
The workflow in Pixpro software itself is dead simple. If you have set up your reference spots on site just for this purpose and made the scan - you need to find these spots and place points on them using projections.
Suppose you have not set up dedicated physical spots on site. In that case, you can choose reference spots on a processed project. Open any 3D layer you like and find stable structures according to our advice. Then, the process is the same - you need to mark these spots with points using projections in photos.
Once done, you can export these points and use them as ground control points in a future project. You can export all points by simply right-clicking on the point layers group, giving the file a name, and choosing our .pxg file format. Now, the first step is complete. Below is a video demonstrating the entire workflow without including the data processing.
Conclusion
The result of the first step of creating GCPs is the initial project and a GCP file we can use in future projects for referencing. In the next article, we will tackle a real-world use case with a real example for surface comparison. The second part will involve using the GCPs obtained with the method described in this article and then exporting and importing data to the initial project. We will also learn to use Pixpros timeline features to take multiple measurements.
Photographer - Drone Pilot - Photogrammetrist. Years of experience in gathering data for photogrammetry projects, client support and consultations, software testing, and working with development and marketing teams. Feel free to contact me via Pixpro Discord or email (l.zmejevskis@pix-pro.com) if you have any questions about our blog.
Related Blog Posts
Our Related Posts
All of our tools and technologies are designed, modified and updated keeping your needs in mind

Why Choose Pixpro Photogrammetry Software? Practical Comparison
There is no shortage of photogrammetry software today. From well established industry tools to newer cloud based solutions, the choice is not exactly obvious, especially for someone just getting started. Most options promise high accuracy, automation, and ease of use, and to some extent they all del
3D Point Clouds in Pixpro: How to Convert and Export Spatial Data
Photogrammetry software produces several types of spatial outputs, but the dense 3D point cloud is the foundation of them all. In Pixpro, the dense point cloud acts as the base dataset from which every other derivative is generated.

How to Create and Import a KML File in Pixpro Waypoints
We are continuing our improvements to the Pixpro Waypoints service and bringing a few small updates. Pixpro Waypoints is a service that allows automatic photogrammetry flights with consumer grade DJI drones using a bit of workaround magic.
Ready to get started with your project?
You can choose from our three different plans or ask for a custom solution where you can process as many photos as you like!
Free 14-day trial. Cancel any time.