.svg@webp)
Large Property Photogrammetry – Real Estate Development Use Case
 Lukas
Zmejevskis
Lukas
Zmejevskis
Property scans are one of the most common use cases, especially for our software. Pixpro is affordable and works well with RTK data and ground control points when necessary. I would argue it is one of the easiest pieces of photogrammetry software to learn for new users.
At the same time, property scans are often one-time jobs. They are done for property owners, developers, or short-term real estate use cases where a quick but accurate snapshot of the site is needed. The use case I will present in this article is exactly that. I will go through the process from the photogrammetry side so you can get a clear idea of what it takes to complete a basic, high-accuracy property development scan.
Challenges of Large Property Photogrammetry
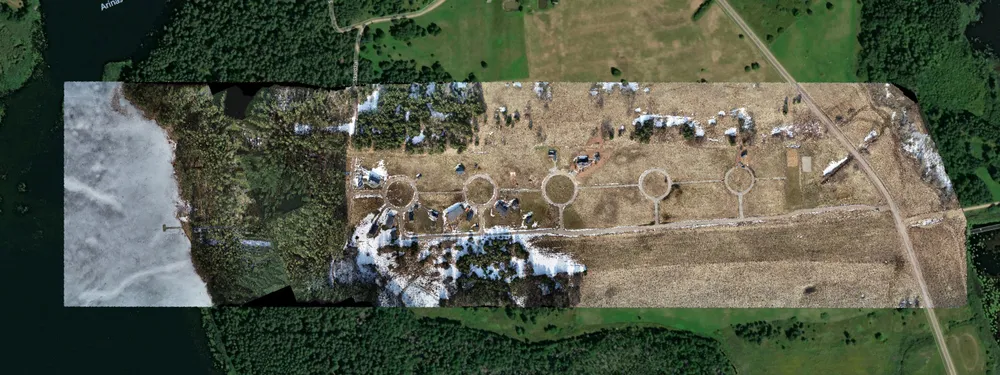
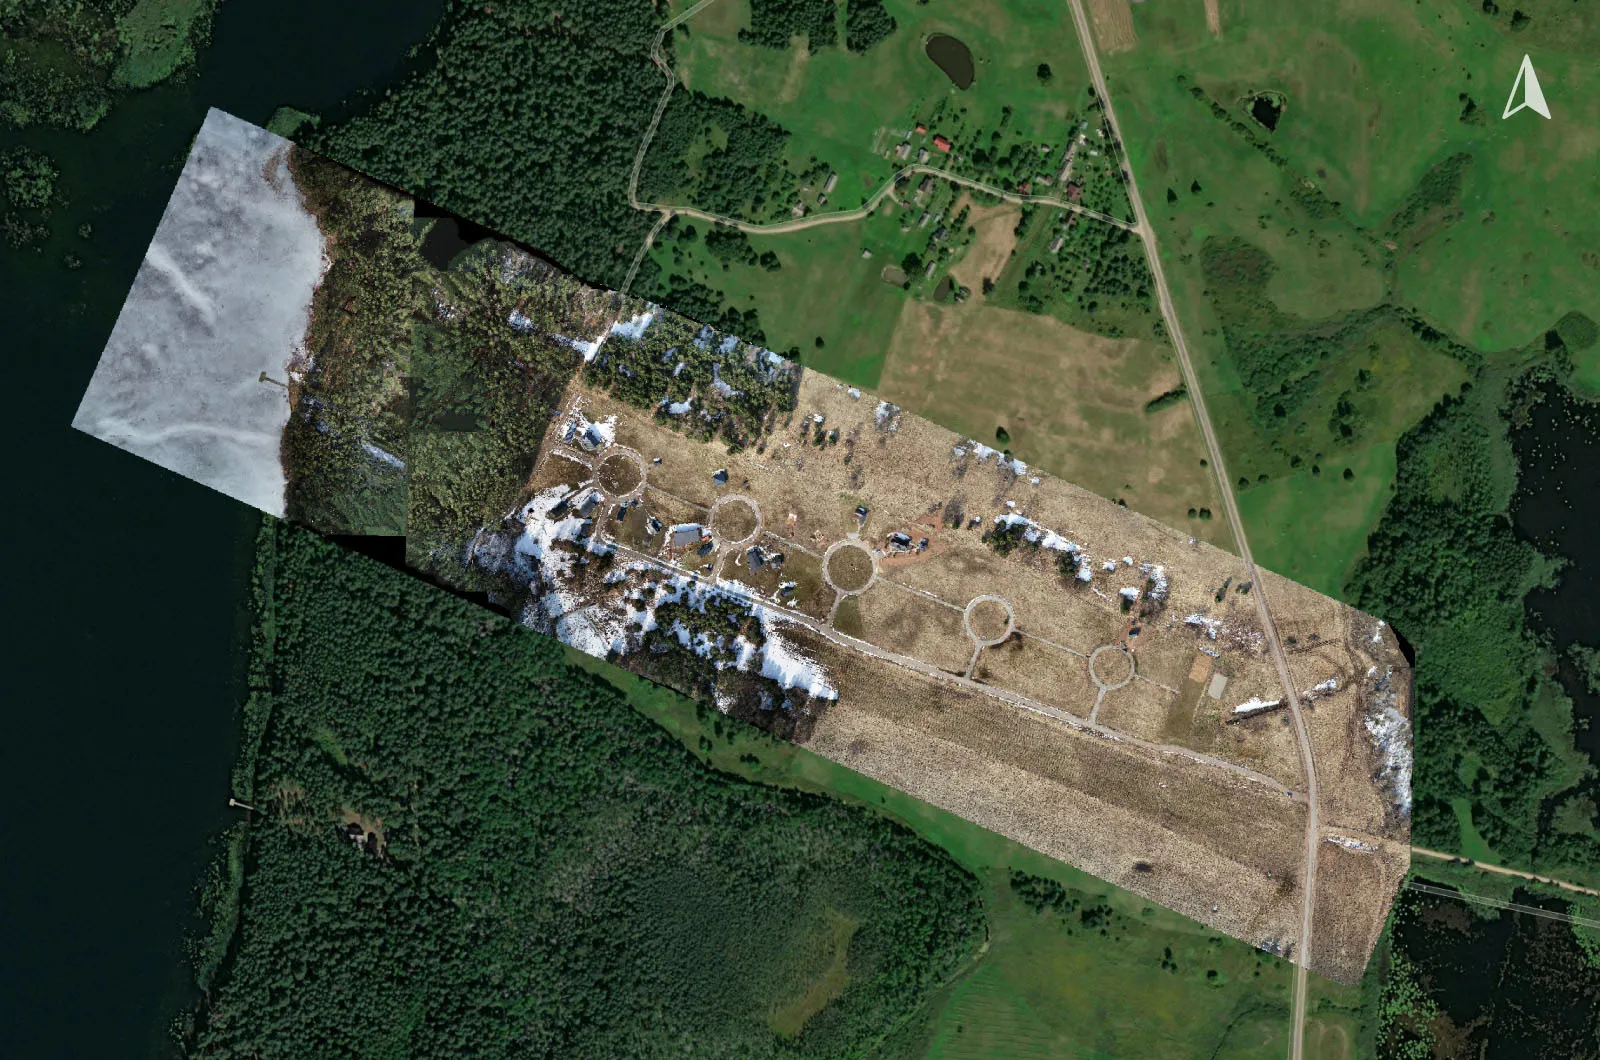
We are dealing with a relatively large property development. A few houses are already built and basic infrastructure has been laid down. The scan itself had already been delayed due to heavy snow cover, which is something we cannot really work around.
Perfect white snow makes an area essentially unscannable for photogrammetry. There is no texture for the software to match between images, which breaks reconstruction. Even if the snow had some texture or if we used a different scanning method, the thickness of the snow layer would introduce measurement errors. So in this case, there was no real alternative but to wait until the snow melted.
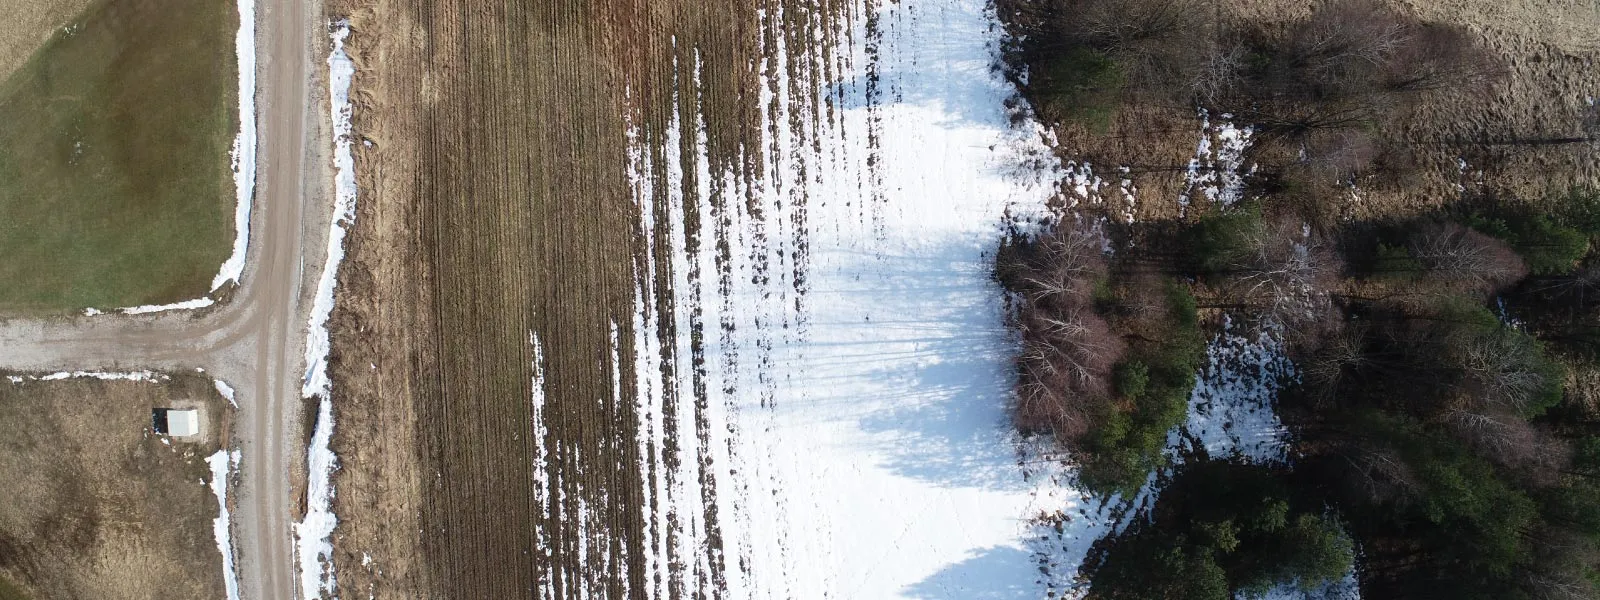 Once the snow was gone, conditions were still not ideal. Temperatures were slightly lower than optimal, which impacts battery performance, but the more significant issue was wind. There were also still some small patches of snow remaining, which may not look perfect in the final 3D scene but are acceptable.
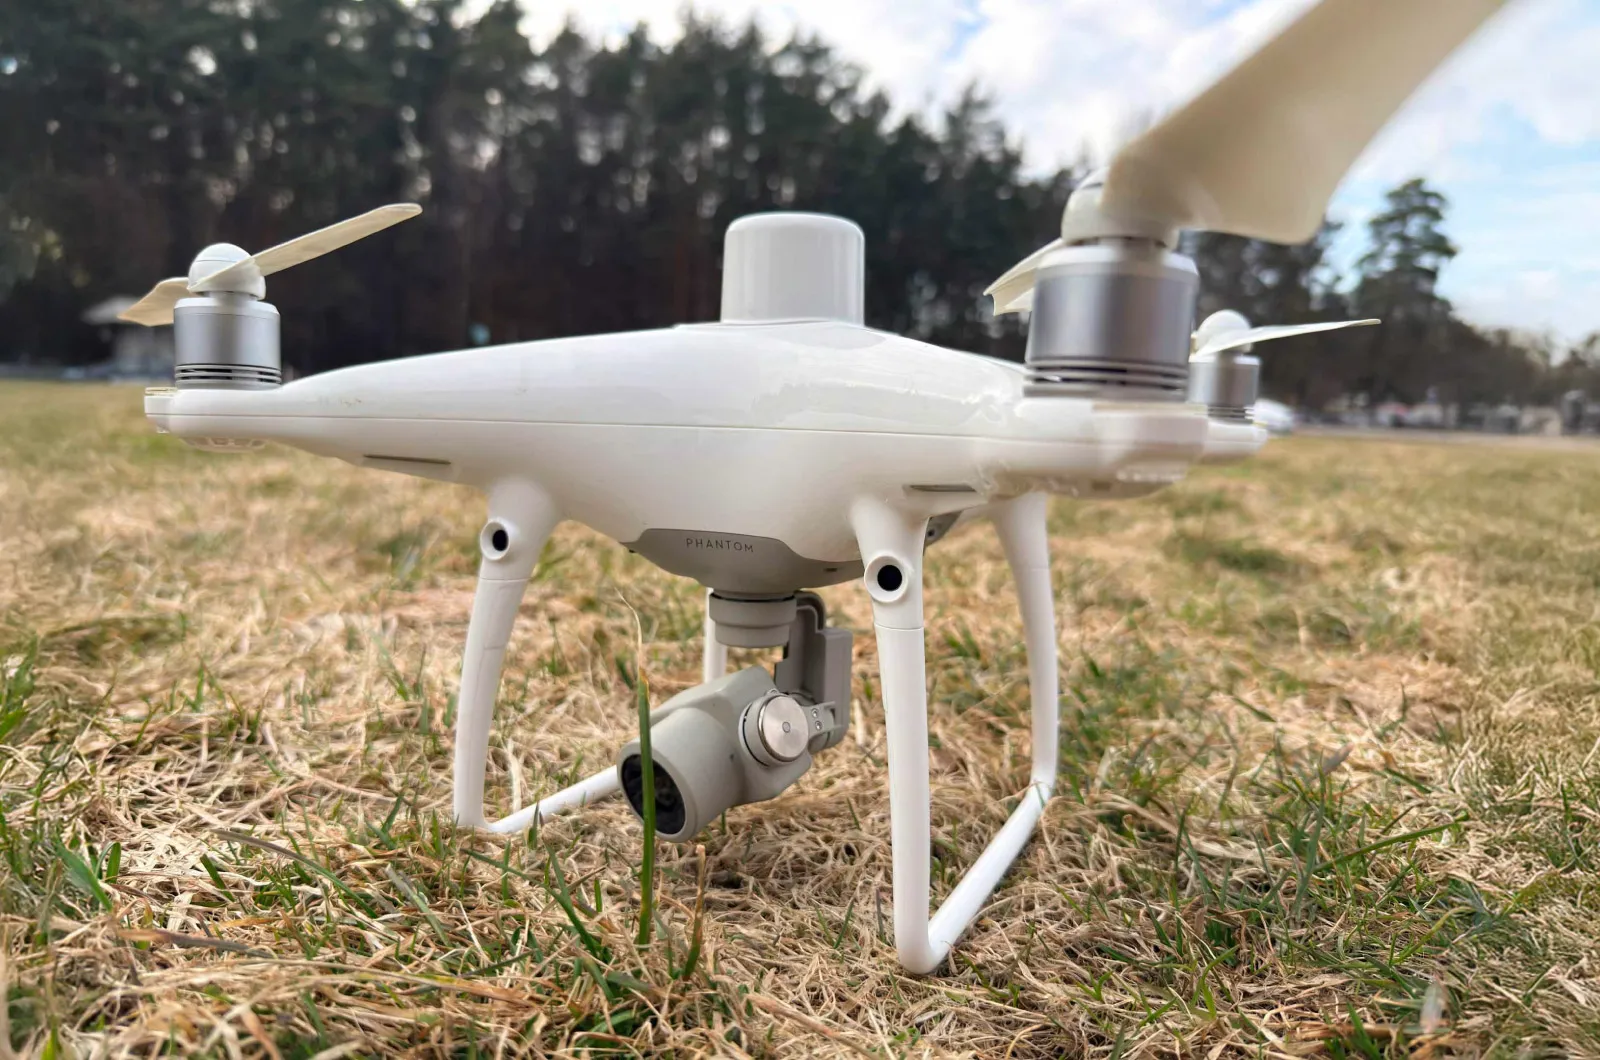 RTK data was required for this project, so I used my Phantom RTK. It handles wind reasonably well, but that comes at the cost of battery life. These batteries are also not new anymore, so their real-world performance is reduced. With that in mind, I had to plan the entire mission carefully so that it could be completed using a maximum of four fully charged batteries.
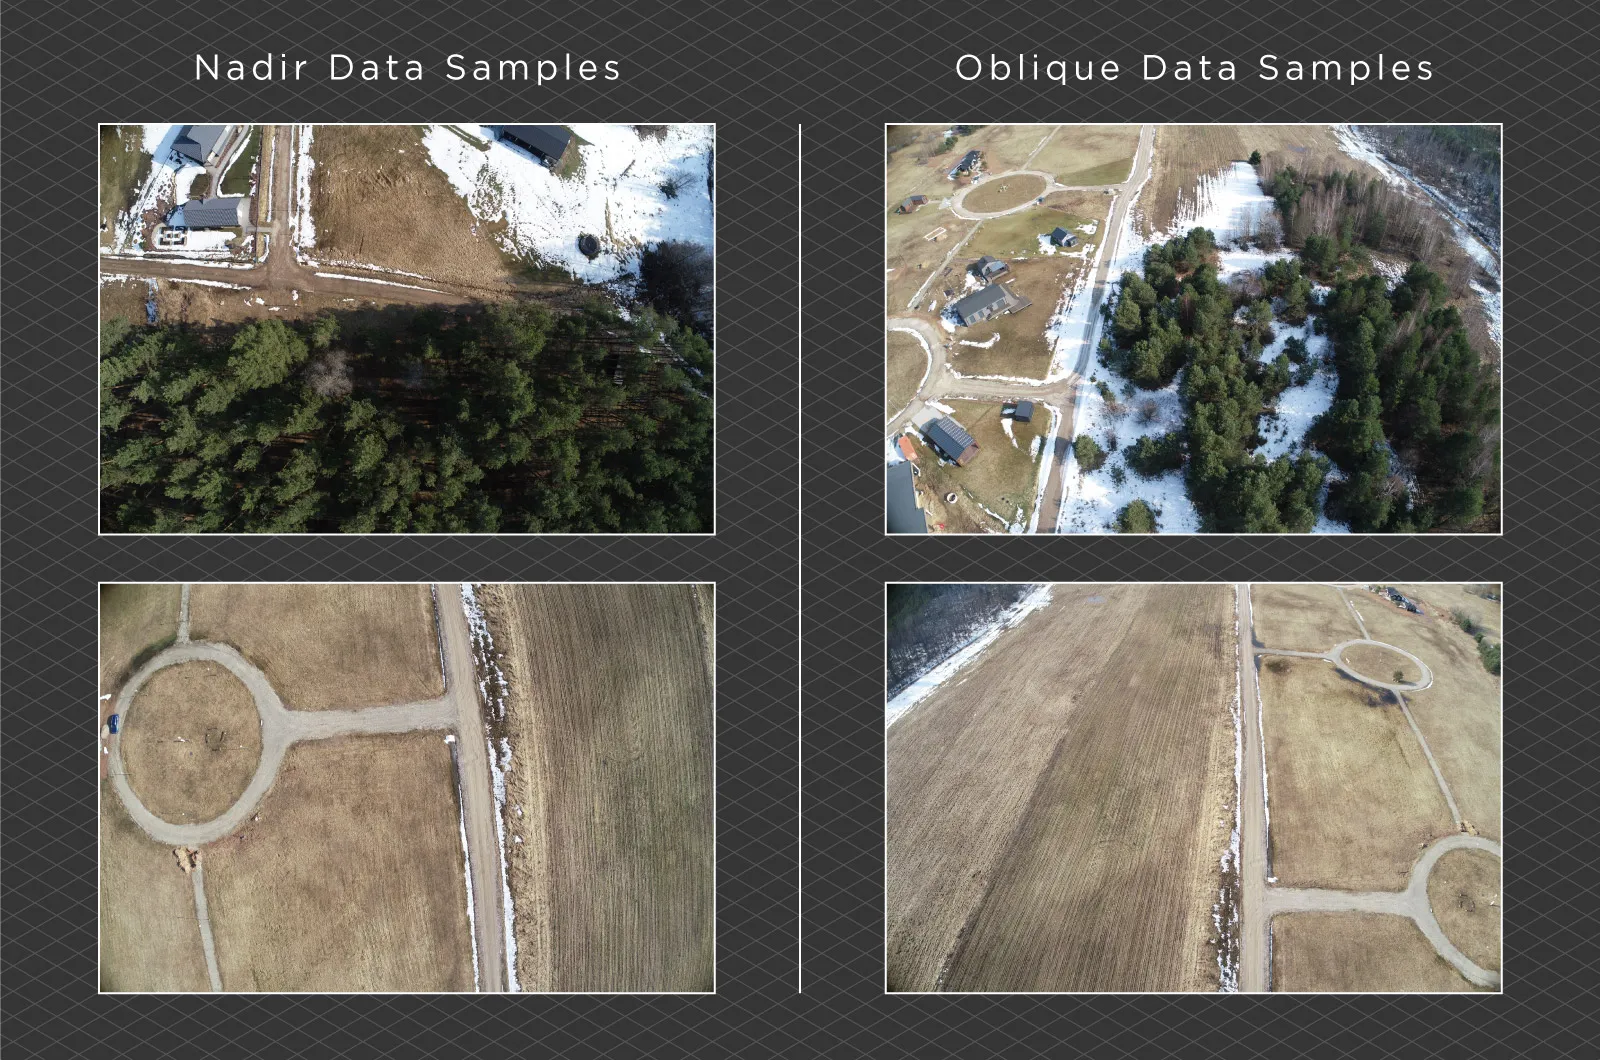
Drone Data Capture and Flight Planning
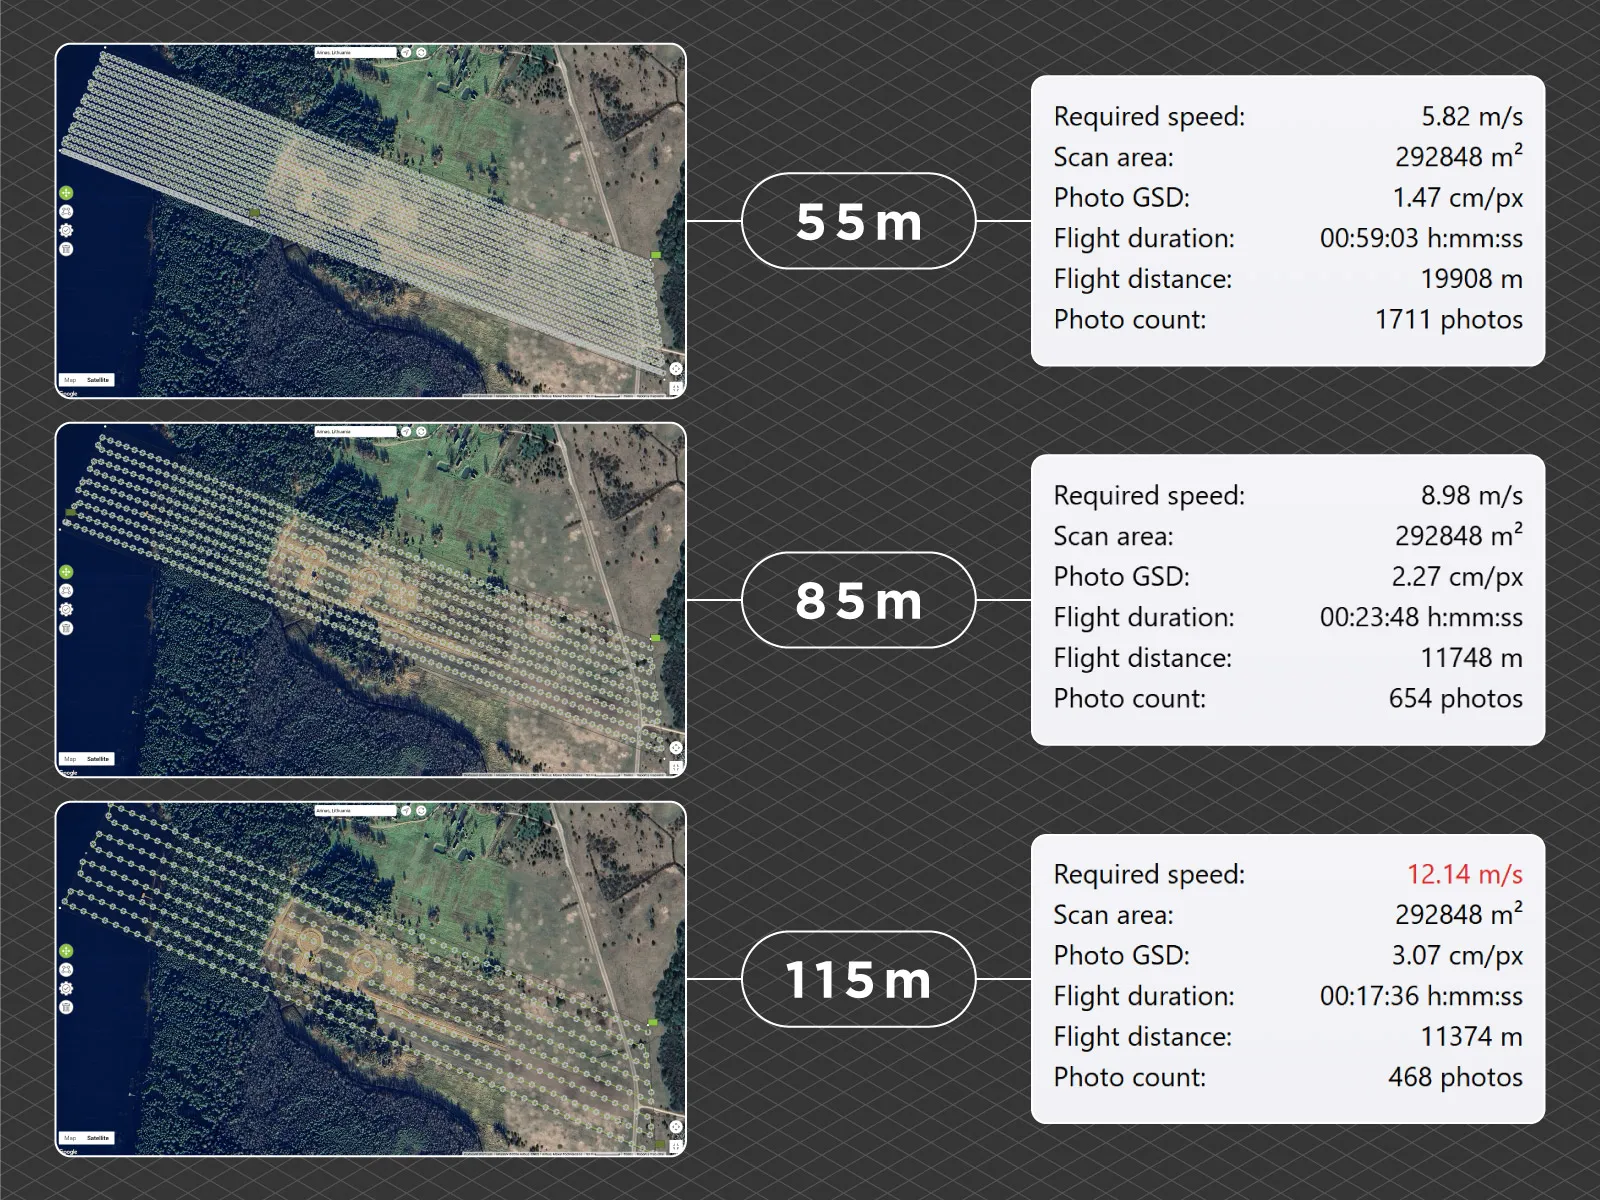
Flight altitude is one of the main variables that determines the scale of the project. The lower you fly, the more photos are required to cover the same area, which increases both flight time and processing time.
Using Pixpro Waypoints, I ran a simulation to estimate the number of images required. Knowing that my Phantom batteries realistically last about 15 minutes each, I settled on an altitude of 85 meters above takeoff. This resulted in approximately 904 images.
 The base grid from DJI Pilot would have produced good enough results, but I added an additional pass using altitude optimization.
Altitude optimization is a feature in the DJI Pilot app used with the Phantom RTK. It adds a line of oblique images to reduce the bowing effect that can appear in standard grid-only flights. This effect can distort the model, especially in larger flat areas. With RTK data, this feature is usually sufficient to maintain good geometric accuracy.
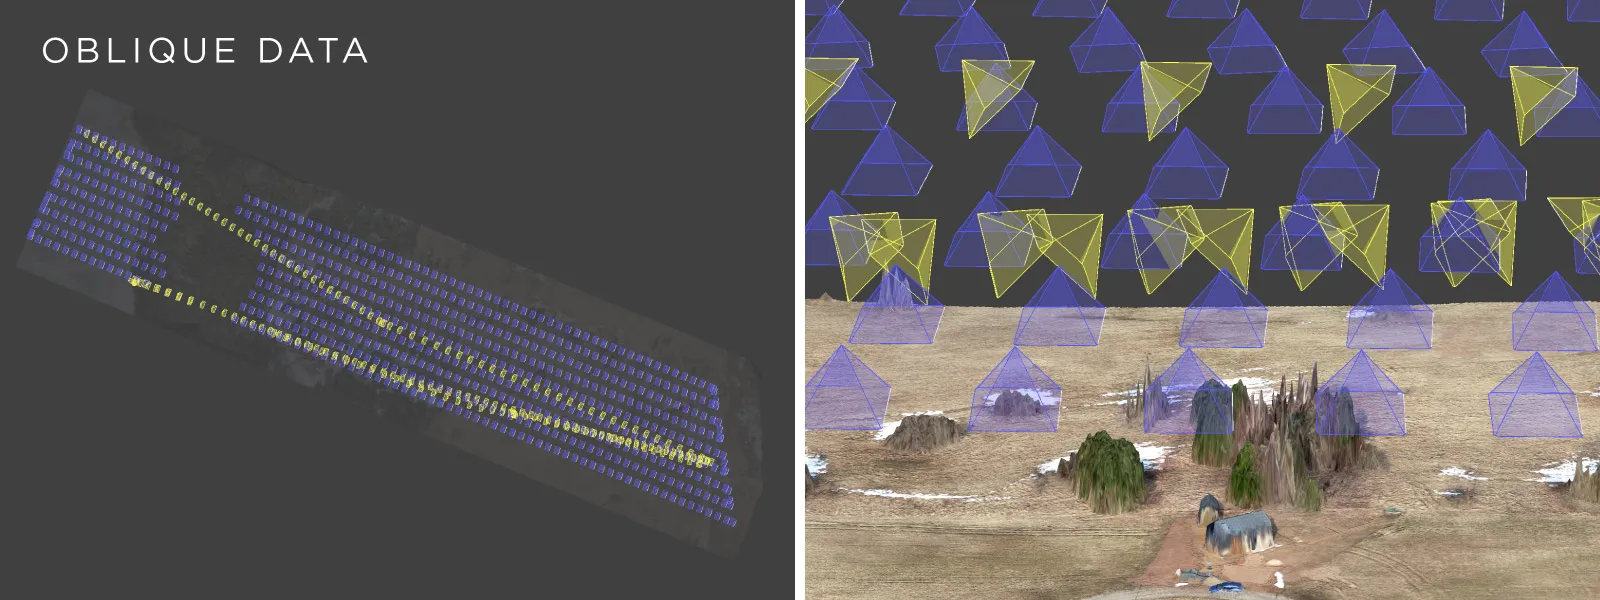 To be safe, I added one more manual pass with the camera tilted at roughly 45 degrees. This provides additional oblique data, to really get ahead of the dreaded bowing effect.
 Photogrammetry Data Processing Workflow
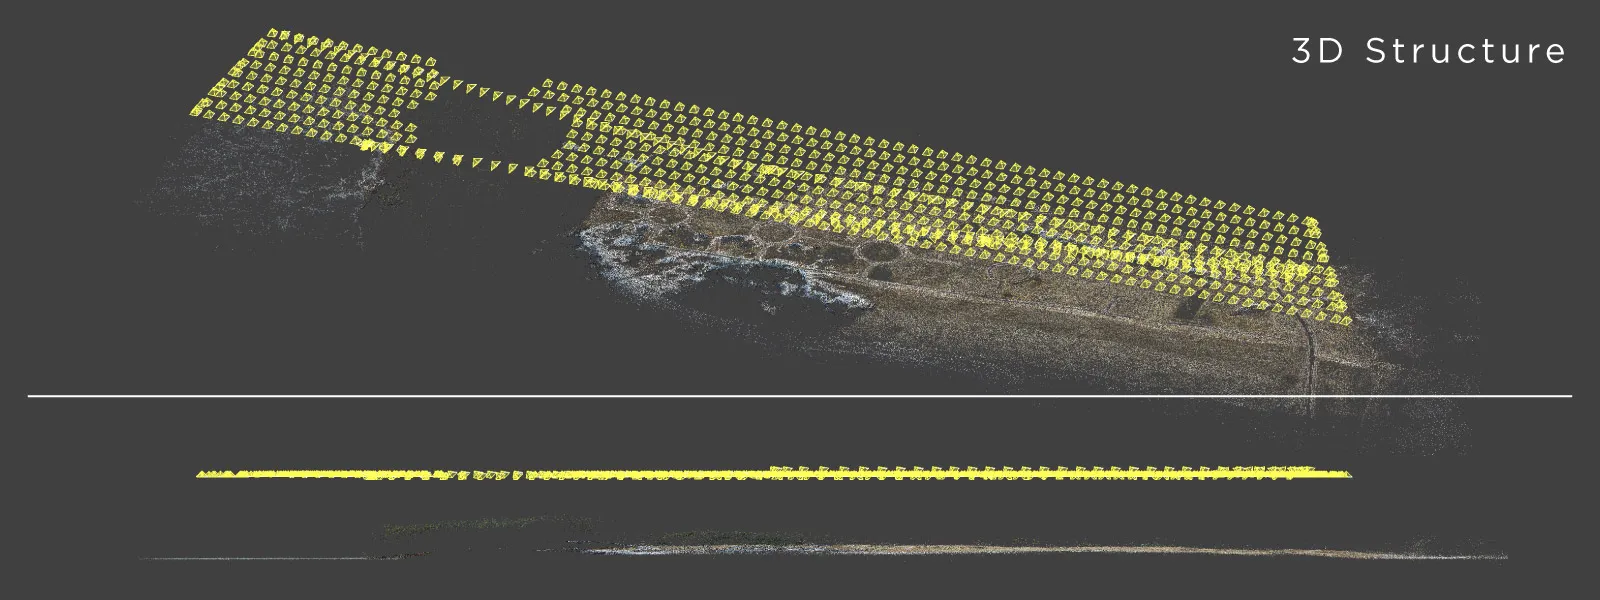
Processing in Pixpro starts with the 3D reconstruction step. When working with RTK data, it is important to select the correct coordinate system and geoid file early in the workflow. This ensures that all outputs are properly referenced and usable in external software.
 The next step is generating the dense point cloud. This is the most time-consuming part of the process. The dense point cloud acts as the foundation for all subsequent layers, so its quality is critical.
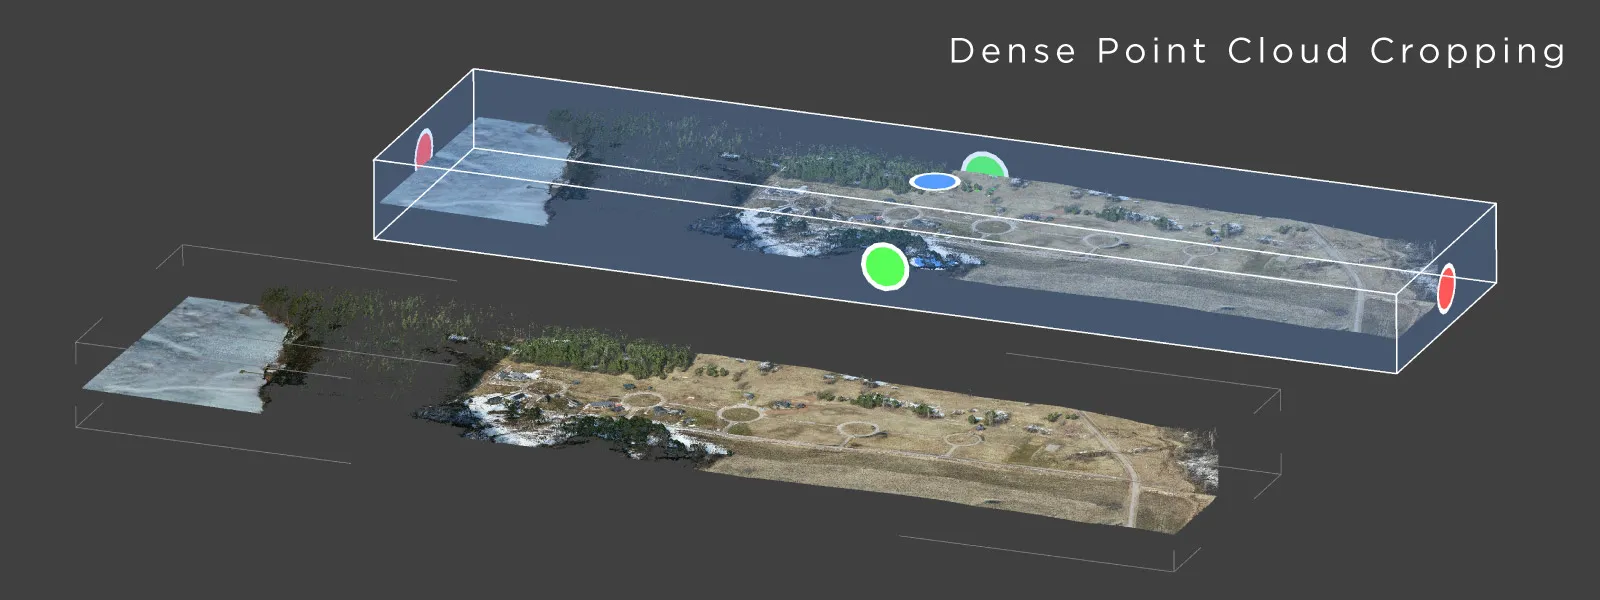
 Once the dense point cloud is complete, the next important step is cropping. Removing unnecessary areas reduces processing load and speeds up later steps. It also keeps the dataset cleaner and more focused on the area of interest.
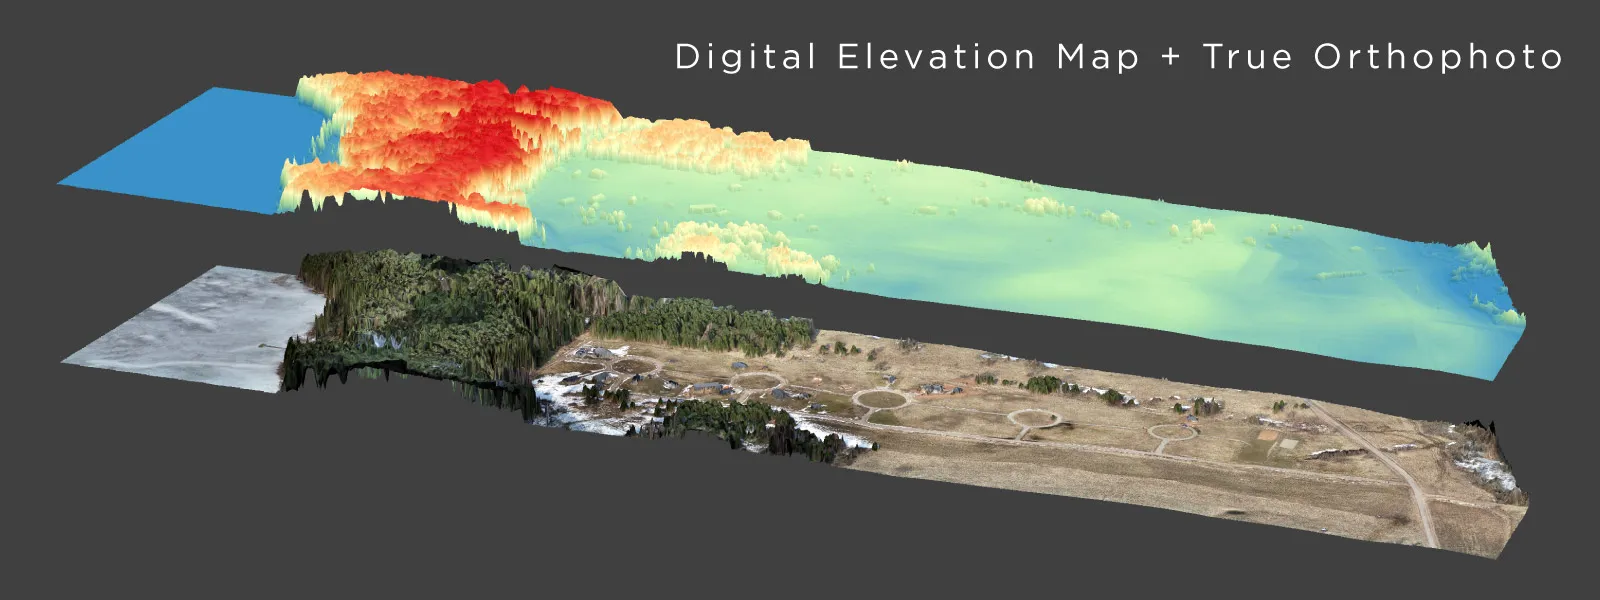
 For this project, the main outputs are a digital elevation model and a true orthophoto. These will be used for volumetric calculations and area measurements, which are typical requirements for property development analysis.
 Measurement and Data Analysis
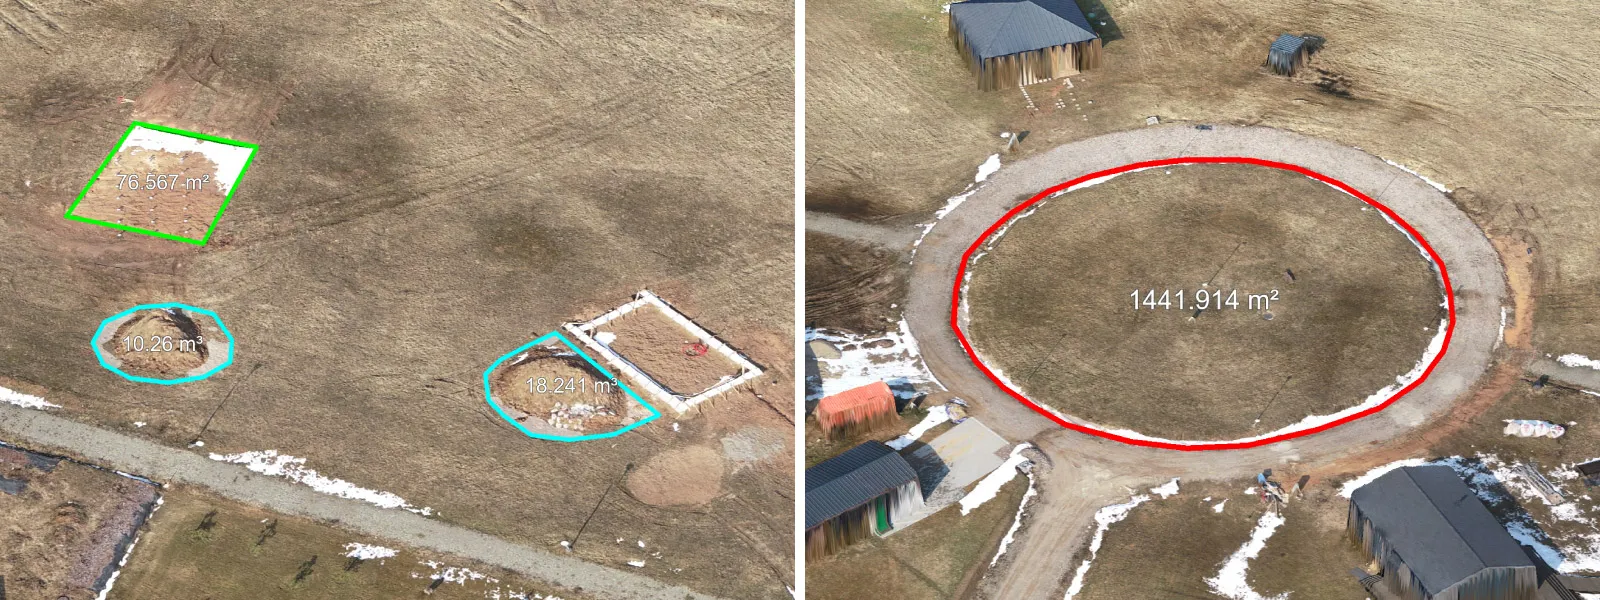
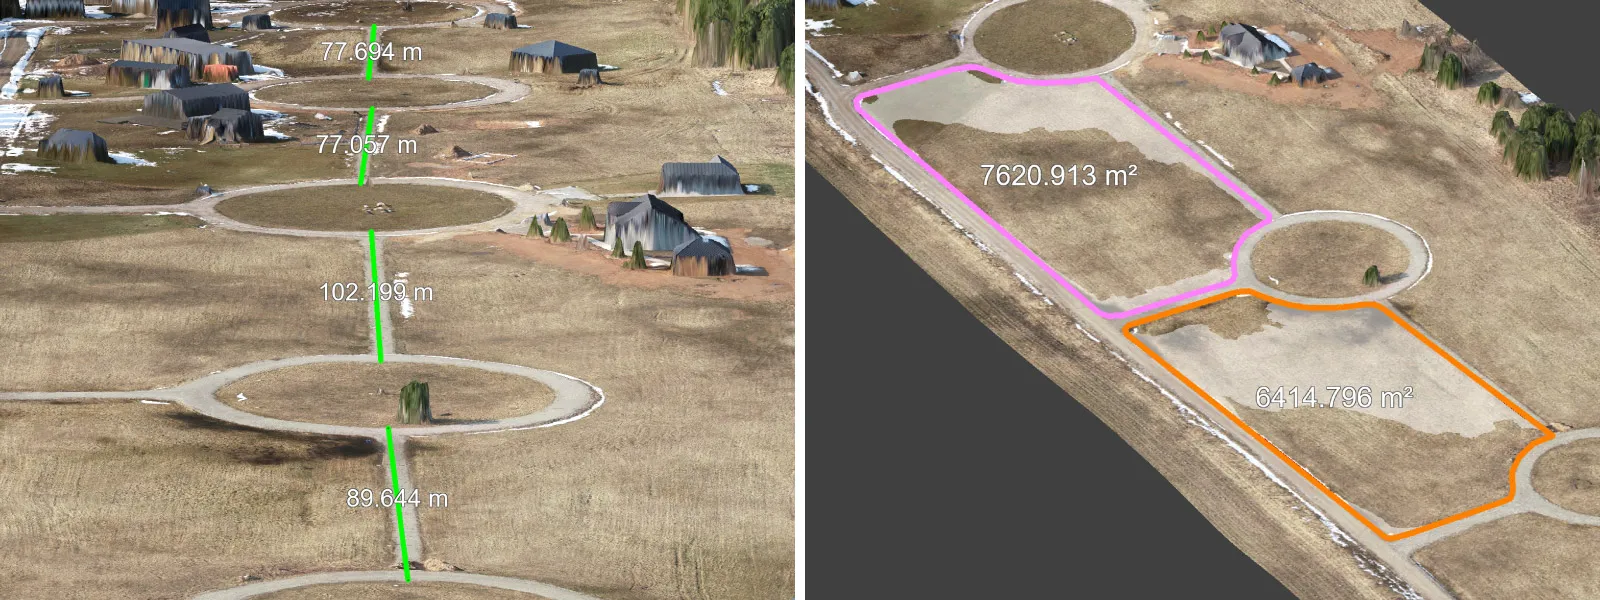
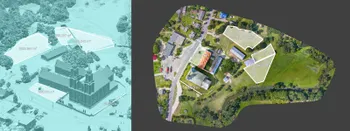
In this use case, the main analysis tools are relatively simple but effective. Drawing lines and polygons allows us to perform linear measurements and calculate volumes directly within the project.
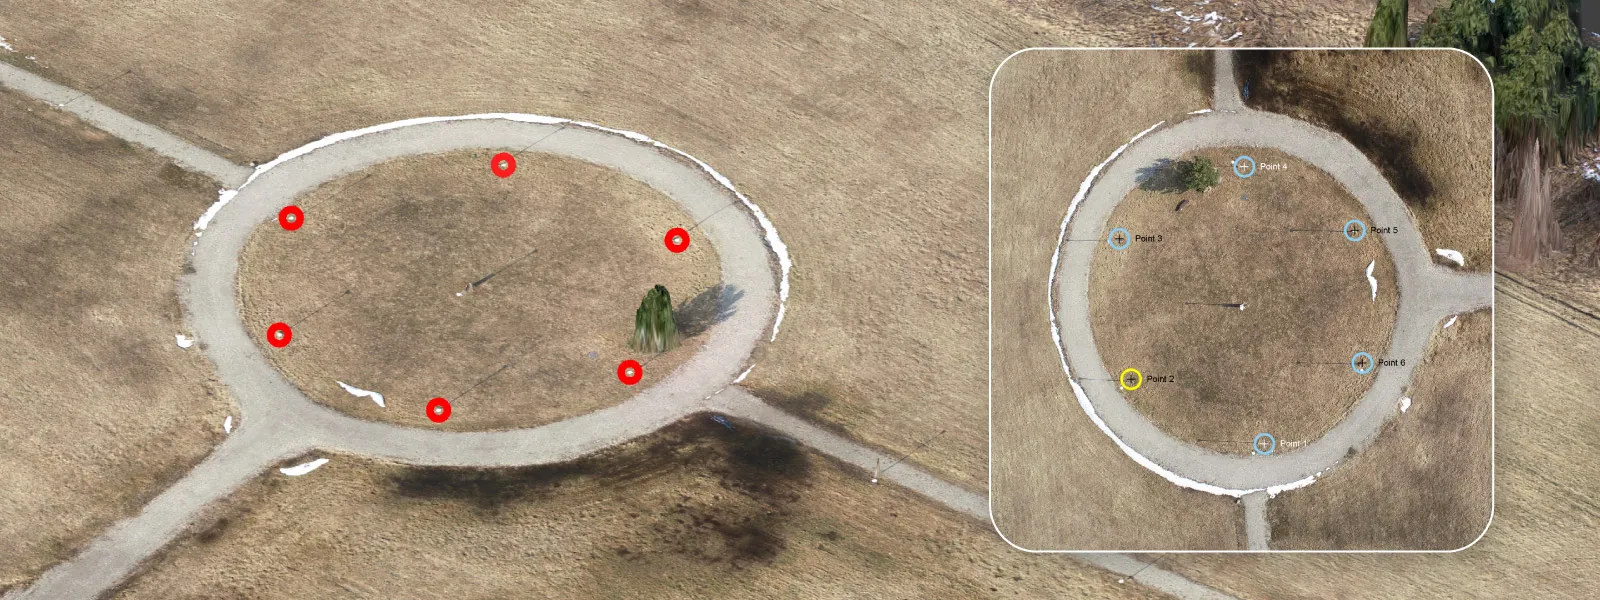
 Points are also useful. They can be used to mark specific locations or extract coordinate data for further use. And we can draw them extremely precisely using photo projections.
 One important advantage is that these objects can be imported as well. If you have CAD drawings or other reference data, you can overlay them on top of the reconstructed model. This creates a direct comparison between planned and actual conditions.
 For this to work correctly, coordinate accuracy must match across datasets. In this case, we are working with RTK data, so centimeter-level accuracy is achievable and expected.
Exporting Photogrammetry Data
The main output for this project is the orthophoto. It is already available as a GeoTIFF within the project, but it can also be exported manually using the standard right-click to export workflow.
We also export the points created during analysis. These can serve as reference markers in other software that requires spatial data input.
Both the orthophoto and the drawn objects contain coordinate information, which allows them to be used together in GIS or CAD software that supports geodetic coordinate systems. The coordinate data is the backbone of all output results, it is spatial data afterall.
 Conclusion
Large property photogrammetry is mostly about getting the basics right. Conditions, flight planning, and capture quality matter far more than anything that happens later in software.
In this case, the biggest limitation was not the hardware or the processing, but simply waiting for the right moment to capture the data. Once that was done properly, everything else followed smoothly. With RTK and a solid workflow using Pixpro software, achieving good accuracy is very realistic. Even for one-time use cases like this, the results are reliable and immediately useful for real-world tasks.
Photographer - Drone Pilot - Photogrammetrist. Years of experience in gathering data for photogrammetry projects, client support and consultations, software testing, and working with development and marketing teams. Feel free to contact me via Pixpro Discord or email (l.zmejevskis@pix-pro.com) if you have any questions about our blog.
Related Blog Posts
Our Related Posts
All of our tools and technologies are designed, modified and updated keeping your needs in mind
DJI Lito X1 for Roof Photogrammetry: Solar and Inspection Use Case
Small drones are the best tool for residential and even commercial roof photogrammetry. They are quiet, attract less attention, are easier to fly fully within regulations, and they are affordable.

Handheld Photogrammetry Construction Interior Scan Use Case
Interior 3D scanning can be useful in a myriad of ways. In this article, I present a scan of a residential building construction site, with its foundation walls and roof almost complete. Further construction will require some visualizations and design according to “the fact.”
Event Planning with Photogrammetry – Use Case from A to Z
Photogrammetry for event planning was the first use case I wrote about on this blog. Now we are back with another venue and an event that will take place in a couple of months.
Ready to get started with your project?
You can choose from our three different plans or ask for a custom solution where you can process as many photos as you like!
Free 14-day trial. Cancel any time.