.svg@webp)
Photogrammetry with the Mavic 3 – No Flight Planner Required Part 1
 Lukas
Zmejevskis
Lukas
Zmejevskis

It has been a few months since the launch of the Mavic 3, which took the position of the latest and greatest drone from DJI. DJI has yet to release a compatible mobile SDK (software development kit) to enable drone control by third-party apps. No third-party apps mean – no automatic flight planners for consistent photogrammetric flights. But some presently available features can help utilize the drone for photogrammetry while waiting for the SDK.
Cine Flight Mode of the Mavic 3
The Mavic 3 has a physical switch to change between flight modes – Cine, Normal, and Sport. Cine mode limits the maximum speed to 5 meters per second. This speed happens to be a very suitable speed for photogrammetric scanning at medium and high altitudes. As the name implies, the model is here to ensure cinematic shots with the smooth motion of the drone with dampened controls. We shall utilize this mode for photogrammetry purposes. However, for this mode to fully replace the tripod mode, which was available on earlier drones and become even more helpful for photogrammetry, we need a minor additional feature – a user-defined speed limit. It seems like a trivial feature that could be added with a software update. For some mind-boggling reason, this feature is not yet available.
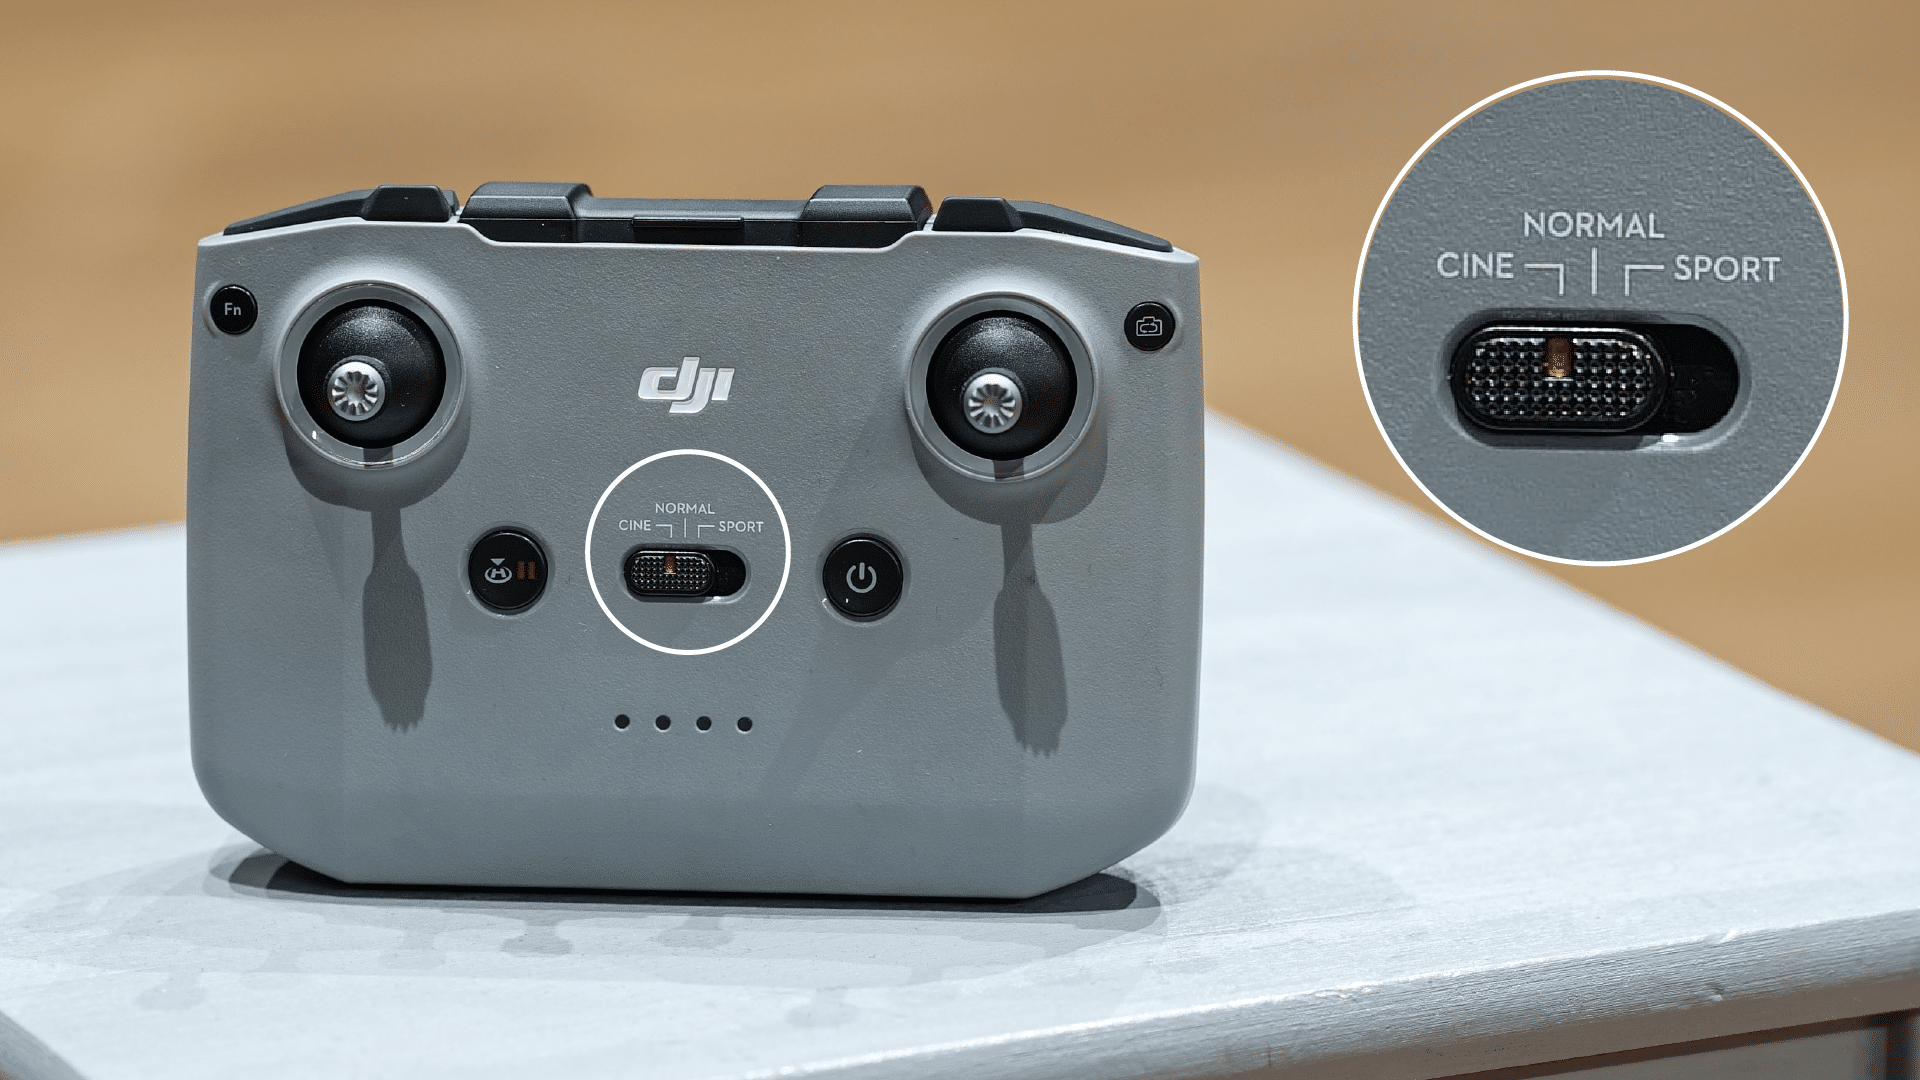
Flight modes on DJI RC-N1 controller
Timed Shooting
Timed shooting is how DJI calls an intervalometer/time-lapse shooting in the Fly app menu. When shooting in this mode, a picture is taken every X seconds. The app allows a lower limit of 2 seconds. 2 Seconds is fast enough to utilize timed shooting for photogrammetric scanning from approximately 40 meters altitude and up. At about 50-meter flight altitude, we get about 80 percent sequential overlap while flying at the maximum speed in cine mode. As we get higher, we can either deal with the increased overlap, which is rarely detrimental, or increase the interval to 3 seconds.
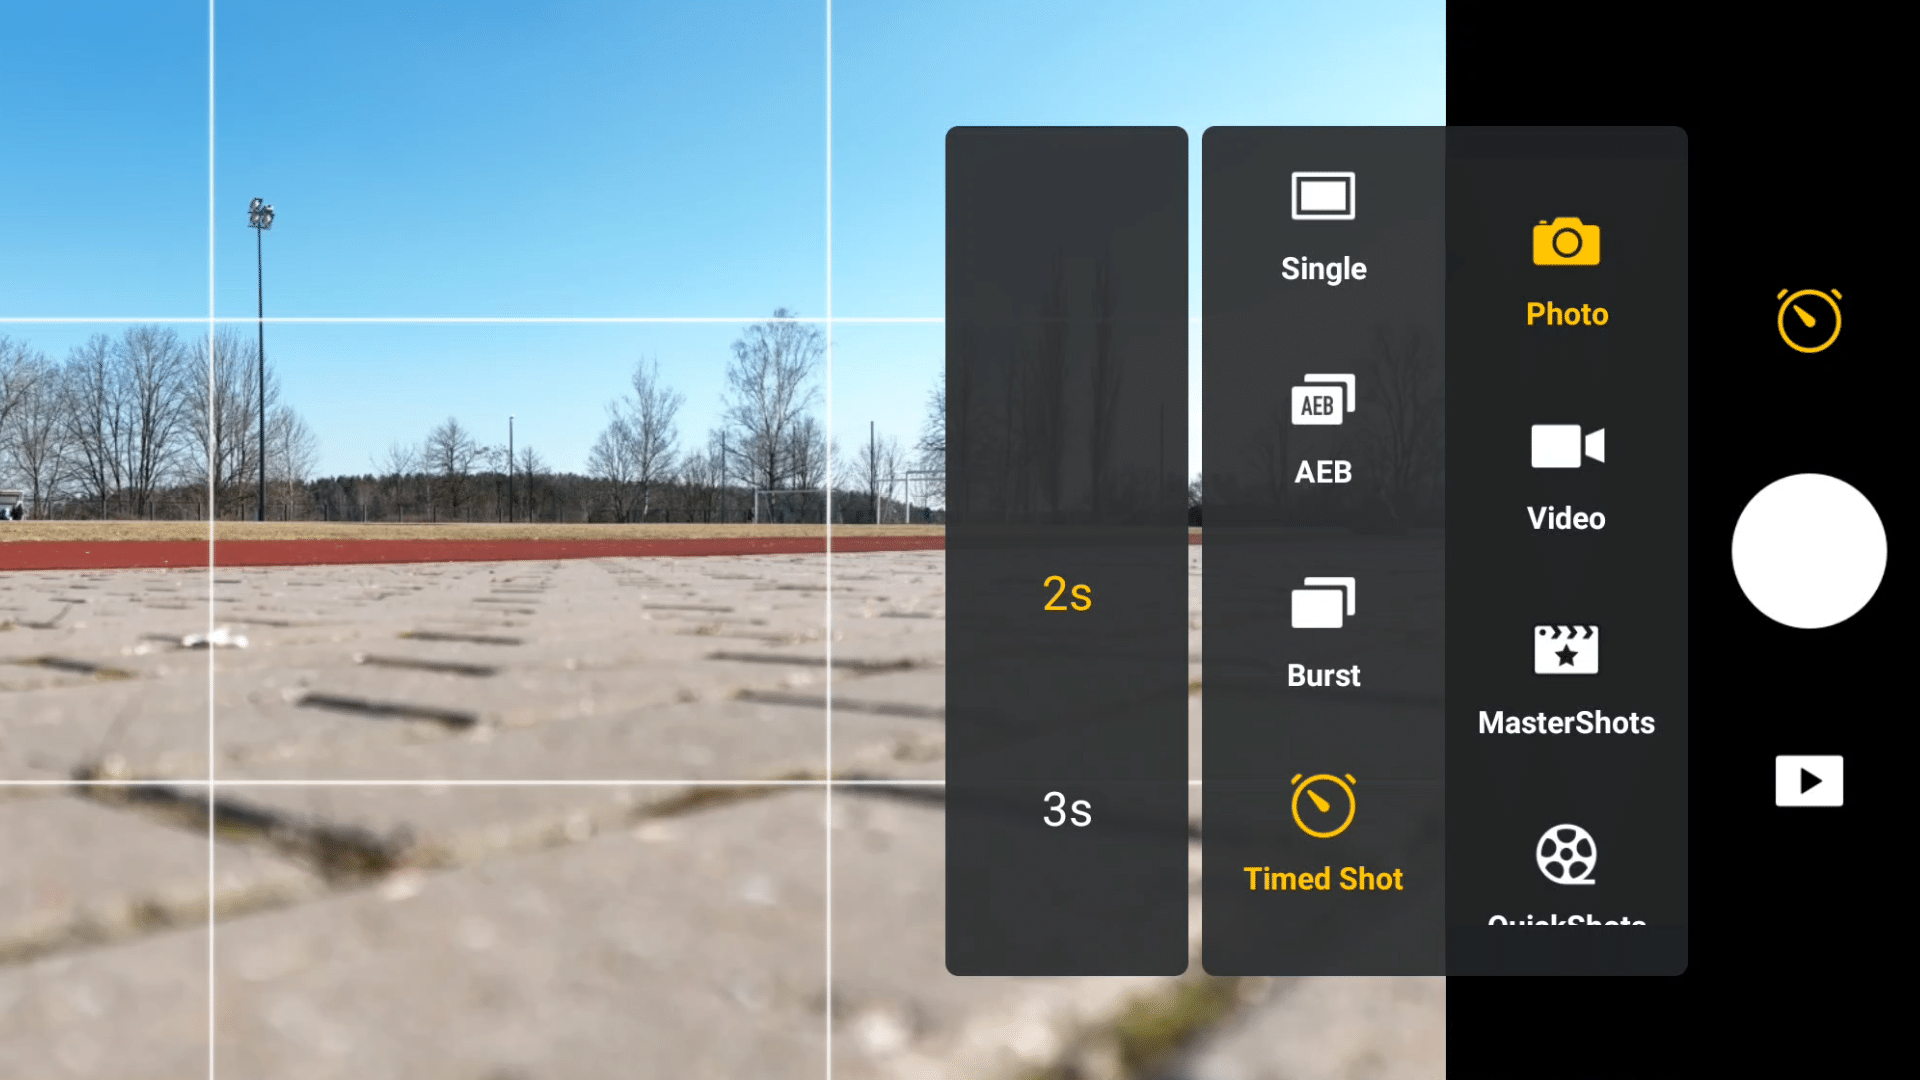
Timed Shot in DJI Fly App
Hyperlapse mode of the Mavic 3
Hyperlapse mode is essentially time shooting mode with a pre-programmed route – as close to waypoint flight plans as we get at the moment. So why not use the hyperlapse feature? Two main reasons: you can not change the interval timer as you can with the timed shooting mode; you would be doing the same work twice, essentially. You have to fly through the waypoints manually and set them up to program the flight route. This consumes more battery than is necessary and increases the time needed for the scan. These two reasons alone make the hyperlapse mode inferior to the technique we are using in our case.
Rule of Thirds Overlay
Another simple but essential tool for successful manual scanning – is the grid of thirds overlaid on the live camera feed. Using this grid, we can ensure that the side overlap is sufficient. Also, it helps with the overall composition and orientation of the drone. The overlay can be enabled in the settings.
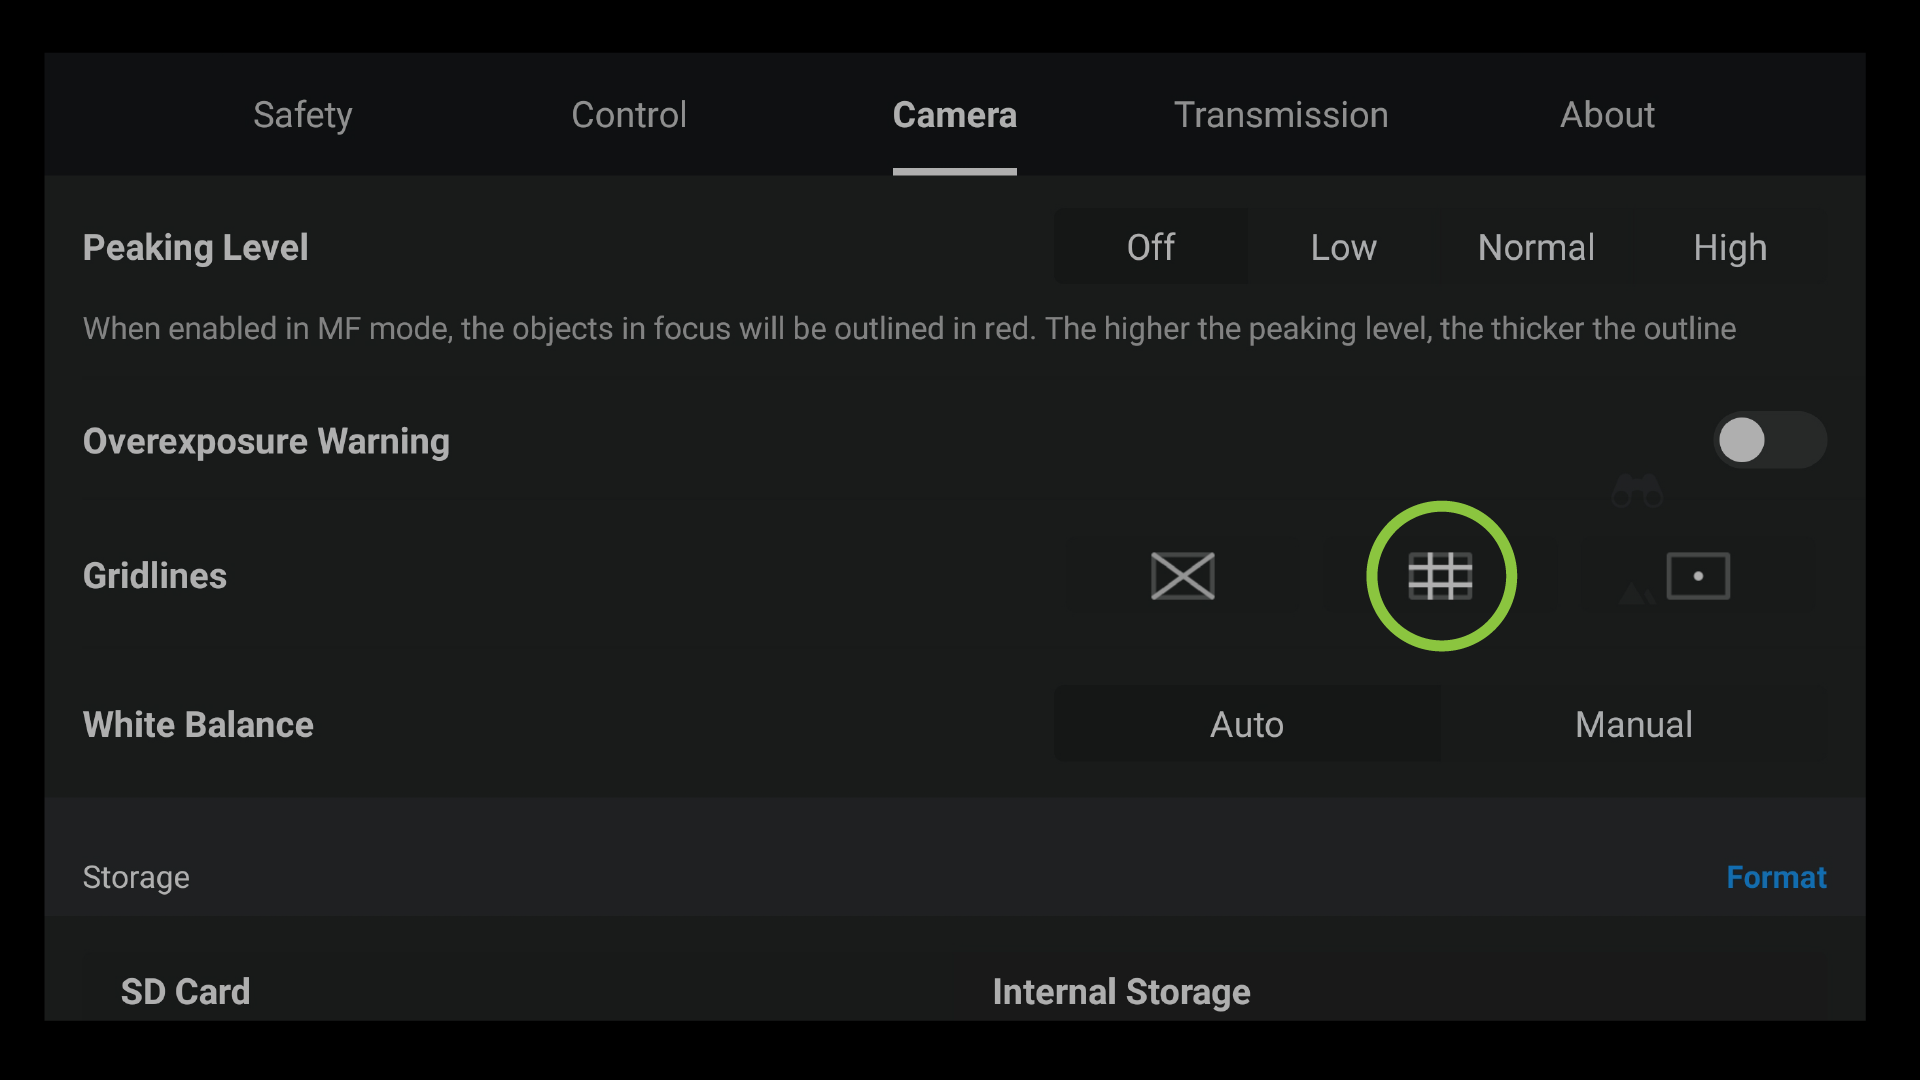
Gridlines setting in DJI Fly App
Nadir scanning with the Mavic 3
So, we have the timed shooting selected, drone set in the cine mode, and rule of thirds grid overlay enabled. Ensure your camera settings are correct: the desired format selected, a fast shutter speed set, aperture wide open, and optimal iso value chosen. In our case, we will be flying in perfect mid daylight at 50 meters of altitude. Our shutter speed is set at 1/1000th of a second, aperture wide open, and ISO at 100. We are shooting in JPG format.
The flight itself is pretty simple. Take off, reach the desired altitude, find a corner of your subject where you wish to begin. Face the camera directly down and start the timed shooting. Now an image is taken every 2 seconds. Fly alongside your subject at the maximum speed using the right stick only, moving backward or forwards (depending on which corner you selected and the orientation of your drone). When the other corner is reached, now it is time to move sideways. As our grid divides the view into 3 equal parts, we need to move the drone half of the division horizontally. Find a point of reference on the ground, see that it moves for 1/6th of the image width, and then stop.
Fly forwards or backward again until you reach the edge of your scanned area. Repeat the process of moving the drone sideways for 1/6th of the image width and move vertically again. By now, it should be clear that we are making a grid while the drone is continuously taking images. This is precisely what flight planners do.
You can check how your flown trajectory looks in the app’s map view. If it is not perfect – that is OK. Minor deviations will not affect the quality of the photogrammetry project. Also, feel free to make adjustments during the flight. Ideal camera positions do not matter if the overlap is good everywhere. When you reach your last corner of the subject and the entire scanned area is covered by images, disable the timed shooting and head home.
Filtering The Images
Once the flight is done and all the images are acquired, go over the entire set on your computer. As always, we must filter out any unrelated photos. Also, we need to remove those images of the scanned subject made in the same spot. As we transition between lines and hover a bit over a single spot while the timed shooting is working – there may be identical photos taken. These have to be removed – only a single image in the same exact location must be present. With all duplicate photos removed, now is the time to process and convert your images to jpeg if you choose to shoot in raw.
The Results
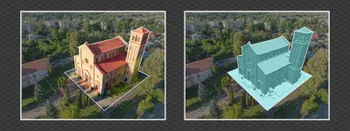
The result is a perfectly usable, high-quality set of nadir images. Coverage is adequate, the resolution is superb as expected. Go through the photos once again, ensuring there are no irregularities and you are done. Process these images in Pixpro or your software of choice and be proud of the skill you got. This applies to any drone with no available flight planners, and you can refine and adopt this simple technique to suit your needs. For example, you can use these fundamentals with the camera at an angle – oblique scanning or even doing a vertical scan. In Part 2 of Photogrammetry with the DJI Mavic 3, we will look into the active tracking modes and whether they can be used for 3D scanning. Spoiler alert, at least one can.
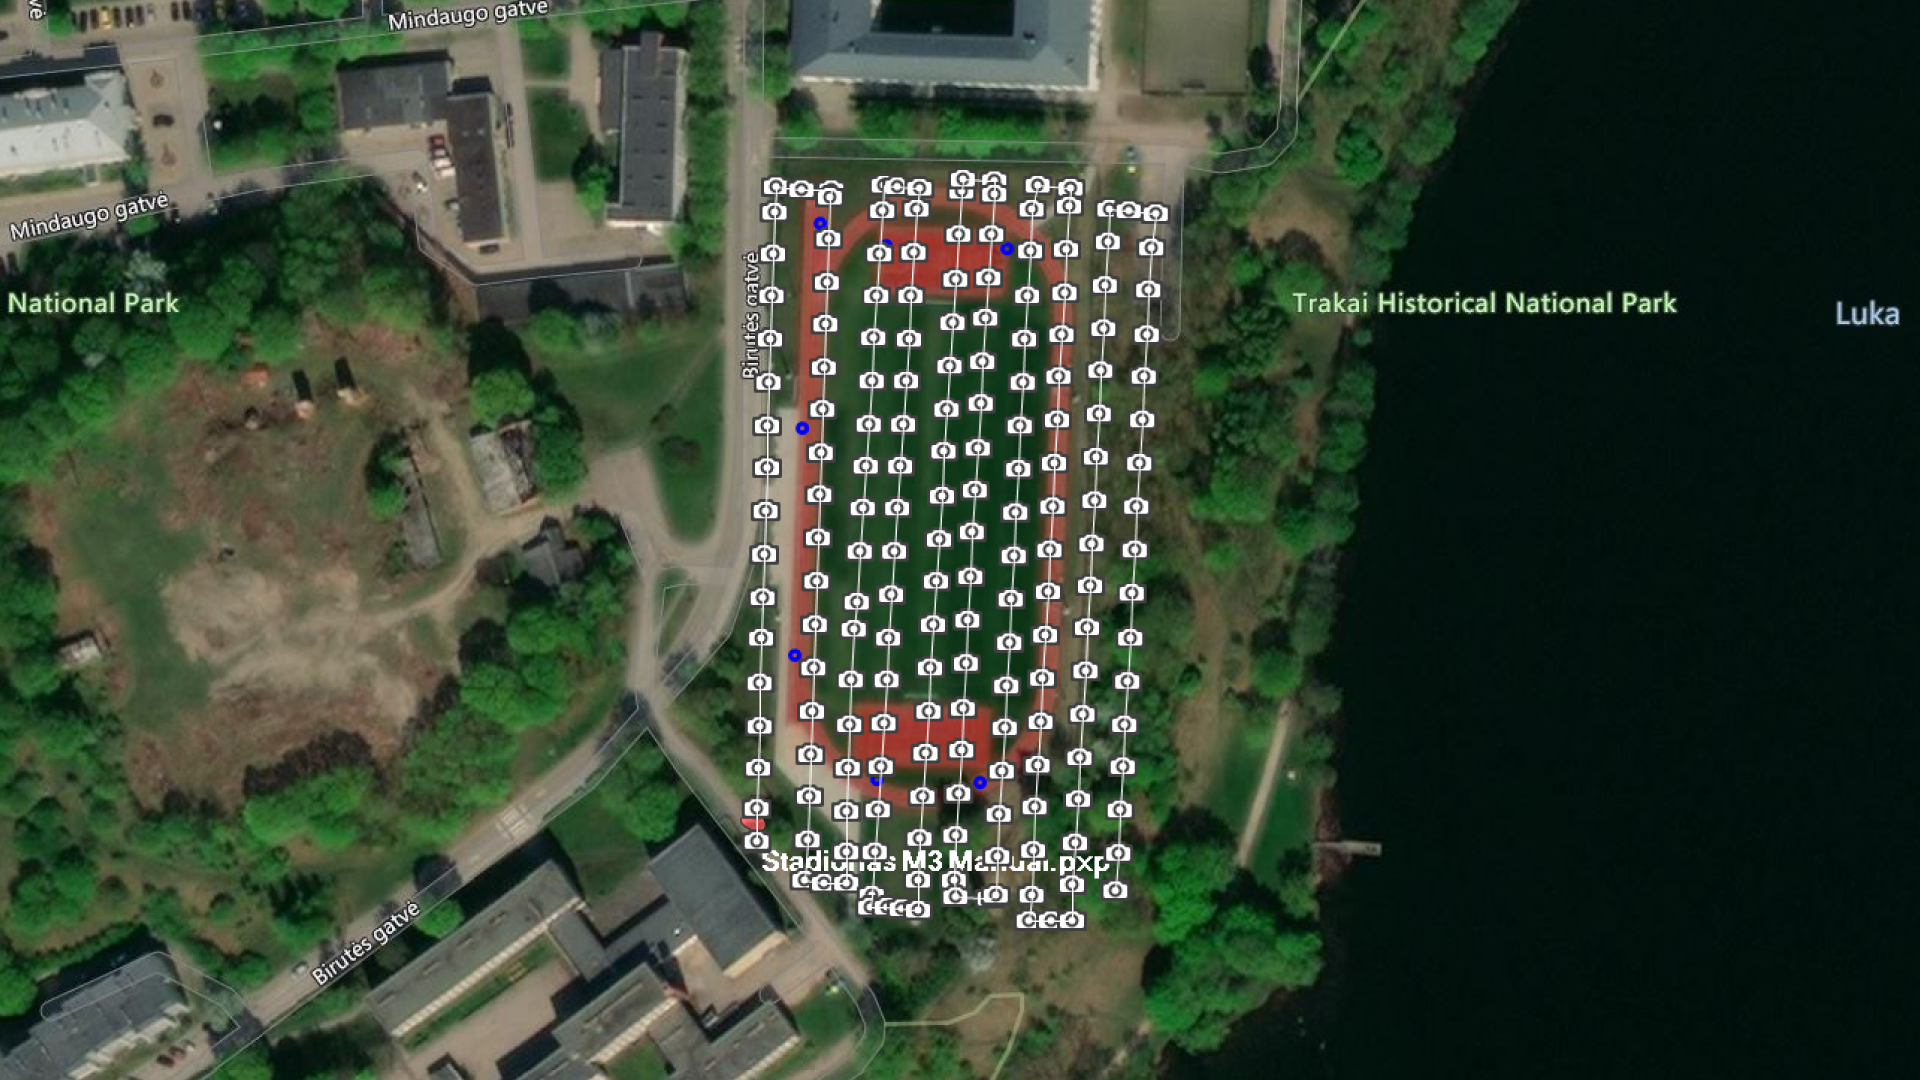
Camera positions on the map
Photographer - Drone Pilot - Photogrammetrist. Years of experience in gathering data for photogrammetry projects, client support and consultations, software testing, and working with development and marketing teams. Feel free to contact me via Pixpro Discord or email (l.zmejevskis@pix-pro.com) if you have any questions about our blog.
Related Blog Posts
Our Related Posts
All of our tools and technologies are designed, modified and updated keeping your needs in mind
Overlap Between Different Perspectives
Photogrammetry can be simple and rigid or complex and adaptable. Combining different scan patterns adds complexity to the work but improves detail and coverage. We often use examples of combined flights, of which the orbital + nadir grid is a classic. They provide great 3D structure while being easy
Pixpro Waypoints - Automated Photogrammetry Flights for Newest DJI Drones
The latest DJI drones are the most capable flying cameras on the market. If you need a tool like that or a competent machine for casual creation - DJI Mavic 3, DJI Mini 4, and DJI Air 3 series drones are the best.

Accuracy of Your Photogrammetry Project
Accuracy in photogrammetry is a multifaceted point of discussion. We can talk about absolute, relative, or even geometric accuracy, to name a few. No tool or technique can really prove anything beyond reproach.
Ready to get started with your project?
You can choose from our three different plans or ask for a custom solution where you can process as many photos as you like!
Free 14-day trial. Cancel any time.