.svg@webp)
True Orthophoto - Orthorectified Imagery and Pixpro Workflow
 Lukas Zmejevskis
Orthorectified or true orthophoto concepts can still be misunderstood and confused with other types of aerial imagery, such as panoramas or orthomosaics. In this article, we revisit these concepts to explain why actual photogrammetry is necessary to create a true orthophoto. We will also look at best capture practices and workflows in Pixpro photogrammetry software, giving you the best results.
Orthorectified Imagery FAQ
We discussed the true orthophoto concept in a few previous articles but decided to do a dedicated one. As software developers, we get questions about various aspects of orthorectified imagery, and here we present a QnA list of the most frequent questions about the subject:
Q. What is the difference between true and “regular” orthophoto?
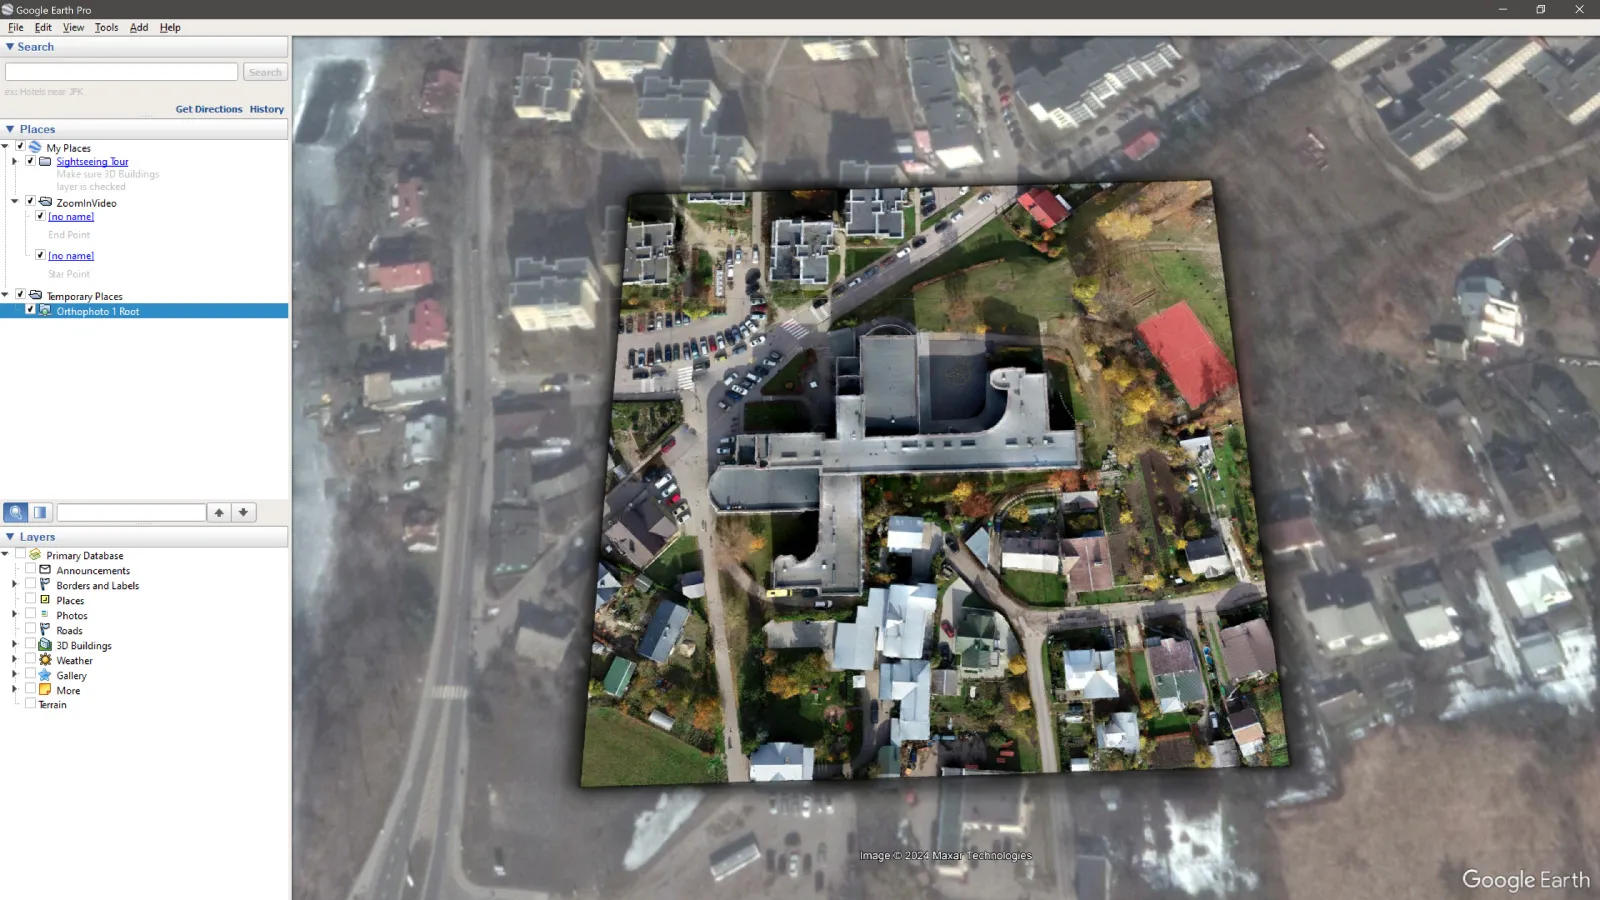
A. True orthophoto image is based on a 3D surface obtained via photogrammetry. This allows the rendering of the scene without any perspective, which is impossible with simple photos or photo stitching.
Q. Why do you need true orthophoto images?
A. Such images are for measurements and accurate representation of the real world. Optical distortion is also eliminated during the photogrammetry process, so you get a “perfect” view from above.
Q. Why is orthophoto processing time much longer than regular photo stitching?
A. Because it requires creating a 3D surface and projecting high amounts of raster data onto it.
Q. Why is true orthophoto often imperfect and contains visual artifacts in urban examples?
A. It is nigh impossible to create a perfect projection or surface from any data when there are many vertical objects.
Q. What are the main factors that determine orthophoto quality?
A. The quality of the 3D reconstruction itself is the main factor, alongside photo quality and flight altitude. The lower the altitude, the harder it is to make a true orthophoto image, but you can expect more detail.
Q. What format is true orthophoto stored in?
A. Almost exclusively in .tif Geotiff raster files.
Q. How do I make a true orthophoto myself?
A. You need to take many photos with a drone as if doing photogrammetry. More on that - in the next chapter.
Aerial Photogrammetry Best Practices
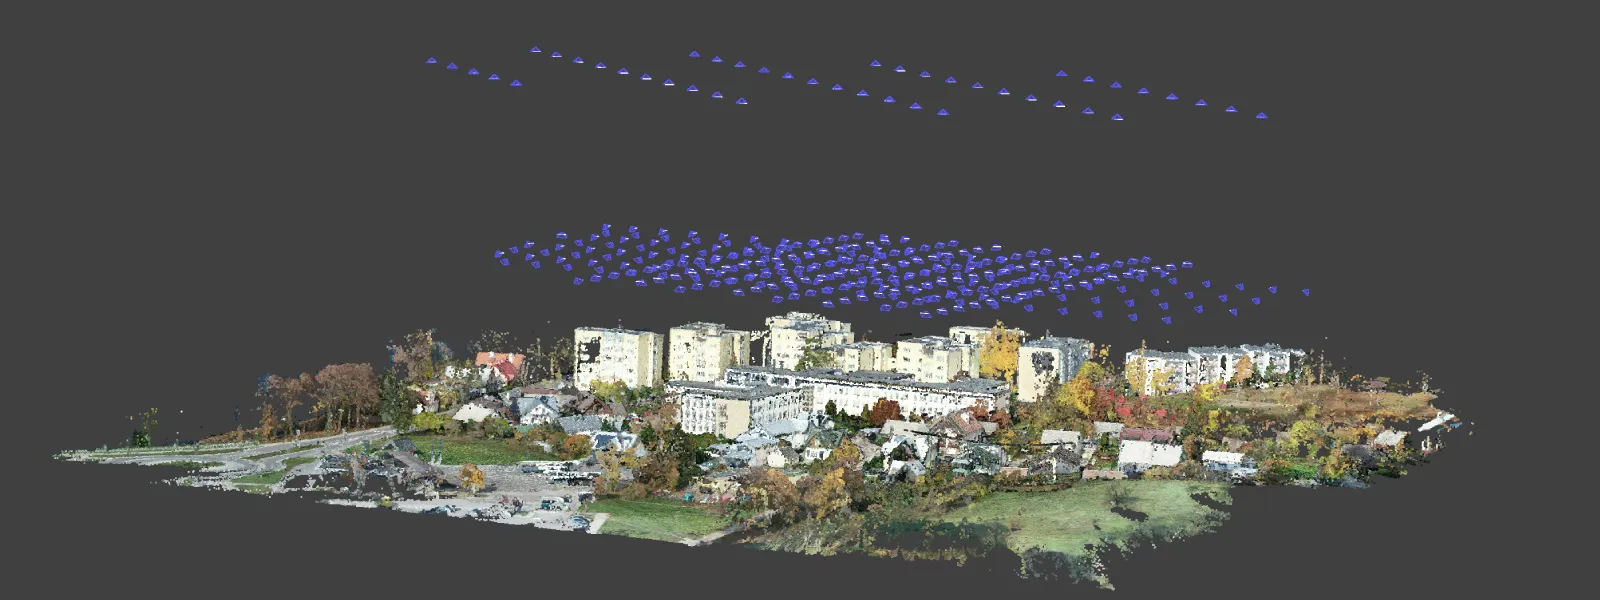
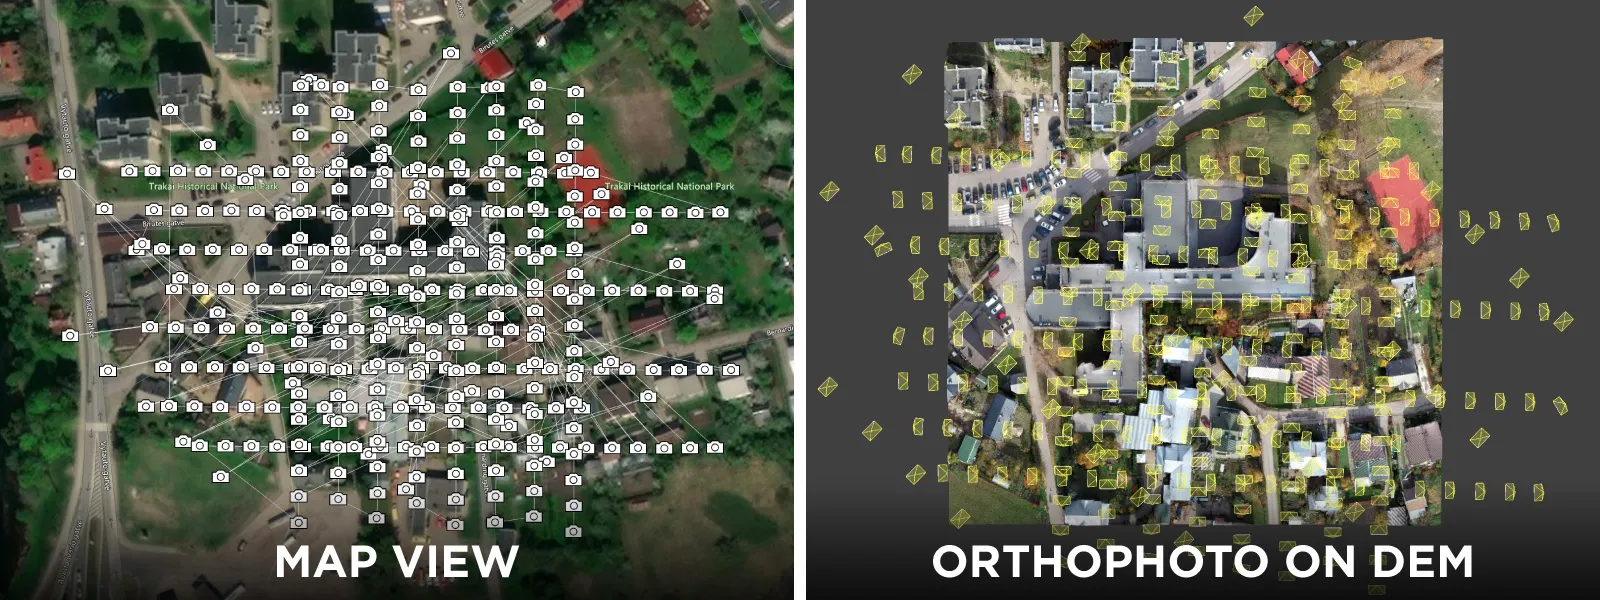
Suppose you want to make a true orthophoto image. In that case, you need an excellent 3D surface and a nadir image set with high overlap for projecting on that surface. You need great photogrammetry fundamentals to get a great surface, as always. Good coverage, consistent overlap, and excellent image quality from your drone. This applies every time we want a high-quality 3D reconstruction - and we always do. But here are a few advanced and orthophoto-specific tips for best results with aerial photogrammetry:
-
Capture nadir photos at the desired flight altitude at 80/80 percent overlap at least.
-
Add other types of flights to the mix, such as orbitals and obliques, if you are using a non-RTK drone or have no GCPs in the project. Additional data helps to avoid bowing or other unwanted effects and results in a better surface quality.
-
Add other flights in addition to the nadir if you are flying over an urban environment with lots of 90-degree surfaces - walls - in all cases.
-
Calculate your surface and overlap according to the highest object in the scan area. For example - if you are scanning a town - you either need to take off at the highest spot in the area or offset your overlap calculations according to the tallest building roofs for the best results. This way, you ensure at least 80/80 overlap on all surfaces throughout the scanned area.
-
Try to fly during stable lighting conditions. Moving clouds that obscure the sun periodically will introduce a lot of differences in photos, which may be hard to correct for the software.
-
If you must fly during changing conditions, use auto exposure, but fix the white balance to sunny or cloudy. (whichever seems more dominant)
-
If you fly in stable lighting conditions - keep your photo exposure and white balance settings fixed.
-
Explore raw photo capture and raw processing possibilities if you need the best results.
-
Cover your area with a good margin, as the surface and orthophoto quality drops in the periphery of the scan.
Orthophoto Creation in Pixpro Software
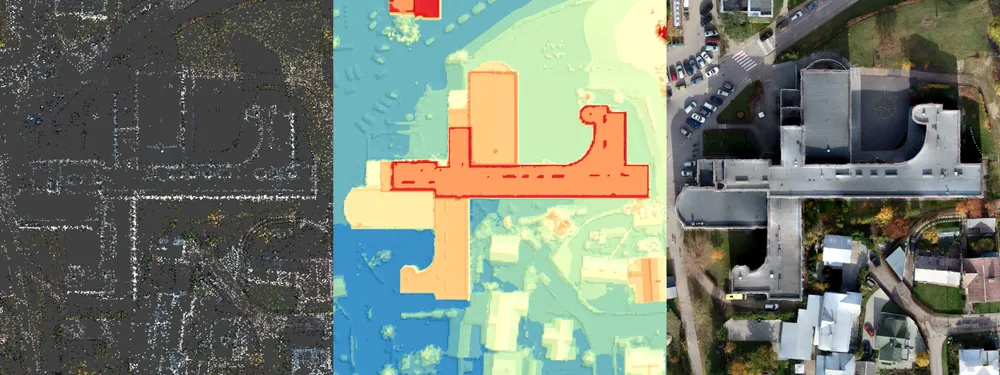
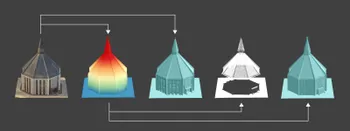
The best orthophoto generation workflow in Pixpro photogrammetry software is quite simple. First, you need to create 4 total layers: sparse point cloud, dense point cloud, digital elevation map, and orthophoto.
For best results, do not just run these processes with full workflow. Run the 3D reconstruction and dense point cloud generation. Then, crop out peripheral areas of the scan that are unnecessary for orthophoto generation. If you follow the advice written above, a considerable amount of periphery should be included in the project. Crop that out at this stage.
Create a digital elevation map from the cropped point cloud and start orthophoto generation. Select only the nadir photos for the orthophoto if your project contains oblique images. It may be a bit tedious, but it is worth it.
During the DEM generation step, you can try to increase the GSD value to improve some edge detail in the project. During the orthophoto generation step, you can adjust GSD to native photo GSD if you want maximum quality. These settings are a matter of experimentation for each individual project. You can generate as many layers as needed; be bold and try different settings.
Lastly, Pixpro has some DEM and Dense point cloud editing tools, which can help clean up rough edges, artifacts, and other minor issues causing imperfections in your orthophoto. We got a couple of articles where we looked deeper into these tools:
Digital Elevation Map Editing Tools in Pixpro
Pixpro 1.7.0 - Multi Camera support and Point Cloud Editor
Orthophoto Export and Import
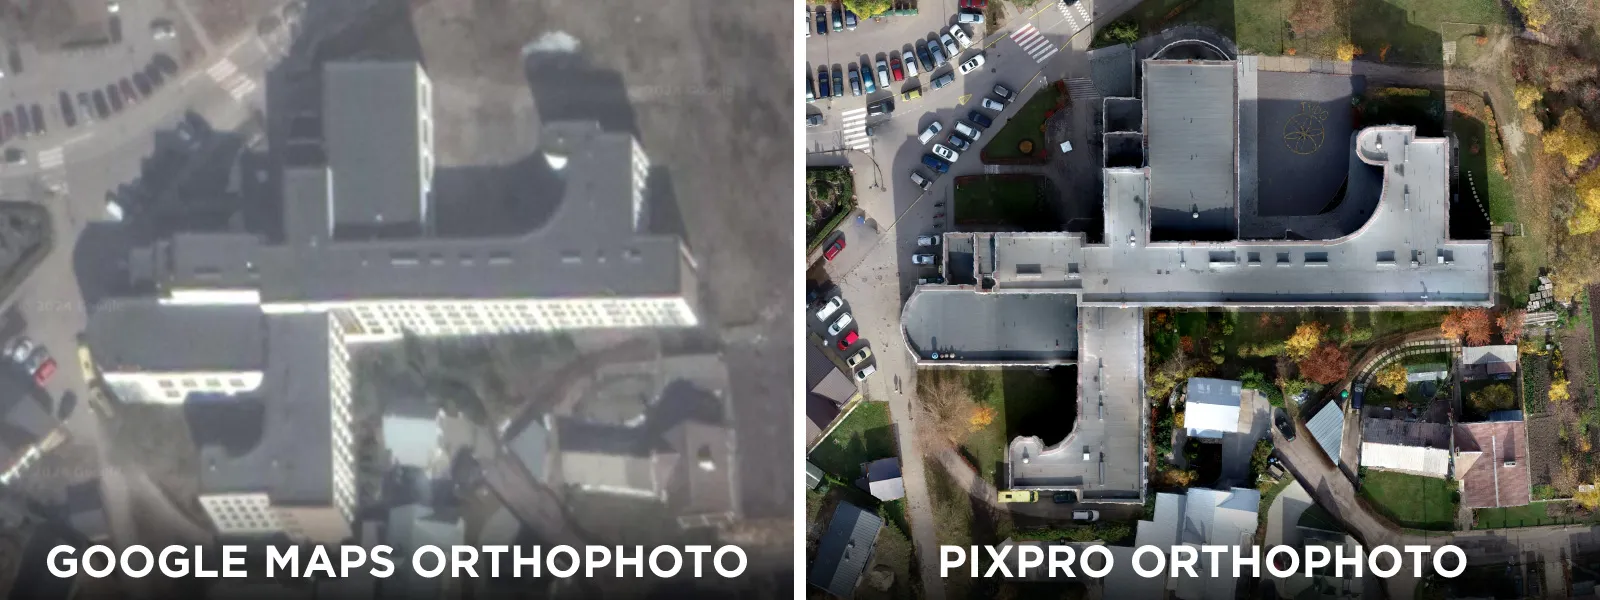
You can export an orthophoto image as a .tif Geotiff file. This format is ubiquitous and will work in any software. A Geotiff file will contain georeferencing, and the orthophoto image will appear in its location. However, it was made without RTK data or GCPs - always expect some offset when compared to a map service.
Conclusion
Orthorectified imagery or true orthophoto is the staple outcome of all photogrammetry solutions. It is the most detailed basis for plans, maps, measurements, and other use cases. We hope we clarified the fundamentals regarding true orthophoto and showed how easy it is to make such an image in Pixpro software. If you still have questions regarding this topic, feel free to contact us via our socials, email, or just ask down below in the comments.
Photographer - Drone Pilot - Photogrammetrist. Years of experience in gathering data for photogrammetry projects, client support and consultations, software testing, and working with development and marketing teams. Feel free to contact me via Pixpro Discord or email (l.zmejevskis@pix-pro.com) if you have any questions about our blog.
Related Blog Posts
Our Related Posts
All of our tools and technologies are designed, modified and updated keeping your needs in mind
Why Choose Pixpro Photogrammetry Software? Practical Comparison
There is no shortage of photogrammetry software today. From well established industry tools to newer cloud based solutions, the choice is not exactly obvious, especially for someone just getting started. Most options promise high accuracy, automation, and ease of use, and to some extent they all del
3D Point Clouds in Pixpro: How to Convert and Export Spatial Data
Photogrammetry software produces several types of spatial outputs, but the dense 3D point cloud is the foundation of them all. In Pixpro, the dense point cloud acts as the base dataset from which every other derivative is generated.

How to Create and Import a KML File in Pixpro Waypoints
We are continuing our improvements to the Pixpro Waypoints service and bringing a few small updates. Pixpro Waypoints is a service that allows automatic photogrammetry flights with consumer grade DJI drones using a bit of workaround magic.
Ready to get started with your project?
You can choose from our three different plans or ask for a custom solution where you can process as many photos as you like!
Free 14-day trial. Cancel any time.
Welcome to Pixpro
Sign in
And access your account.