In-Camera Focus Bracketing - Sony A7 IV How To
 Lukas
Zmejevskis

After many years of manual focusing or using third-party solutions, we finally got the focus bracketing feature in one of the most popular full-frame cameras on the market—the Sony A7 IV. I have been exploring small-scale photogrammetry in a few previous articles, and focus stacking is something I avoided in this recent series. Now that we do have in-camera focus bracketing, I will go over the new functionality and prepare to use it for macro photogrammetry.
Why Focus Bracket
Focus bracketing is the process of taking many photos of the same subject in the same spot, but the lens is focused at different focus distances. These distances, of course, depend on the subject, while the number of photos we need to take depends on how much "depth" we need to cover.
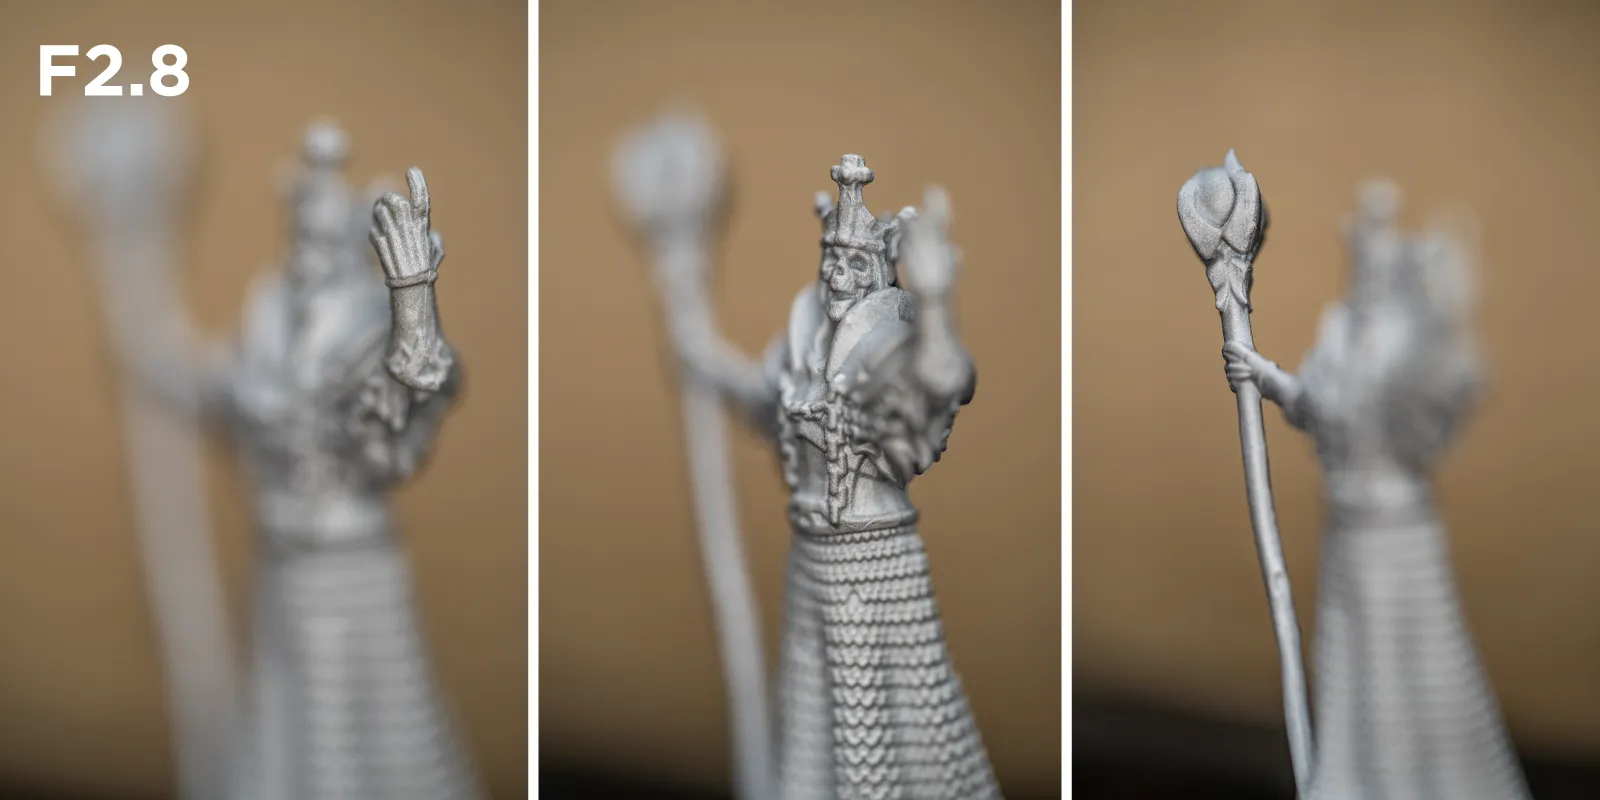 Focus bracketing, and photo stacking allow us to combat the thin depth of field problem at macro scales. Due to physics and how optics work, if we take pictures of something tiny from a really close-up, the sharp part of the image becomes extremely thin, even if we close down the aperture.
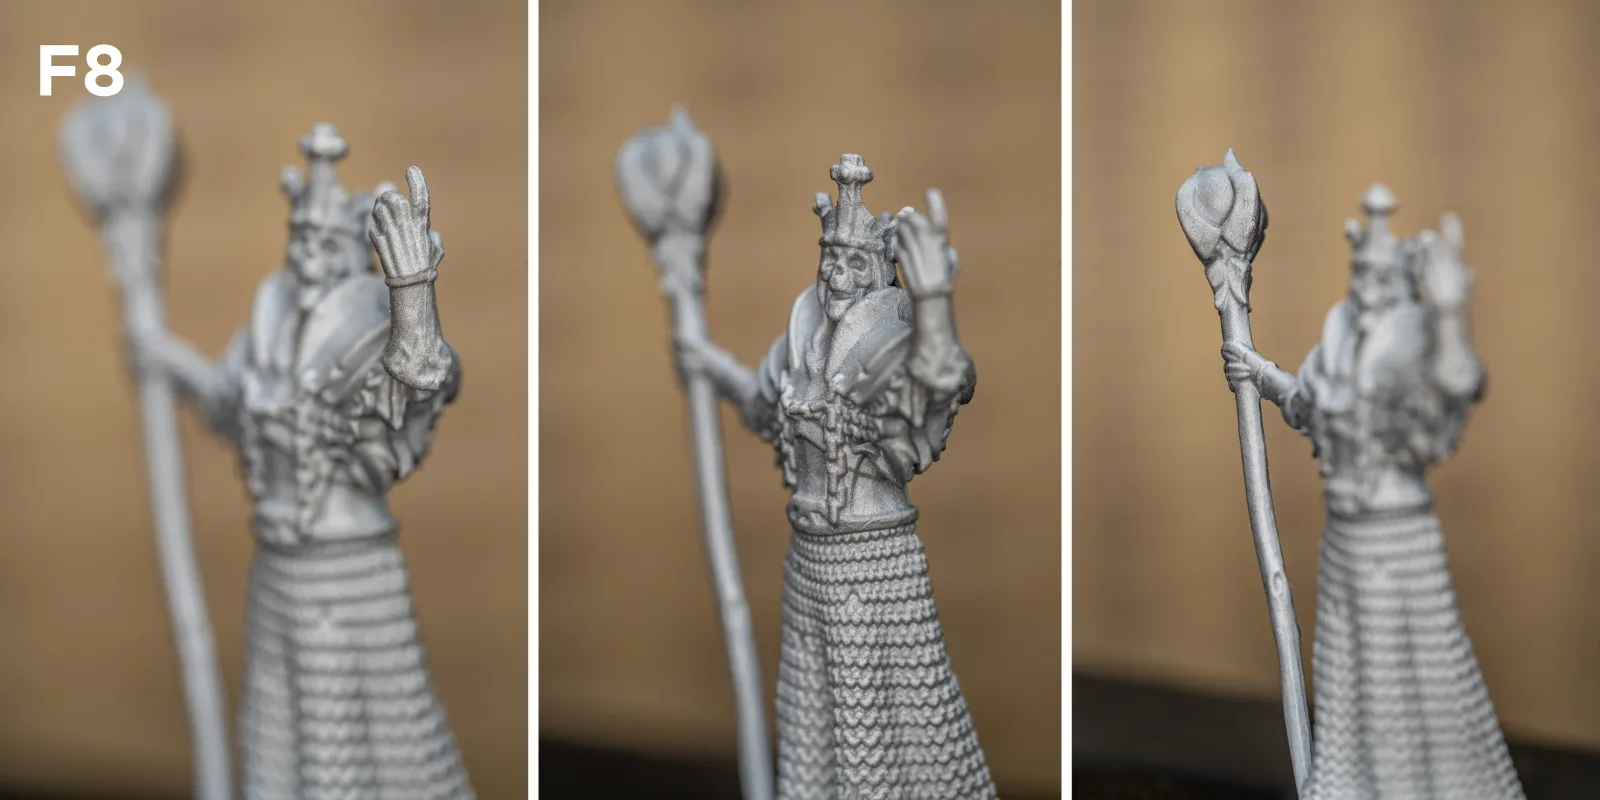 If your subject is flat and perpendicular to the camera, the depth of field in focus may not be a problem, but this is rarely the case and is practically impossible in photogrammetry. Thus, we overcame the problem by just taking more photos and merging them.
Capturing Focus Bracketed Images
We have a few workflows for capturing many photos with different focus planes. The first and most tedious one is to manually turn the lens's focus ring or slide the camera back and forth while taking photos. In some cases, this is the only way to shoot, for example, if you have a manual-focus lens. Macro professionals also use flashes and motorized sliders to make such a workflow quicker or more consistent, but we will take advantage of the new Sony firmware update and use an autofocusing lens.
With an AF lens, the camera moves the focus plane between each shot for you, so you need the camera and your subject to remain stable during capture. AF motors in modern lenses are precise and capable of consistently controlled increments of focus plane movement. If you can use focus bracketing in this manner, it is probably your best choice in many cases.
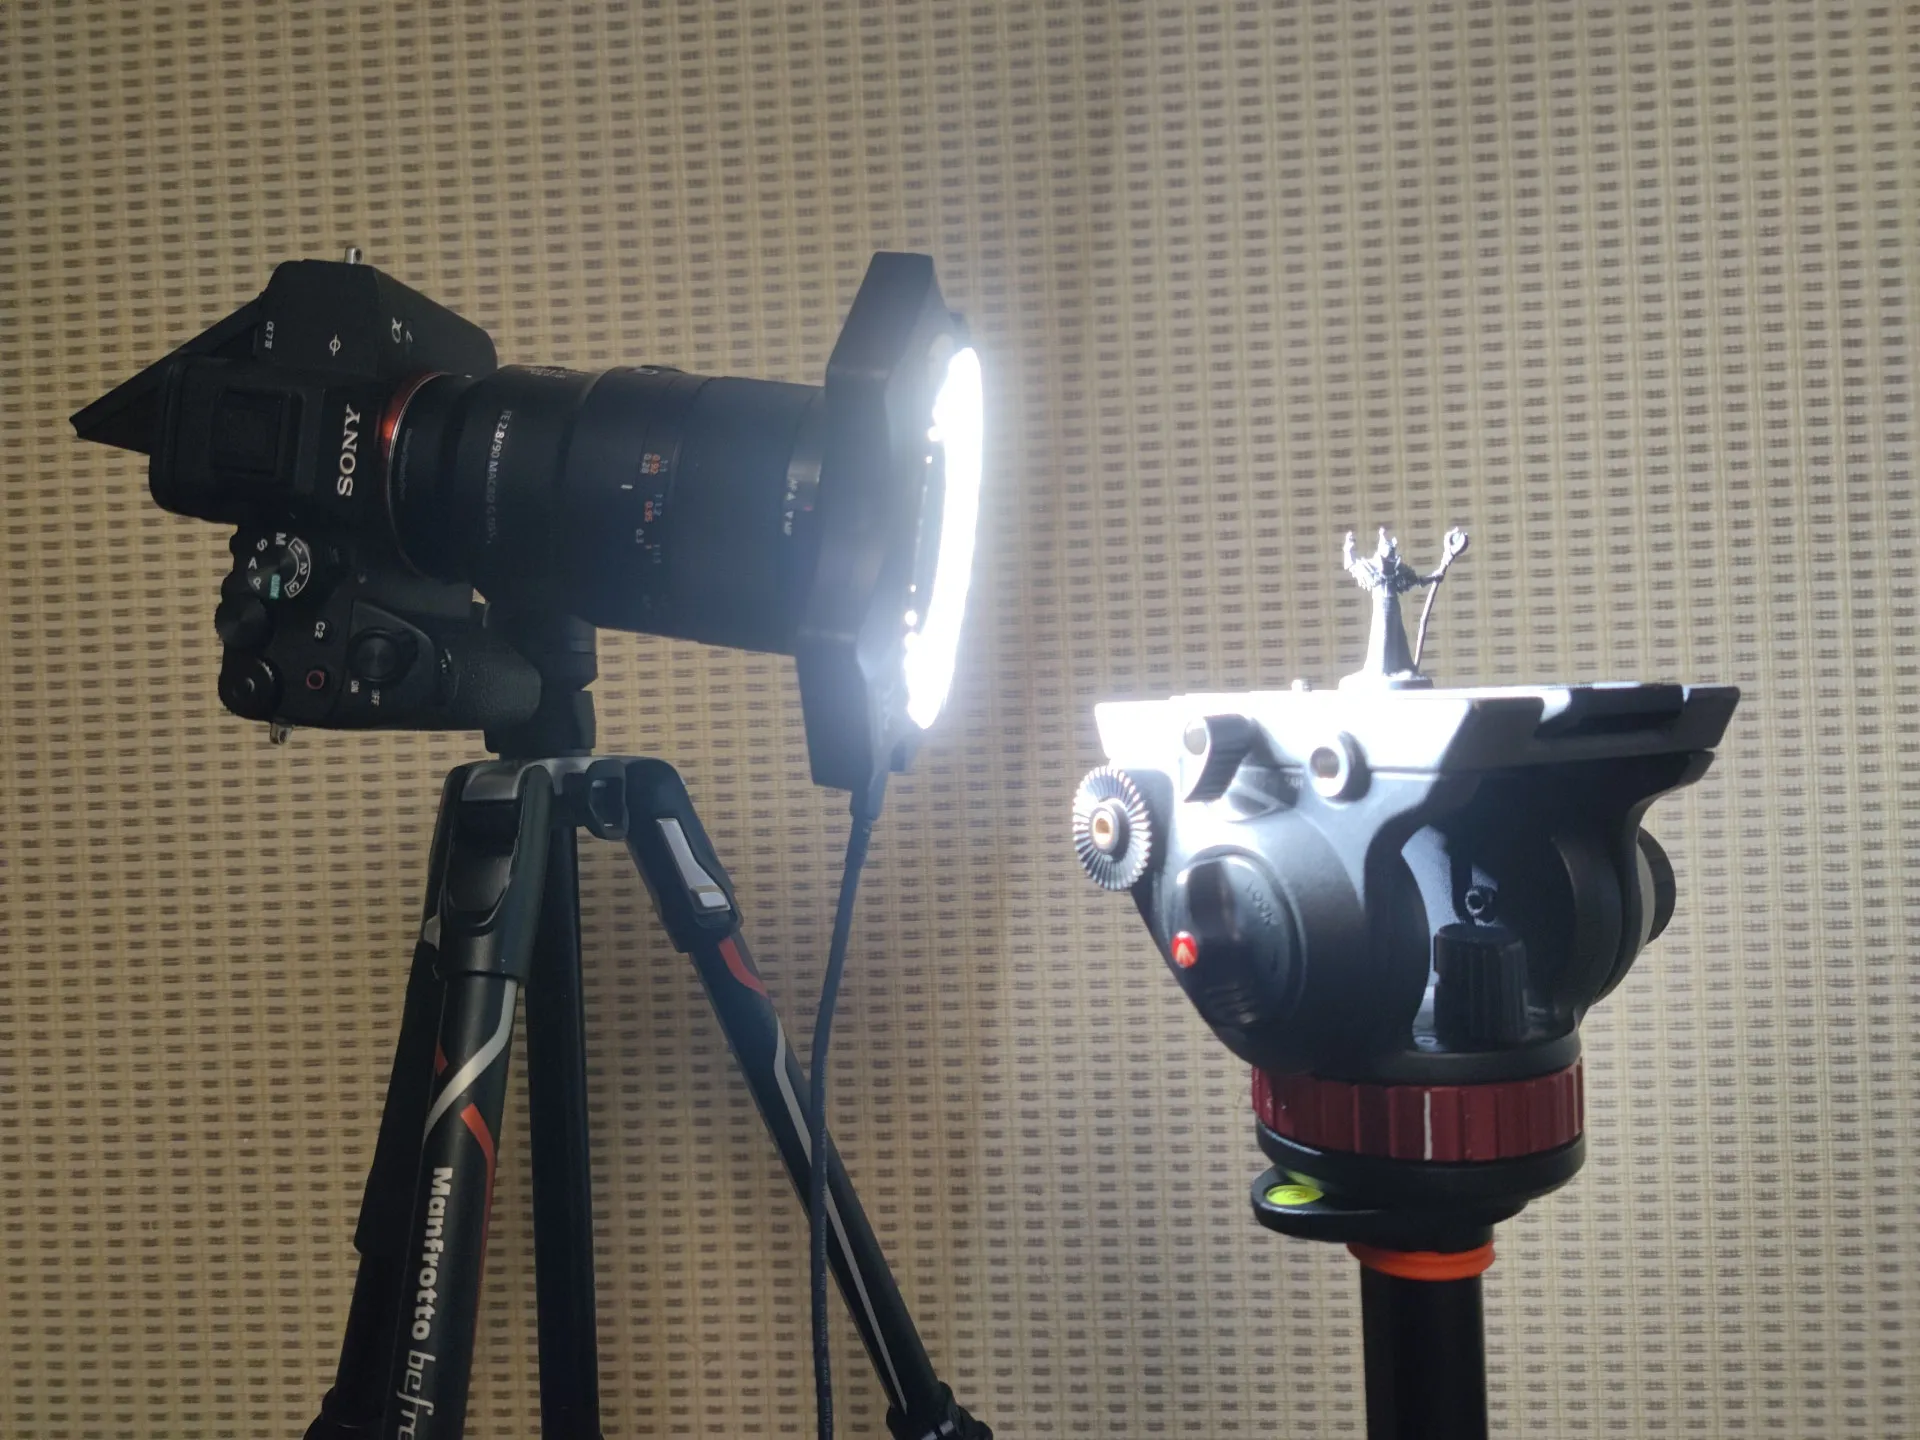
For the setup, I put the camera on a tripod and the scanned object on a stable surface near it (also a tripod). For lighting, I am using a ring light in front of the lens. The camera is the freshly updated Sony A7IV with the classic Sony f2.8 90mm G macro lens. The subject is a small board game figurine. If you know its name, exchange it for a free Pixpro license.
 Sony Specific Workflow
Sony's implementation is quite simple. The focus bracketing option is under drive settings; enter this mode, frame your subject, and focus on the closest point. Choose the step width and how many photos you wish to take. Press the shutter button, and the camera will take pictures while moving the focus plane forward. Easy and straightforward, but there is some nuance and practical advice to be had here. Here are a few of our recommendations for successful shooting:
-
We need to eliminate camera shake even at a microscopic level. Set your camera shutter to be fully electronic so the physical curtains do not move. If you do not want a fully electronic shutter, use EFCS and a long interval between shots.
-
Use manual exposure for consistency and ISO 100 for the lowest noise output. Shoot in RAW for maximum quality and flexibility.
-
Set your lens to the sweet spot aperture. A sweet spot is an aperture that is closed down to maximize depth of field but not so much as to introduce the softening effect of diffraction. 99 percent of all full-frame lenses will have their sweet spot performance up to f8. So, if you do not know the exact tested value, go for f8.
-
Go to the focus bracketing settings by clicking right a few times and choosing the shooting location as a new folder. Each bracketing series creates a new folder on the memory card, which helps to keep things tidy.
If you follow this advice, it will be a good starting point. Now, there is some trial and error to do. With an aperture like f8, even at a macro distance, I found that a step width of 10(wide) gives enough overlap for good stacking. A wide step will result in fewer photos covering the entire subject. How many exactly will you need to find out for each case? In this case, I calculated about 0.55 millimeters per one wide step - so maybe you can use this value as a starting point. Below is a video showing a test capture as seen in the camera screen.
Example
The figurine is not that small, but I oriented it in almost the worst way possible. We are taking the photo almost directly from its narrow side, so its hand is close to the lens while the staff is at the opposite end, spanning the whole width of the figurine. We need to cover about 30 millimeters of depth. With some trial and error, I arrived at a 55 photo value for the widest step possible and got full coverage of the subject.
Stacking Photos in Software
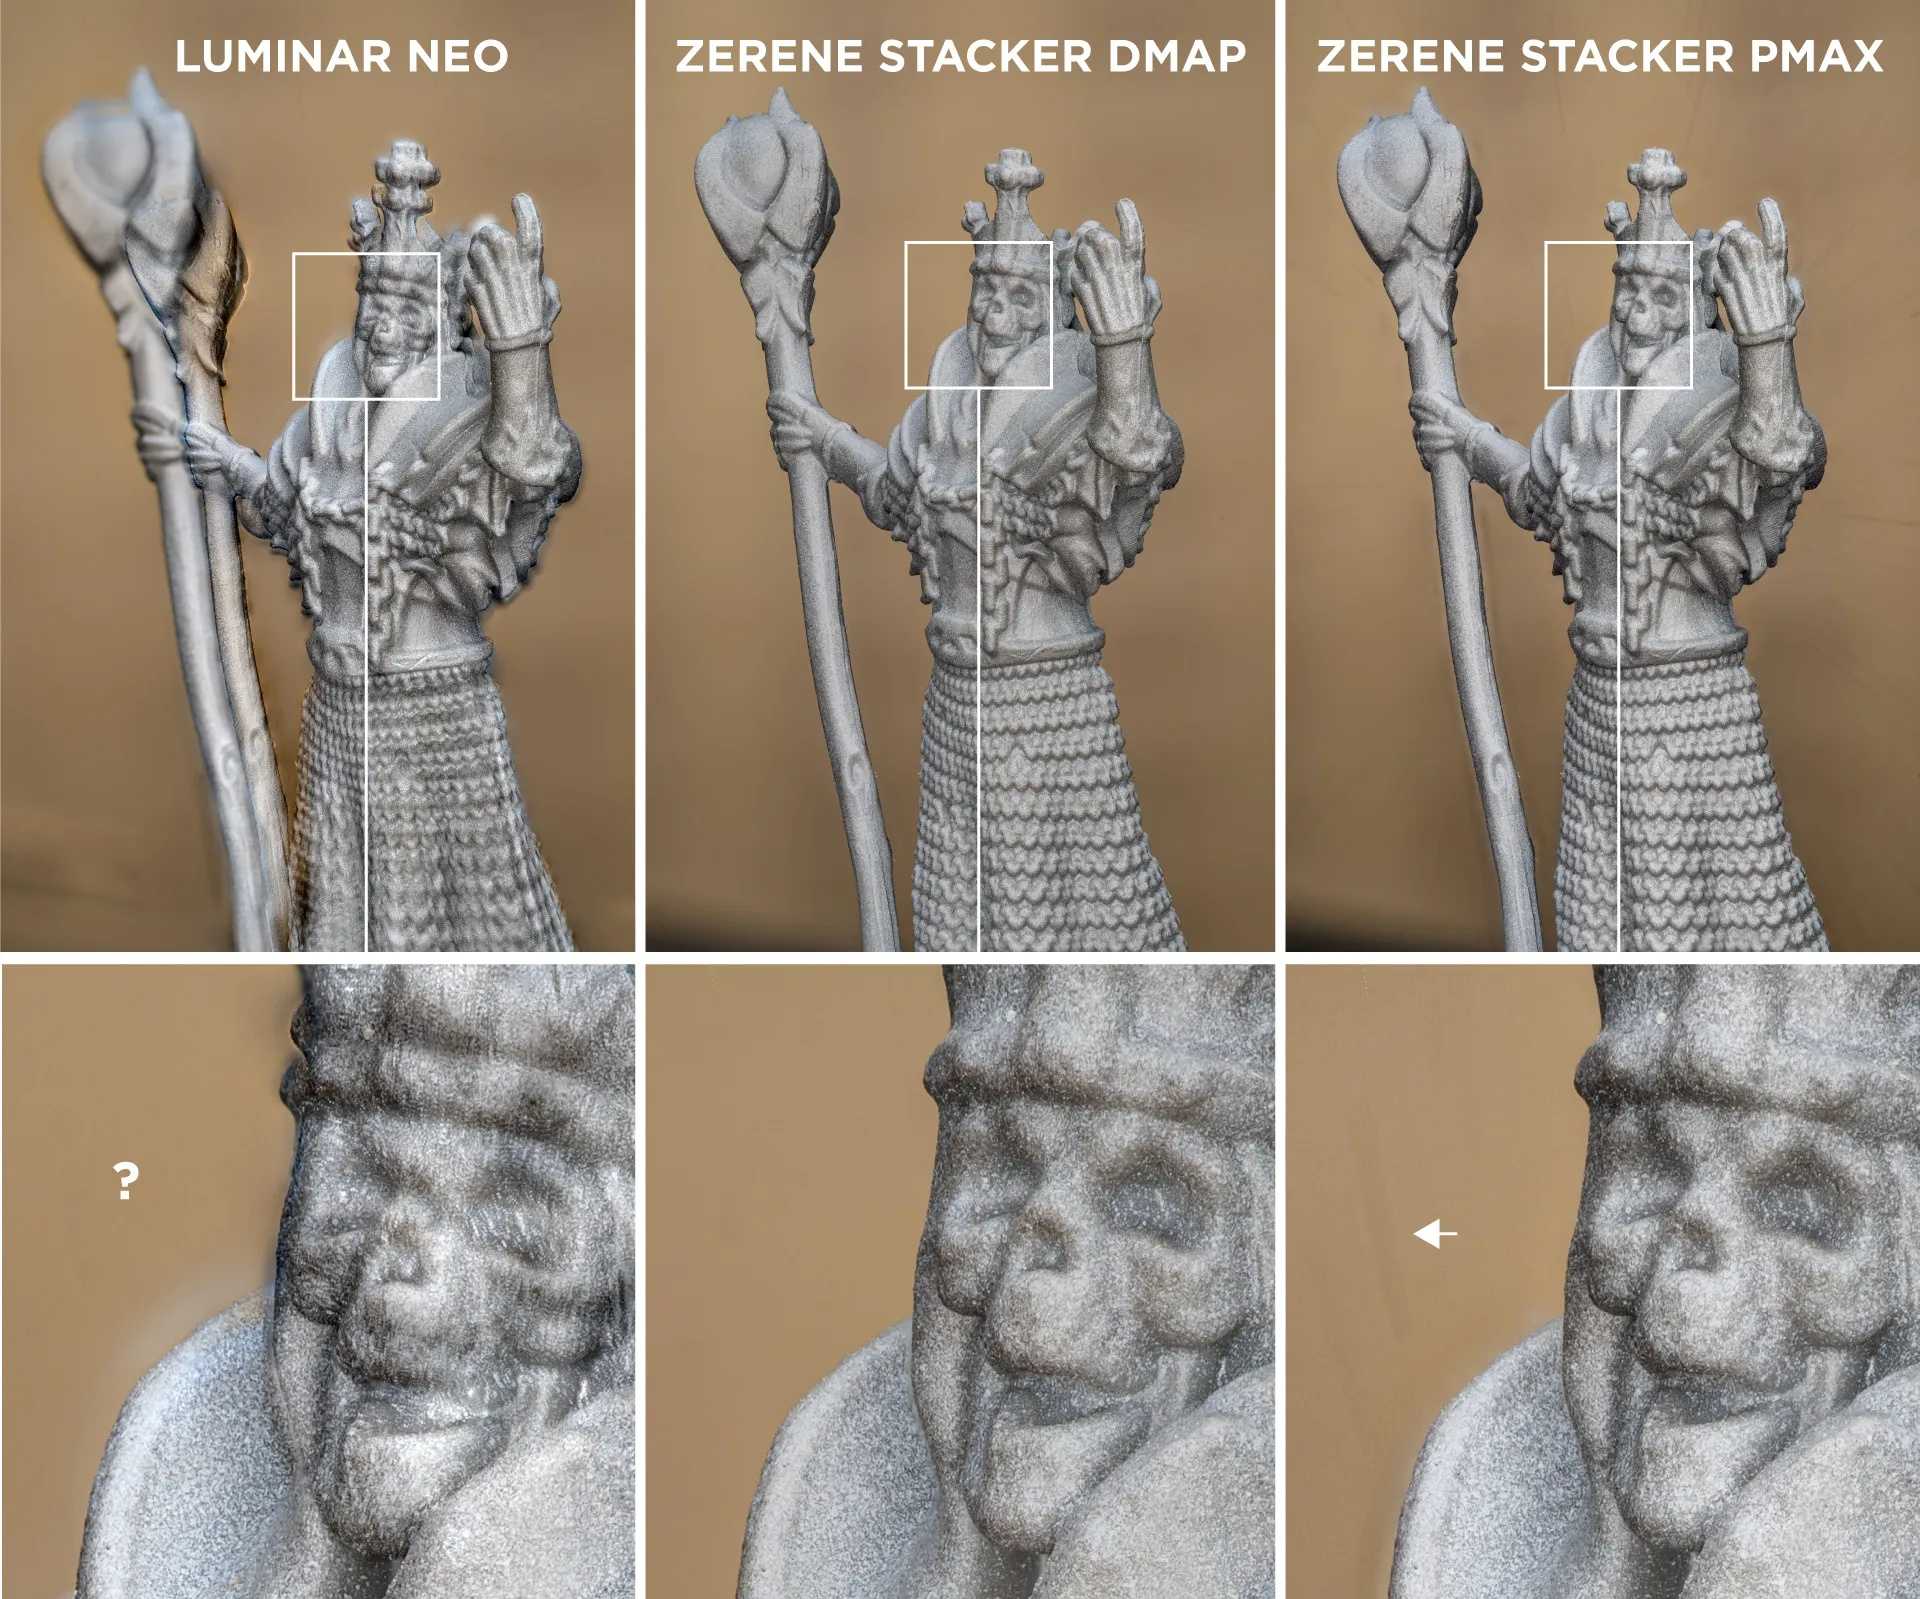
With the capture finished, we need to find stacking software. I have tried three for this case: Zerene stacker, Helicon Focus Pro, and Luminar Neo, which is a new kid on the block. It is not a specific stacking tool like the two classics, but it has this feature, so why not try it? Let us look at the results for each software below.
Helicon Focus Pro Results:
![]() Luminar Neo and Zerene Stacker Results:
Luminar Neo and Zerene Stacker Results:
 Photogrammetry and Stacking?
Yes. It works, and I have done it in the past. Check out this article on focus stacking for photogrammetry. In the previous article, I used a tool that allowed focus stacking without the in-camera feature. Now that we have it in the camera, I will try again, and hopefully, it will be a better experience taking thousands of photos for macro scan. For that, look for an upcoming blog post.
Conclusion
The exact workflow described in this article applies to the Sony A7IV and other Sony cameras that have this feature (A7RV also has it as of the writing of this article). However, the concepts all apply to focus stacking in general with any camera. Fujifilm and Panasonic cameras have had this feature for a while, and the implementation will not be that different. If you have a macro lens, you can try using virtually any small object. Next time, we are doing 100 times more photos and getting a focused stacked photogrammetric 3D scan.

Photographer - Drone Pilot - Photogrammetrist. Years of experience in gathering data for photogrammetry projects, client support and consultations, software testing, and working with development and marketing teams. Feel free to contact me via Pixpro Discord or email (l.zmejevskis@pix-pro.com) if you have any questions about our blog.
Related Blog Posts
Our Related Posts
All of our tools and technologies are designed, modified and updated keeping your needs in mind

Photogrammetry 202 - Pixpro Blog Index
In our final blog post of the year, we are indexing Pixpro photogrammetry blog posts from the last two years. After publishing regularly for a while, things tend to scatter: posts about workflows, Pixpro features, hardware tests, random experiments, use cases, comparisons.

Travel Photogrammetry - More Fun than 2D Photos
Sometimes a 2D photo does not do justice to a moment or a place, and you wish you had something more… dimensional. Something that captures shape, texture, and the little details that flat images tend to flatten even more.
Viltrox 14mm vs. Pergear 14 mm Lens – Choosing for Interior Photogrammetry
Ultrawide-angle lenses are most commonly used in photogrammetry for interior scanning. I am planning to do an interior-type construction site scan, so I need a lens for my Sony full-frame camera. There are plenty of premium wide-angle options, but I need something that provides the best image qualit
Ready to get started with your project?
You can choose from our three different plans or ask for a custom solution where you can process as many photos as you like!
Free 14-day trial. Cancel any time.
.svg@webp)