.svg@webp)
3D Asset Creation With Photogrammetry
 Lukas
Zmejevskis
Lukas
Zmejevskis
3D asset creation with the help of photogrammetry has become the bread and butter of the VFX and game industries. In many cases, photogrammetric 3D scanning can be quicker and more efficient than creating a 3D model from scratch. Intricate organic shapes, unique weathering patterns and formations, naturally occurring flaws, and textures are hard to mimic without direct reference to the real world. It applies to aerial and terrestrial photogrammetry. This blog will focus on small object 3D scanning, often used for 3D asset creation. There are many ways to go about it. Let us begin with the easiest one.
Test Subject
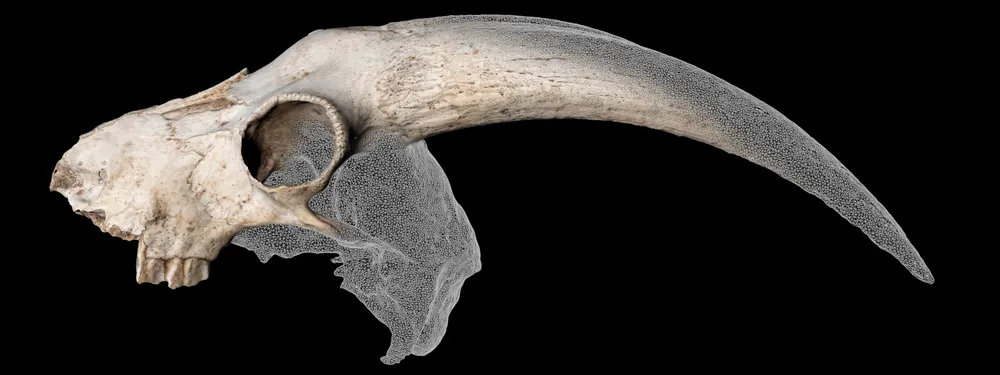
Our test subject for this blog will be an organic, naturally decayed, and textured object – a 40-centimeter-long mountain goat skull. It served well as a Halloween decoration and should be a perfect 3D asset for any spooky game. The skull is from the Cantabrian mountains, found during a caving expedition.
Subject vs. Camera Movement
Essentially there are two ways of going about 3D asset creation with photogrammetry. Either the camera is moving, the subject is stationary, or vice versa. The so-called turn table scans require more preparation and equipment and therefore are harder to execute. As this will be the first blog entry in a series about 3D asset creation, let us focus on the easiest one. Also, we shall not be using any artificial lighting as well. Creating a custom lighting setup should come after you have mastered 3D scanning in natural lighting.
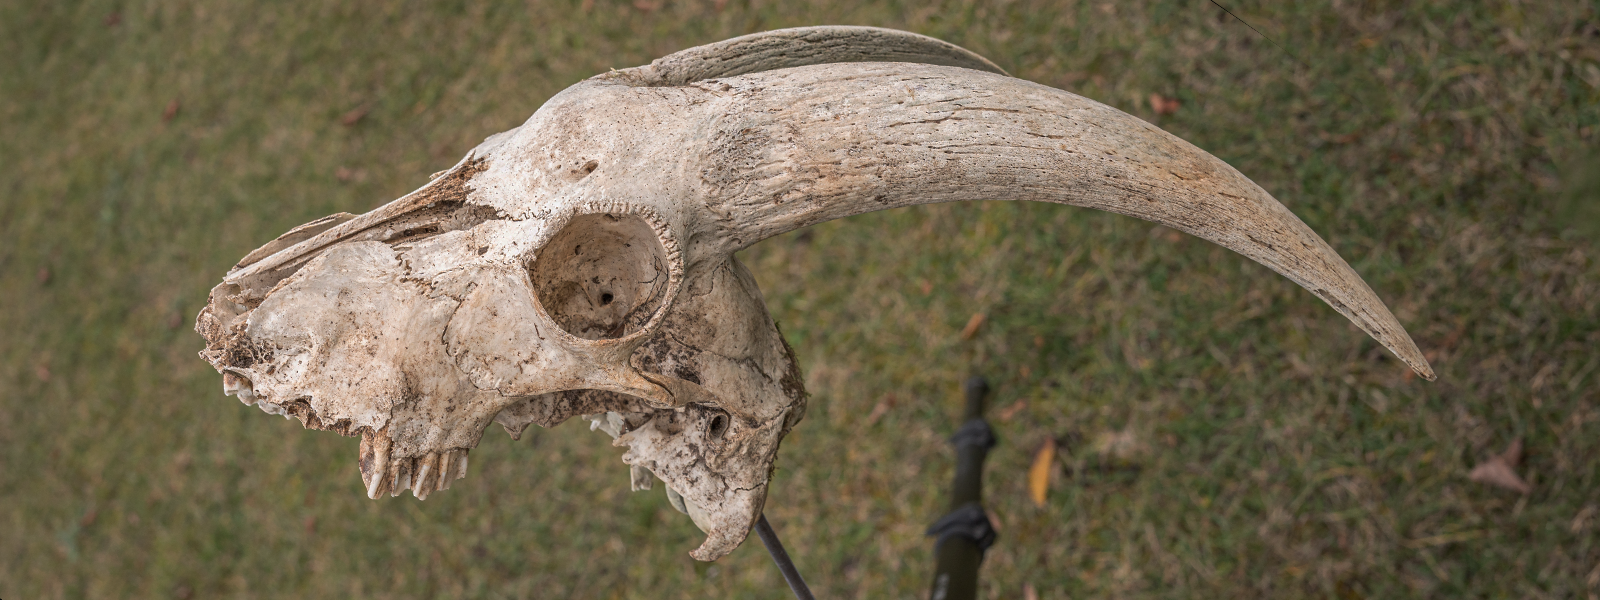
The Setup
Our setup is straightforward. We took the skull outside, alongside a tripod with a threaded rod screwed into it. The skull mounts on the threaded rod. There are a few things to focus on here:
- The mounting of the object you are scanning should be as discreet as possible, so it will not become a large part of the scanned object. In our case, the threaded rod is 6 millimeters in diameter, so it is pretty low profile.
- The mount should be stable, and the object must not move.
- The height of the object should be convenient. You must be able to take pictures of any part of the object.
You can achieve these things however you like, but they are not up for debate. If the object moves, your scan will fail. If you cannot reach a part of the object – your scan will fail. Practically it is not hard to satisfy these requirements. You have to be diligent.
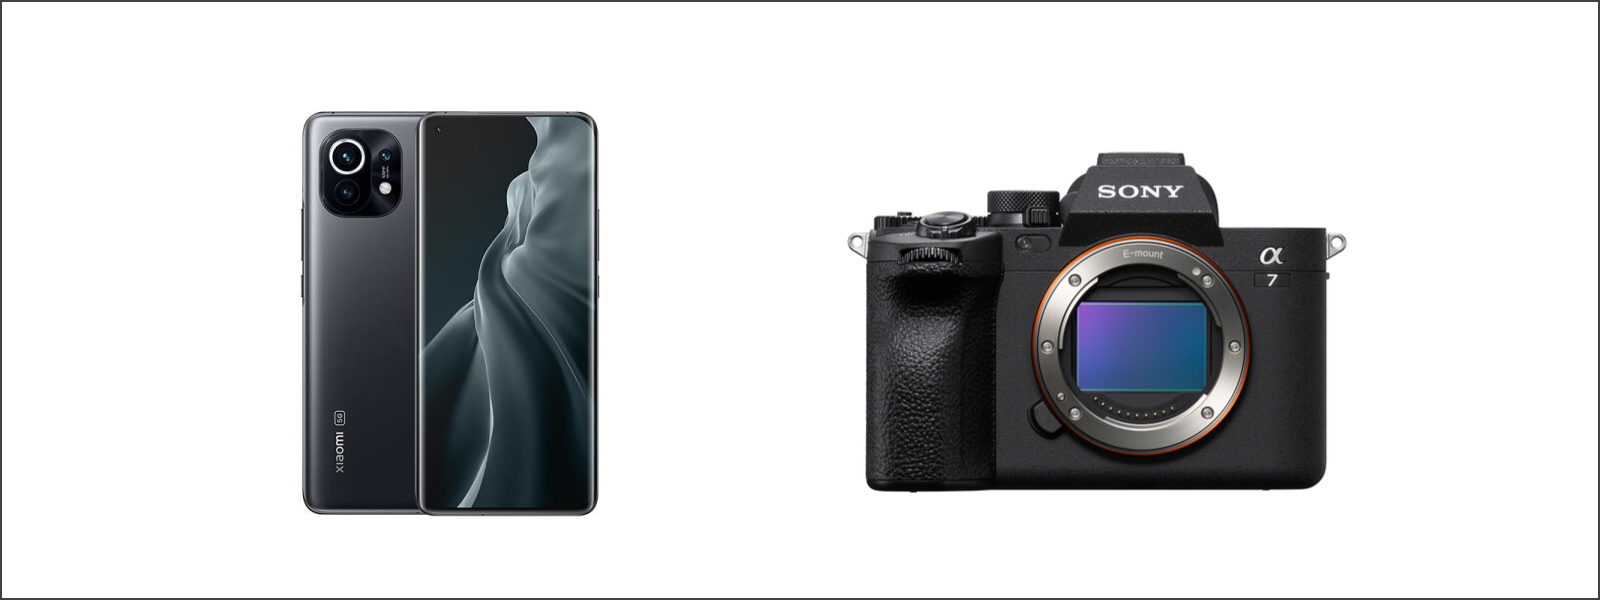
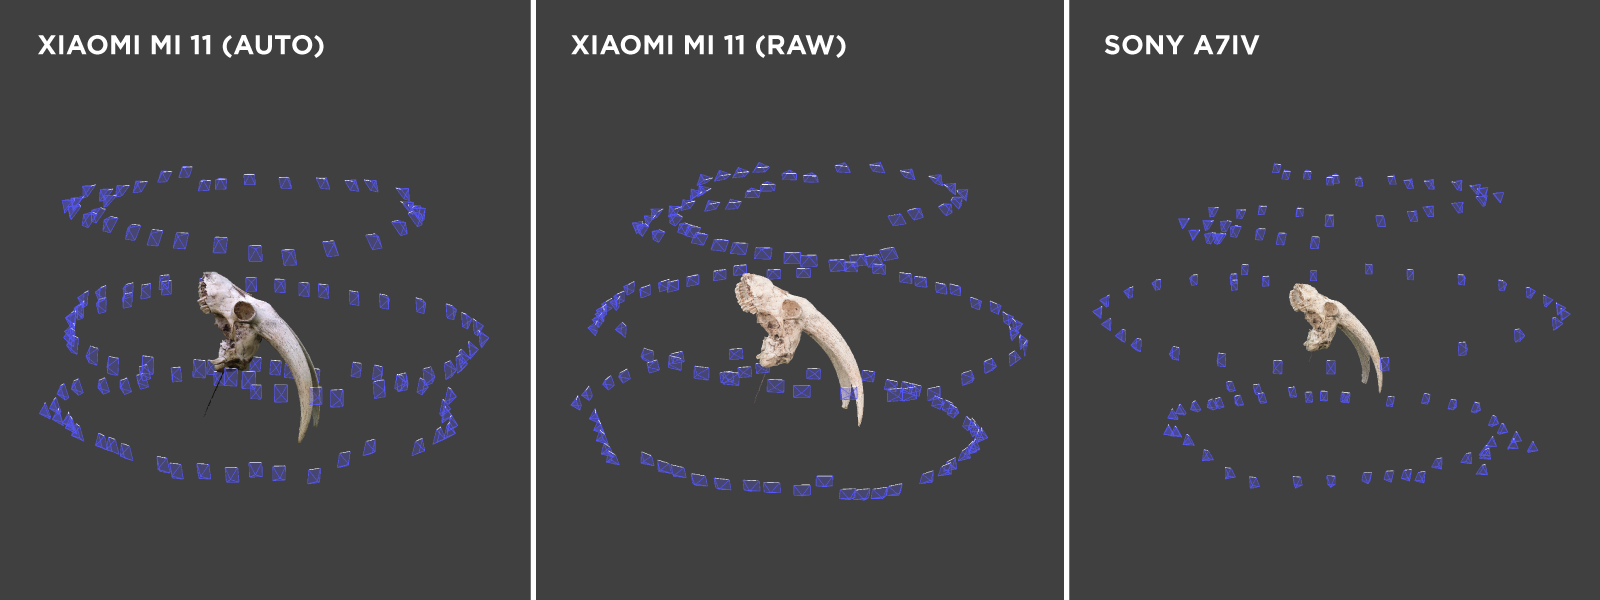
For taking photos, we brought two cameras: a smartphone with a competent camera – Xiaomi Mi11 and the professional Sony A7IV full-frame camera with a 35-millimeter lens.
We took the photos on an overcast day at midday. We did not choose any location in particular because we had the perfect lighting – a thin cloud cover and no wind. You might need to be more careful about the desired location if you go out during harsh lighting conditions and wind. Wind moving the object or drastically different lighting on different sides of the asset can ruin the scan. So you may need to find a more sheltered spot in such conditions.
Taking The Photos
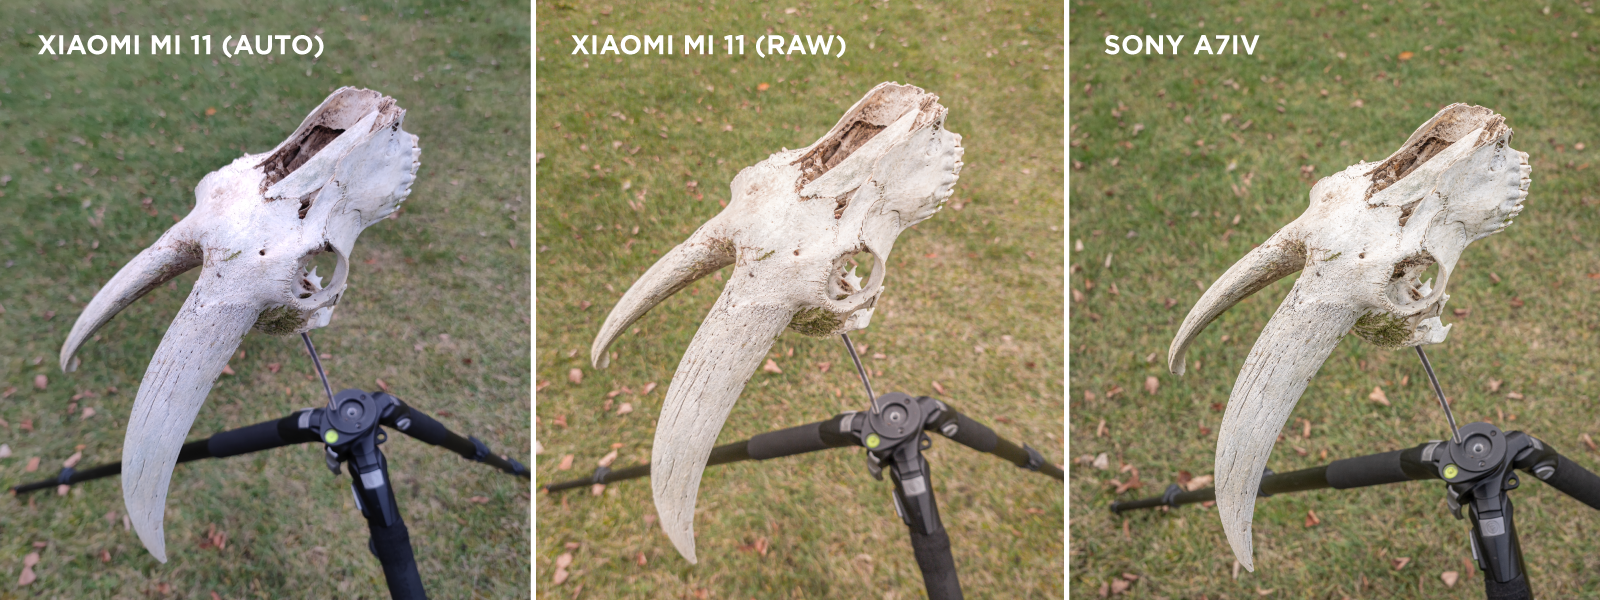
We took the photos in three rows. Middle, top, and bottom, keeping the entire object in the frame and focus. For testing purposes, we made three similar scans:
- With the Xiaomi Mi 11 primary camera and auto mode. Ensure no special filters or gimmicky settings such as HDR, AI, or “high resolution” modes are enabled. Avoid “full width” or 16:9 pictures. Only the original 4:3 aspect ratio, full resolution, and highest jpeg quality. We can call this the “clean mode.” No useless features enabled, just the photos.
- With the Xiaomi Mi 11 primary camera in Pro mode. Same thing as the auto mode, but this shoot provided RAW images from the camera. We set the exposure on auto, white balance on “cloudy,” standard autofocus.
- With the Sony A7IV manual exposure mode. Manually exposed, the object is nice and bright from all angles, with continuous autofocus on the skull at all times. The lens was closed down to the aperture of f8 to keep as much of the skull in focus.
We took the photos moving from left to right around the skull, a small step for each shot. The overlap may not have been perfectly consistent, but most importantly, it was sufficient.
Photo Processing
We inspected JPG photos from the Mi 11 before 3D reconstruction to ensure they were all successful. We found a single shot that was misfocused. In total, we used 121 photos for the 3D reconstruction.
We processed the RAW images in Adobe Lightroom. We adjusted the exposure and white balance to make all photos look identical. These are basic adjustments familiar to all photographers. If you are shooting RAW, you are probably familiar with RAW image processing and export. Just remember to avoid any cropping and heavy, stylized editing. We totaled 133 images from the Mi 11 and 104 from the sony A7IV.
3D Asset Reconstruction
Now that we have all images ready for processing, you can upload them to your favorite photogrammetry software. We will use Pixpro to reconstruct all three examples. Creating a project in an arbitrary coordinate system will help avoid confusion due to phone GPS data. Smartphones save GPS data in the photo metadata, which will not be accurate enough to reference such a small scan. By creating an arbitrary project, we avoid any use of GPS data. Otherwise, we run everything in the default settings and use the clipping box to isolate the skull. You will see background details reconstructed when using this type of technique. Remove the background and your mounting mechanism with the tools you have. In Pixpro, we will also use manual referencing tools to scale and orientate the skull.
Results
We got successful, high-quality 3D models with textures in all three cases. We can now export these models to more specialized software or sharing platforms. If the models are too large for any use case, Pixpro has decimation options for size reduction.
Conclusion
Outdoor orbit-type scans may be the easiest path to 3D scanning small objects, but success is not guaranteed. Depending on the complexity of the thing or its texture, there may be some issues. So for the first attempts, we recommend using something easy to scan with distinct textures and features. Our example has a complex shape but no monotonous or reflective surfaces, so it is pretty easy to scan. In the future, we will convert more complex cases and a studio setup for 3D asset creation.
Photographer - Drone Pilot - Photogrammetrist. Years of experience in gathering data for photogrammetry projects, client support and consultations, software testing, and working with development and marketing teams. Feel free to contact me via Pixpro Discord or email (l.zmejevskis@pix-pro.com) if you have any questions about our blog.
Related Blog Posts
Our Related Posts
All of our tools and technologies are designed, modified and updated keeping your needs in mind
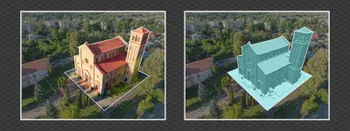
Overlap Between Different Perspectives
Photogrammetry can be simple and rigid or complex and adaptable. Combining different scan patterns adds complexity to the work but improves detail and coverage. We often use examples of combined flights, of which the orbital + nadir grid is a classic. They provide great 3D structure while being easy

Pixpro Waypoints - Automated Photogrammetry Flights for Newest DJI Drones
The latest DJI drones are the most capable flying cameras on the market. If you need a tool like that or a competent machine for casual creation - DJI Mavic 3, DJI Mini 4, and DJI Air 3 series drones are the best.

Accuracy of Your Photogrammetry Project
Accuracy in photogrammetry is a multifaceted point of discussion. We can talk about absolute, relative, or even geometric accuracy, to name a few. No tool or technique can really prove anything beyond reproach.
Ready to get started with your project?
You can choose from our three different plans or ask for a custom solution where you can process as many photos as you like!
Free 14-day trial. Cancel any time.