.svg@webp)
Cross Polarization Photogrammetry
 Lukas
Zmejevskis
Lukas
Zmejevskis

In the previous post, we looked at the easiest way of scanning a small object with the help of photogrammetry. It involved going outside, using natural light, and doing orbital scans. A more complex but professional way is to set up a home/studio scanning setup and utilize cross polarization. With the right equipment and skills, photogrammetric scanning can become more efficient and consistent in a stable environment.
Turntable vs. Orbit
While orbital scans are still feasible and perfectly doable indoors, setting up a turntable makes the process faster, and the whole setup takes up much less space. Unless you can work in a professional studio with intense continuous lighting (or professionally adjusted strobes), you will have much less light than outdoors. It means that in both scenarios, you must ensure the stability of the camera and the object to utilize long camera exposures. Let us summarize the main differences between orbital and turntable scanning:
Orbital indoor scans:
- Require a tripod for the camera (in most cases);
- Require moving the camera with the tripod for each picture;
- Must have the object be static and stable during the whole shoot;
- Relies on ambient lighting;
- Utilize the same technique as outdoor orbital scans.
Turntable indoor scans:
- Require a tripod for the camera;
- Require a neutral, non-reflective surface to put your object on;
- Involve moving the thing itself;
- Give best results with cross polarization lighting setups;
- If cross polarization is unavailable, turntable setups require perfect, diffused, uniform lighting from all angles.
Also, there are many possible combinations of both of these techniques. For example, you can move the object and the camera to achieve the best angles. But in our opinion, most of these “hybrid” techniques are made redundant if you have the means to do cross polarization in a controlled environment. Thus we suggest striving to create the most practical and easy-to-use setup, which we will discuss further.
What is Cross Polarization?
Cross polarization is a technique where we utilize polarized light to remove all specular highlights from an object, thus making it look “flat.” So you can scan even reflective and glossy objects (to a degree) with this setup. You can read about the complex physics of polarization in the Wikipedia article. We will focus on how to achieve this effect in practice.
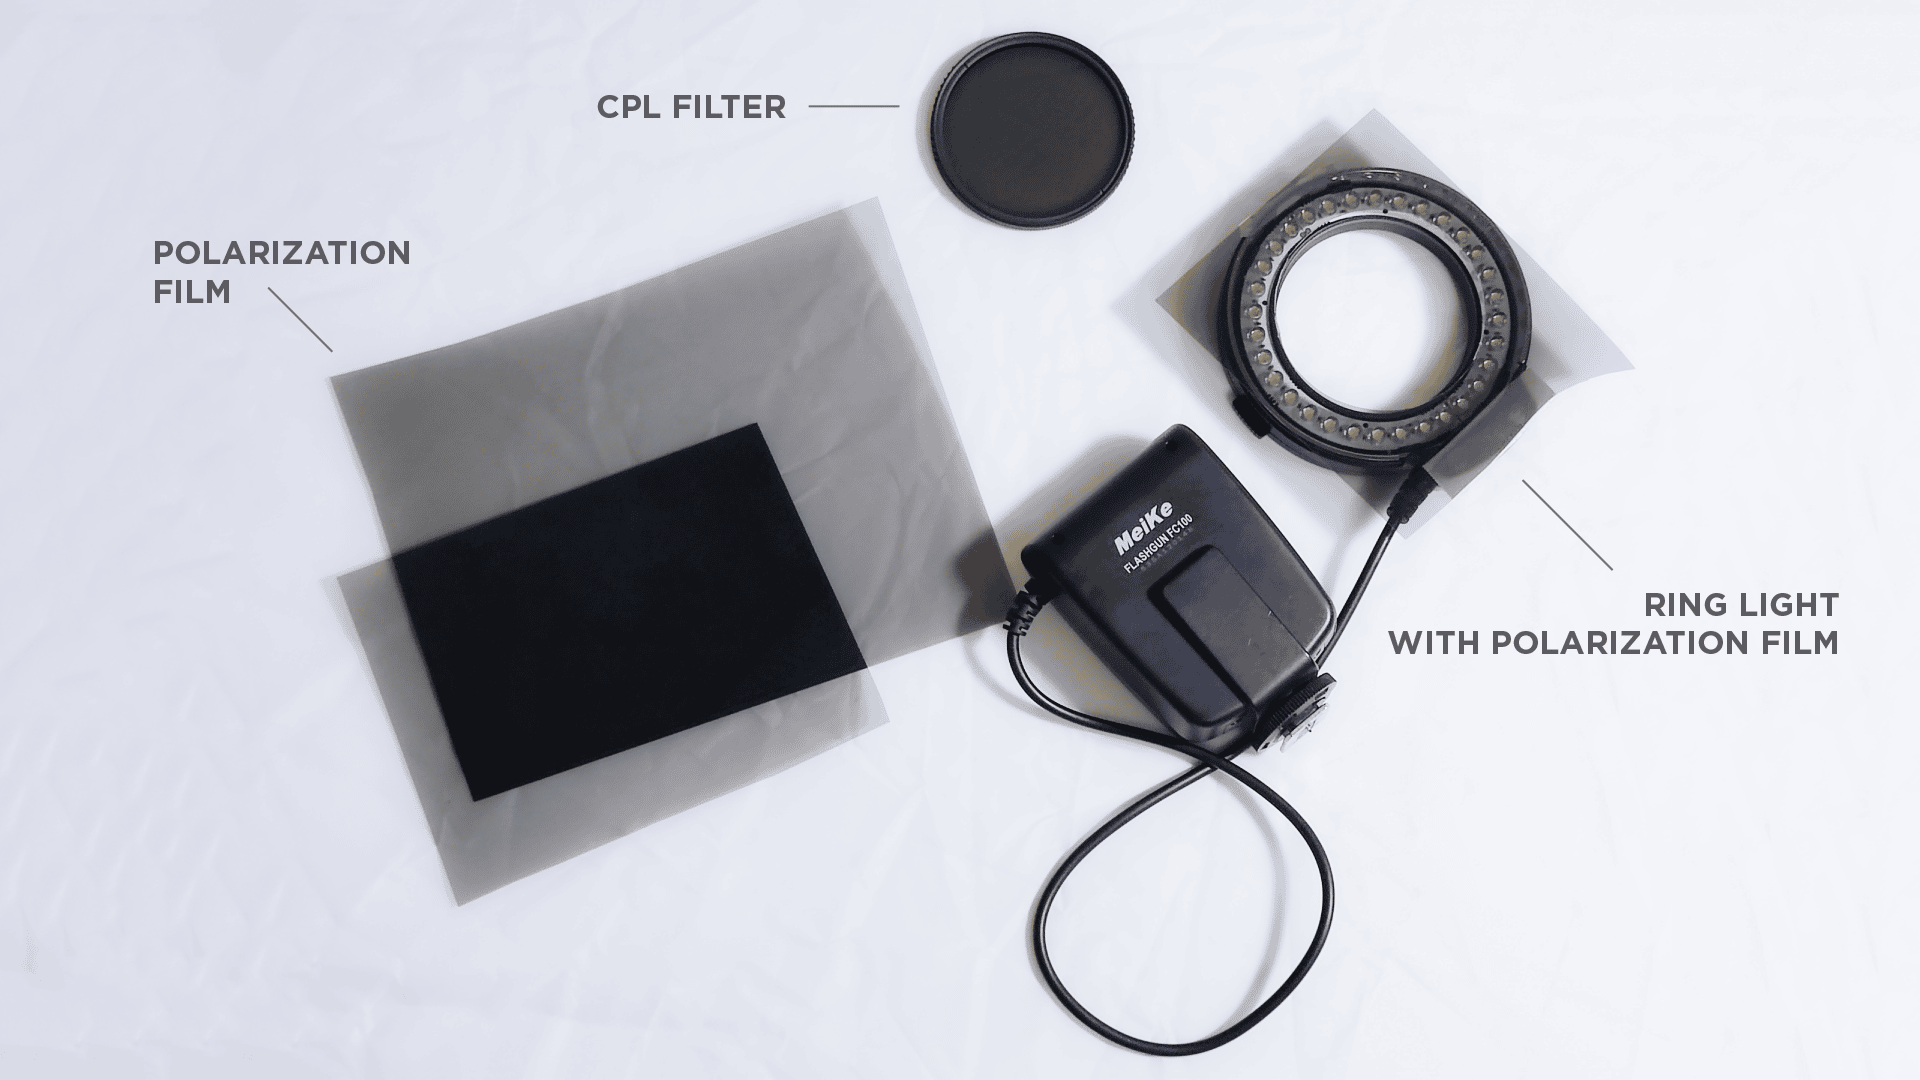
To create the most effective cross polarization setup, you will need three things besides a camera with a lens: a piece of polarization film, a ring light, and a CPL Filter.
Polarization Film
You can source the film in two ways – either buying or salvaging. Look for polarization film on Amazon or any other wide-spectrum shop. Alternatively, we can recover it from old LCD screens. Each screen will contain two polarization film layers. We recommend this for seasoned DIY enthusiasts and people who might have a broken monitor lying around. You can find many videos of people removing film from old LCD screens on Youtube.
A Ring Light
We recommend just buying a cheap LED video ring light. It can be a free-standing one or one that mounts to the lens. It does not have to be especially powerful. Make sure it is compatible with your lens – the center hole is big enough. We had a Meike FC100 lying around, so we used that. Do not opt for expensive macro flashlights – we will need continuous light and have to do some alterations.
Circular Polarizer Filter
You will need a CPL too. These filters are widely available in many sizes and price ranges. For our case, the cheapest CPL filter will suffice. Just make sure it is the correct diameter for your lens.
Additional Equipment
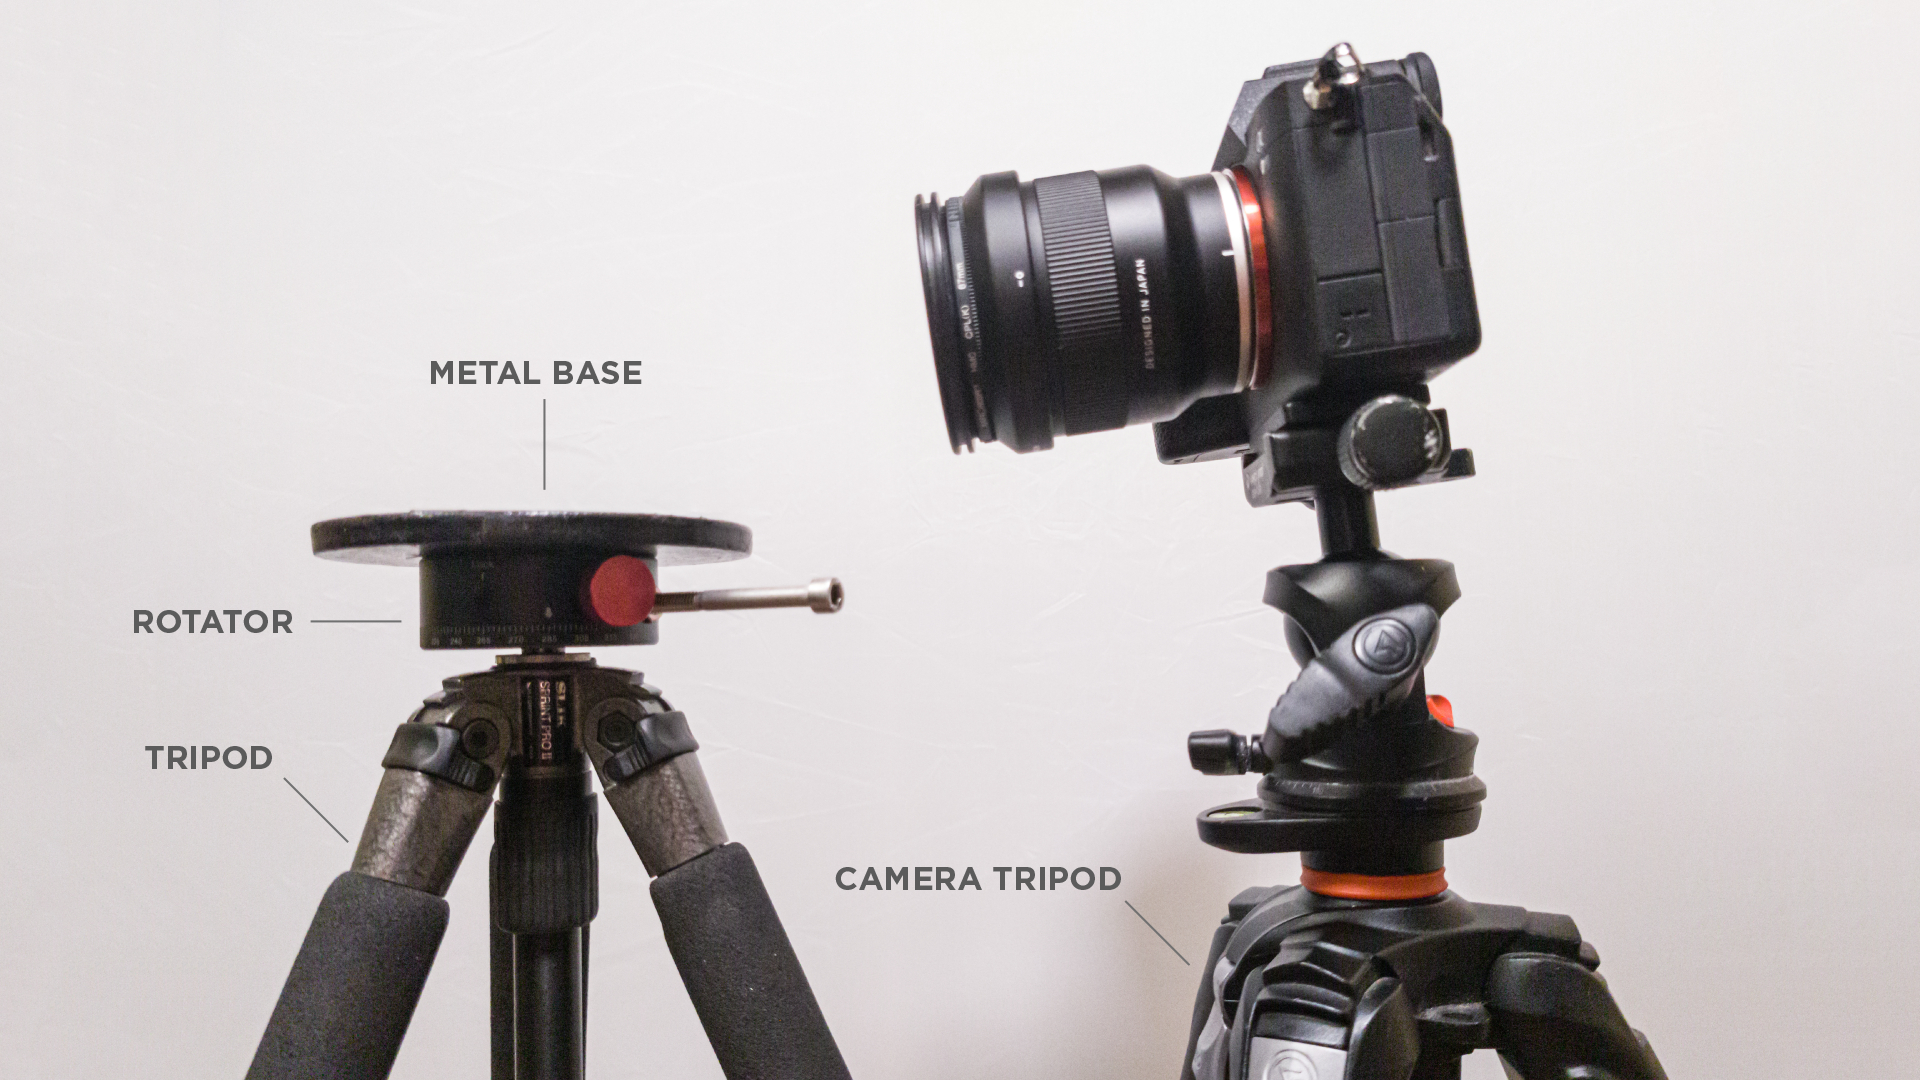
A tripod for your camera is also a must, but that is usually a part of any camera kit. It must ensure that your camera remains rock solid during prolonged exposure. Additionally, two pieces to make a perfect setup will be required – a surface to put your objects on and a background. Ideally, the base and the background should be matt black material with minimal reflections and imperfections. Black adhesive velvet works best, but you can also use any black clothing or fabric.
Finally, if the base can rotate freely – you have the complete setup. You can achieve the rotation by any means necessary. It can be a pizza base covered in the mentioned black velvet or a second tripod with a rotating head. Or just a piece of the carton with a nail in the middle. Of course, there are products designed for this exact purpose. Still, the implementation will not affect the quality, only the efficiency of producing images. So do what you can do best for now, and when you prove the concept, you can decide how far you need to go with the equipment.
Assembling The Setup
If you have everything you need, you must do some work before taking photos. To do the cross polarization work, you must put the CPL filter in front of your lens and your polarizing film in front of your light. This part might require some disassembly and modification. Most importantly, you might need to remove the diffusion from your light, as some diffusers prevent polarization. We removed the white plastic and exposed the bare LEDs of the FC100.
Once you have done that, you need to put the polarizing film in front of the light. So cutting a hole for the lens is a must. In our case, we attached the polarizing film to the disassembled ring light with double-sided tape. Honestly, you do not need anything more complex.
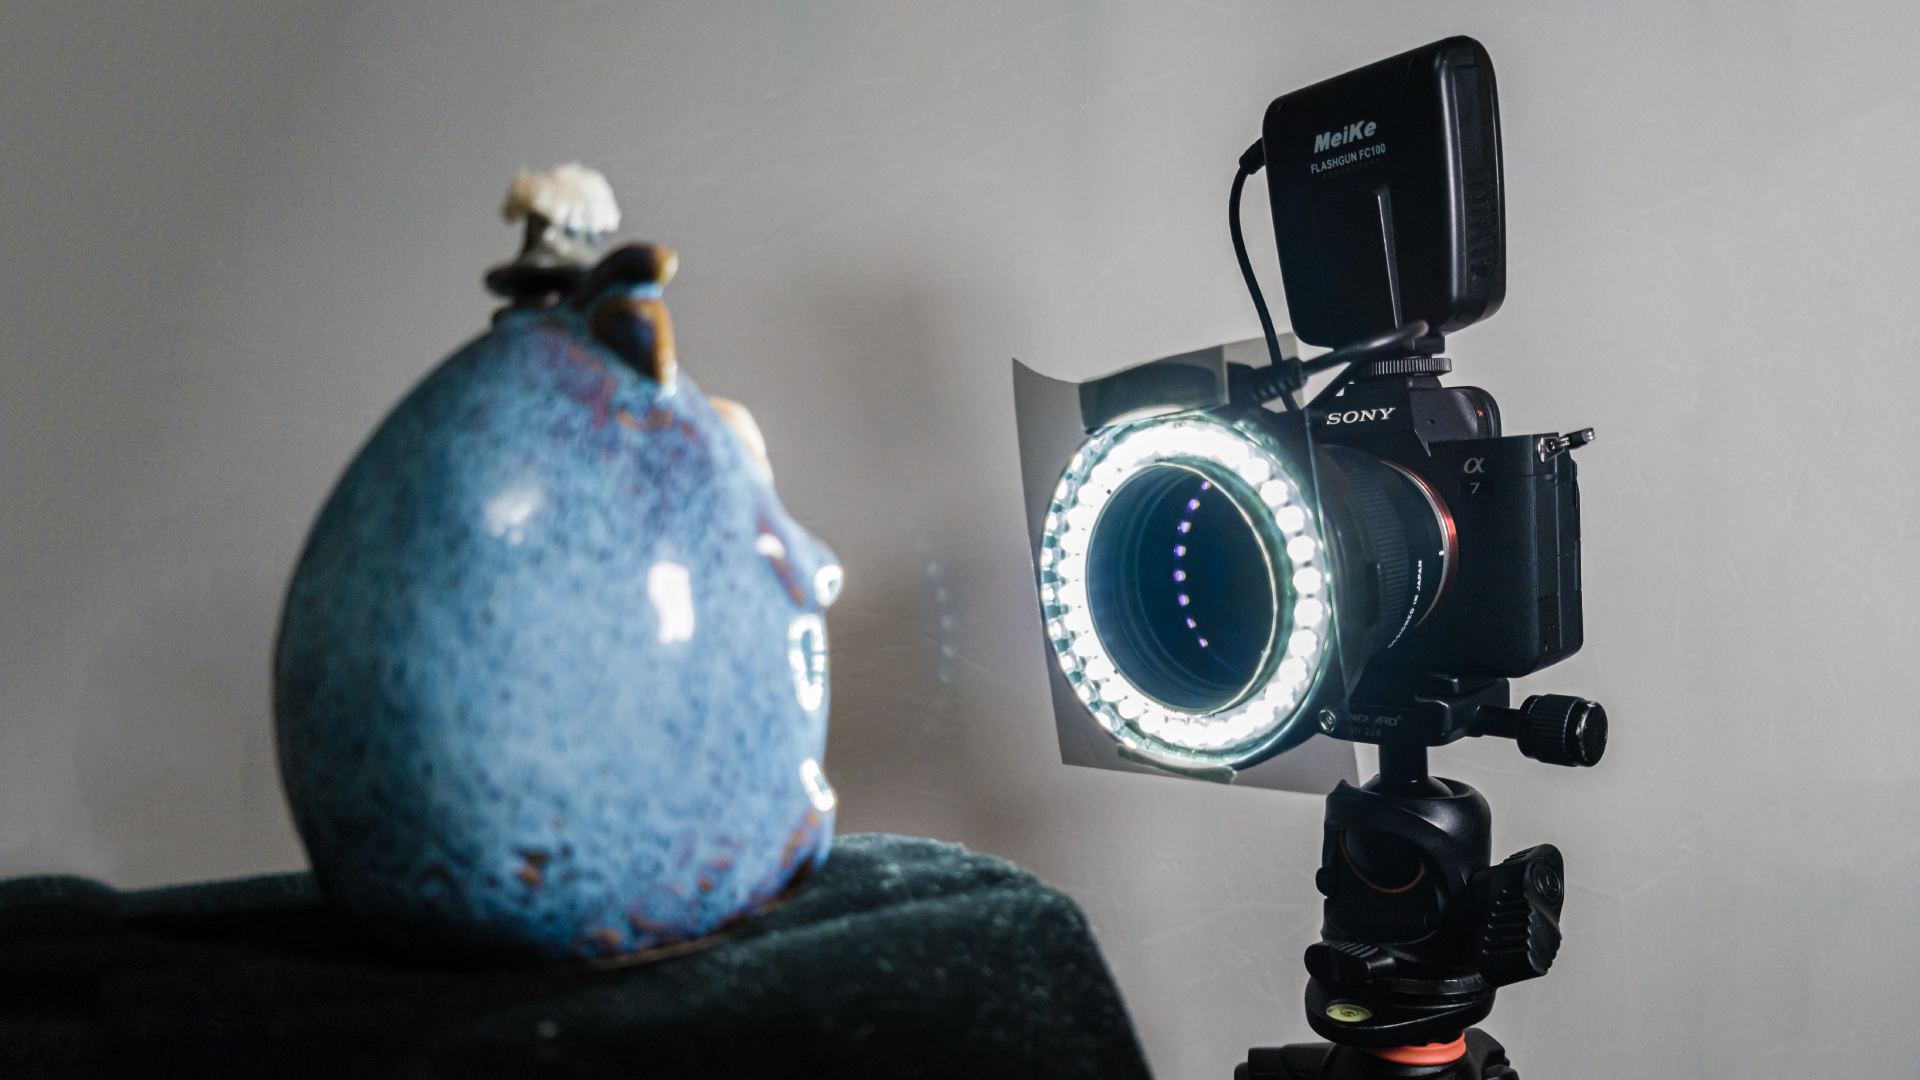
Put the ring light with the film on your camera, which should already have the lens with the filter attached. Set up the surface you have chosen for the objects. Either with or without the rotation function, select an object for testing. Ideally, it should be more reflective to highlight the benefit of cross polarization. The camera should face the thing directly from the front, so the spinning axis is close to parallel to the camera sensor plane. Once everything is ready, we can begin testing.
Enabling Cross Polarization
Now that everything is ready, we can set up our cross polarization. Turn off any lights or light sources in the room. It is best if it is pitch black, but a computer screen in the background will not ruin the process. Our ring light should be the overwhelming source of illumination on the object.
Turn on the ring light while the camera is facing your object. The object should fill as much of the field of view as possible. Now you need to turn the CPL filter to any direction and observe how the reflected highlights disappear. After a few turns, you will get an idea of your setup’s effectiveness. Find a spot where the least specular highlights are visible on your object.
The background and the base on which the object lies should also be pitch black. If the background reflects light, try moving it back further from the camera. If the base is illuminated and visible in the camera, try reducing the power output of the ring light. In our case, we used the weakest power mode on our light for all examples, a black velvet bag for a base and the black side of a reflector as a background. When your object feels like it is floating in the void – you have nailed it.
Camera Settings
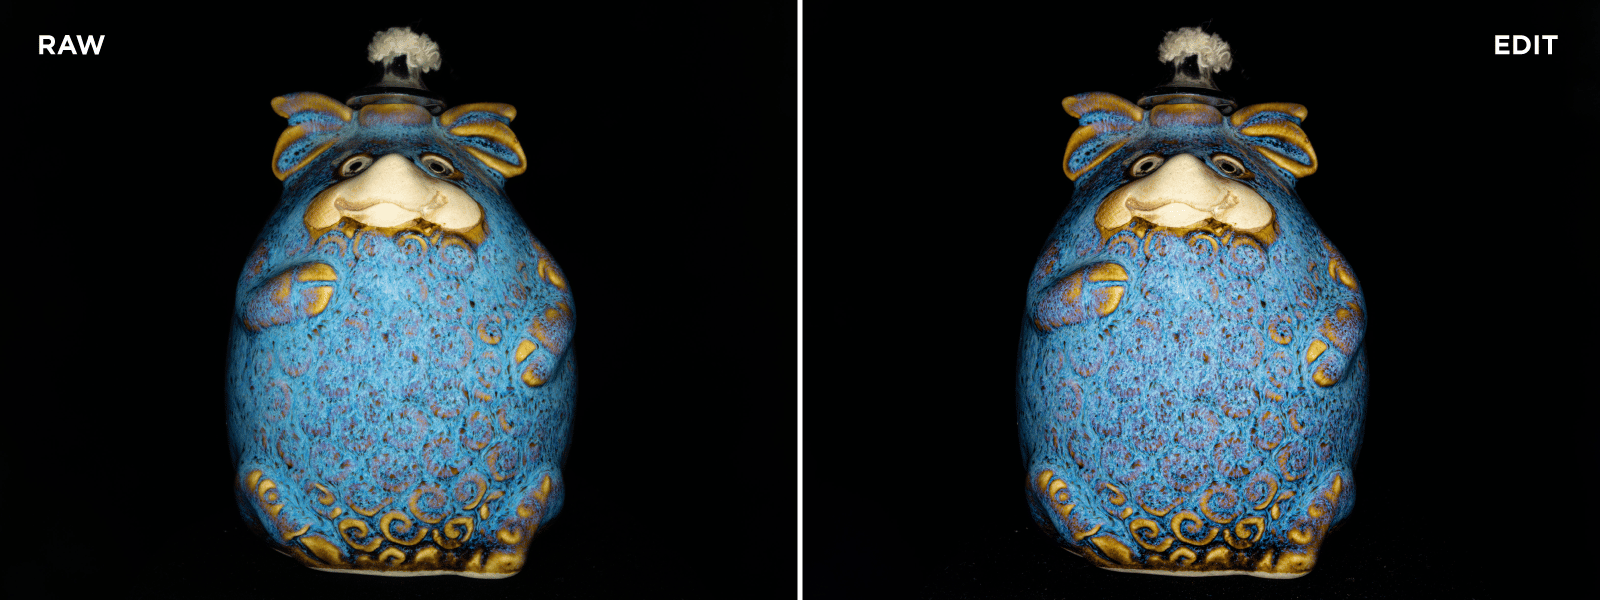
We used a professional full-frame camera with a cheap but decent 35-millimeter lens – the same as in our previous article. Exposure settings were based on the shutter speed as we kept the aperture closed down to f22 to maximize the depth of field and ISO at 100 to maintain the best quality. Shutter speeds varied from 2 to 7 seconds for different objects. It means that the camera must remain perfectly still during the exposure. We used a 5-second timer and an electronic first curtain shutter to ensure no residual vibrations remained. If you use a DSLR, do not forget to use mirror lockup. We took raw images and processed them lightly in Lightroom to bring out some more detail and keep the white balance identical.
Taking The Photos
With the cross polarization, base, and background calibrated, we can begin to take photos. If you have a spinning base, spin the scanned object and take pictures approximately every 15 degrees. You should have at least 24 images around a full 360-degree rotation. If you have a fixed base, pick up the object and place it with the same 15-degree offset. Just ensure that you do not alter the object while picking it up. If you are trying to scan a teddy bear or a squishy and hairy thing, a spinning base might be your only option. For rigid objects, picking them up and placing them down might not be a problem.
After a “spin” is complete, you can either place the object on a different side or move the camera up and angle it down to gain more coverage. You need to cover every part of the object you want in 3D. A single “spin” will not be enough in most cases.
Examples
With the setup we detailed above and general photogrammetry best practices, we made a few examples, all of which turned out quite well. With the right photogrammetric processes, these can become high-quality 3D assets for any game engine or VFX production. Keeping in mind that we achieved this with minimal additional investment, we can regard this as highly efficient.
Conclusion
Cross polarization is a powerful tool for photogrammetry. You can push its limits by scanning ever larger and smaller objects, which might require some tweaks. But we hope that what we detailed in this article will help build a foundation to understand cross polarization use for 3D asset scanning and help you get started.
Photographer - Drone Pilot - Photogrammetrist. Years of experience in gathering data for photogrammetry projects, client support and consultations, software testing, and working with development and marketing teams. Feel free to contact me via Pixpro Discord or email (l.zmejevskis@pix-pro.com) if you have any questions about our blog.
Related Blog Posts
Our Related Posts
All of our tools and technologies are designed, modified and updated keeping your needs in mind

Overlap Between Different Perspectives
Photogrammetry can be simple and rigid or complex and adaptable. Combining different scan patterns adds complexity to the work but improves detail and coverage. We often use examples of combined flights, of which the orbital + nadir grid is a classic. They provide great 3D structure while being easy

Pixpro Waypoints - Automated Photogrammetry Flights for Newest DJI Drones
The latest DJI drones are the most capable flying cameras on the market. If you need a tool like that or a competent machine for casual creation - DJI Mavic 3, DJI Mini 4, and DJI Air 3 series drones are the best.

Accuracy of Your Photogrammetry Project
Accuracy in photogrammetry is a multifaceted point of discussion. We can talk about absolute, relative, or even geometric accuracy, to name a few. No tool or technique can really prove anything beyond reproach.
Ready to get started with your project?
You can choose from our three different plans or ask for a custom solution where you can process as many photos as you like!
Free 14-day trial. Cancel any time.