.svg@webp)
Measuring Roofs with Photogrammetry
 Lukas
Zmejevskis
Lukas
Zmejevskis
For solar panel experts, measuring roofs and modeling photovoltaic power plants are daily tasks that can involve dangerous procedures. But with the help of drones and photogrammetry, the efficiency and safety of many methods can be improved. This article will reveal just how easy it is to measure roofs using consumer-grade drones and Pixpro software.
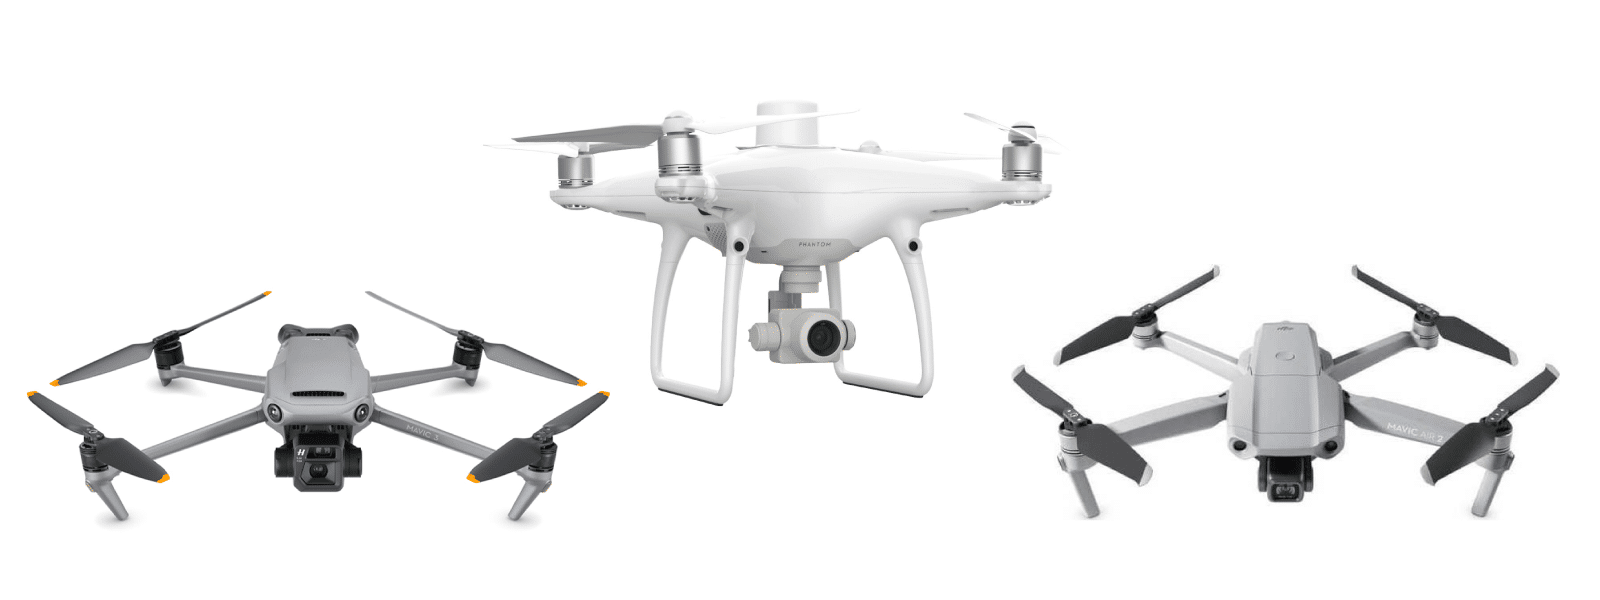
Choosing a Drone
To enable measurements in a photogrammetry project, we need some kind of referencing. Luckily most quadcopter drones use GPS data for flight operations, like setting a home point and hovering in a single spot. GPS location data is embedded in the images taken with the UAV. This data allows us to have a scale in a photogrammetry project and therefore measure anything in the scene. Thus there are two main requirements for a drone for our use case:
- The drone must be GPS-enabled.
- The drone must have a decent quality camera.
Most DJI, Autel, Yuneec, and Skydio drones meet such criteria. Toy copter drones for children or FPV drones for racing will not meet the requirements, whereas large, fixed wing drones have an entirely different purpose.
Taking the First Flight
Then comes the piloting skills. To be able to take aerial images, you do have to know how to safely pilot the drone. But with modern GPS-enabled quadcopters, learning is easy. You can start slow and learn what each control does by letting the drone hover in a single spot while gradually familiarizing yourself with the drone’s speed, sensitivity, and inertia. Essential advice for learning to fly a GPS enabled quadcopter:
- The process starts indoors: read the user manual, and watch beginner-oriented videos.
- Check if all components are undamaged and present in your purchase, and ensure they contain the latest firmware.
- Create all necessary accounts and logins, so you would not have to do that in the field.
- Start flying in a vast open space, i. e. a football stadium.
- Start slow, don’t rush the process. You don’t want to end the learning process with a crashed drone.
- Take your time. Use up all available resources and learn as much as possible before doing any flights that matter. Learn how the drone behaves if the batteries run out and how it automatically returns home and lands.
Photographing for Photogrammetry
Photo sets made for photogrammetry must follow a few rules:
- Images must contain the subject in question. Remove all irrelevant photos from the image set.
- Images must be sharp and properly exposed. So no motion blur, good focus, and not too dark or too bright.
- Images must overlap by 80 percent or more. This is what enables the 3D reconstruction in the software.
We have covered the topic of taking images in quite a few of our previous articles:
Photogrammetry Fails and Issues Part 1
Photogrammetry Fails and Issues Part 2
Easy Roof Inspection with Pixpro
Flight Planner. Do I Need One?
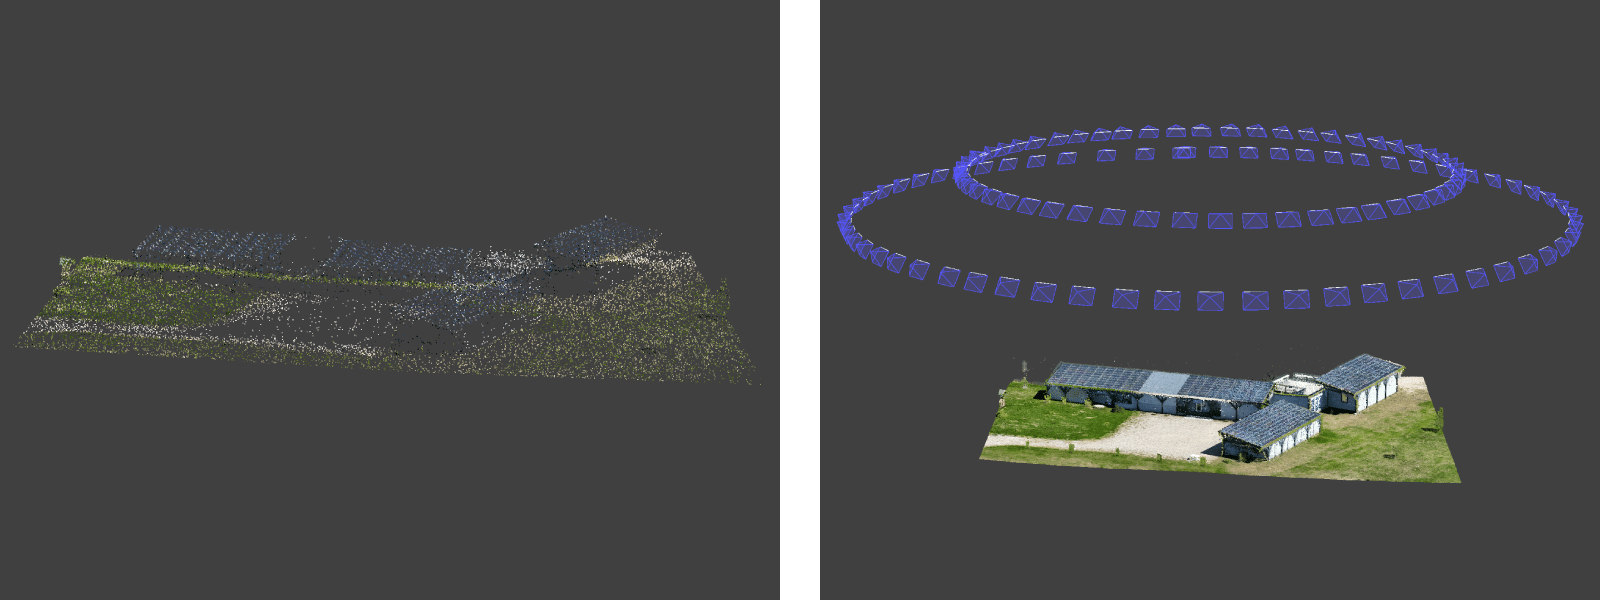
You have to combine your flying skill with the available camera resources to obtain a well-made set of photos. Usually, making an orbital scan with 25 – 45 images is enough for residential house roofs to create a perfectly usable 3D model and begin measurements.
Suppose you use a Flight planners app like Drone Duty with a compatible drone. In that case, it is even easier to control your flight and make consistent 3D scans daily – a must for energy industry professionals and service providers.
Photogrammetry Software
Once the image set is made and thoroughly inspected, we can upload these images into photogrammetry software such as Pixpro. Pixpro allows you to use your PC for processing or our cloud services, depending on your subscription level. With Pixpro, you only need to run two steps to start measuring.
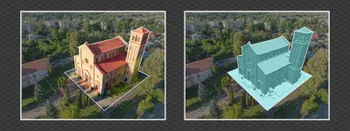
Step 1: 3D reconstruction – the initial process that processed the camera positions in your 3D scene.
Step 2: Dense point cloud – a 3D point cloud representing your scene.
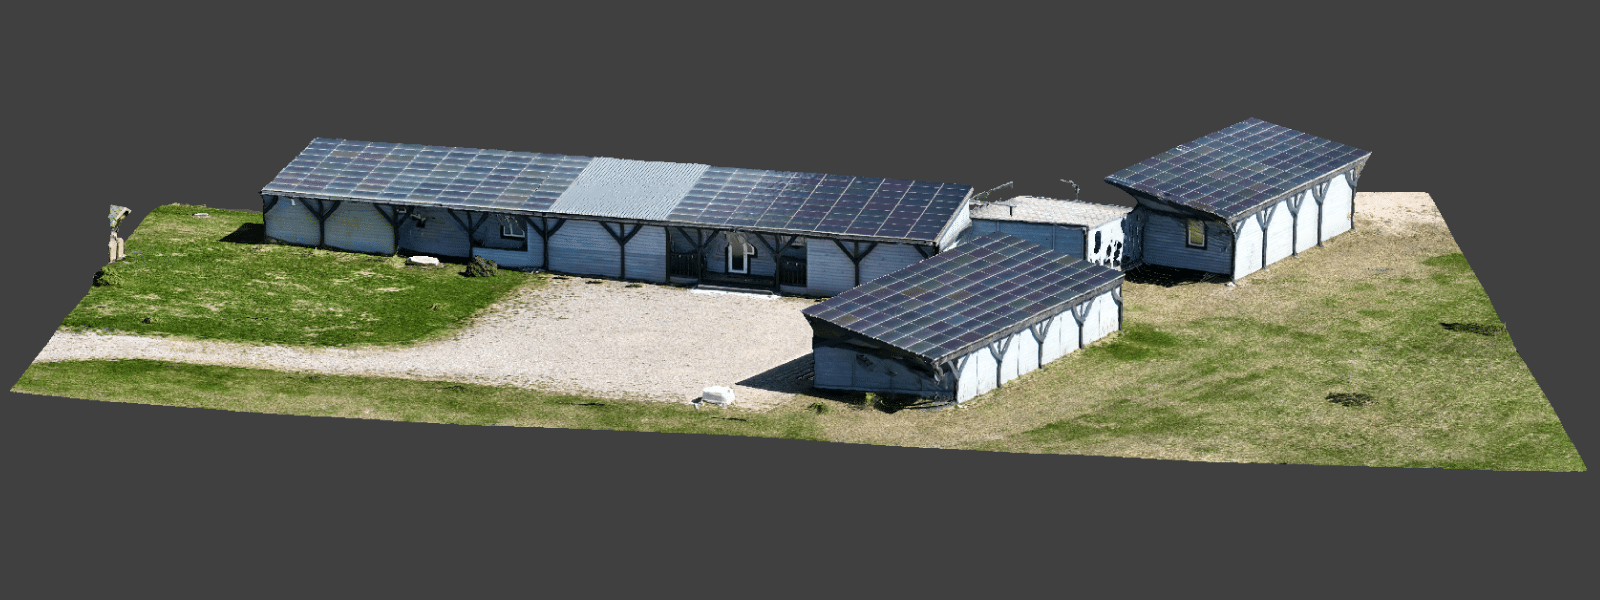
To work in a more realistic setting, you can process a 3D Mesh with Textures.
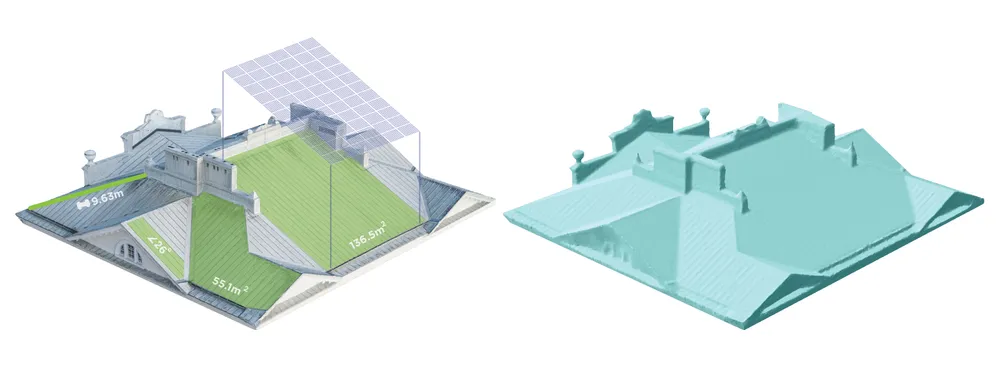
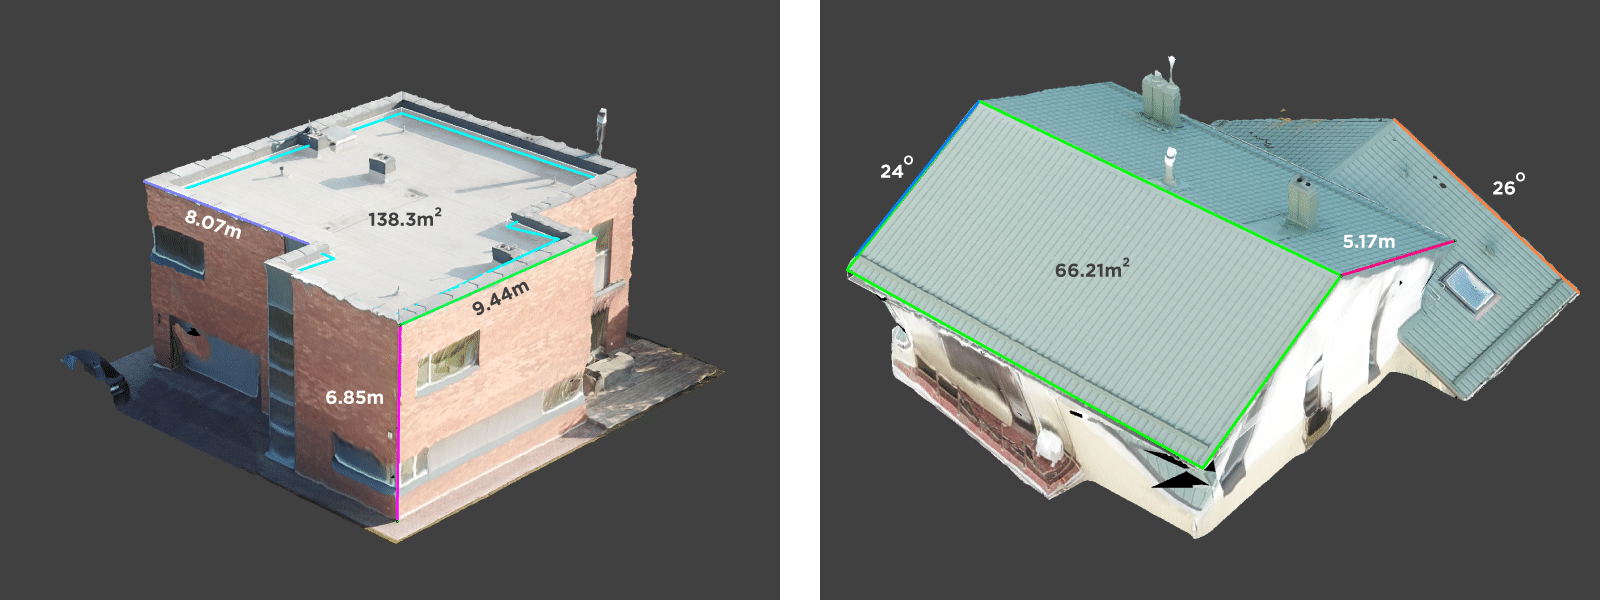
To begin measuring with Pixpro, you can just start drawing Lines on your 3D scene. In Pixpro, all measurements are provided instantly with the object you draw. You can draw on a Dense point cloud or the 3D mesh to measure length and angle. With a good set of images made with a stable GPS signal, you can expect relative accuracy of 2 centimeters with Pixpro linear measurements.
Results
At first – it may be daunting to undertake and master a new workflow for measuring roofs or other objects for solar panel installation purposes. But suppose you manage to overcome the initial hurdles. In that case, you will find yourself doing quick and accurate measurements efficiently and safely. The whole process described in this article barely takes an hour to complete, with the benefits of inspecting the roof. With the 3D mesh available to you, you can delve into more advanced workflows and 3D visualizations, which can help your PV panel installation sales and workflow. We will look at more advanced workflows and result in future articles in our blog.
Photographer - Drone Pilot - Photogrammetrist. Years of experience in gathering data for photogrammetry projects, client support and consultations, software testing, and working with development and marketing teams. Feel free to contact me via Pixpro Discord or email (l.zmejevskis@pix-pro.com) if you have any questions about our blog.
Related Blog Posts
Our Related Posts
All of our tools and technologies are designed, modified and updated keeping your needs in mind
Overlap Between Different Perspectives
Photogrammetry can be simple and rigid or complex and adaptable. Combining different scan patterns adds complexity to the work but improves detail and coverage. We often use examples of combined flights, of which the orbital + nadir grid is a classic. They provide great 3D structure while being easy
Pixpro Waypoints - Automated Photogrammetry Flights for Newest DJI Drones
The latest DJI drones are the most capable flying cameras on the market. If you need a tool like that or a competent machine for casual creation - DJI Mavic 3, DJI Mini 4, and DJI Air 3 series drones are the best.

Accuracy of Your Photogrammetry Project
Accuracy in photogrammetry is a multifaceted point of discussion. We can talk about absolute, relative, or even geometric accuracy, to name a few. No tool or technique can really prove anything beyond reproach.
Ready to get started with your project?
You can choose from our three different plans or ask for a custom solution where you can process as many photos as you like!
Free 14-day trial. Cancel any time.