.svg@webp)
Shutter Speed, ISO and Motion Blur in Drone Photogrammetry, Part 2: The Roof Test
 Lukas
Zmejevskis
Lukas
Zmejevskis
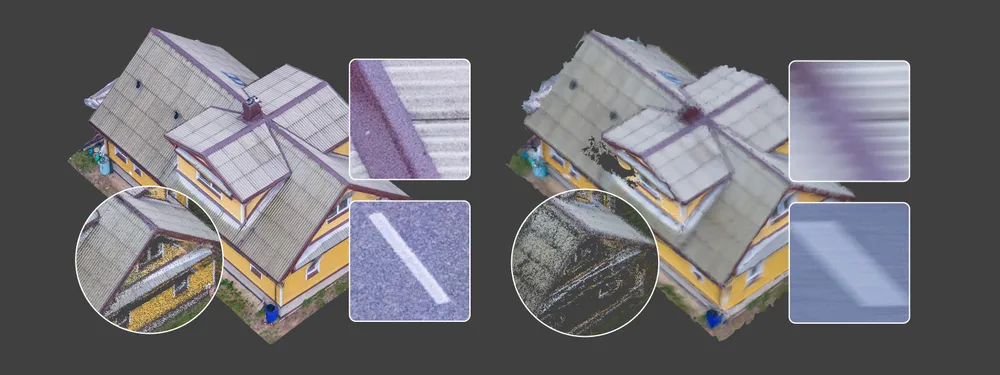
In Part 1 I went through the theory: how shutter speed, ISO and motion blur trade against each other, and a speed table that says how fast you can fly before blur creeps in. This is the practical part. Same roof, same orbit, seven times, from high ISO and a fast shutter down to low ISO and a shutter so slow it has no business producing a 3D model.
It did not go the way the theory said it would, and that turned out to be the interesting part.
The Short Version
- Seven orbits of the same roof at dusk, ISO 6400 down to ISO 100, all at 1.7 m/s. The shutter went from 1/160 down to 1/4.
- By the half pixel rule from Part 1, almost every set should have been too blurry. In practice, the dense cloud stayed around 1.4 million points down to 1/40.
- Noise cost almost nothing. ISO 6400 reconstructed as well as anything in the test.
- Blur is what eventually broke it: warping from 1/20, noisy edges at 1/10, and useless for measurement at 1/4.
- The rule that comes out of it: in bad light with a moving drone, raise ISO before you let the shutter drop.
The Setup
The subject was an ordinary residential roof, the typical solar installation job: sloped, with a chimney, and nothing shiny or reflective. Easy to scan, which is what you want when the point is to test the light rather than the subject.
The drone was the DJI Mavic 4 Pro, flying an orbital mission in Pixpro Waypoints: a 35 m radius at 25 m flight height, 1.7 m/s, about 35 photos per orbit. That puts the camera roughly 40 m from the roof, or about 8 mm per pixel. Each orbit took a little over two minutes.
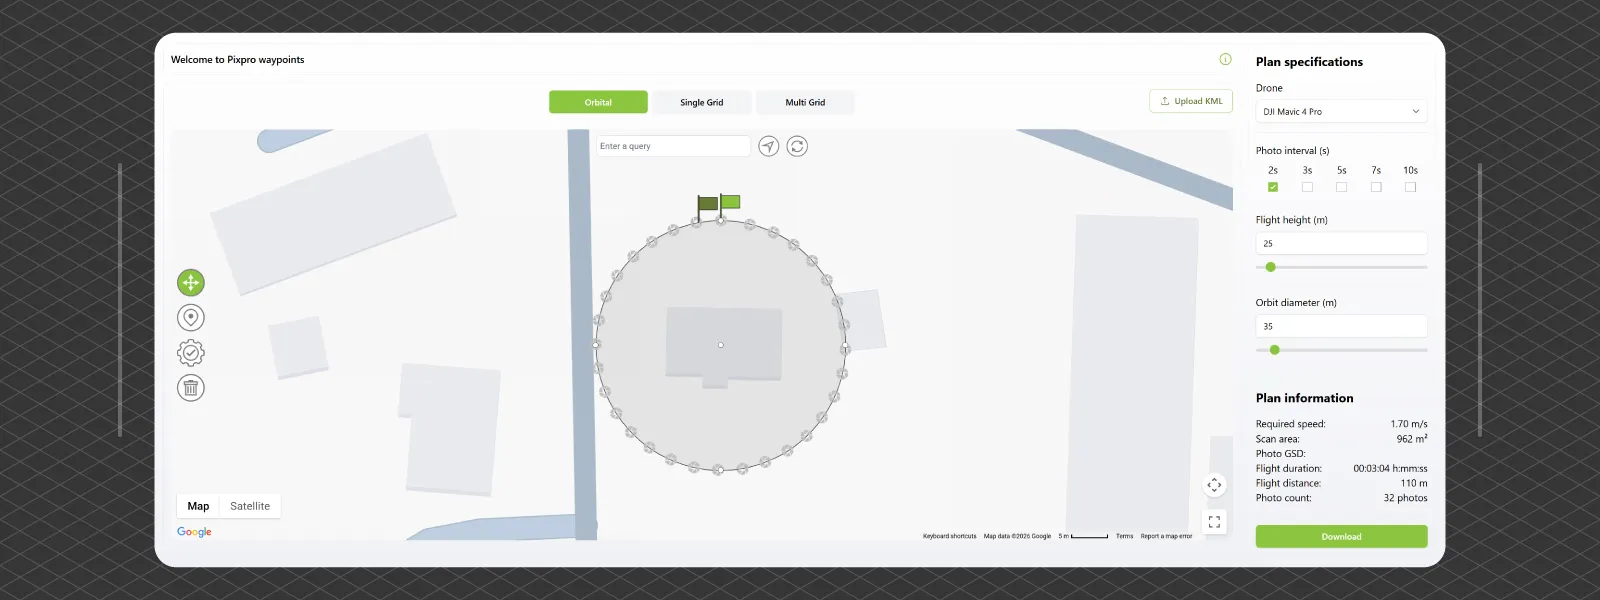 For every set I fixed the ISO manually and let the camera choose shutter and aperture, doubling the ISO down from 6400 to 100. All photos were shot in RAW and processed in Lightroom with identical settings, then every set was reconstructed in Pixpro on the default medium settings.
The conditions were heavy overcast, almost raining, with humidity at 100 percent. Overcast is usually a good thing for photogrammetry. The light is perfectly even, with no hard shadows, much like a studio. There just was not much of it.
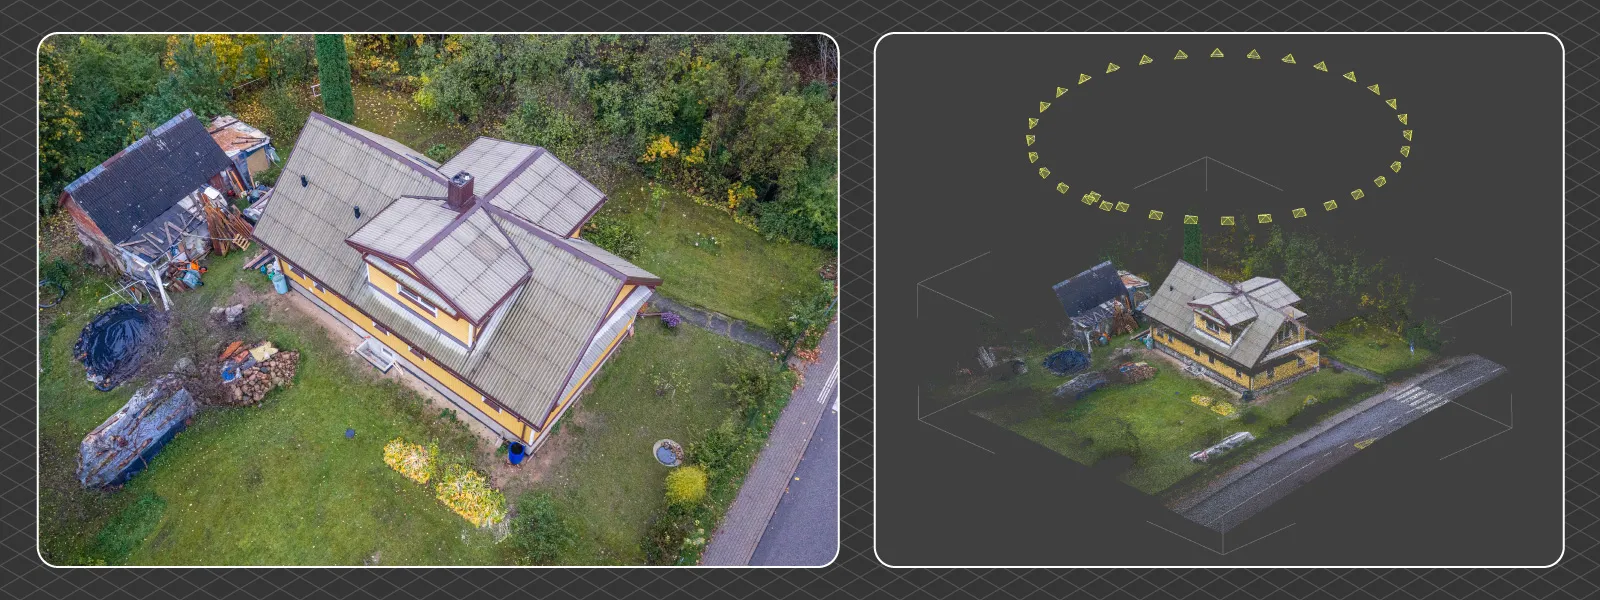 And there was less than it looked. To the eye a grey autumn evening seems perfectly bright, because your eyes adapt and the sensor does not. At ISO 100 the camera needed a quarter of a second at f/2, in what my eyes were telling me was still daylight.
Each orbit took only a couple of minutes, so the light was low but consistent across the whole test. The steps between sets are not perfectly clean doubles, mainly because auto exposure opened the aperture toward f/2 on the slowest ones, but the trend is clear.
The Results
| ISO | Shutter | Predicted blur | Dense points | What it looked like |
|---|---|---|---|---|
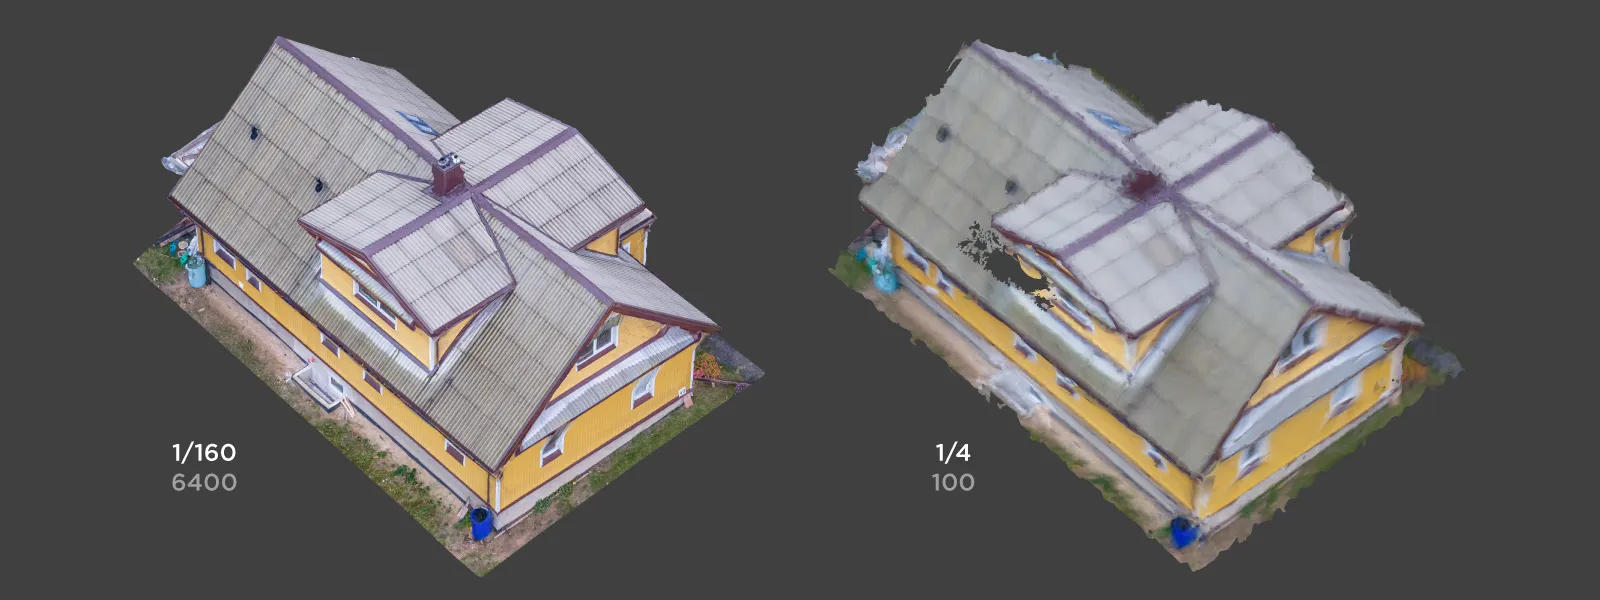
| 6400 | 1/160 | ~1.3 px | 1.39 M | Noisy, sharp, no issues |
| 3200 | 1/80 | ~2.7 px | 1.41 M | Less noisy, still sharp |
| 1600 | 1/40 | ~5 px | 1.39 M | Near frame blurred, structure fine |
| 800 | 1/20 | ~11 px | 1.1 M | Blurry, some warping creeping in |
| 400 | 1/15 | ~14 px | 1.0 M | Very blurry, minimal warping, measurements decent |
| 200 | 1/10 | ~21 px | 800 k | Super blurry, noisy warpy edges, measurements in the ballpark |
| 100 | 1/4 | ~54 px | 536 k | Thick, noisy dense, useless for measurement |
The predicted blur column is the Part 1 formula applied as if the drone were flying in a straight line past the roof: speed times shutter time, divided by GSD. By the half pixel rule, every row after the first should have been in trouble.
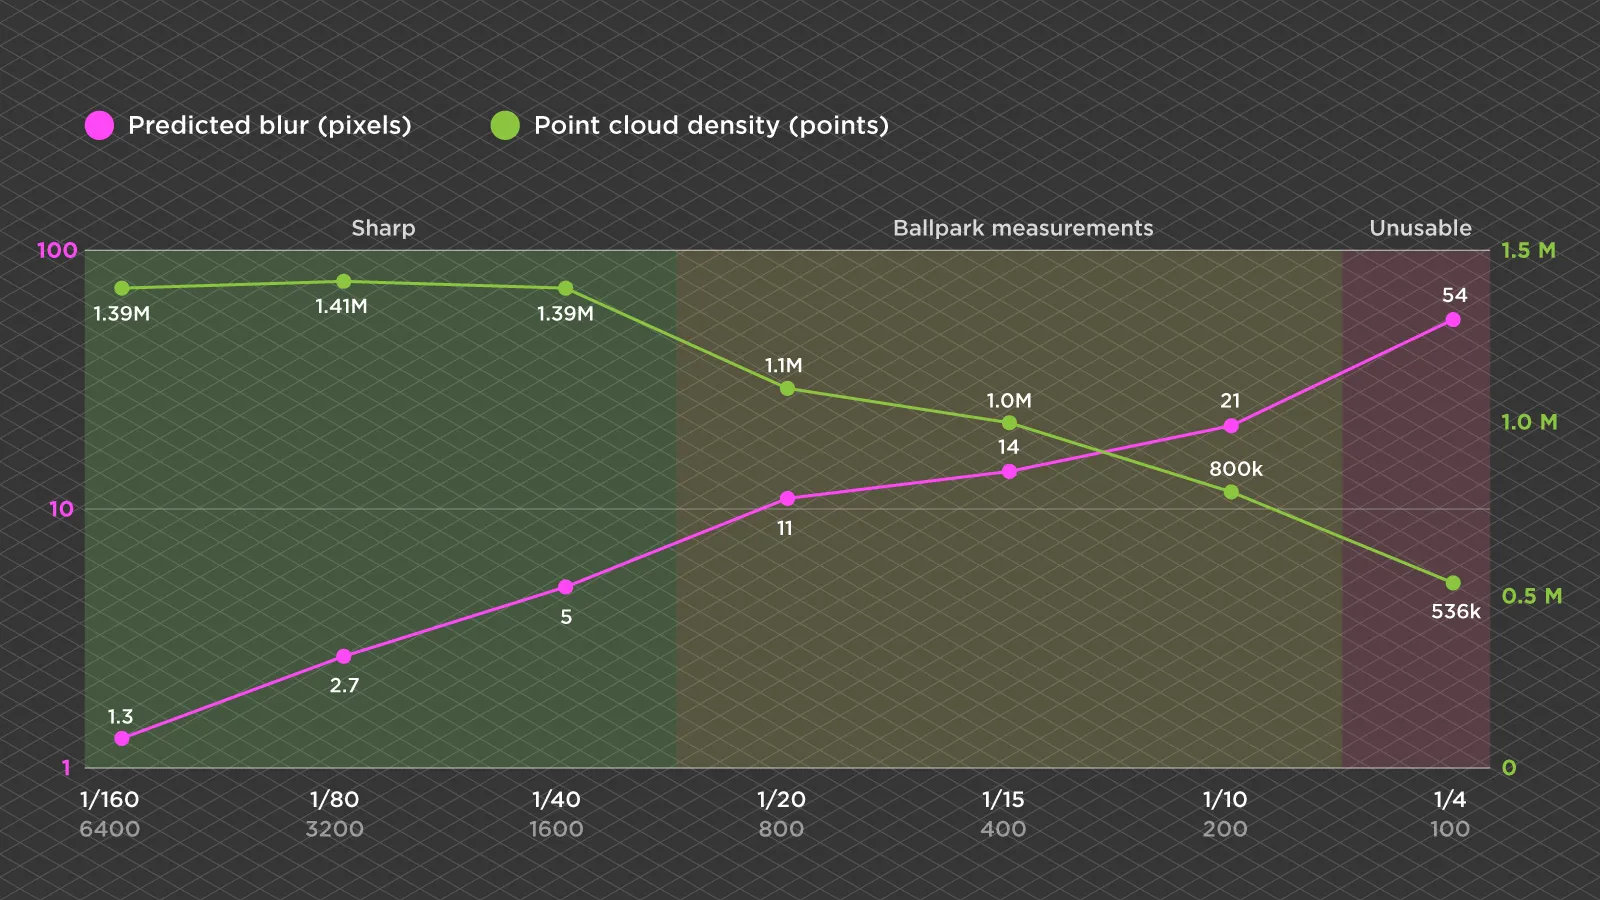 They were not. The dense cloud held at about 1.4 million points through ISO 1600 and 1/40, where the photos were already visibly blurred, with the closer parts of the frame obviously smeared. At 1/20 some warping started creeping into the dense cloud. At 1/15 and 1/10 the model was still structurally sound and measurements were in the right ballpark, though edges in the dense cloud got noisy. Only at 1/4 did it truly fall apart, with a dense cloud that was thick, noisy and no good for measuring anything. And even then the reconstruction itself still went through.
I expected the software to give up much sooner.
Why It Held Together
The half pixel rule from Part 1 is a rule for maximum detail. It says when you start losing quality, not when the reconstruction stops working, and this test shows how wide the gap between those two points can be. A few things helped keep this one on the right side of it.
The blur is consistent. At a constant speed and a constant shutter, every photo in the orbit is smeared in the same direction by roughly the same amount. Neighboring frames still look alike to each other, and that likeness is what matching actually depends on. Blur that is the same everywhere is much easier for the software to live with than blur that changes from frame to frame.
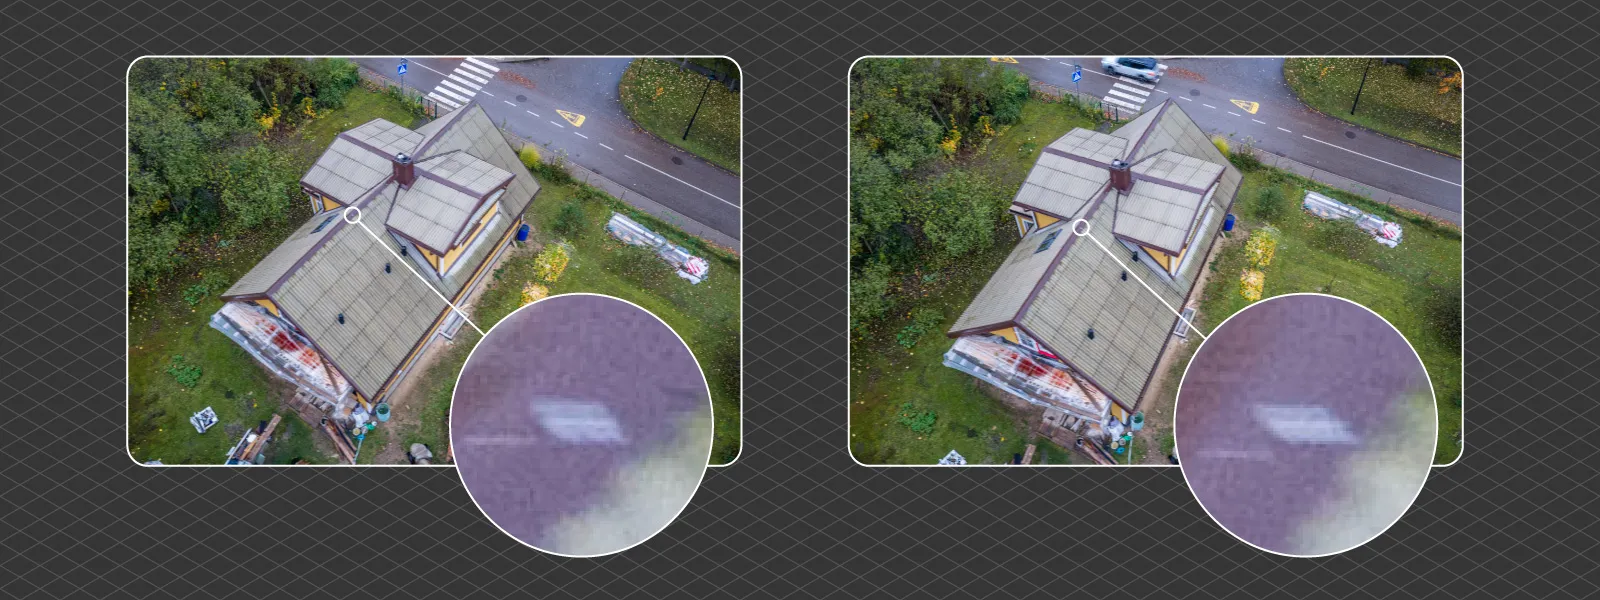 The subject and the light were kind. A matte, well textured roof gives the software plenty to hold on to, even when every feature is a little soft. Overcast light meant no shadows moving or changing between frames, so whatever detail survived the blur looked the same from every angle.
The processing was consistent. Every set went through Lightroom with identical RAW settings, so no set was rescued or penalized by its editing. The differences in the table come from the capture alone.
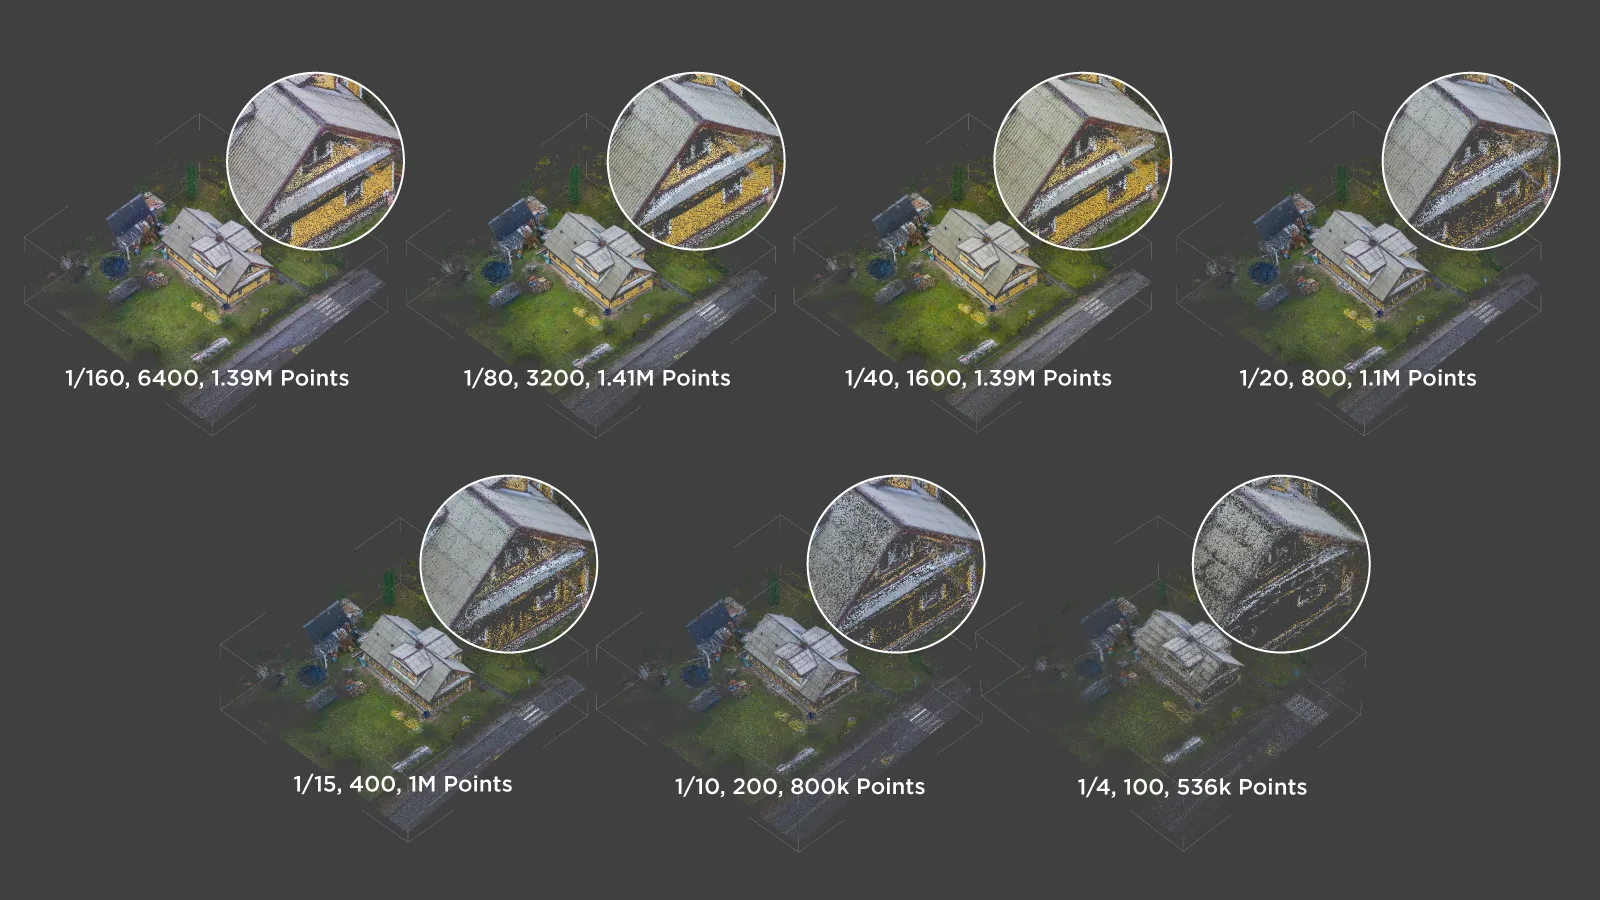 One caution on reading the table: dense point count measures density, not accuracy. The more useful warning signs were the warping, the noisy edges and the thick, fuzzy surfaces in the dense cloud. Those appeared well before the point count collapsed.
Noise Versus Blur
This was the question Part 1 left open, and in this test the answer was clear. Noise barely mattered.
ISO 6400 was visibly noisy, and it reconstructed to essentially the same dense cloud as ISO 3200 and 1600. Noise on a well textured roof at medium settings simply did not stop the software. Blur did. Every real loss in quality in this test came from the shutter slowing down, not from the ISO going up.
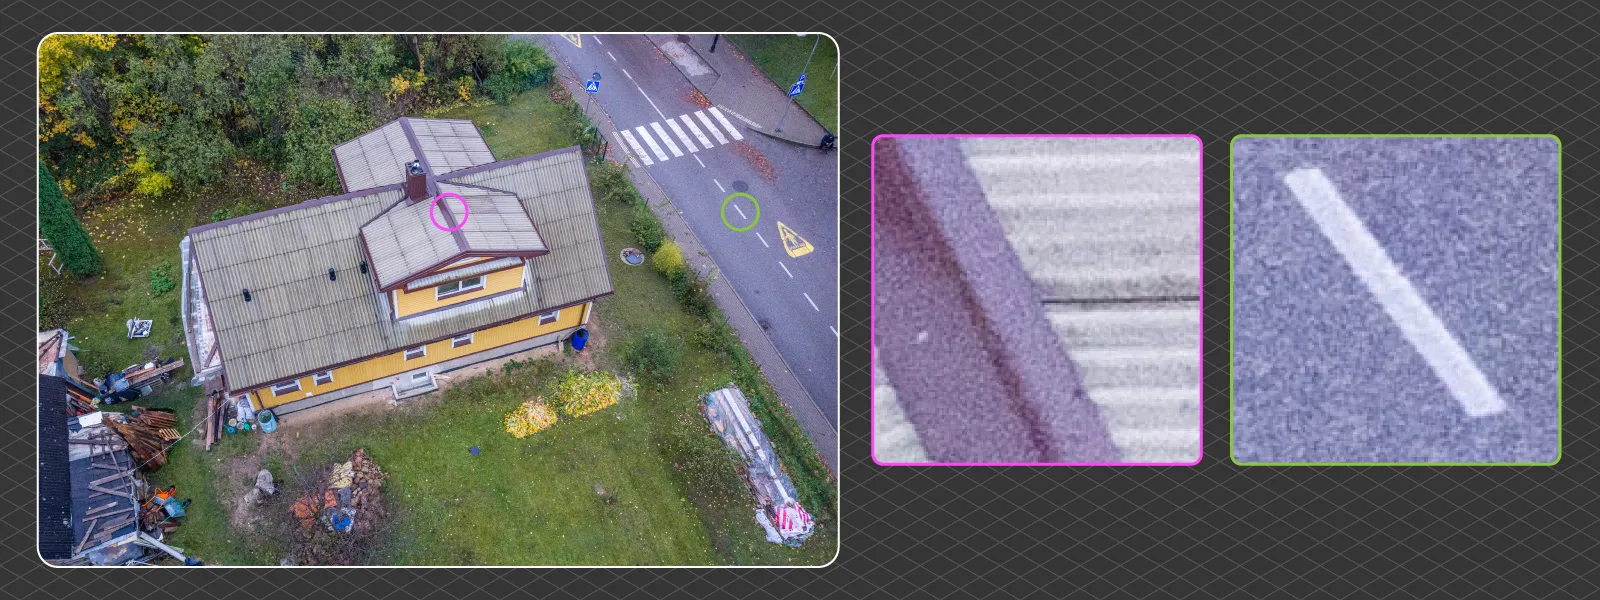 So with a moving drone in bad light, the rule is simple: raise ISO before you let the shutter drop. At this distance and speed, everything at 1/80 and faster was clean, 1/40 was soft but structurally fine, 1/20 to 1/10 was still usable with care, and 1/4 was done.
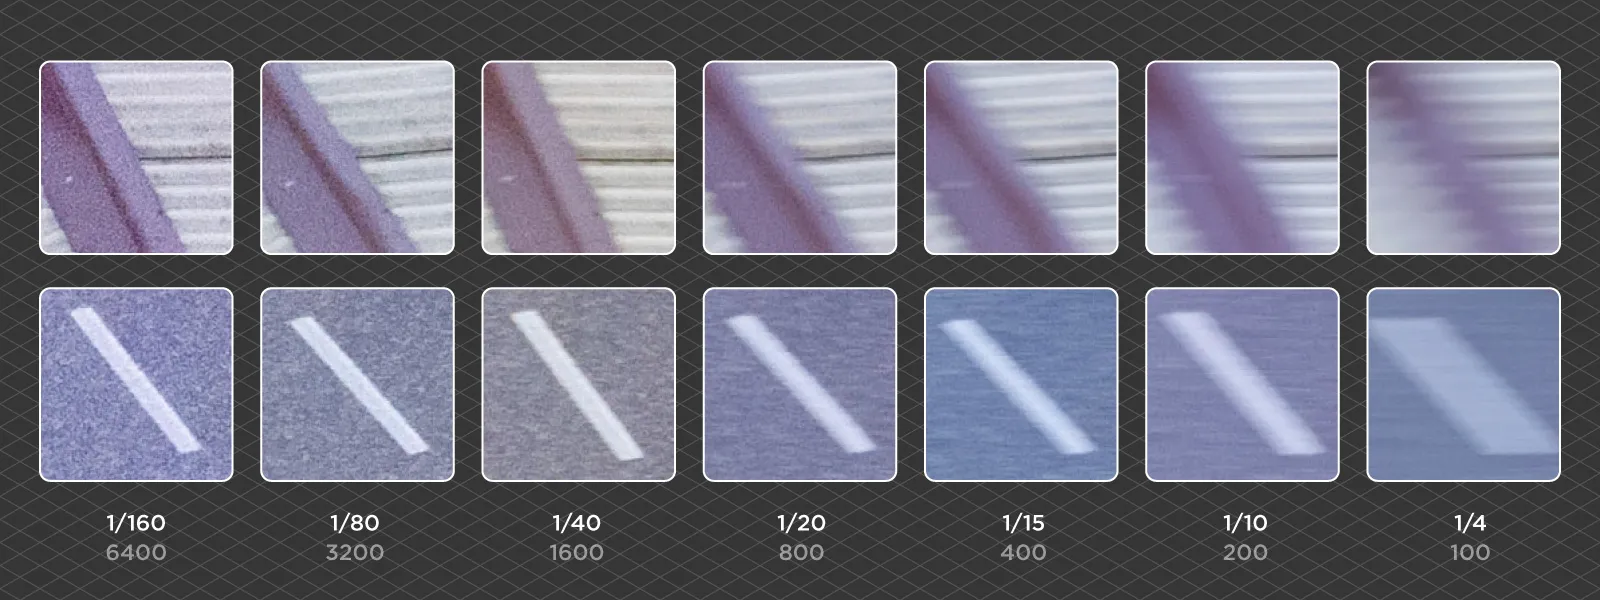 It is worth remembering whenever ISO is left on auto, because there is no guarantee the camera will make the same trade. If it protects a low ISO by lengthening the shutter, that is the wrong way round for a moving drone.
Field Rules
- Trust the shutter speed, not your eyes. Grey, humid evenings are far darker for the camera than they look.
- Raise ISO first. Keep the shutter fast enough for your speed and distance, using the table in Part 1, and accept the noise.
- Keep speed and shutter constant through the orbit. Even blur is far easier on the reconstruction than blur that changes from frame to frame.
- Shoot RAW when the light is marginal, and process every photo in the set the same way.
- Slow the drone down if the shutter has to go below about 1/40 at this kind of distance.
- Judge the dense cloud, not the point count. Look for warping, thick surfaces and noisy edges before you trust any measurement.
- Do not measure from a set at quarter second shutter speeds. At that point the model is a picture, not a measurement.
Conclusion
If you are late and the weather is bad, do not give up. In this test the software reconstructed a usable roof well past the point where the theory said the photos were too blurry, and the noise from high ISO cost almost nothing at all. The limits are real, but they sit further out than the half pixel rule suggests, at least for a matte, textured subject in even light.
 The theory is still the right starting point, because it tells you which way to trade. This test just says the trade is more forgiving than it looks on paper. Which raises the obvious next question: how far can it be pushed? Next time I want to find the real floor. Properly dark conditions, a shutter kept fast on purpose, and photos deliberately underexposed by several stops and pulled back up in post, to see whether brightening a dark RAW file later is any better or worse for photogrammetry than raising ISO in the air.
Frequently Asked Questions
Can you do drone photogrammetry in low light?
Yes, more than most people expect. In this test a Mavic 4 Pro orbit reconstructed a usable roof model down to a 1/10 shutter at 1.7 m/s. Quality drops gradually, and the results only became useless for measurement at a quarter of a second.
Is high ISO or motion blur worse for photogrammetry?
In this test, blur was clearly worse. ISO 6400 reconstructed as well as the cleaner sets, while every real loss in quality came from slower shutter speeds. With a moving drone, raise ISO before lowering the shutter speed.
Why did the blurry photos still reconstruct?
Mainly because the blur was the same in every frame, so neighboring photos still matched well. A matte, textured roof and even overcast light helped too. The half pixel rule marks where detail starts to suffer, not where reconstruction stops working.
What shutter speed do I need for a drone orbit at dusk?
At about 40 m from the subject and 1.7 m/s, 1/80 or faster gave clean results, 1/40 was soft but structurally fine, and 1/20 to 1/10 was usable with care. Fly slower or closer and the numbers shift, so check the speed table in Part 1.
Is dense point count a good measure of scan quality?
Only partly. It measures density, not accuracy. Warping, noisy edges and thick, fuzzy surfaces in the dense cloud are better warning signs, and they appeared before the point count dropped.
Photographer - Drone Pilot - Photogrammetrist. Years of experience in gathering data for photogrammetry projects, client support and consultations, software testing, and working with development and marketing teams. Feel free to contact me via Pixpro Discord or email (l.zmejevskis@pix-pro.com) if you have any questions about our blog.
Related Blog Posts
Our Related Posts
All of our tools and technologies are designed, modified and updated keeping your needs in mind
Pixpro to Gaussian Splatting: How to Export Your Project to Postshot
Gaussian splatting is no longer a curiosity. People are using it for walkthroughs, marketing visuals, virtual environments, and increasingly as a pretty companion to a scan they already flew.
 Pixpro Team

The Top 10 Pixpro Blog Articles So Far
We have been publishing on this blog every week for years now, on everything from stockpile volumes and coordinate systems to scanning a cake. So it seemed like a good time to look at the numbers and see which posts people actually read, rather than which ones we enjoyed writing.
Pixpro Team

Portrait Orientation in Photogrammetry: When It Actually Helps
Is there anything to gain by scanning in portrait instead of the usual landscape? Sometimes, a little. But orientation is one of the least important decisions you make on a scan, and it is worth understanding why before you give it any more thought than that.
Pixpro Team
Ready to get started with your project?
You can choose from our three different plans or ask for a custom solution where you can process as many photos as you like!
Free 14-day trial. Cancel any time.