.svg@webp)
Quick Vehicle Accident Documentation with Photogrammetry
 Lukas
Zmejevskis
Lukas
Zmejevskis
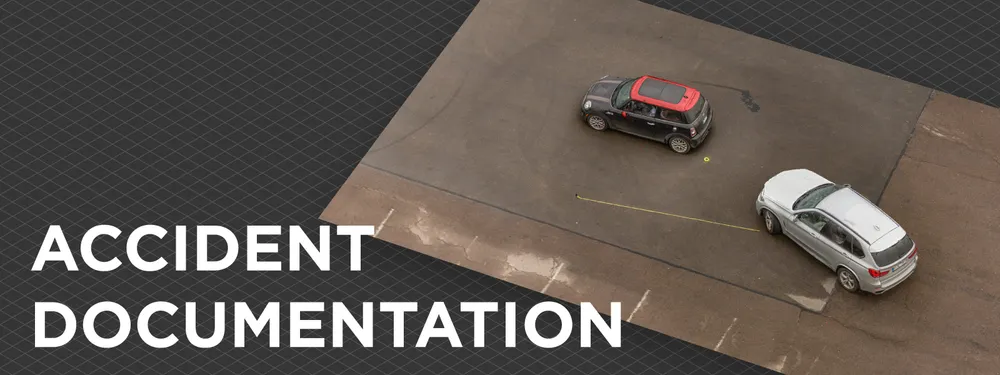
Photogrammetry is the ultimate form of documentation. If you are adept at doing photogrammetric scans, you can gather photographic data, resulting in a 3D scene that you can measure. Invaluable when the dependability of the data means solving disputes between people during legal processes. One such area is road accidents, where detailed data analysis is necessary to settle disagreements. We mocked up a car accident scene and made examples to show how quickly and easily we can gather photogrammetric data for such use cases.
Why Photogrammetry?
Using photogrammetry in vehicular accident analysis has a few clear benefits:
-
Quick data gathering allows for clearing obstacles from the road as quickly as possible.
-
The scene is effectively immortalized for any future analysis.
-
3D data enables remote analysis, with as many simultaneous instances as needed for as many specialists.
-
3D scenes provide much more information than regular photos for measurements and exact relative positions between relevant scene elements.
Equipment for Photogrammetry
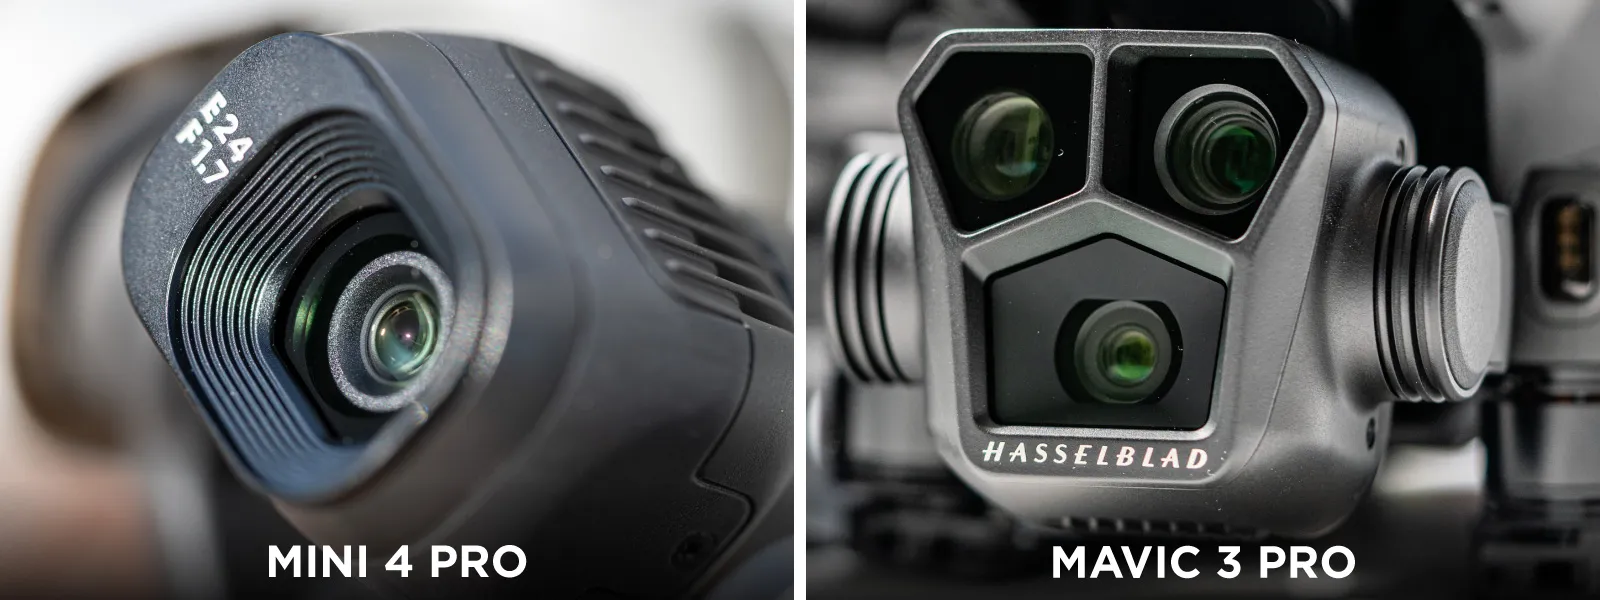
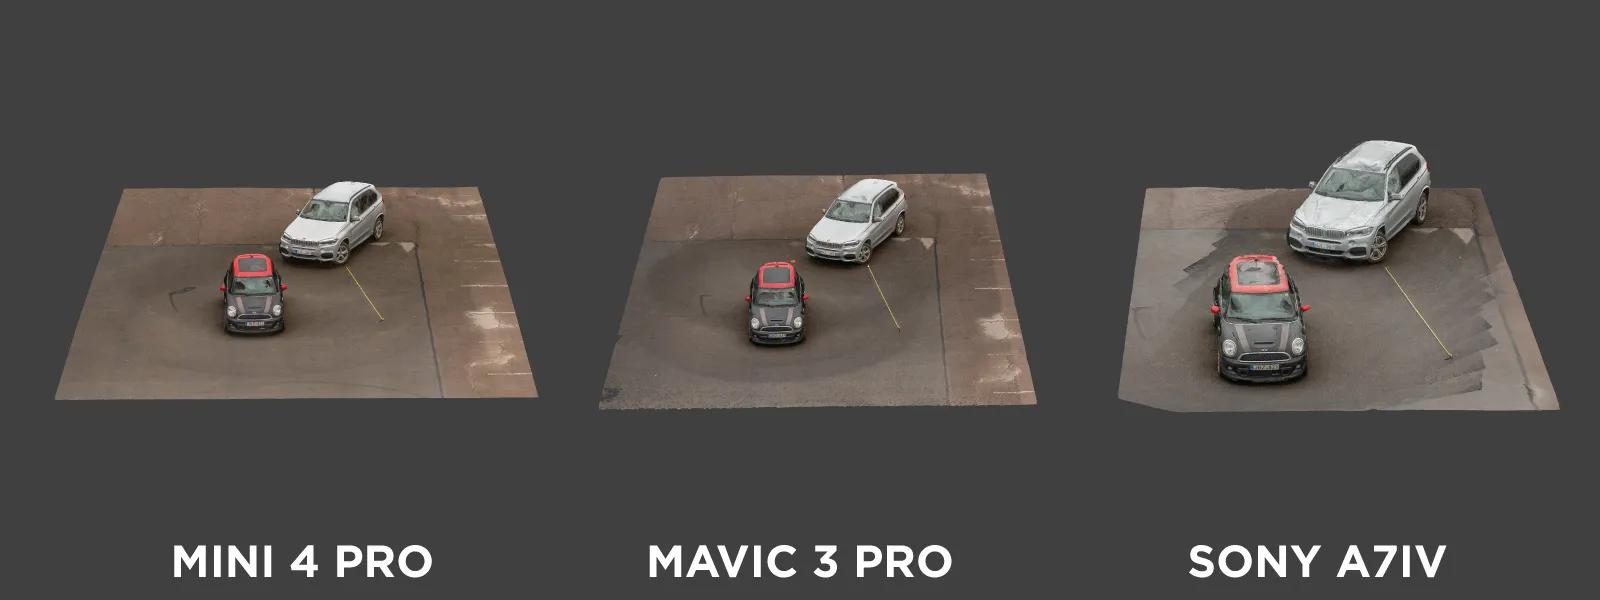
The most essential piece of equipment is the camera. A flying camera - a drone - works best in this use case and is a ubiquitous tool in photogrammetry in general. We recommend getting a competent drone for this kind of work. To make examples for this article, we use a small but powerful DJI Mini 4 Pro drone and a larger DJI Mavic 3 Pro drone.
Flying a drone may not always be possible, so we also made one scan using a handheld camera. Specifically, we employed a Sony A7 IV mirrorless full-frame camera with a 24-millimeter lens and monopod to raise the camera above our heads for a better perspective. Additionally, we brought and placed a tape measure for scaling later in the software.
Lastly, we processed the photos in Pixpro, which you need a Windows PC to run. However, we also offer a cloud processing service, which can significantly reduce the need for a powerful machine.
Aerial Scanning Method
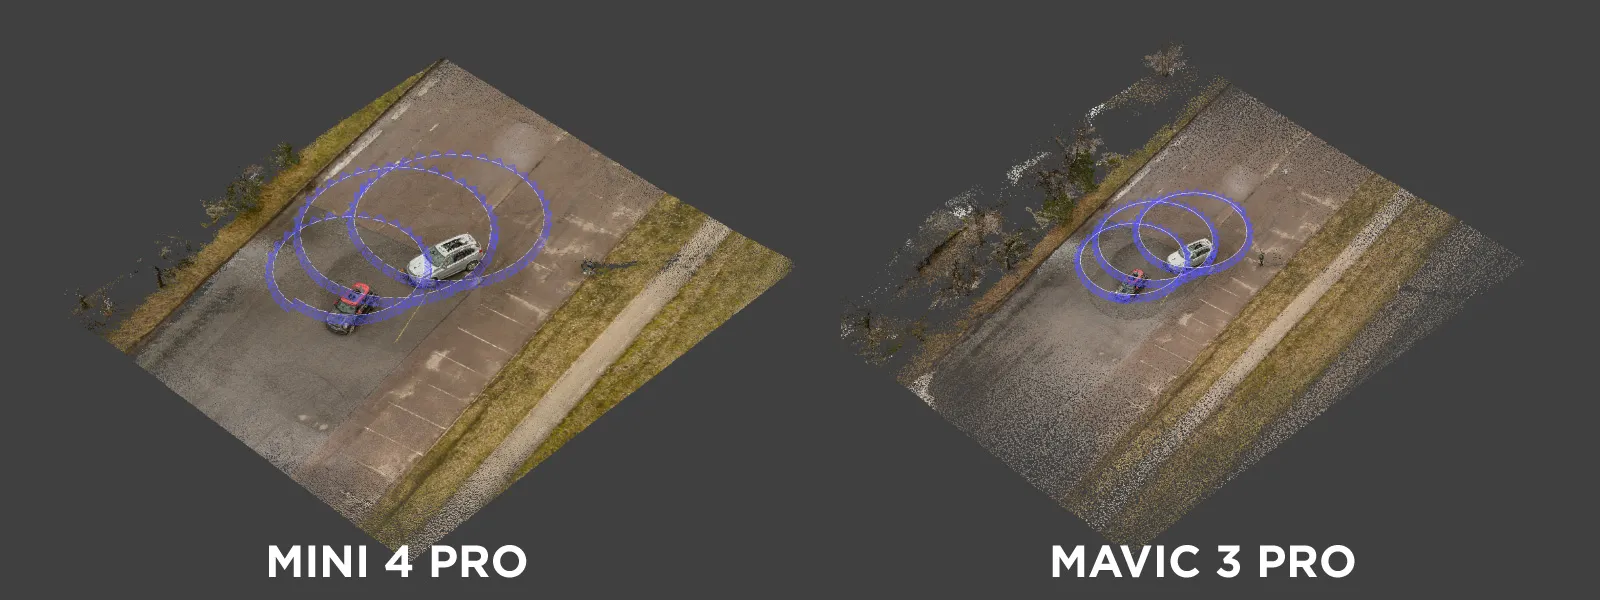
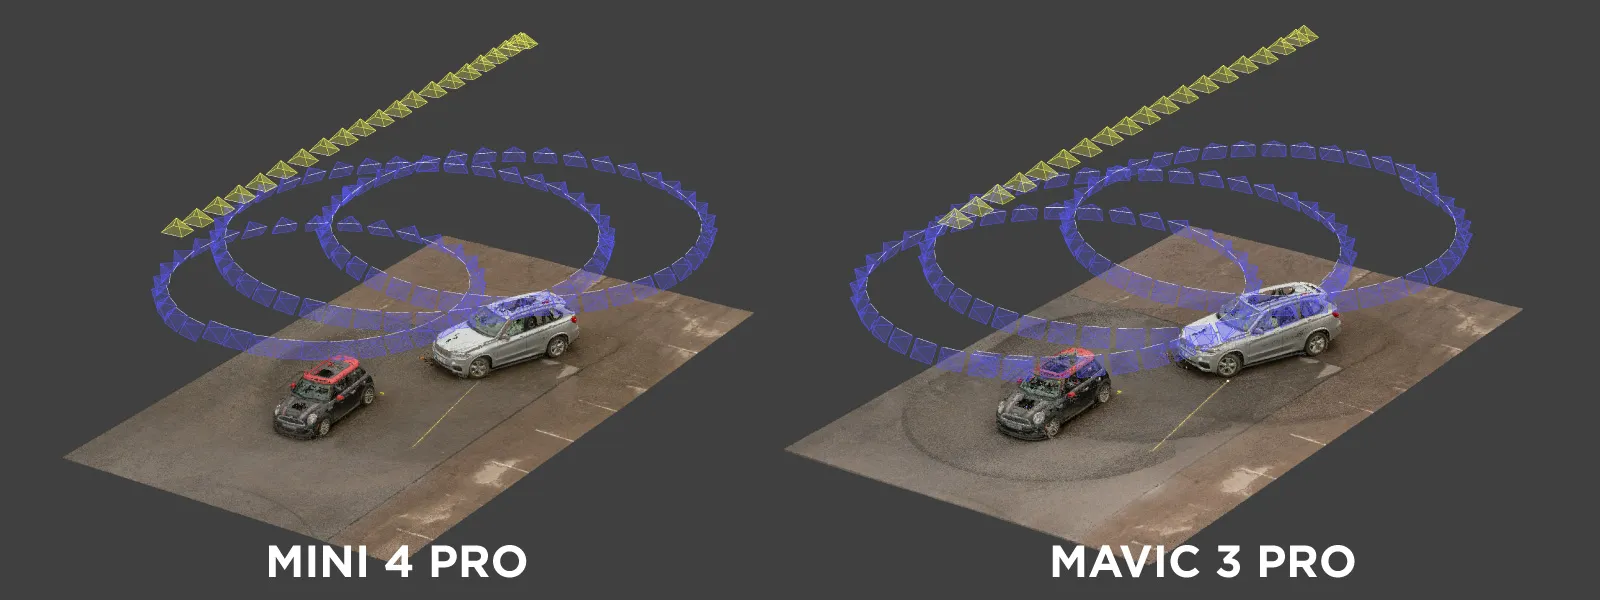
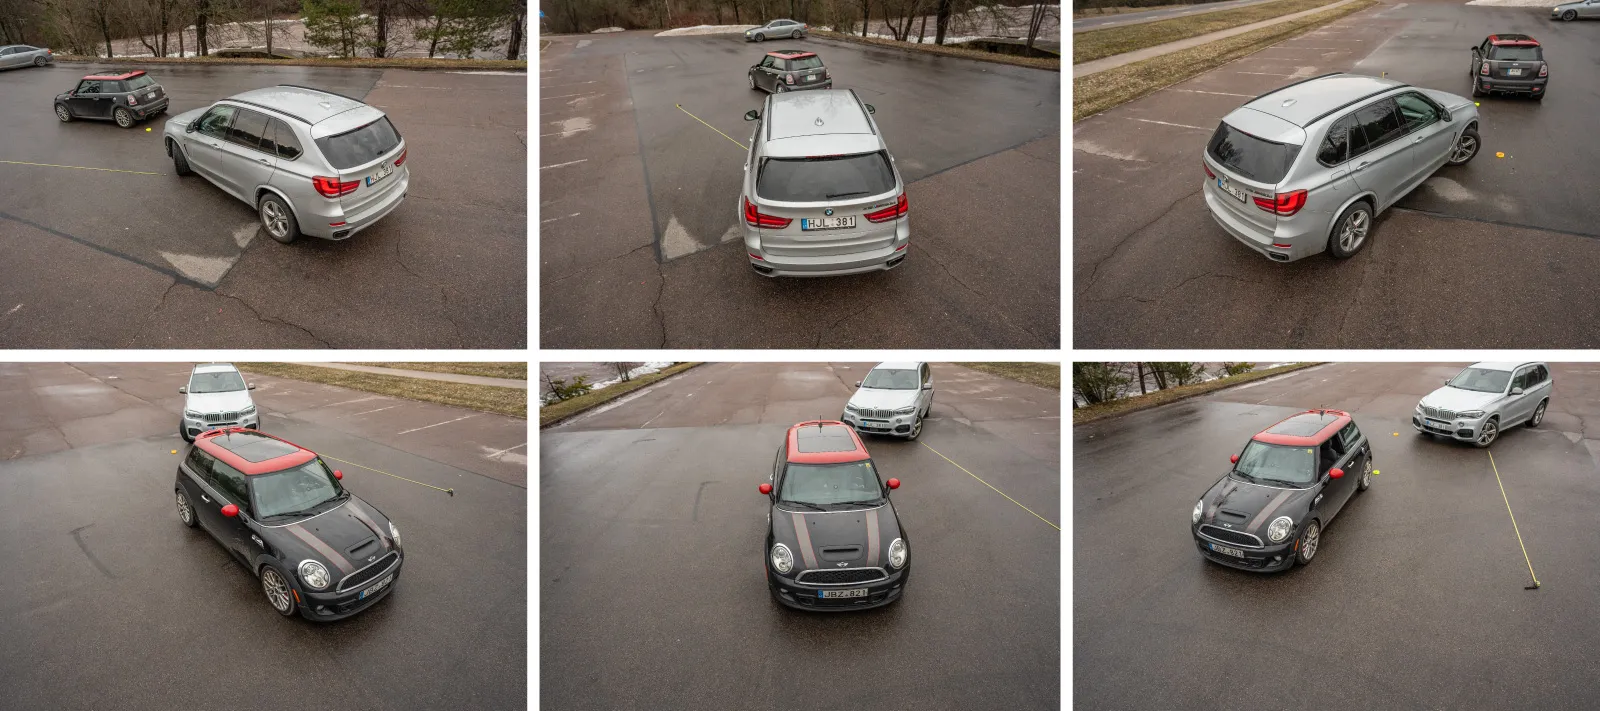
For our aerial examples, we employed the most efficient way of obtaining 3D models from photos - orbital scans. We did orbital flights at only 4.5-meter altitude to simulate a crowded space. Our mock accident had two cars, so we did an orbit for each car and a third orbital flight for the impact area between the vehicles. We combined these orbitals into a single project, and our results were pretty good.
It took only 10 minutes to acquire the photos with both drones, including takeoff and landing. We used hyperlapse - circle mode with the DJI Fly app for orbital capture. In the app, you must select an object to track and begin a flight with specific parameters. To replicate what we did, follow these steps:
-
Take off with your drone at a safe spot.
-
Reach 4.5 meters above ground and fly near one of the vehicles so the drone is about 3-4 meters away from the car measured horizontally.
-
Point your camera to the cars, go to hyperlapse capture mode, and select circle mode.
-
In the DJI fly app's main windows, select the original photo saving as RAW or JPEG. We chose RAW for this particular case.
-
Draw a box around the roof above the front doors of the car.
-
Select a capture interval of 2 seconds (the default value) and a speed of 0.5 meters per second (also a default value).
-
Begin the capture and wait until a full circle around the car is complete.
-
Repeat the same for all vehicles or points of interest on the scene.
For each orbital, you should get about 30 to 40 photos. As a bonus, we also did a horizontal flyby above the scene to get a top-down view if necessary. We used the "free" mode of hyperlapse capture and flew directly above the scene with the camera pointed downwards. The settings were the same as we used for orbitals.
Handheld Camera Photogrammetry
We did an even faster scan with fewer photos for the handheld example. We walked around the perimeter of the scene and took a shot with each large step. We raised the camera above our heads with a simple monopod and triggered it with a simple Bluetooth remote (you can do the same with a phone app or a wired remote). With this method, we took 61 photos in a few minutes.
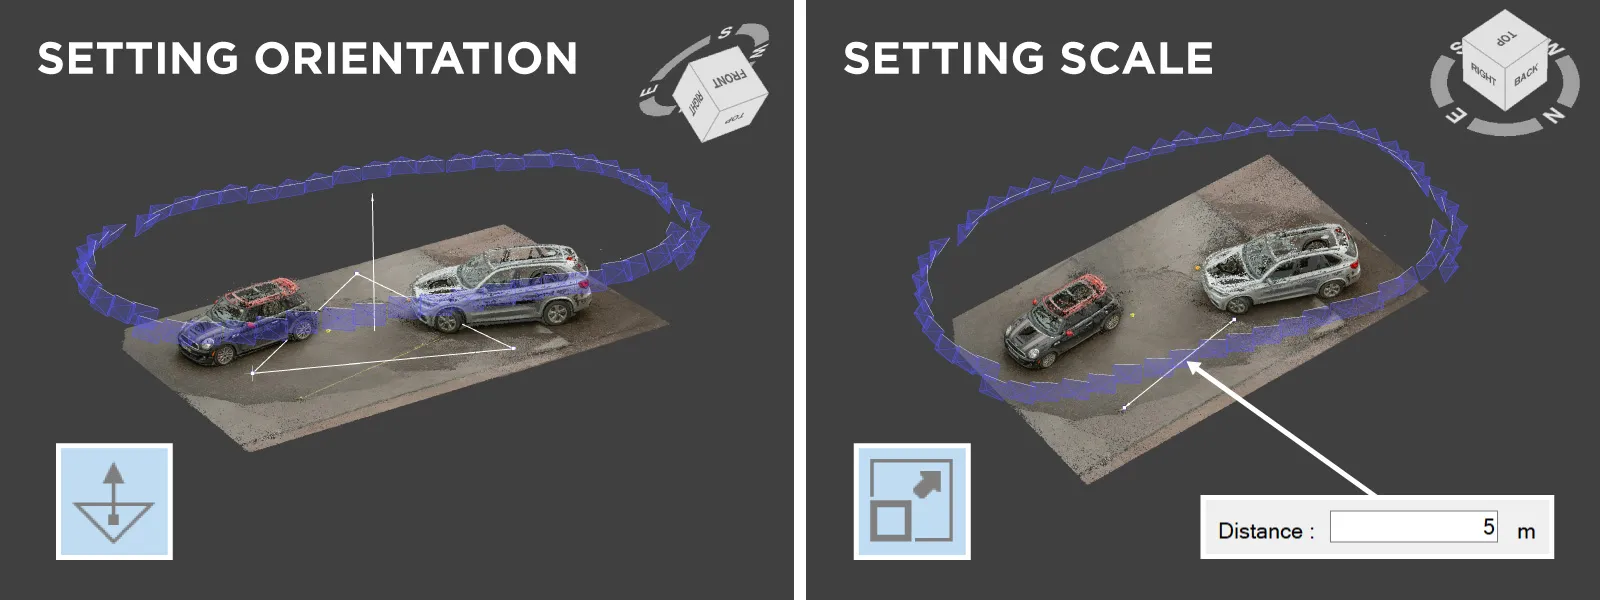
In hindsight, more photos would have been better (just taking smaller steps). However, the scene is fully reconstructed and available for analysis. The one caveat with handheld camera captures is that there is no GPS data, so we need to scale and orient the project ourselves. Pixpro has tools for scaling according to the tape measure we placed in the scene.
Remember that the fundamental requirements of photogrammetry always apply. So, in both scenarios, we maximized image quality by controlling shutter speed and camera movement. We did our scans in a relatively dim environment during sunset, so we had to push the ISO values up, and we took and processed RAW photos for the best results.
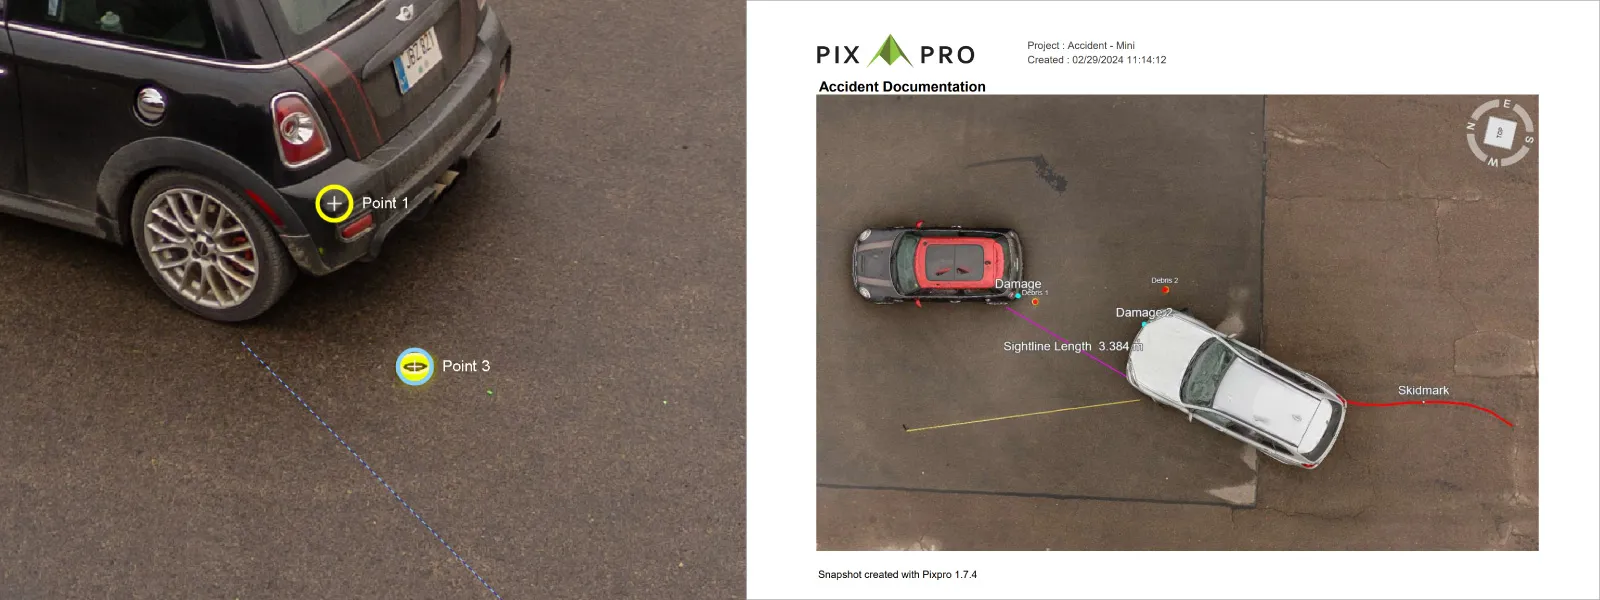
Pixpro Photogrammetry Software Workflow
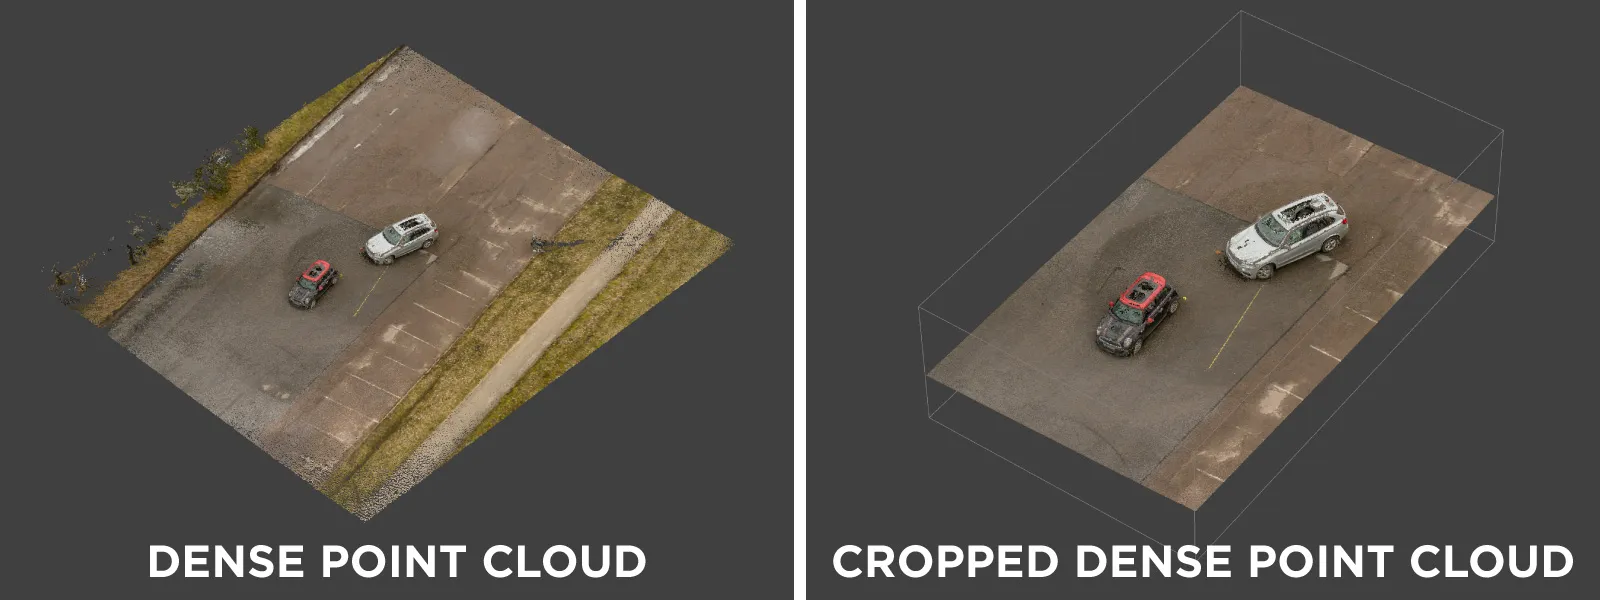
In Pixpro software, we processed the scene with default settings, first making sparse and dense point clouds, then cropping the dense point cloud so only the relevant scene area was left.
From the cropped point cloud, we created a 3D mesh with texture. We can add point lines on the mesh for measurements or annotations. We can also export this 3D model for use in other software.
We can also export a simple report directly from Pixpro software, which will be easy to print and add to the case files.
Conclusion
With 10 minutes of data capture and, at most, 30 minutes of work on a PC, it is tough to justify not using photogrammetry for more contentious cases of road accidents. There is enough detail to spot damage, markings on the road, debris, and other elements of the scene. We can also measure distances in the scene. Such data may be crucial in a court of law if any disputes arise long after the accident. It will be tough to question anything in a fully reconstructed 3D scene.
Photographer - Drone Pilot - Photogrammetrist. Years of experience in gathering data for photogrammetry projects, client support and consultations, software testing, and working with development and marketing teams. Feel free to contact me via Pixpro Discord or email (l.zmejevskis@pix-pro.com) if you have any questions about our blog.
Related Blog Posts
Our Related Posts
All of our tools and technologies are designed, modified and updated keeping your needs in mind
DJI Lito X1 for Roof Photogrammetry: Solar and Inspection Use Case
Small drones are the best tool for residential and even commercial roof photogrammetry. They are quiet, attract less attention, are easier to fly fully within regulations, and they are affordable.
Large Property Photogrammetry – Real Estate Development Use Case
Property scans are one of the most common use cases, especially for our software. Pixpro is affordable and works well with RTK data and ground control points when necessary.

Handheld Photogrammetry Construction Interior Scan Use Case
Interior 3D scanning can be useful in a myriad of ways. In this article, I present a scan of a residential building construction site, with its foundation walls and roof almost complete. Further construction will require some visualizations and design according to “the fact.”
Ready to get started with your project?
You can choose from our three different plans or ask for a custom solution where you can process as many photos as you like!
Free 14-day trial. Cancel any time.