.svg@webp)
Macro Photogrammetry - Combining Multiple Techniques
 Lukas Zmejevskis
Macro photogrammetry requires combining focus stacking, cross-polarization, and 3D image capture methods to scan small objects successfully. It is the most time-consuming and laborious type of photogrammetric 3D scanning. However, we are ready to take up such a task because we have covered all the basics needed in our previous blog posts. Thus this article will rely a lot upon a few of our previous articles.
Macro Photogrammetry Challenges
The main challenge of 3D scanning small subjects is the thin depth of field. We overcome it by using the focus stacking process, which needs multiple photos per camera position.
Read more: Focus Stacking for Photogrammetry
Lighting a tiny subject, whether reflective or not, is much more difficult on small scales. Even seemingly matte objects produce specular highlights, which can mess up the algorithms and not look aesthetically pleasing. To combat this, we use cross-polarization lighting.
Read more: Cross Polarization Photogrammetry
The final challenge is our subject orientation and camera positions. We must ensure good coverage of the entire object by mounting it and moving it so that there are no blind spots and the overlap is sufficient for 3D reconstruction. Depending on your case, this may require a bit of DIY thinking.
Read more: 3D Asset Creation With Photogrammetry
Setup Process
Now it is just a matter of executing the entire process of stacking each photo for each camera position and keeping track of what is happening. We will describe the process of making our example step by step without missing anything. If you find an unfamiliar action or term, we highly recommend rechecking the previous articles. We will not introduce any new concepts in this article, only the combination.
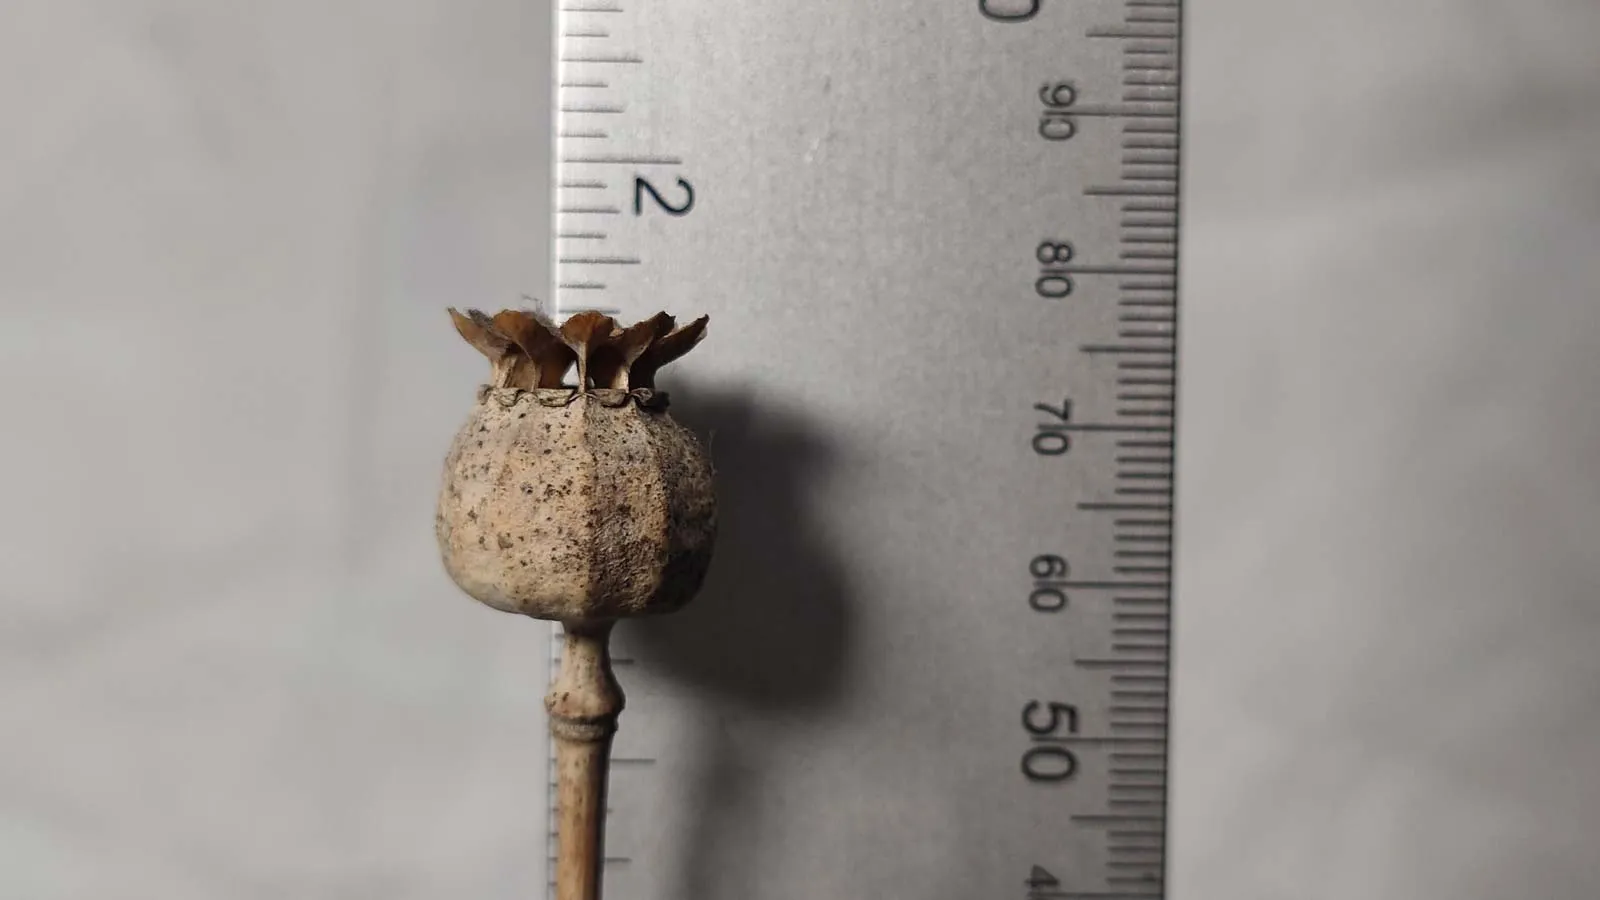
Step 1: Choosing the subject. We will make a 3D scan of a dried poppy that has a relatively uniform shape, and its texture is visible only at the macro scale. It is a good, easy example to test the workflow.
Step 2: Choose the gear. For the scan, we will use a macro lens with autofocus, a ring light with polarizing film, a circular polarization filter, a tripod for the camera, a rotator, and a tripod for our subject.
Step 3: Mount the object. This step will require the most creative thinking. Ideally, the object would float in space, and we could take photos around it. As anti-gravity tables are not yet a thing, we must figure out the next best thing. Because our dried poppy has a stem, we will use that as our mounting point. We attached it to the rotator with some sticky clay.
Step 4: Set up the background. Our background will be a black piece of paper as far from the object as possible. Because our subject is so small, setting up a background is easy, you do not need a large surface area.
Step 5: Set up the camera. The camera goes on the tripod, and the filter mounts on the lens alongside the ring light. Because this is a long shoot, we use mains power for the camera and the ring light and will not rely on battery power.
Step 6: Camera framing. We plan to do three turntable rows around the object at approximately 45, 0, and -45 degree angles. Set up the tripod so these angles are physically achievable. Frame the subject, so it takes as much field of view in the frame as possible. With macro scans, minimum focusing distance will be your limit most of the time. So we bring the poppy as close as possible without stepping over this limit or cutting off a part of it.
Step 7: Camera settings. We will shoot raw photos at f11, iso 100 for best quality, and the shutter speed will compensate for proper exposure. Shutter speed becomes a few seconds, so the utmost stability of the whole setup is required. All stabilization systems are off because these can be unreliable in long exposure scenarios.
Step 8: Adjust the polarization. Turn the filter while keeping the light stationary until all specular highlights are gone.
Step 9: Set up the remote control. We use Helicon Remote with the camera connected via wifi to a PC. In this software, you must verify that the connection is solid and set up the stacking distance. The remote control may be unnecessary if you have a camera that supports focus bracketing

Shooting Process
The setup is the hardest part. Now comes the most extensive. We need to take a set of focus-stacking images for each camera position instead of just one, as we usually do. We use a rotator that allows turning the object every 15 degrees, which means making 24 photos per turn. Multiply that by three because we have three camera angles. Then multiply that by the number of images needed to stack the full depth of field, in our case - 18 shots for each position.
It means we need to take 1296 photos to scan the tiny object. Helicon Remote software automatically handles the 18 image stacks and transfers photos directly to the computer via wifi. So this bulk of the job is automated. We still need to turn the rotator after each stack capture and manually trigger another one. This type of workflow does require your presence and attention. After capturing each turn of 24 images, we must adjust the camera to the next position.
Suppose you have the technological knowledge and equipment. In that case, you can fully automate the process, but this will apply to only a few professionals. Depending on your setup, this can take up to a few hours to complete, not counting unwanted delays. If you are shooting RAW, plan the storage space accordingly. One thousand two hundred ninety-six raw 33-megapixel photos mean 43 gigabytes of disk space.
Stacking Process
We need to make a single image from each 18-photo stack. We will use Helicon Focus Pro, a dedicated focus stacking software. The software allows running batch processes, so we need only a few clicks to stack all photos. However, stacking 18 raw images 72 times will take considerable time, even on powerful PC hardware. In our case, the process took 130 minutes to complete on an Nvidia 3080 GPU.
Here you have two choices. You can process all raw images and export them as jpegs for stacking or stack raw images and process stacked raws to get jpegs for photogrammetry. Fundamentally you will get the same result. We determined it is more convenient to stack RAWs and wait a little longer but deal less with file locations and sorting.
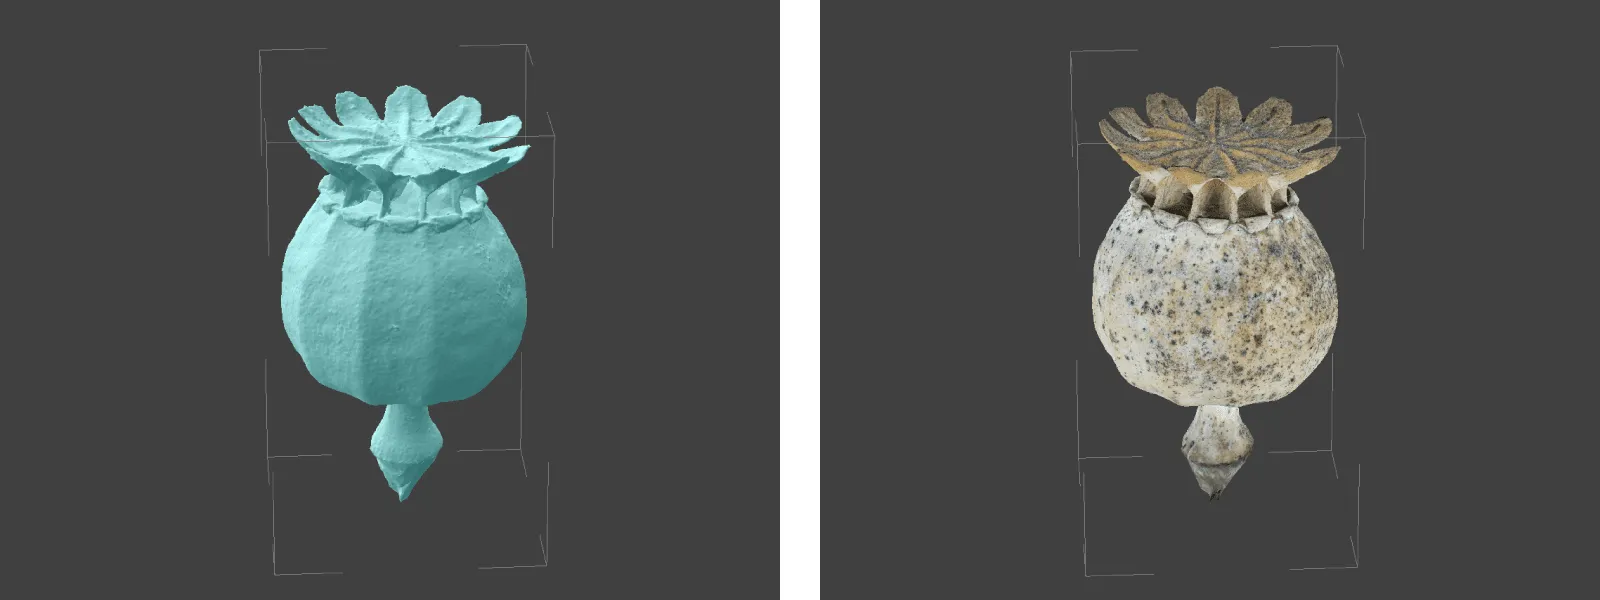
Results
Finished stacked and converted jpegs go into the photogrammetry software. If everything goes right, you should get an exemplary 3D model with a clearly visible camera position arrangement around your object. Our example turned out pretty good, but it did take quite some time to complete. At first, we made a mistake using the rotator, so we had to redo half of the work, setting us back an additional few hours. Photogrammetric processing itself took up just a tiny fraction of the entire workflow.
Conclusion
Hopefully, this article gives an idea of what it takes to do macro photogrammetry. The process is long and requires a lot of prior knowledge. Still, with focus and attention to detail, you can do it without stress and expensive equipment. But the result might be worth all the effort because it provides a unique perspective of a more miniature world in all three dimensions. Unique macro 3D models can be either particular assets for the 3D entertainment industry or made for functional parts and reverse engineering.
Photographer - Drone Pilot - Photogrammetrist. Years of experience in gathering data for photogrammetry projects, client support and consultations, software testing, and working with development and marketing teams. Feel free to contact me via Pixpro Discord or email (l.zmejevskis@pix-pro.com) if you have any questions about our blog.
Related Blog Posts
Our Related Posts
All of our tools and technologies are designed, modified and updated keeping your needs in mind

Commercial Roof Scan and Inspection
This blog post shares a real-world use case of a massive roof inspection job. The goal was to get a general scan of a commercial building roof for initial inspection and overview.
Buying a Used Drone - Mavic 2 Pro in 2024
Buying used gear is an excellent way to save money and obtain something that may not be on sale anymore. With drones reaching the 4th or 5th technological generation, the used drone market is becoming more extensive.
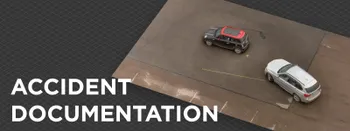
Quick Vehicle Accident Documentation with Photogrammetry
Photogrammetry is the ultimate form of documentation. If you are adept at doing photogrammetric scans, you can gather photographic data, resulting in a 3D scene that you can measure. Invaluable when the dependability of the data means solving disputes between people during legal processes.
Ready to get started with your project?
You can choose from our three different plans or ask for a custom solution where you can process as many photos as you like!
Free 14-day trial. Cancel any time.
Welcome to Pixpro
Sign in
And access your account.