.svg@webp)
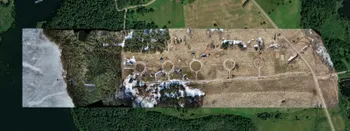
Multiple Roof Inspection - Low Altitude Orthophoto
 Lukas Zmejevskis
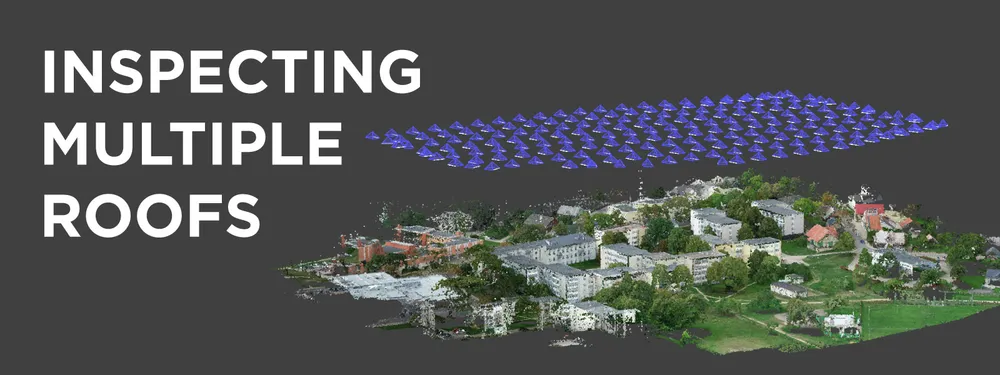
Roof inspection is a staple use case for aerial photogrammetry. This blog post looks at a particular flavor of roof inspection for analysis. After renovating an entire block of buildings, we need to check for defects or any shortcomings the contractor might have missed. We will use low altitude, high detail nadir imagery collected with a drone. It is a simple but fundamental use case for photogrammetry, with a few caveats we must explore.
Overlap
Overlap is the most critical factor when it comes to good 3D reconstruction. For nadir scanning (when the camera is facing directly down), controlling overlap with either flight planning software or manual flight is very straightforward. Set the overlap to 80/80 percent in the flight planning app and forget. On how to control the overlap when doing manual nadir scans, read a few of our previous posts:
Photogrammetry with the Mavic 3 - No Flight Planner Required Part 1
Photogrammetry Calculator - GSD, Flight Speed and More
Common Overlap Mistake
Overlap calculation in the flight planner apps depends on the altitude above the take-off point. So when doing low altitude scans - the height of a building might be a huge issue, as it considerably reduces the overlap for the roof surface.
For example, suppose we were doing a 30-meter altitude scan above a 10-meter building without adjusting for the height of the building. In that case, our factual overlap decreases by 33 percent at the height of the roof. It is the difference between a successful 3D reconstruction and an artifact-filled mess.
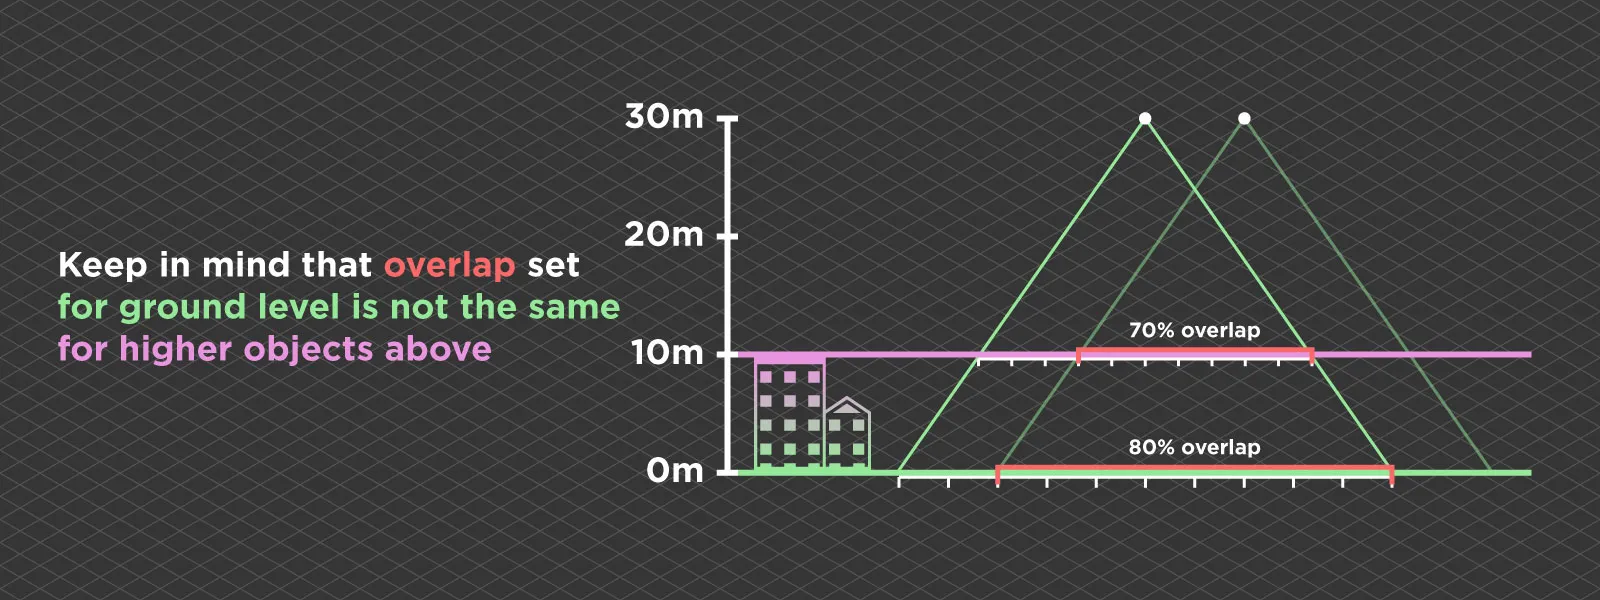
We can take off from the roof or some high ground at a similar height to adjust for the difference or use the relative surface height setting. When doing flights for this article, we employed the Phantom 4 RTK drone, which does have this setting. As we took off about 10 meters lower than the surface for which we needed detail - we had to enter a value of -10 meters in this case. It increased the flight height by 10 meters while keeping the same amount of photos.
With the overlap and relative altitude settings clarified, we can execute the simplest form of automatic flight - a nadir grid - often called single grid or 2D photogrammetry, or do the manual flight and collect our data. The next step is processing.

Data Processing
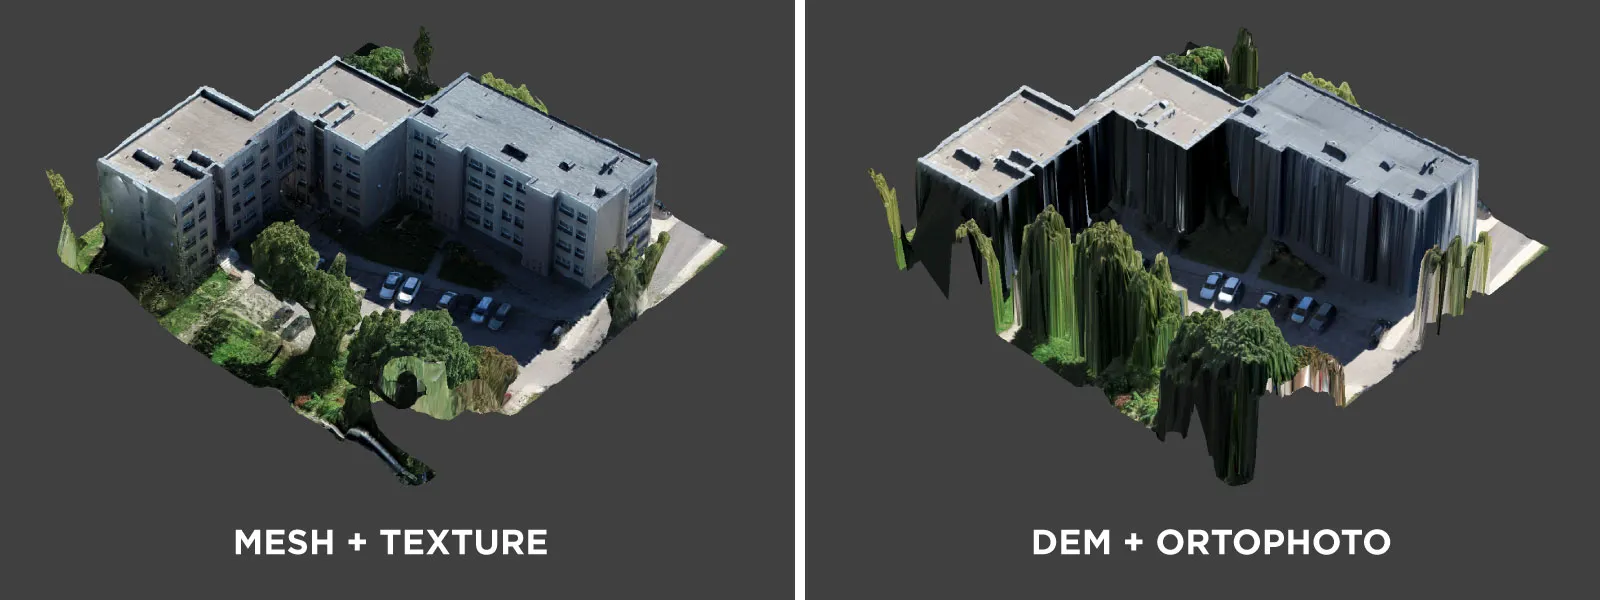
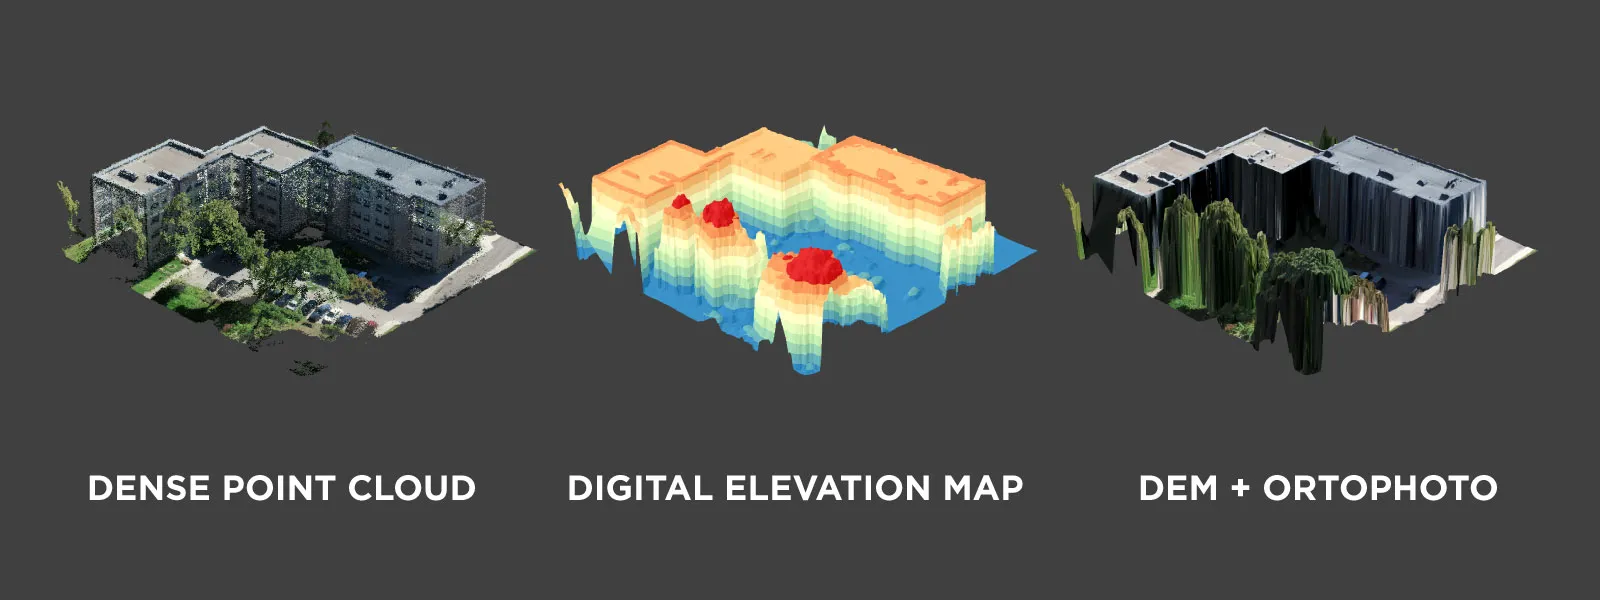
To create a true orthophoto image - a digital elevation map and, in turn, a dense point cloud is necessary. It means running the initial step of 3D reconstruction, then point cloud densification and cropping the point cloud manually before making a digital elevation map. A DEM is not a proper 3D mesh, so it looks pretty different and does not have any wall detail. It is normal as it is a height map, aka a 2.5D surface.
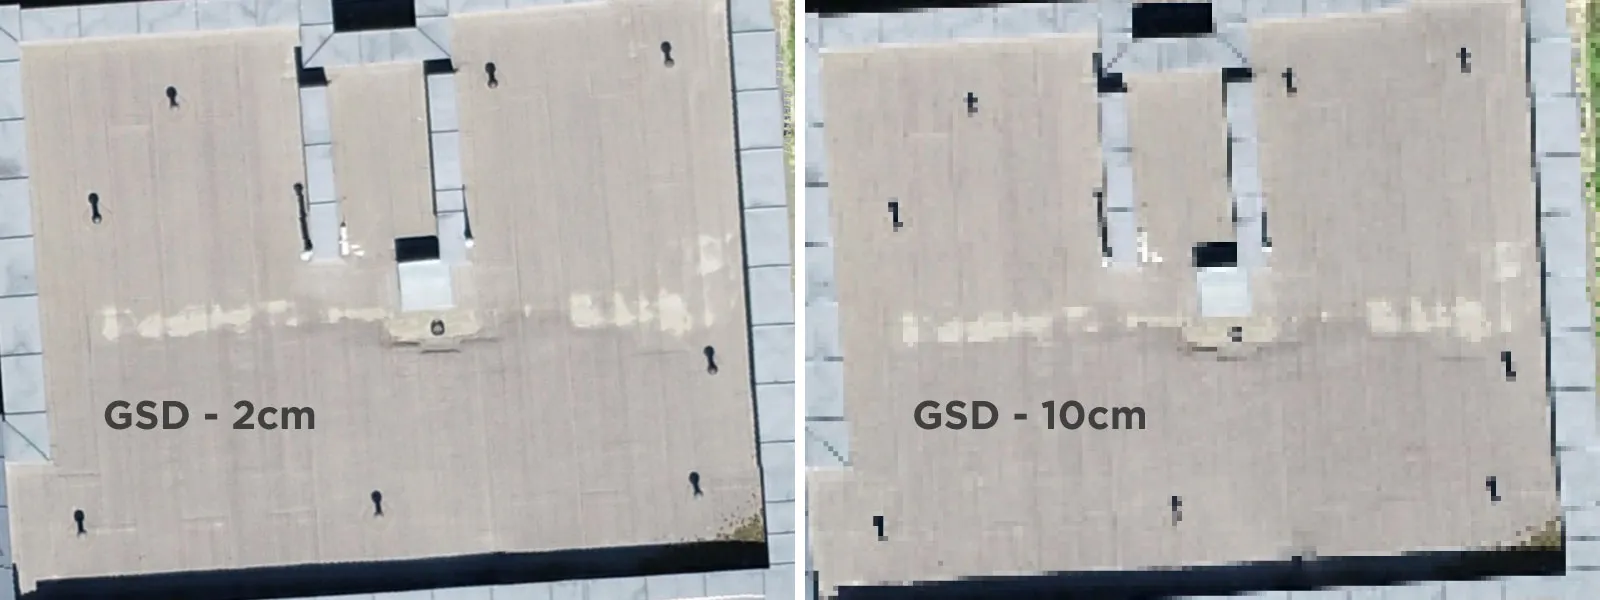
For the DEM surface, we create an orthophoto image, and to maximize its resolution, we need to choose the same GSD values as our native photo GSD. This value will depend on the camera and the altitude of the flight. If you forget what the native GSD value is, you can always use our handy photogrammetry calculator for clarification. You will, however, need to remember or figure out the flight height above the scanned surface. Also, never set the GSD value smaller than the native, as you will waste processing time and data storage for no visual improvement.
Examples
We can work on either the 3D mesh, which is more visually appealing, or a DEM surface with maximum resolution orthophoto, which might have more detail than the mesh texture. As we are working and looking directly from above, a full 3D mesh might be unnecessary. In any case, the inspection workflow is the same for whichever type of layer you choose.
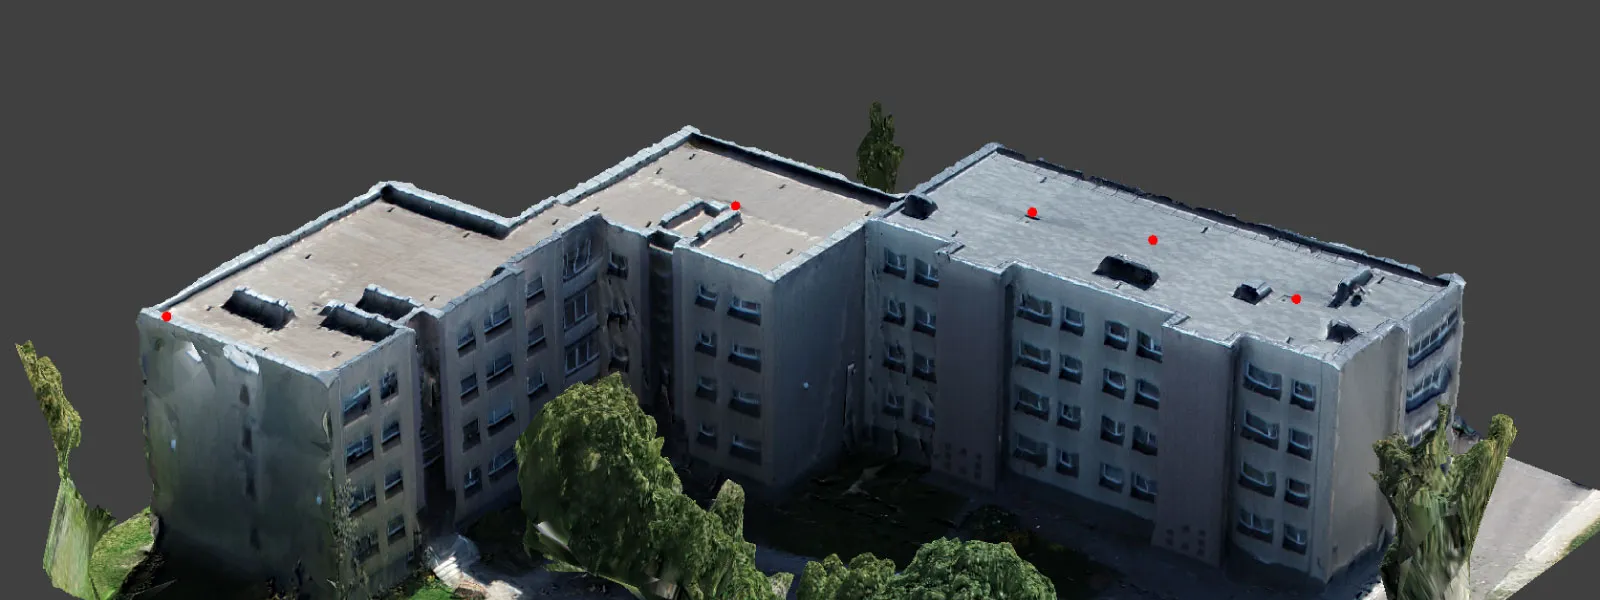
First, in the initial inspection in the 3D view, we can find any significant defects or apparent anomalies, mark them with points, and annotate them. Also, we can see signs of more minor flaws and designate them with points. If this information is sufficient, we can begin addressing the issues in the physical world.
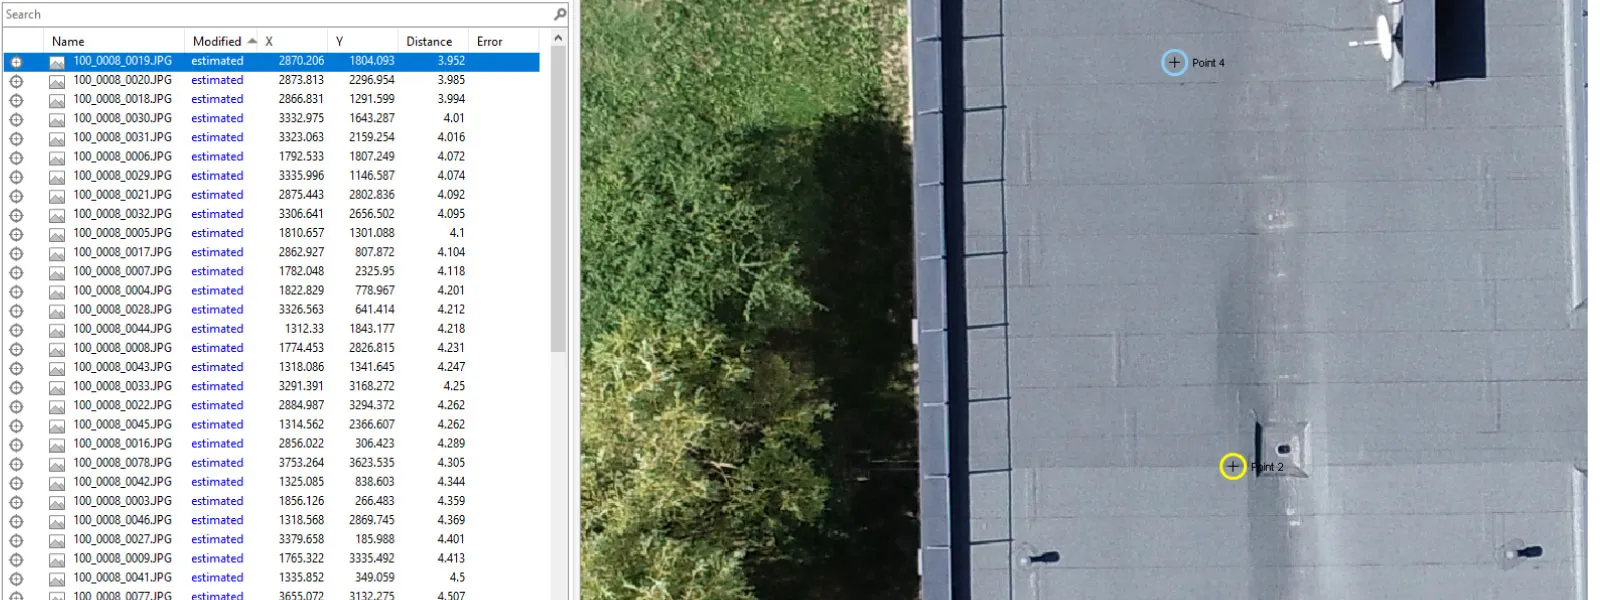
If we need to see the marked areas in as much detail as possible, we enter the projections menu in Pixpro. It lets us see the exact spot we marked in the photos and inspect these areas at the maximum possible resolution captured during the flight. We can also adjust the precise location of each marking using the projections. With adjustments made, we can change the color and size of each marking point and add annotations.
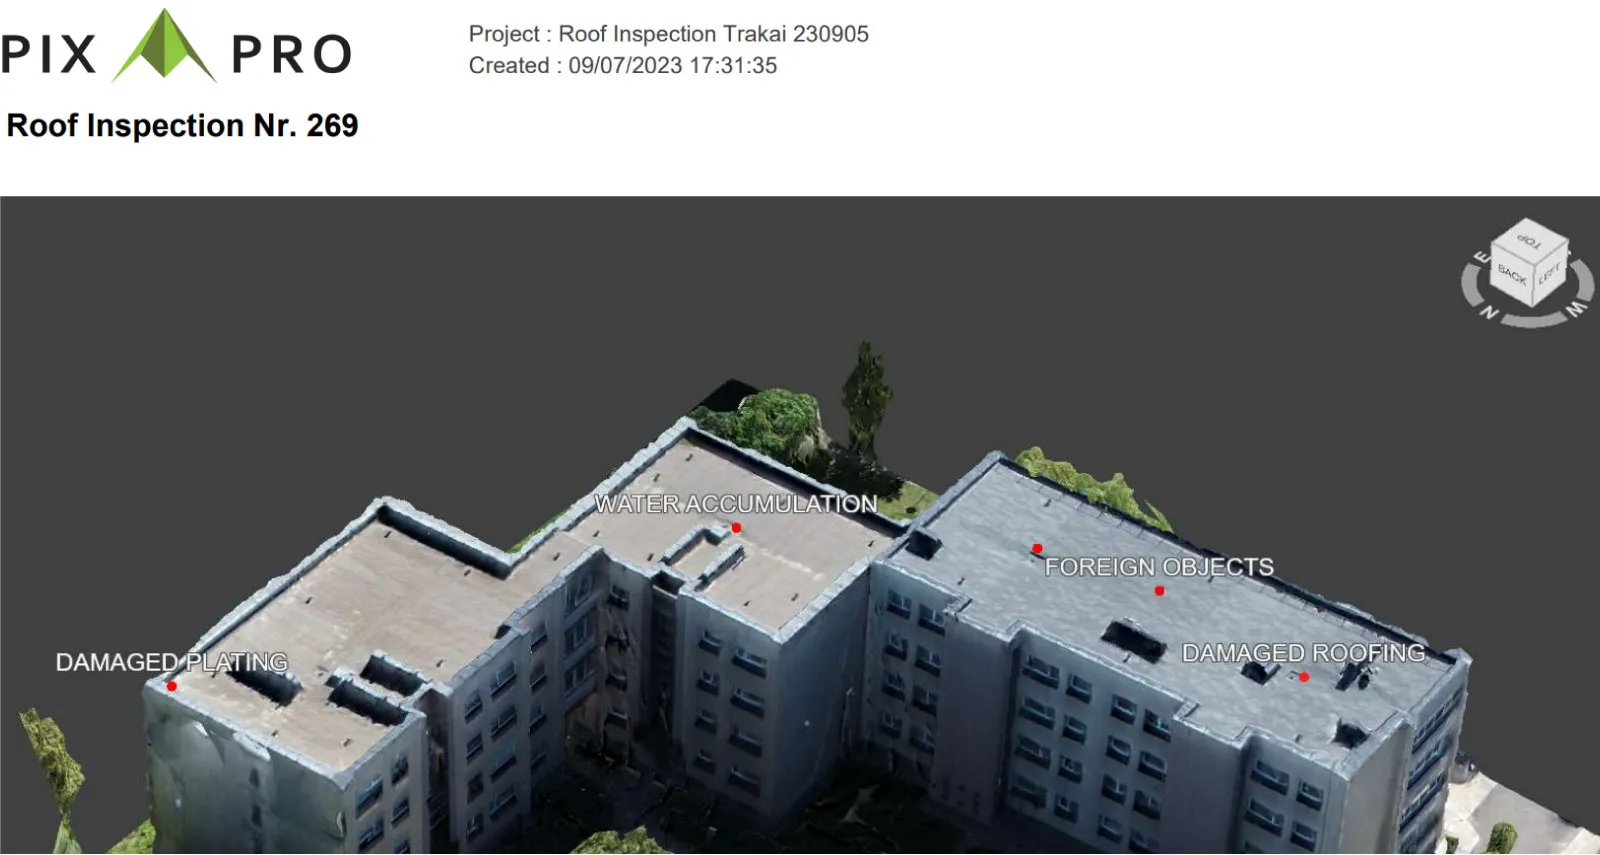
Finally, the data can be exported as georeferenced vectors for overlay and analysis in any other software or direct input into a GPS device for field usage. Data export will depend on your specific workflow and how you address any potential issues found during the inspection. For more minor cases like ours, a PDF report from Pixpro is enough for technicians to find and liquidate all the problems we found using the drone.
Conclusion
Nadir scan might not provide the neat 3D mesh results we expect from photogrammetry. Still, it is the most efficient way of covering large areas with consistent resolution data while being the most accessible automatic flight type. Any drone that supports automated flying will have the single grid option. After processing, high-resolution orthophoto imagery will be incomparably more detailed than any map data, not to mention being as recent as you need. It will help inspect and find any issues with the roofing job without going up a single ladder step. This data will also serve as concrete evidence for any arguments regarding the quality or quantity of completed contracts.
Photographer - Drone Pilot - Photogrammetrist. Years of experience in gathering data for photogrammetry projects, client support and consultations, software testing, and working with development and marketing teams. Feel free to contact me via Pixpro Discord or email (l.zmejevskis@pix-pro.com) if you have any questions about our blog.
Related Blog Posts
Our Related Posts
All of our tools and technologies are designed, modified and updated keeping your needs in mind
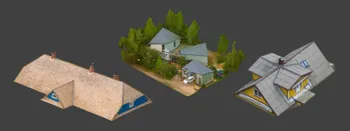
DJI Lito X1 for Roof Photogrammetry: Solar and Inspection Use Case
Small drones are the best tool for residential and even commercial roof photogrammetry. They are quiet, attract less attention, are easier to fly fully within regulations, and they are affordable.
Large Property Photogrammetry – Real Estate Development Use Case
Property scans are one of the most common use cases, especially for our software. Pixpro is affordable and works well with RTK data and ground control points when necessary.

Handheld Photogrammetry Construction Interior Scan Use Case
Interior 3D scanning can be useful in a myriad of ways. In this article, I present a scan of a residential building construction site, with its foundation walls and roof almost complete. Further construction will require some visualizations and design according to “the fact.”
Ready to get started with your project?
You can choose from our three different plans or ask for a custom solution where you can process as many photos as you like!
Free 14-day trial. Cancel any time.
Welcome to Pixpro
Sign in
And access your account.