.svg@webp)
Manual Photogrammetry – Combining Different Flights
 Lukas
Zmejevskis
Lukas
Zmejevskis
The orbital scan is the most efficient aerial manual photogrammetry flight type for relatively small objects. But if your subject falls out of the category of being relatively small, what to do then? Combining multiple types of flights can often be the answer. In this article, we will scan a larger object – the roof of a shopping center using the DJI Mavic 3 drone with the default DJI Fly app.
Manual Photogrammetry With DJI Drones
This article heavily relies on a couple of our older posts on doing orbital and nadir scans without a flight planner application. You can catch up on these here:
Photogrammetry with the Mavic 3 – No Flight Planner Required
Photogrammetry with DJI Mavic 3 – Orbital Scanning
By learning these techniques, we mitigate the need for automatic flight planning in 3rd party apps. And as we know, third-party applications will not be coming to consumer-grade DJI drones like the Mavic 3 or Mini 3 Pro. Automatic flying remains on enterprise-grade drones from now on. However, we will still use non-overpriced hardware for manual photogrammetry, which can be even better.
Single Orbit Flight
We obtain a single orbit with the POI (point of interest) flight type when using the tracking functions of DJI drones. To begin tracking, we must select our subject by drawing on the screen and then choose the POI flight mode. Then we tap the “go,” and the drone will start to orbit around a fixed spot on the ground. The tracking will not work perfectly, especially for buildings, but we can get used to it with a few tries.
When the drone is orbiting around our subject – we need to take photos at consistent intervals. Timed shooting is not available in tracking yet, but we asked DJI to bring it back because there is no real reason why it should not be available. For now, we take a photo approximately every 2 seconds by counting. Or when the buffering line around the shutter icon in the app disappears. When this line disappears, the drone is ready to take another picture. Check your memory card if the line takes a long time to disappear. Slower cards will make the buffering longer; reformatting the card might solve your issue. Once the drone makes more than one full rotation, you can stop taking photos and finish the flight.
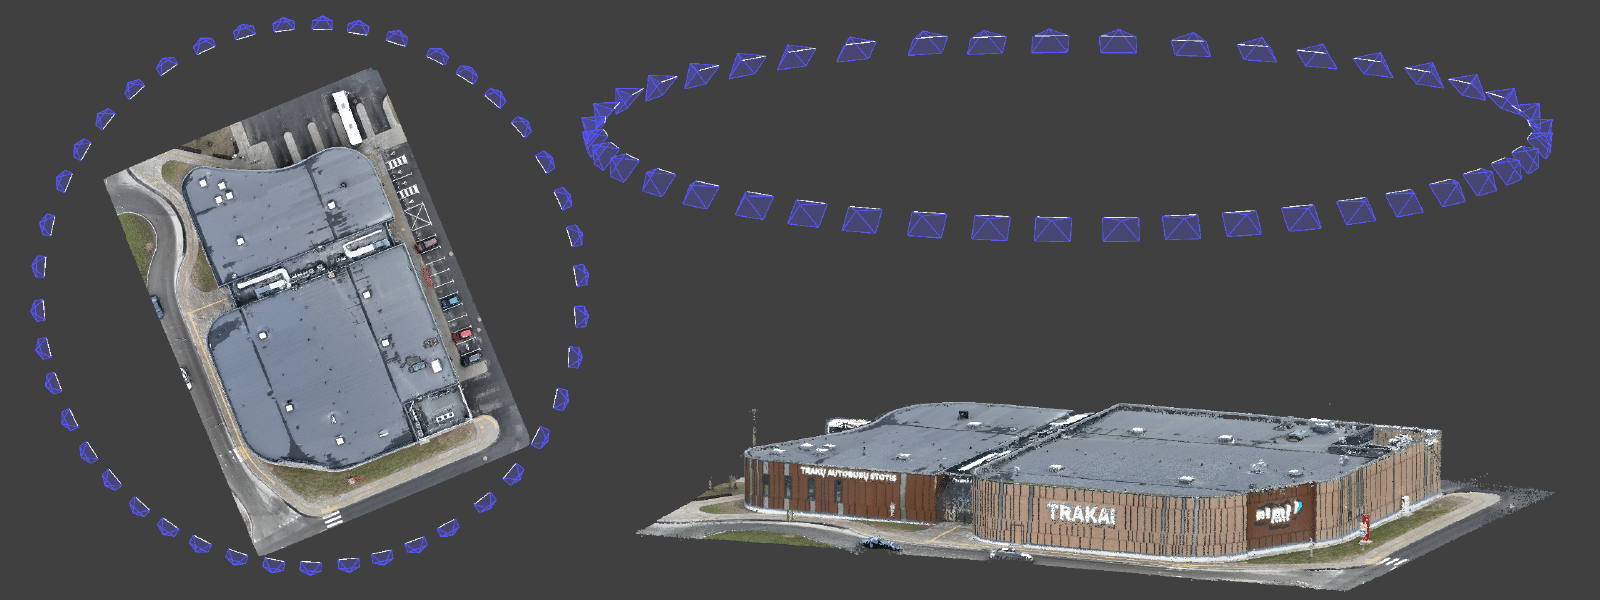
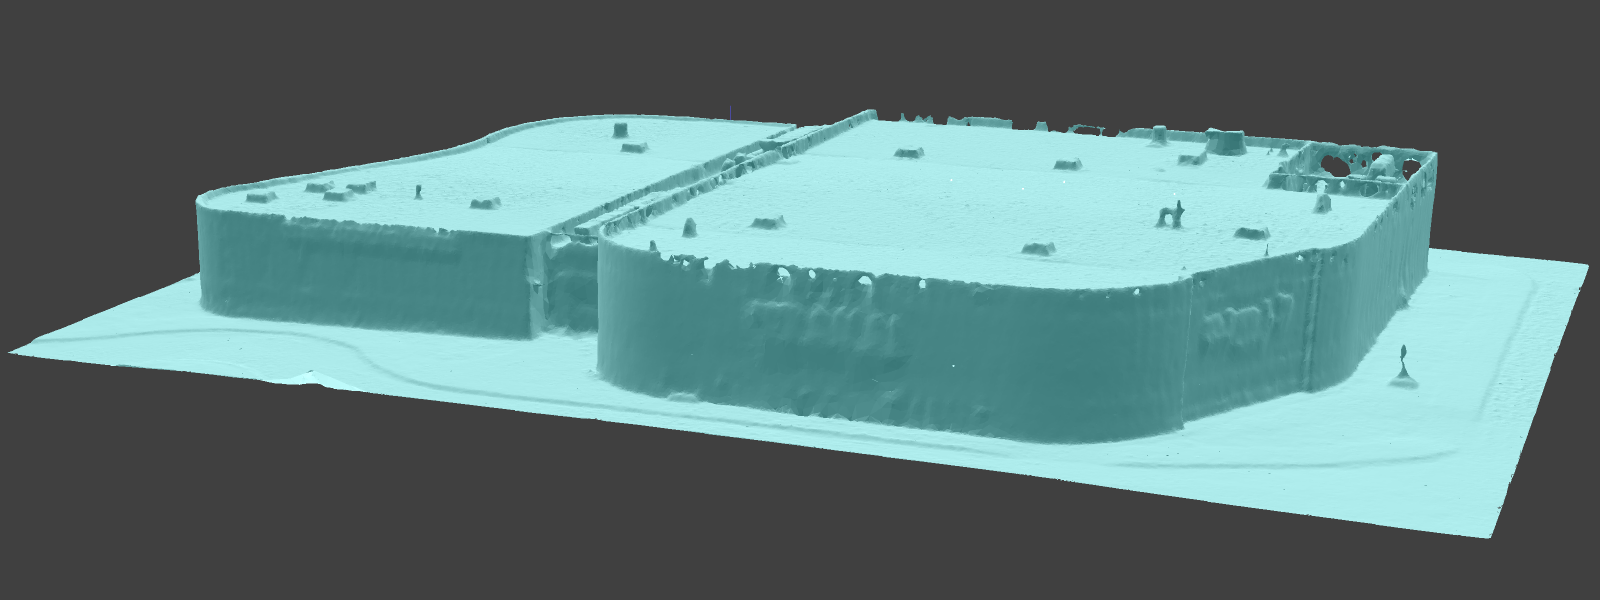
In our case, we made a single orbit around the shopping center. And as expected, orbiting a larger object from such a distance does not yield incredible detail, but the overall structure is sound.

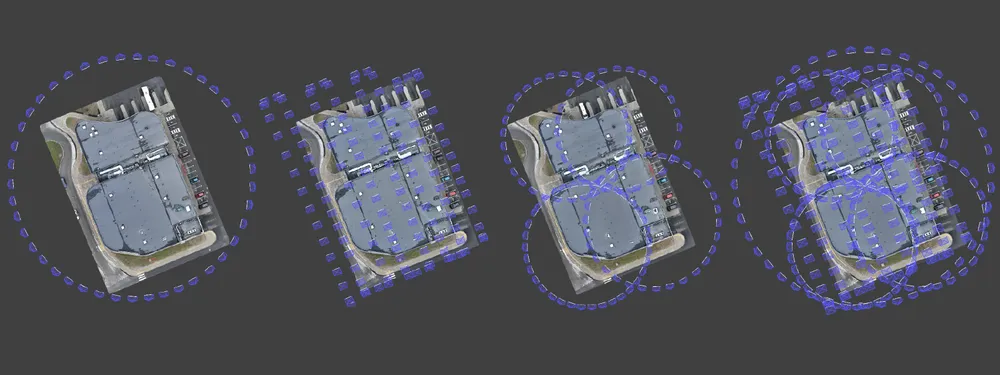
Multiple Orbits in a Flight
To increase the detail, we need to reduce the distance between the camera and the subject. To make that work, we need to split up our building into four quadrants and scan each with a separate orbit.
To begin scanning a single quadrant go to the center of the building, set your desired height, and face any of the quadrants. Engage tracking by drawing around the center part of the view and begin orbiting and taking photos in the same manner as before. A screen capture video of doing just that is down below.
Do this for all four quadrants; voila, you have four orbits covering the entire shopping center. Such flight yields better detail than the single orbit with a moderate increase in overall photo count.
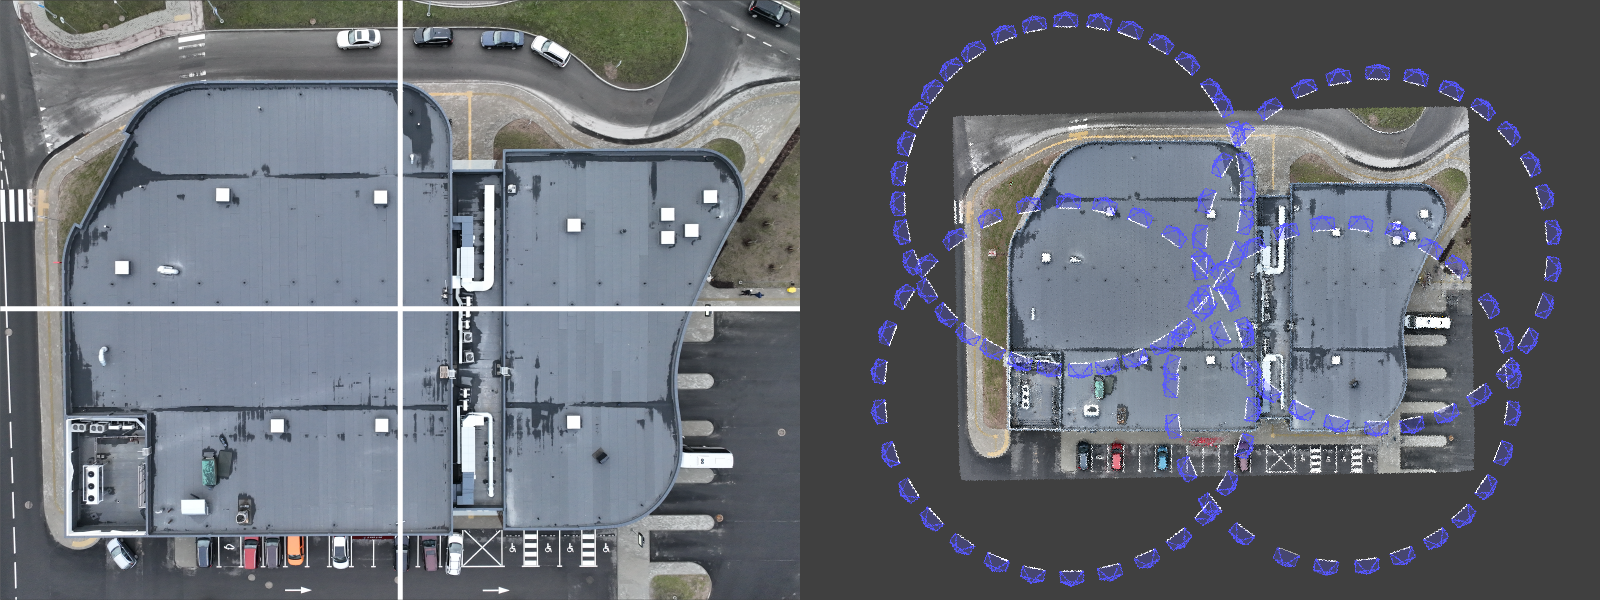
Additional Nadir Scan
Adding photos facing directly down allows you to add more detail and have the ability to make orthophoto images of the roof without any risk of artifacts. Orbital scans will never produce perfect orthophoto imagery because of the oblique angle.
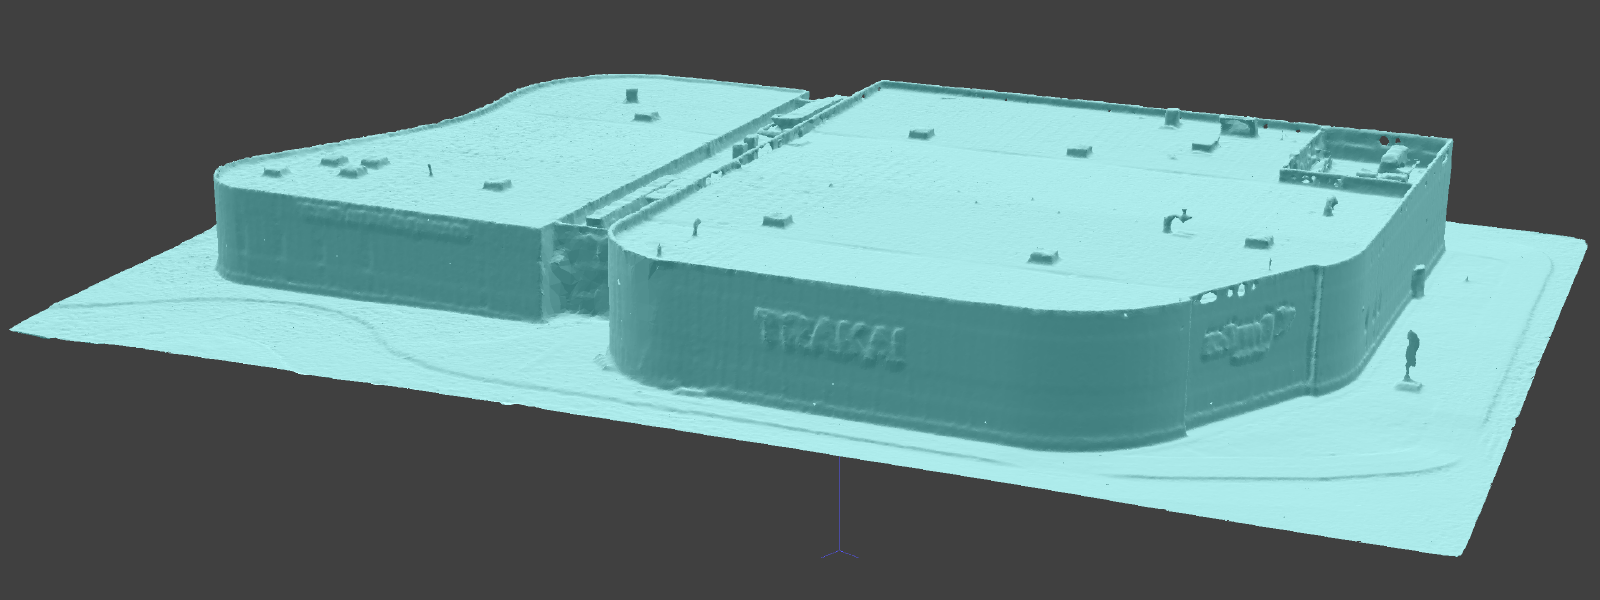
Nadir scan on its own is a bad idea, though. Scanning a flat object while taking only top-down photos may introduce a bowing effect. We must always combine nadir photos with oblique imagery. Nadir scans work only on extreme terrains or with professional-grade referencing such as GCPs or RTK.
Common Photogrammetry Problem – the Bowl Effect
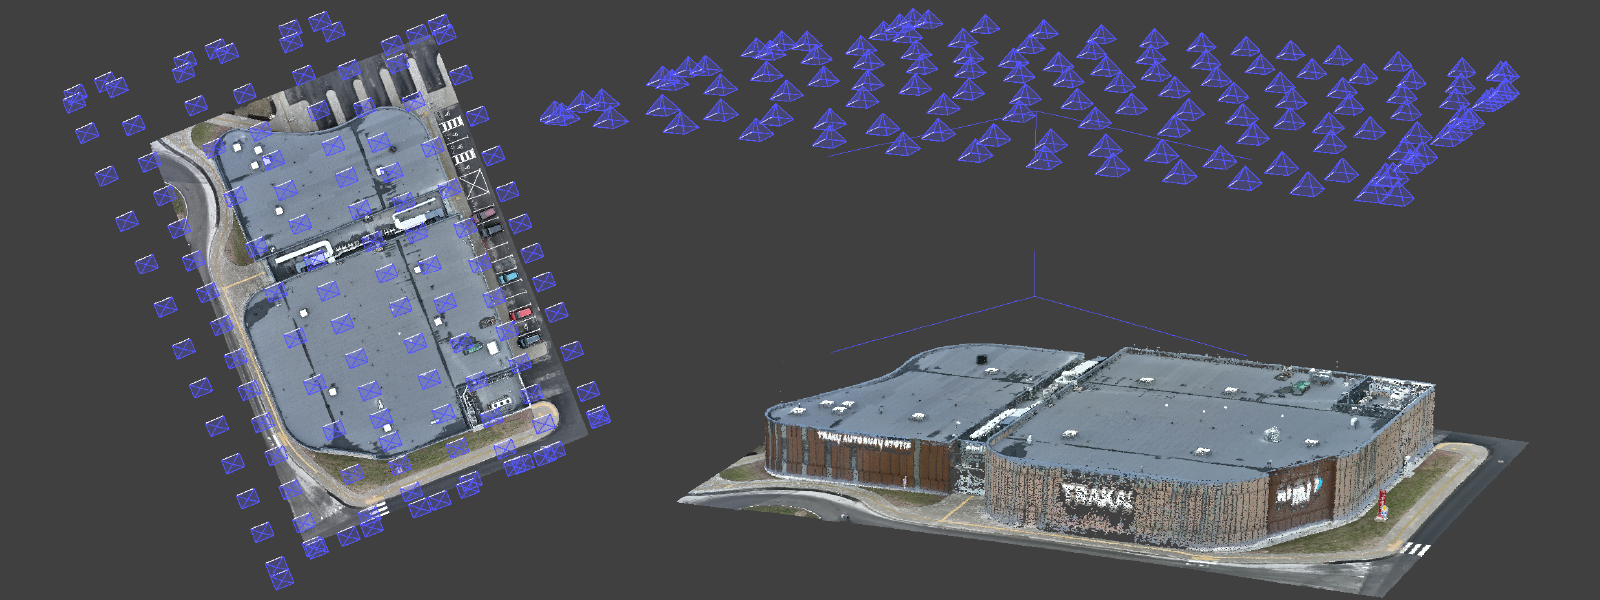
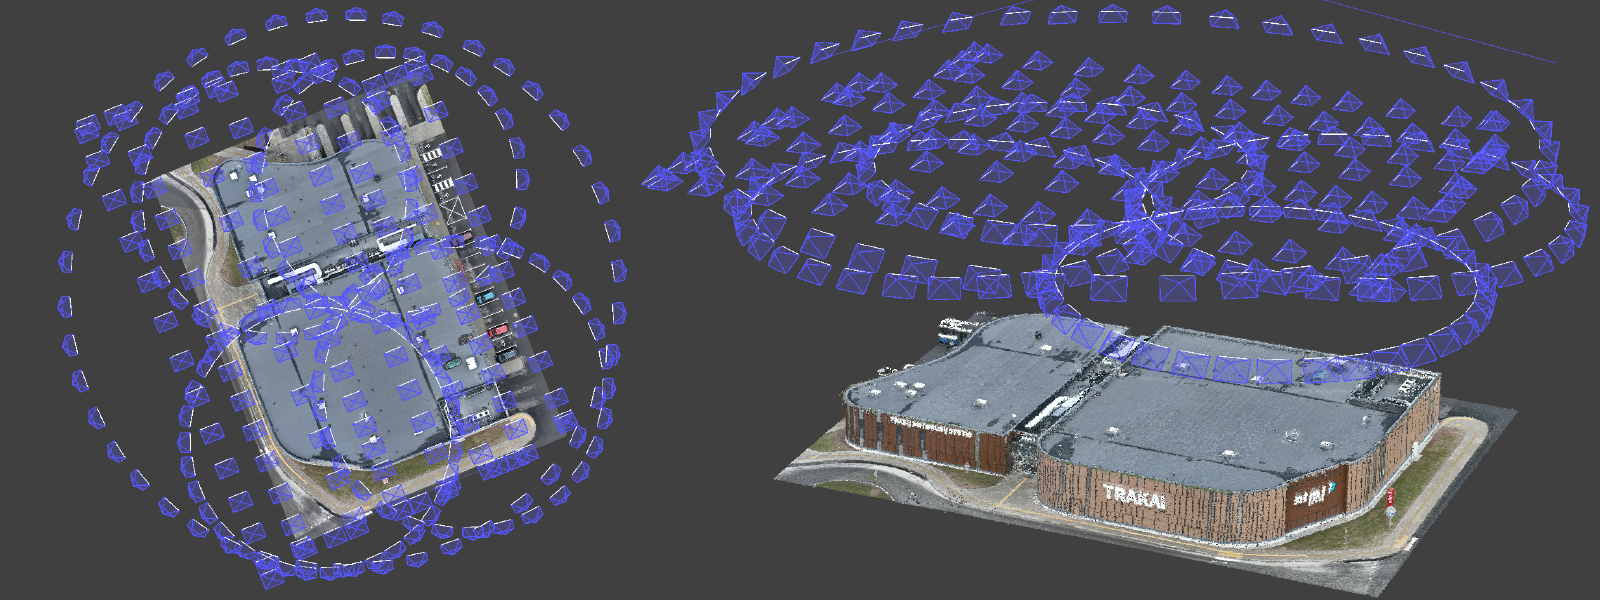
Combining All Photosets
Combining all photo sets is as easy as uploading them into a single Pixpro project. This idea will work with any photogrammetry software and yield the best results. We combined all three flights into one, but combining either orbital flight with the nadir one makes the most sense.
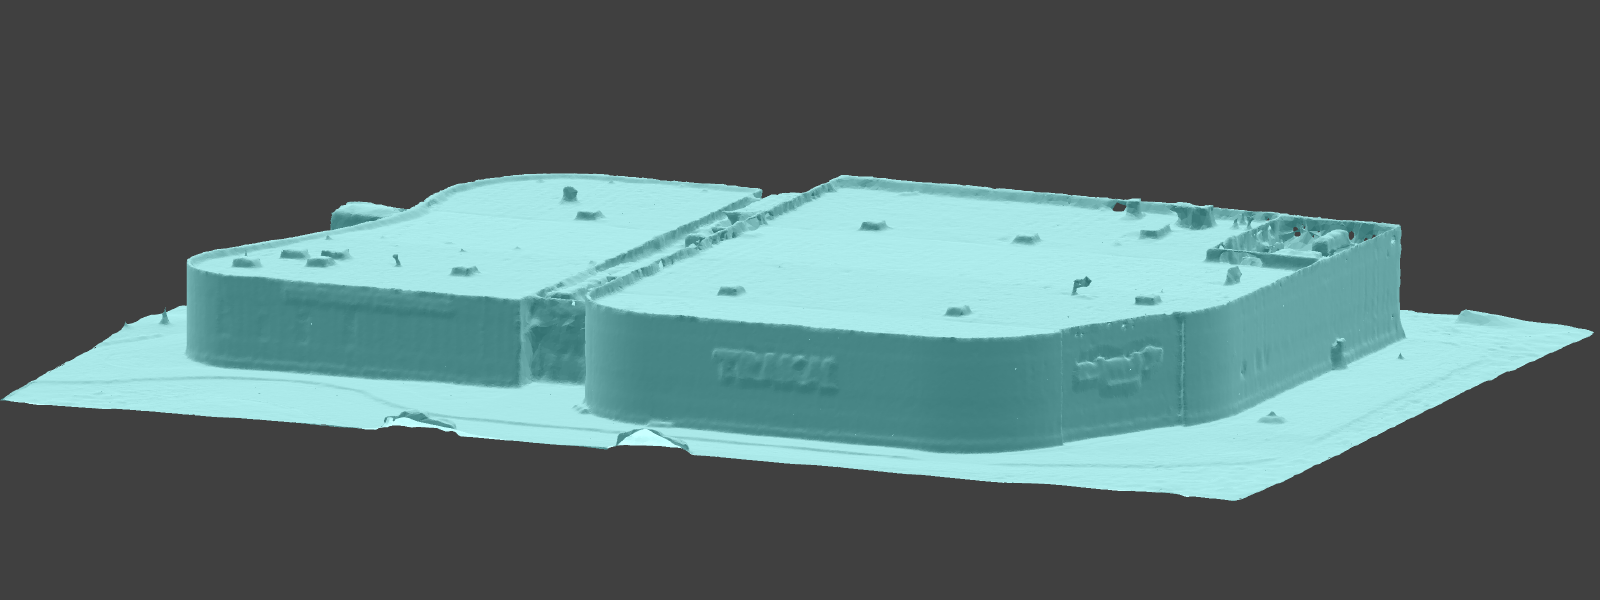
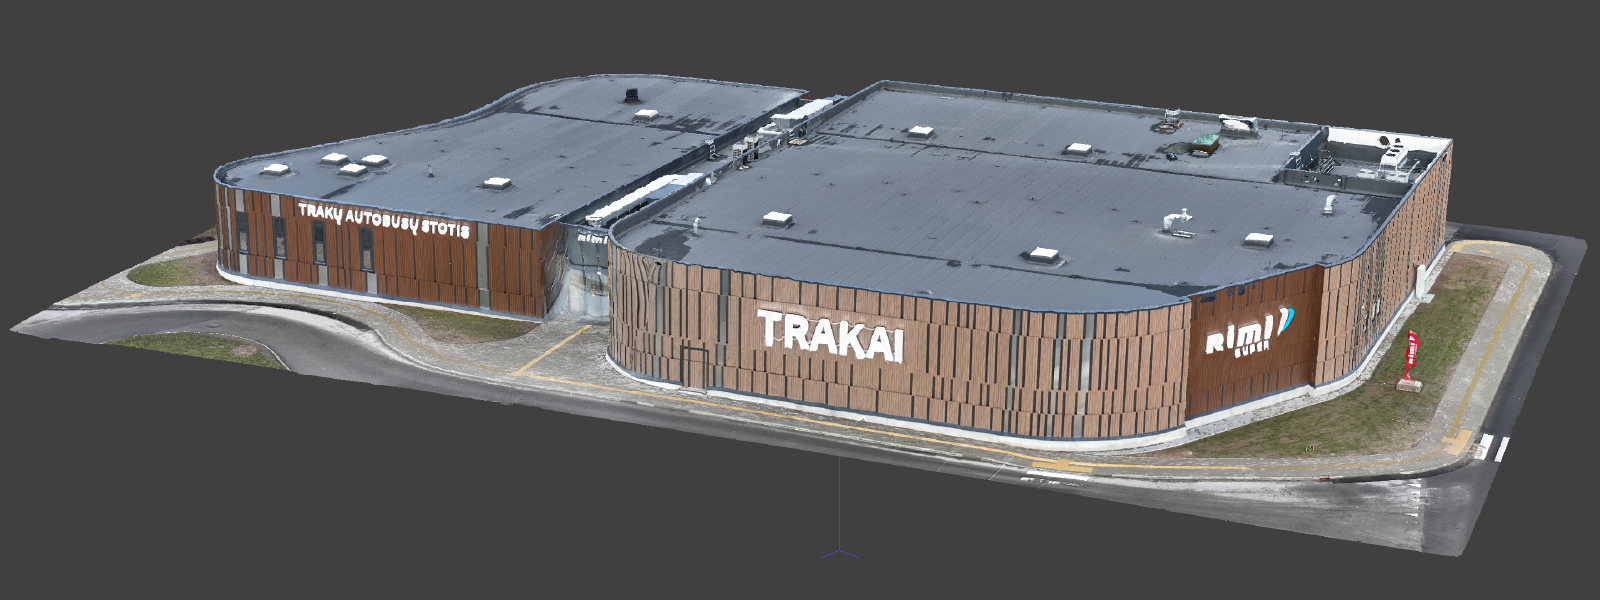
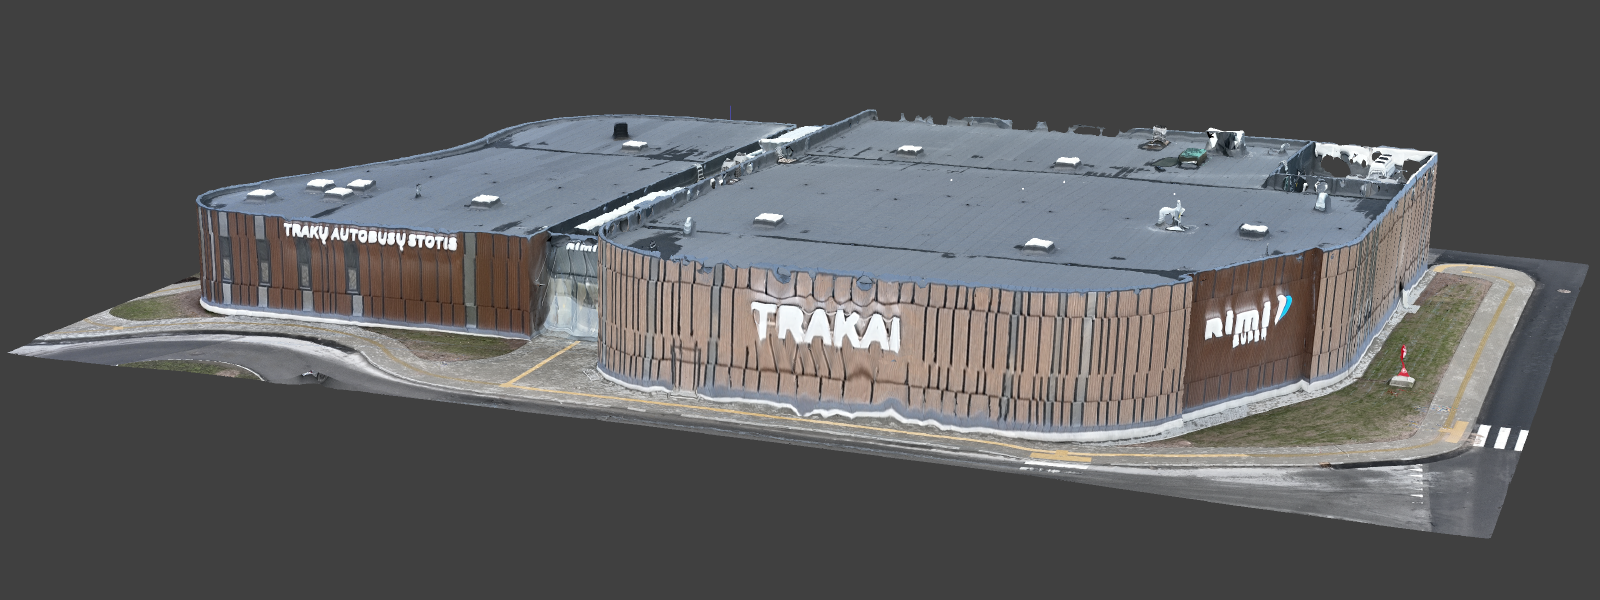
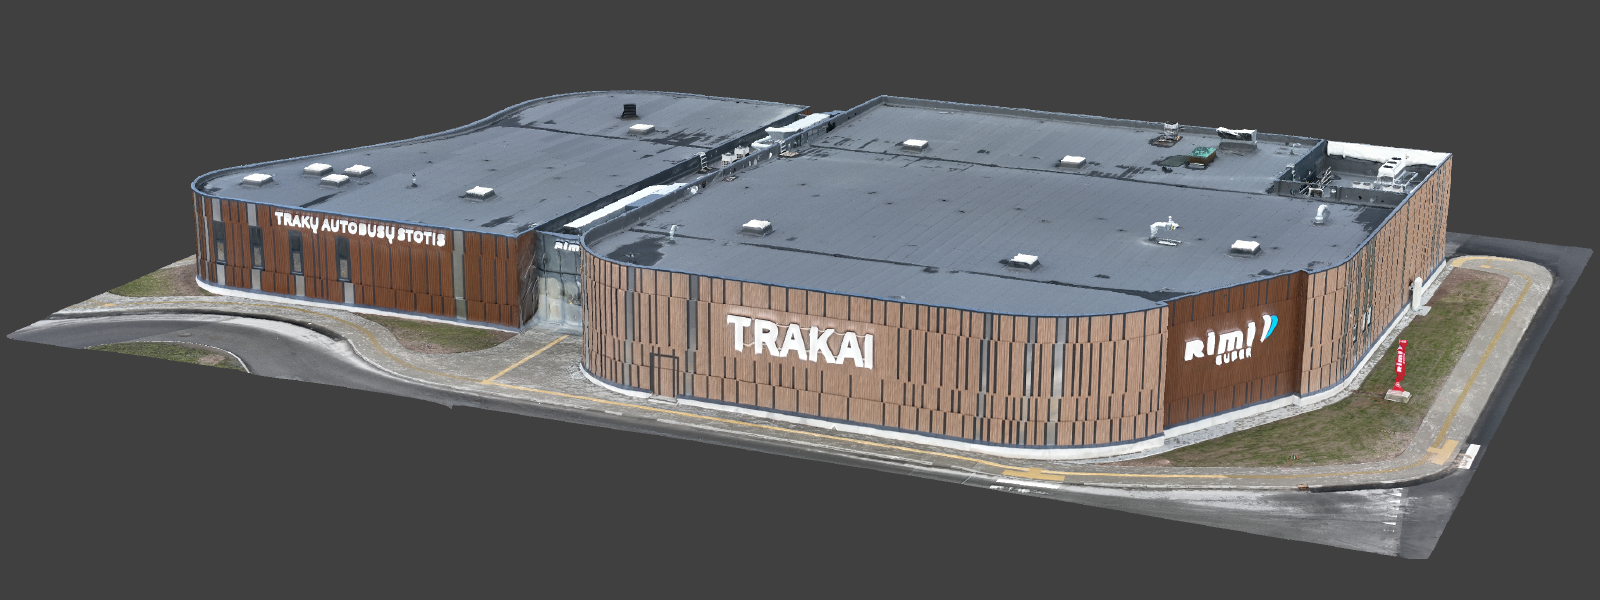
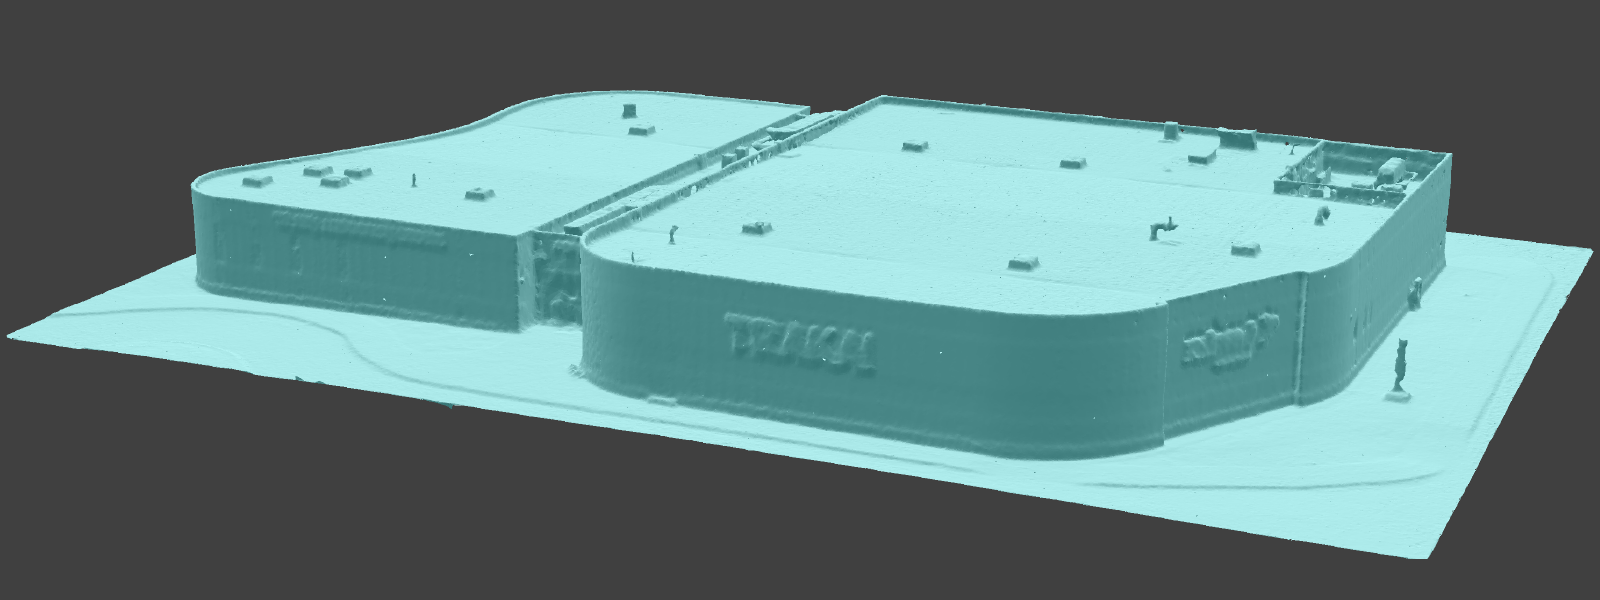
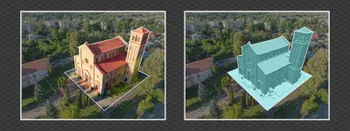
Results
With combined photo sets, we get the best structural integrity and detail in our 3D model yet, at a price of more extended processing. But selecting a lesser-quality preset to save processing time will still give us better results than just using a single flight’s worth of photos. Input data is always the most crucial part of manual photogrammetry.
Of course, adding even more similarly made photos will be redundant and will not increase detail further. So when combining different photo sets – ensure that each bunch has a different perspective to the subject, so new data is available for processing. That includes camera angles, heights, and distances to the object.
Conclusion
Making nadir and orbital sets without a flight planner is easy, and combining them does not mean you need to do anything differently. Combined image sets with oblique and nadir imagery provide the best 3D structure in many cases while keeping things efficient. The main requirement for success is sound photogrammetry for each photoset and a short time frame between them for consistency.
Photographer - Drone Pilot - Photogrammetrist. Years of experience in gathering data for photogrammetry projects, client support and consultations, software testing, and working with development and marketing teams. Feel free to contact me via Pixpro Discord or email (l.zmejevskis@pix-pro.com) if you have any questions about our blog.
Related Blog Posts
Our Related Posts
All of our tools and technologies are designed, modified and updated keeping your needs in mind
Overlap Between Different Perspectives
Photogrammetry can be simple and rigid or complex and adaptable. Combining different scan patterns adds complexity to the work but improves detail and coverage. We often use examples of combined flights, of which the orbital + nadir grid is a classic. They provide great 3D structure while being easy
Pixpro Waypoints - Automated Photogrammetry Flights for Newest DJI Drones
The latest DJI drones are the most capable flying cameras on the market. If you need a tool like that or a competent machine for casual creation - DJI Mavic 3, DJI Mini 4, and DJI Air 3 series drones are the best.

Accuracy of Your Photogrammetry Project
Accuracy in photogrammetry is a multifaceted point of discussion. We can talk about absolute, relative, or even geometric accuracy, to name a few. No tool or technique can really prove anything beyond reproach.
Ready to get started with your project?
You can choose from our three different plans or ask for a custom solution where you can process as many photos as you like!
Free 14-day trial. Cancel any time.