.svg@webp)
Cave Entrance Finding with Aerial Photogrammetry
 Lukas Zmejevskis

Intro
Aerial photogrammetry is a versatile tool with use cases spanning many disciplines. This article will examine how speleology enthusiasts and professionals use aerial photogrammetry to find, inspect and mark cave entrances. A remote-controlled flying camera with GPS is an invaluable tool and the core of modern cave-finding methods. Drones open up possibilities and accessibility that terrestrial techniques cannot match.
Traditional Methods
Classic methods of finding caves are geospatial data analysis or physical search. For data analysis, speleologists examine satellite imagery for different rock formations and colors, shapes of vegetation, growing trees, or traces of water bodies. Data analysis also includes looking over detailed maps and contemplating relief contour lines to find possible entrance/exit locations.
Also, classic methods involve plain physical exploration. It begins with conversations with locals who may have seen cave entrances and can give hints about possible locations. Then comes a lot of climbing, walking on rough terrains, and even listening to the sounds of animals, such as monkeys that like to spend time in the shade of cave entrances. During all this, a GPS device is always present so that coordinates can be recorded, and everything found is saved as spatial data.
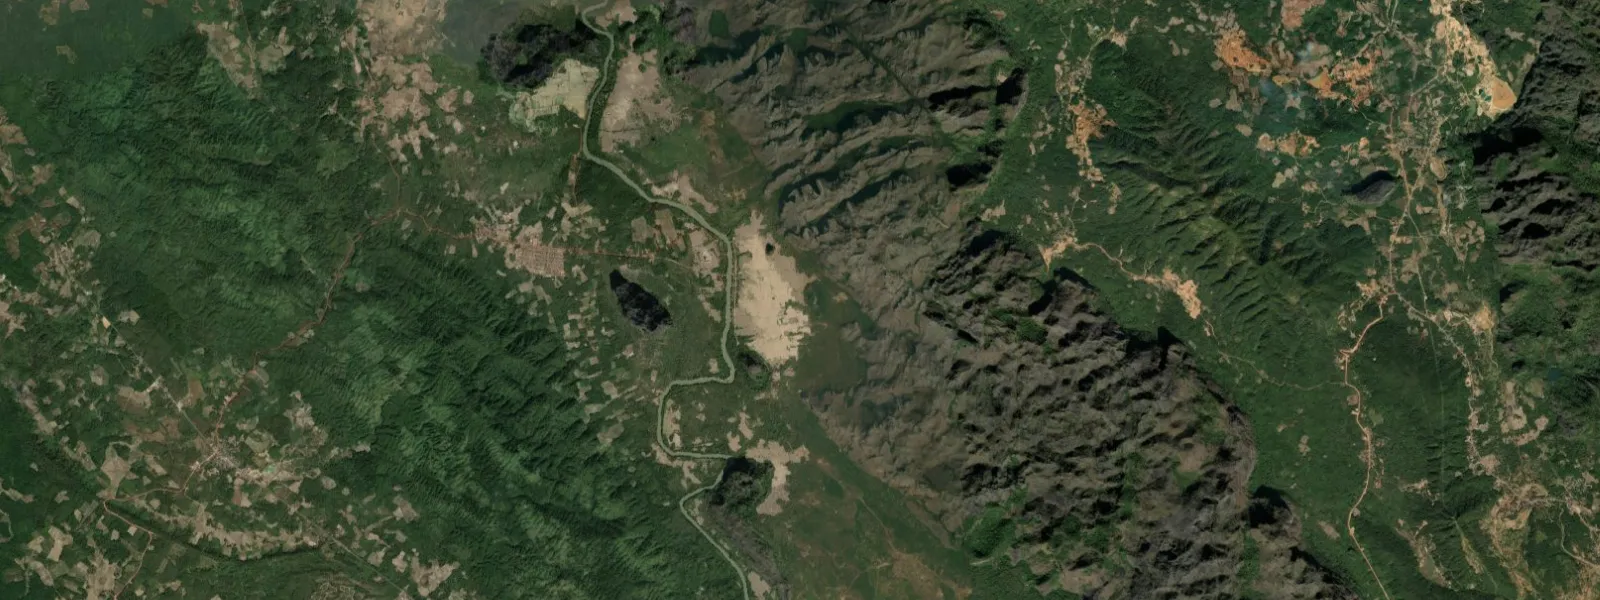
Even for experienced explorers comfortable with all of the classical methods, drones significantly boost efficiency and effectiveness in exploring the surrounding areas. Especially in the most remote and exciting locations where terrestrial exploration is challenging, the chance of finding new caves is high.
Main Goal
The goal of a successful aerial cave search is accurate enough GPS coordinates of a brand new cave entrance. Obtained GPS coordinates allow speleologists to effectively carry out further research: plan a route to reach the cave entrance, match the position of the newly found entrance with other already known objects, link topographic surveys, etc.
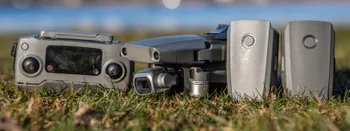
Anyone in possession of a camera drone with GPS can do such surveys in their caving regions. The drone does not have to meet any particular requirements beyond that. In the case described in this article, the team used a DJI Mavic 2 Pro drone and the default DJI GO 4 app to control it. What is left is other necessary equipment and some know-how.
Drone Flights
One of the most critical aspects of cave-finding drone flights is choosing a good take-off and landing spot from which the drone can be piloted without any issues. There should be no direct sight interference between the drone and the pilot, especially rocks or dense trees, which would result in a short operating range and live feed transmission issues. Taking off in a more open spot allows a better and quicker GPS signal lock which is essential.
Before taking off - you should have at least a rough idea of where areas of interest may lie and what signs of caves you are looking for. During the flight - continuously monitor the battery and remaining flight time - as a forced landing in a jungle or mountains will most likely result in a lost drone. Leave enough battery for a comfortable flight to your home point, and always have more than enough batteries to cover the work you are trying to accomplish.
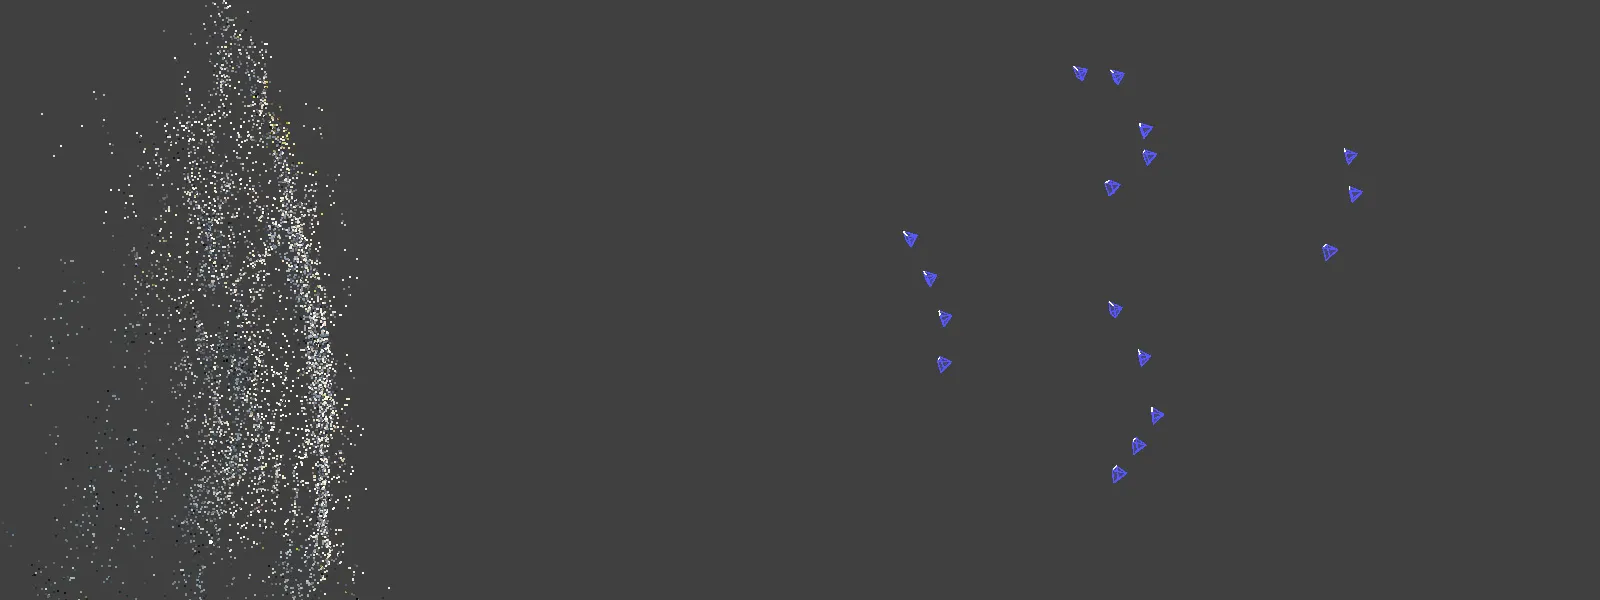
We can begin data capture once we identify some key spots or areas. The goal is to do a small, manual photogrammetric scan of the key area. It means adhering to photogrammetry fundamentals - taking high-quality overlapping photos from different positions. There is no need to do any particular patterns or use automatic flight planning. The 3D reconstruction will be successful if the images have sufficient overlap.
To ensure a successful 3D reconstruction, fly in orbital or grid patterns. An orbital pattern means making a full or even a partial circle around the key area or spot, and a grid pattern means flying in an alternating grid in front of or above the key area. We have written numerous blog posts utilizing these two fundamental patterns for 3D scanning.

Data Processing
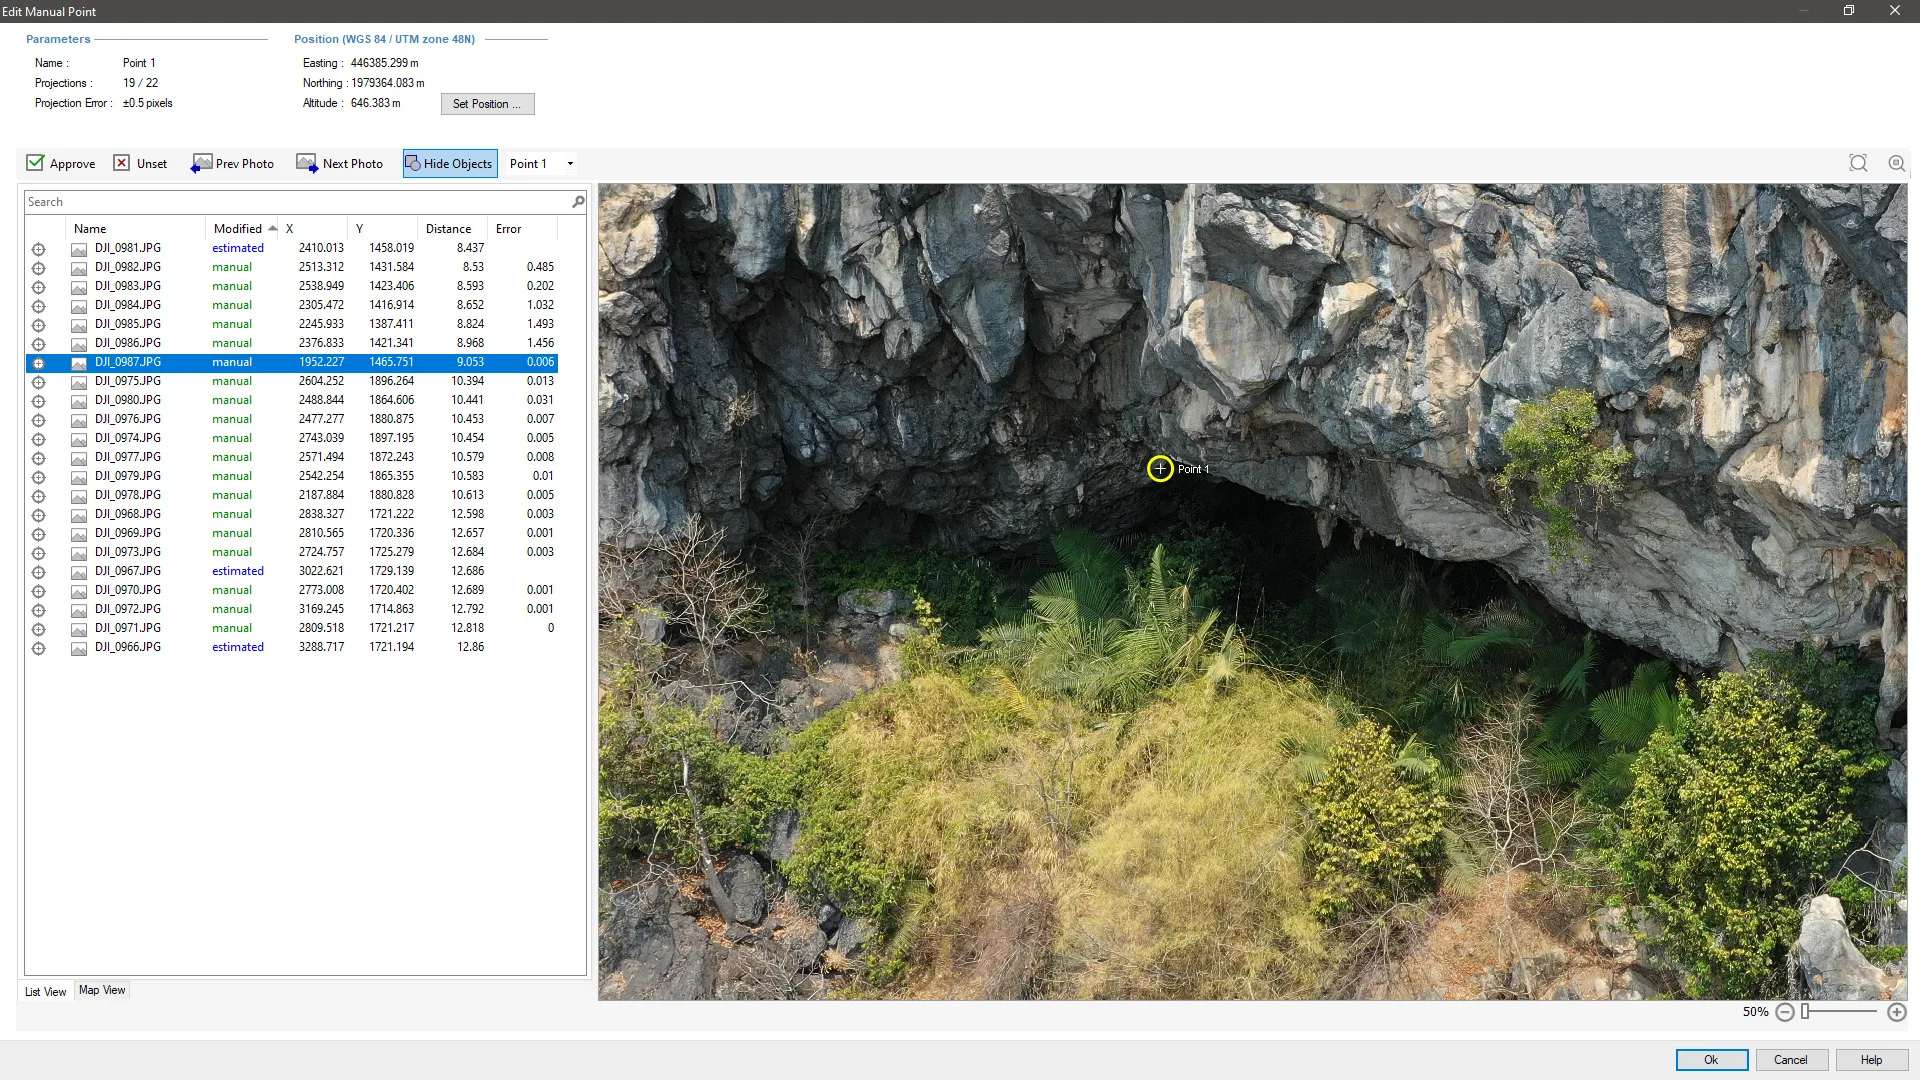
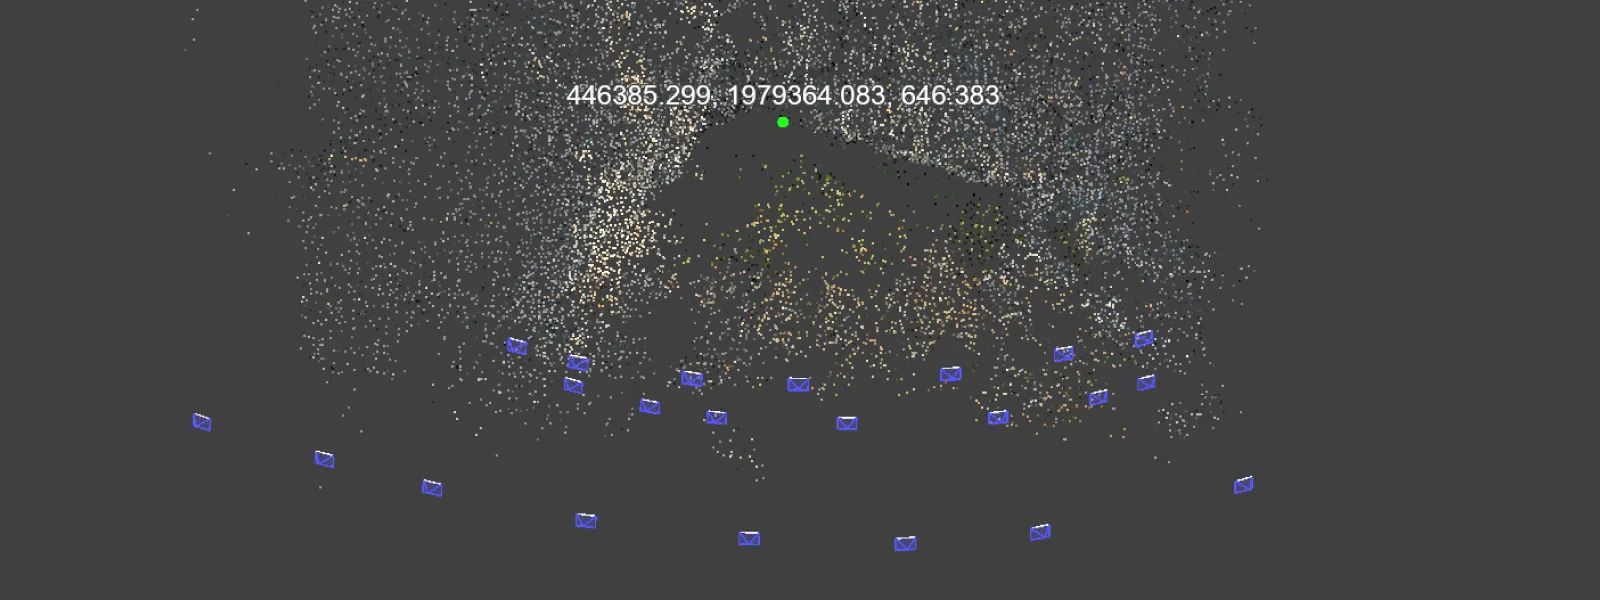
For data processing, we used Pixpro photogrammetry software. For this use case, only the first processing step is necessary to inspect the photos and obtain the coordinates of key spots. It means it can be done quickly with any reasonable laptop on the field - even when other flights are still in progress. We recommend using at least two microSD cards, which could be in rotation and would not introduce downtime for the drone pilot.
We processed image sets ranging from 6 to 36 images; for each, the 3D reconstruction takes up to a few minutes to complete using a “Fast” preset. This step is enough to obtain a coordinate placed on any photos successfully used for the reconstruction.
We can place a point object in Pixpro on any layer, including the sparse point cloud. Once you place a point on any of the visible point cloud dots, we can inspect it in the projection window and start going through the photos. Suppose you do find a location that you need coordinates for. In that case, adjust the projections in at least three pictures in your project, and the coordinates will update. Now the point object contains the coordinates, which can be copied or exported to use in a GPS device or saved in a database.
Coordinate Accuracy
You can find and save coordinates in any successfully reconstructed scene in a few easy steps and 5 minutes of total work. But what accuracy can we expect from these coordinates?
In short, the accuracy depends on the GPS unit inside of the device; in our case, it is the drone, and drones usually have decent consumer-grade GPS units. It means 1 - 2 meter accuracy in XY plane and 2 - 5 meter in Z altitude. For geodetic and survey use cases, more precision is necessary. For cave entrance findings, the coordinates are sufficient to guide explorers to an opening that may be larger than the coordinate deviations.
It is also worth mentioning that in consumer drones, the altitude value in photo metadata (and, therefore, any derivative data) is usually relative to the WGS84 ellipsoid. Consequently, it may not match the height of objects on a map. Since maps typically have their specific height datum.
To calculate the difference between the WGS84 height and your map, you can take a photo when the drone is on the ground and record that altitude value. By localizing the take-off point on the map, you can find out the height of this point from the map data and the height from the photo metadata. Knowing the difference between the heights on the map and in WGS84, you can easily convert heights from one system to another by subtracting the difference.
Conclusion
Drone photogrammetry also has many other applications in speleology. With more comprehensive flights and complete processing on a dedicated, powerful PC, you can generate full-fledged 3D surface models around cave entrances or other pertinent surface features. But the elementary application of only the first stage has revolutionized our speleological exploration capabilities during an expedition in Laos, from which the examples you can see in this article. The method requires many resources like drones, batteries, portable computers, and electricity. Still, it makes up for it with sheer capability and efficiency.
Photographer - Drone Pilot - Photogrammetrist. Years of experience in gathering data for photogrammetry projects, client support and consultations, software testing, and working with development and marketing teams. Feel free to contact me via Pixpro Discord or email (l.zmejevskis@pix-pro.com) if you have any questions about our blog.
Related Blog Posts
Our Related Posts
All of our tools and technologies are designed, modified and updated keeping your needs in mind
Buying a Used Drone - Mavic 2 Pro in 2024
Buying used gear is an excellent way to save money and obtain something that may not be on sale anymore. With drones reaching the 4th or 5th technological generation, the used drone market is becoming more extensive.
Quick Vehicle Accident Documentation with Photogrammetry
Photogrammetry is the ultimate form of documentation. If you are adept at doing photogrammetric scans, you can gather photographic data, resulting in a 3D scene that you can measure. Invaluable when the dependability of the data means solving disputes between people during legal processes.
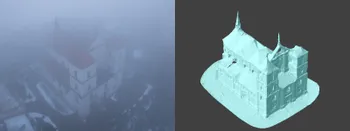
Weather Conditions for Photogrammetry - Rain and Fog
Winter in the northern hemisphere can be a severe limiting factor for millions of jobs. Including us - photogrammetrists who do aerial photogrammetry. In this blog post, we push the limits of wet weather and do some tests in heavy fog conditions and during light rain.
Ready to get started with your project?
You can choose from our three different plans or ask for a custom solution where you can process as many photos as you like!
Free 14-day trial. Cancel any time.
Welcome to Pixpro
Sign in
And access your account.